The Bank Accounts section lets you add, view, and manage customer bank account information.
To access the bank accounts list, go to the Account > Bank Accounts section.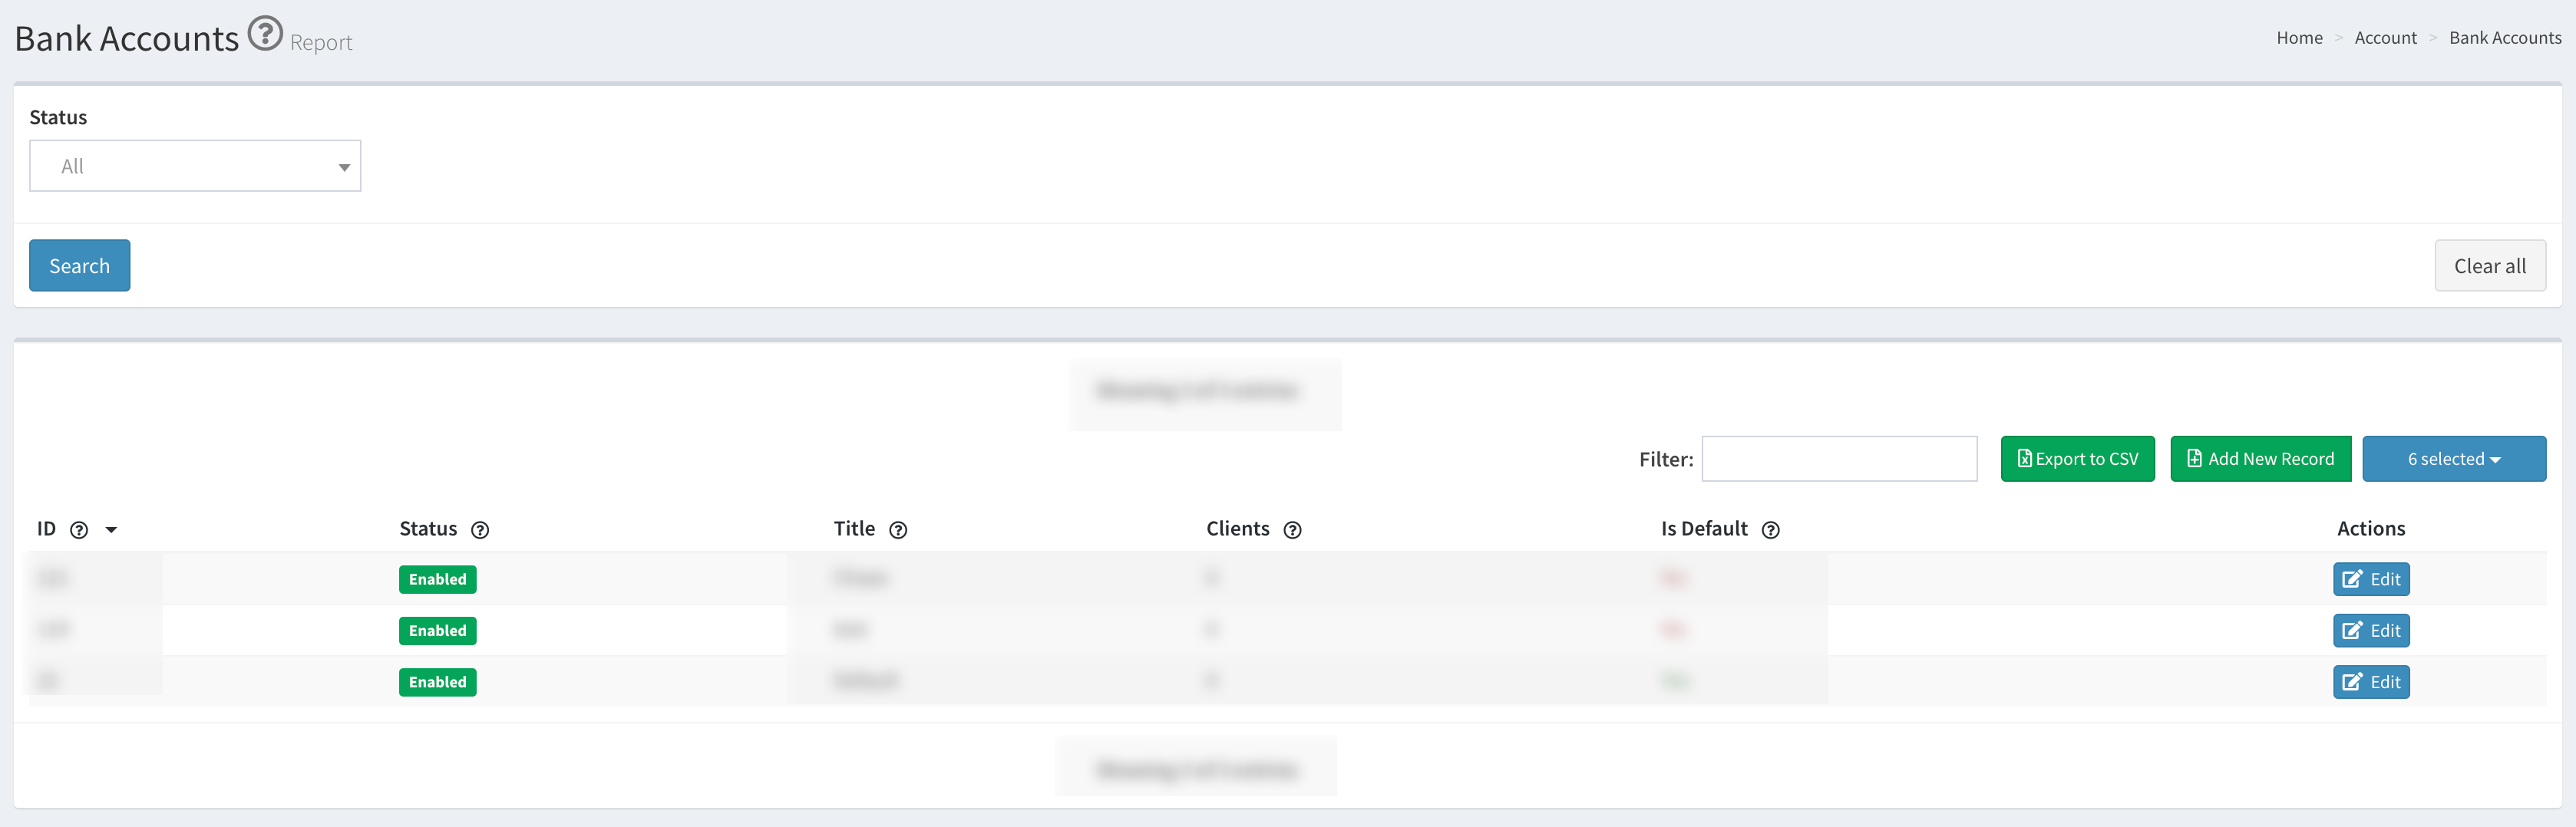
You can narrow down the search results by using the following filters:
- Status: Select the bank account’s status (Enabled / Disabled).
The list contains the following information:
- ID: The identification number of the bank account in the system.
- Status: The status of the bank account (Enabled / Disabled).
- Title: The name of the bank account in the system.
- Clients: The number of clients with the selected bank account.
- Is Default: The “Yes” option is displayed if the selected bank account is set as a default. The “No” option is displayed if the selected bank account is not set as a primary bank account.
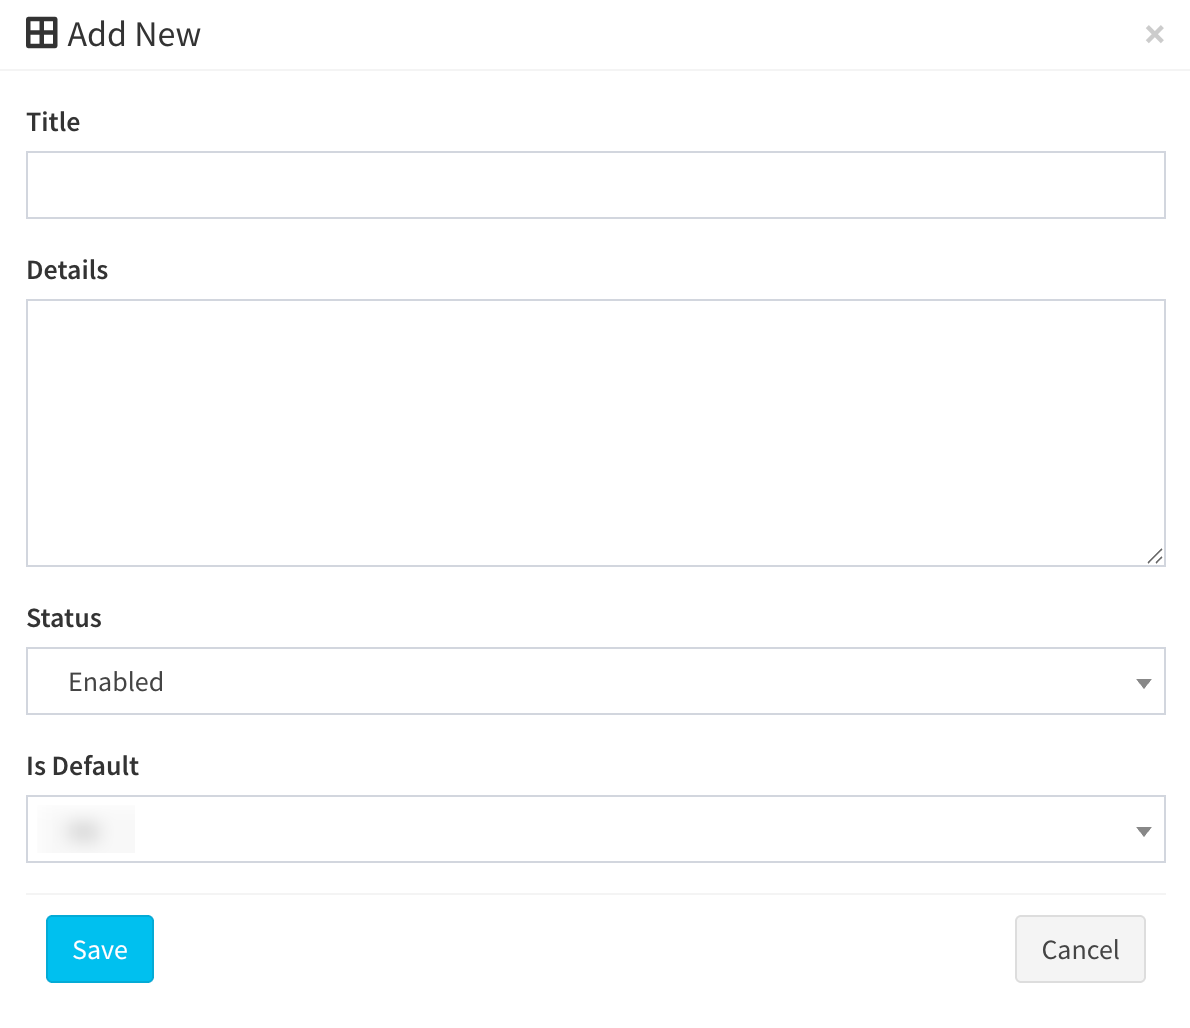
To add a new bank account to the list, click the “Add New Bank Account” button and fill in the following information in the pop-up window:
- Title: Enter the name of the bank account.
- Details: Enter the general information about the bank account.
- Status: Select the bank account status from the drop-down list (Enabled / Disabled).
- Is Default: Select the “Yes” option to set the bank account as a default one. Select the “No” option to leave the bank account as secondary.
Click the “Save” button to complete.
To edit the existing bank account record, select the record from the list and click the “Edit” button in the “Actions” column. Fill in the data fields in the pop-up window, and click the “Save” button to confirm the changes.
