The Settings section allows you to customize the invoice and payout settings, connect and configure the payment systems, and set the payout thresholds.
To access the settings, go to the Account > Settings section.
- Invoice Settings
- Payout Settings
- Mailing Settings
- Payment Thresholds
- Payment Methods
- CRM Integrations
Invoice Settings
The “Invoice Settings” tab allows you to customize the information displayed in Customer invoices.
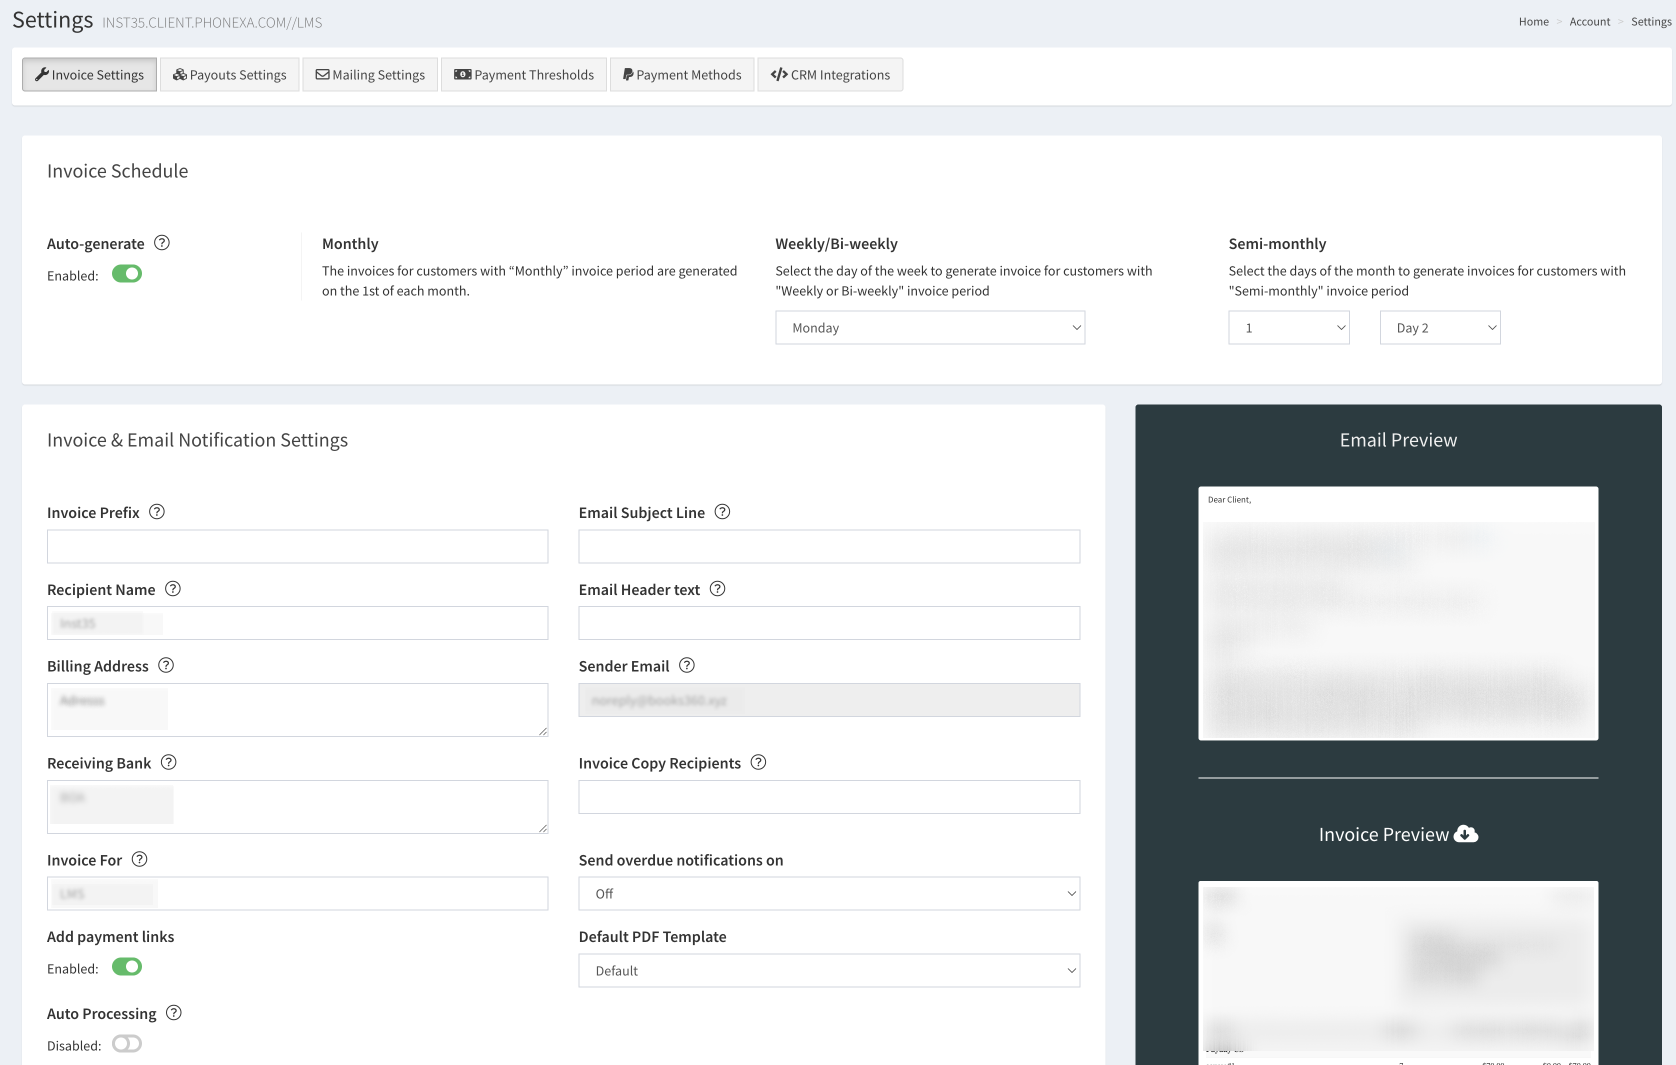
The “Invoice Schedule” block allows you to configure the schedule for the autogenerated invoices. Configure the following fields:
- Auto-generate: Switch the toggle to the “ON” position to enable the automatically generated invoices pulled directly from the system’s component. To generate the invoices manually, leave the feature disabled.
- Monthly: The invoices for customers with a “Monthly” invoice period are generated on the 1st of each month.
- Weekly/Bi-weekly: Select the day of the week to generate an invoice for customers with a "Weekly or Bi-weekly" invoice period.
- Semi-monthly: Select the days of the month to generate invoices for customers with a "Semi-monthly" invoice period.
The “Invoice & Email Notification Settings” block allows you to configure the invoice format and the email recipients. Fill in the following fields:
- Invoice Prefix: Enter the text to be displayed as a prefix in an invoice (maximum six characters).
- Recipient Name: Enter the full name of the payee.
- Billing Address: Enter the billing address.
- Receiving Bank: Enter the name of the receiving bank (applies only if the bank information is not configured in the Bank Accounts section).
- Invoice For: Enter the component or service the customer is invoiced for.
- Add payment link: Switch the toggle to the “ON” position to include the payment link in the invoice.
- Auto Processing: Switch the toggle to the “ON” position to process the invoices and charge the customers automatically. Note: To use this feature, the “Use Payment Tokens” option must be enabled during payment method setup.
- Email Subject Line: Enter the text to be displayed as the subject of the email. If left blank, it will show the Company name and the Invoice number.
- Email Header Text: Enter the text to be displayed at the beginning of the email.
- Sender Email: Enter the email address of the sender.
- Invoice Copy Recipients: List any additional email address(es) to receive a copy of the invoice. Invoices are sent to default recipients based on the Accounting Settings of each Customer/Buyer.
- Send overdue notifications on: Select the day when overdue notifications are sent to the customers (Off, Sunday, Monday, Tuesday, Wednesday, Thursday, Friday, Saturday).
- Default PDF Template: Select the default template option for invoices.
To view and download the preview of the current configuration, check the “Email Preview” and “Invoice Preview” blocks. In case of any configuration changes, the updated section will be highlighted in yellow.
Click the “Save” button to complete.
Payout Settings
The “Payout Settings” tab allows you to manage the general details and recipients of the Vendor payouts.
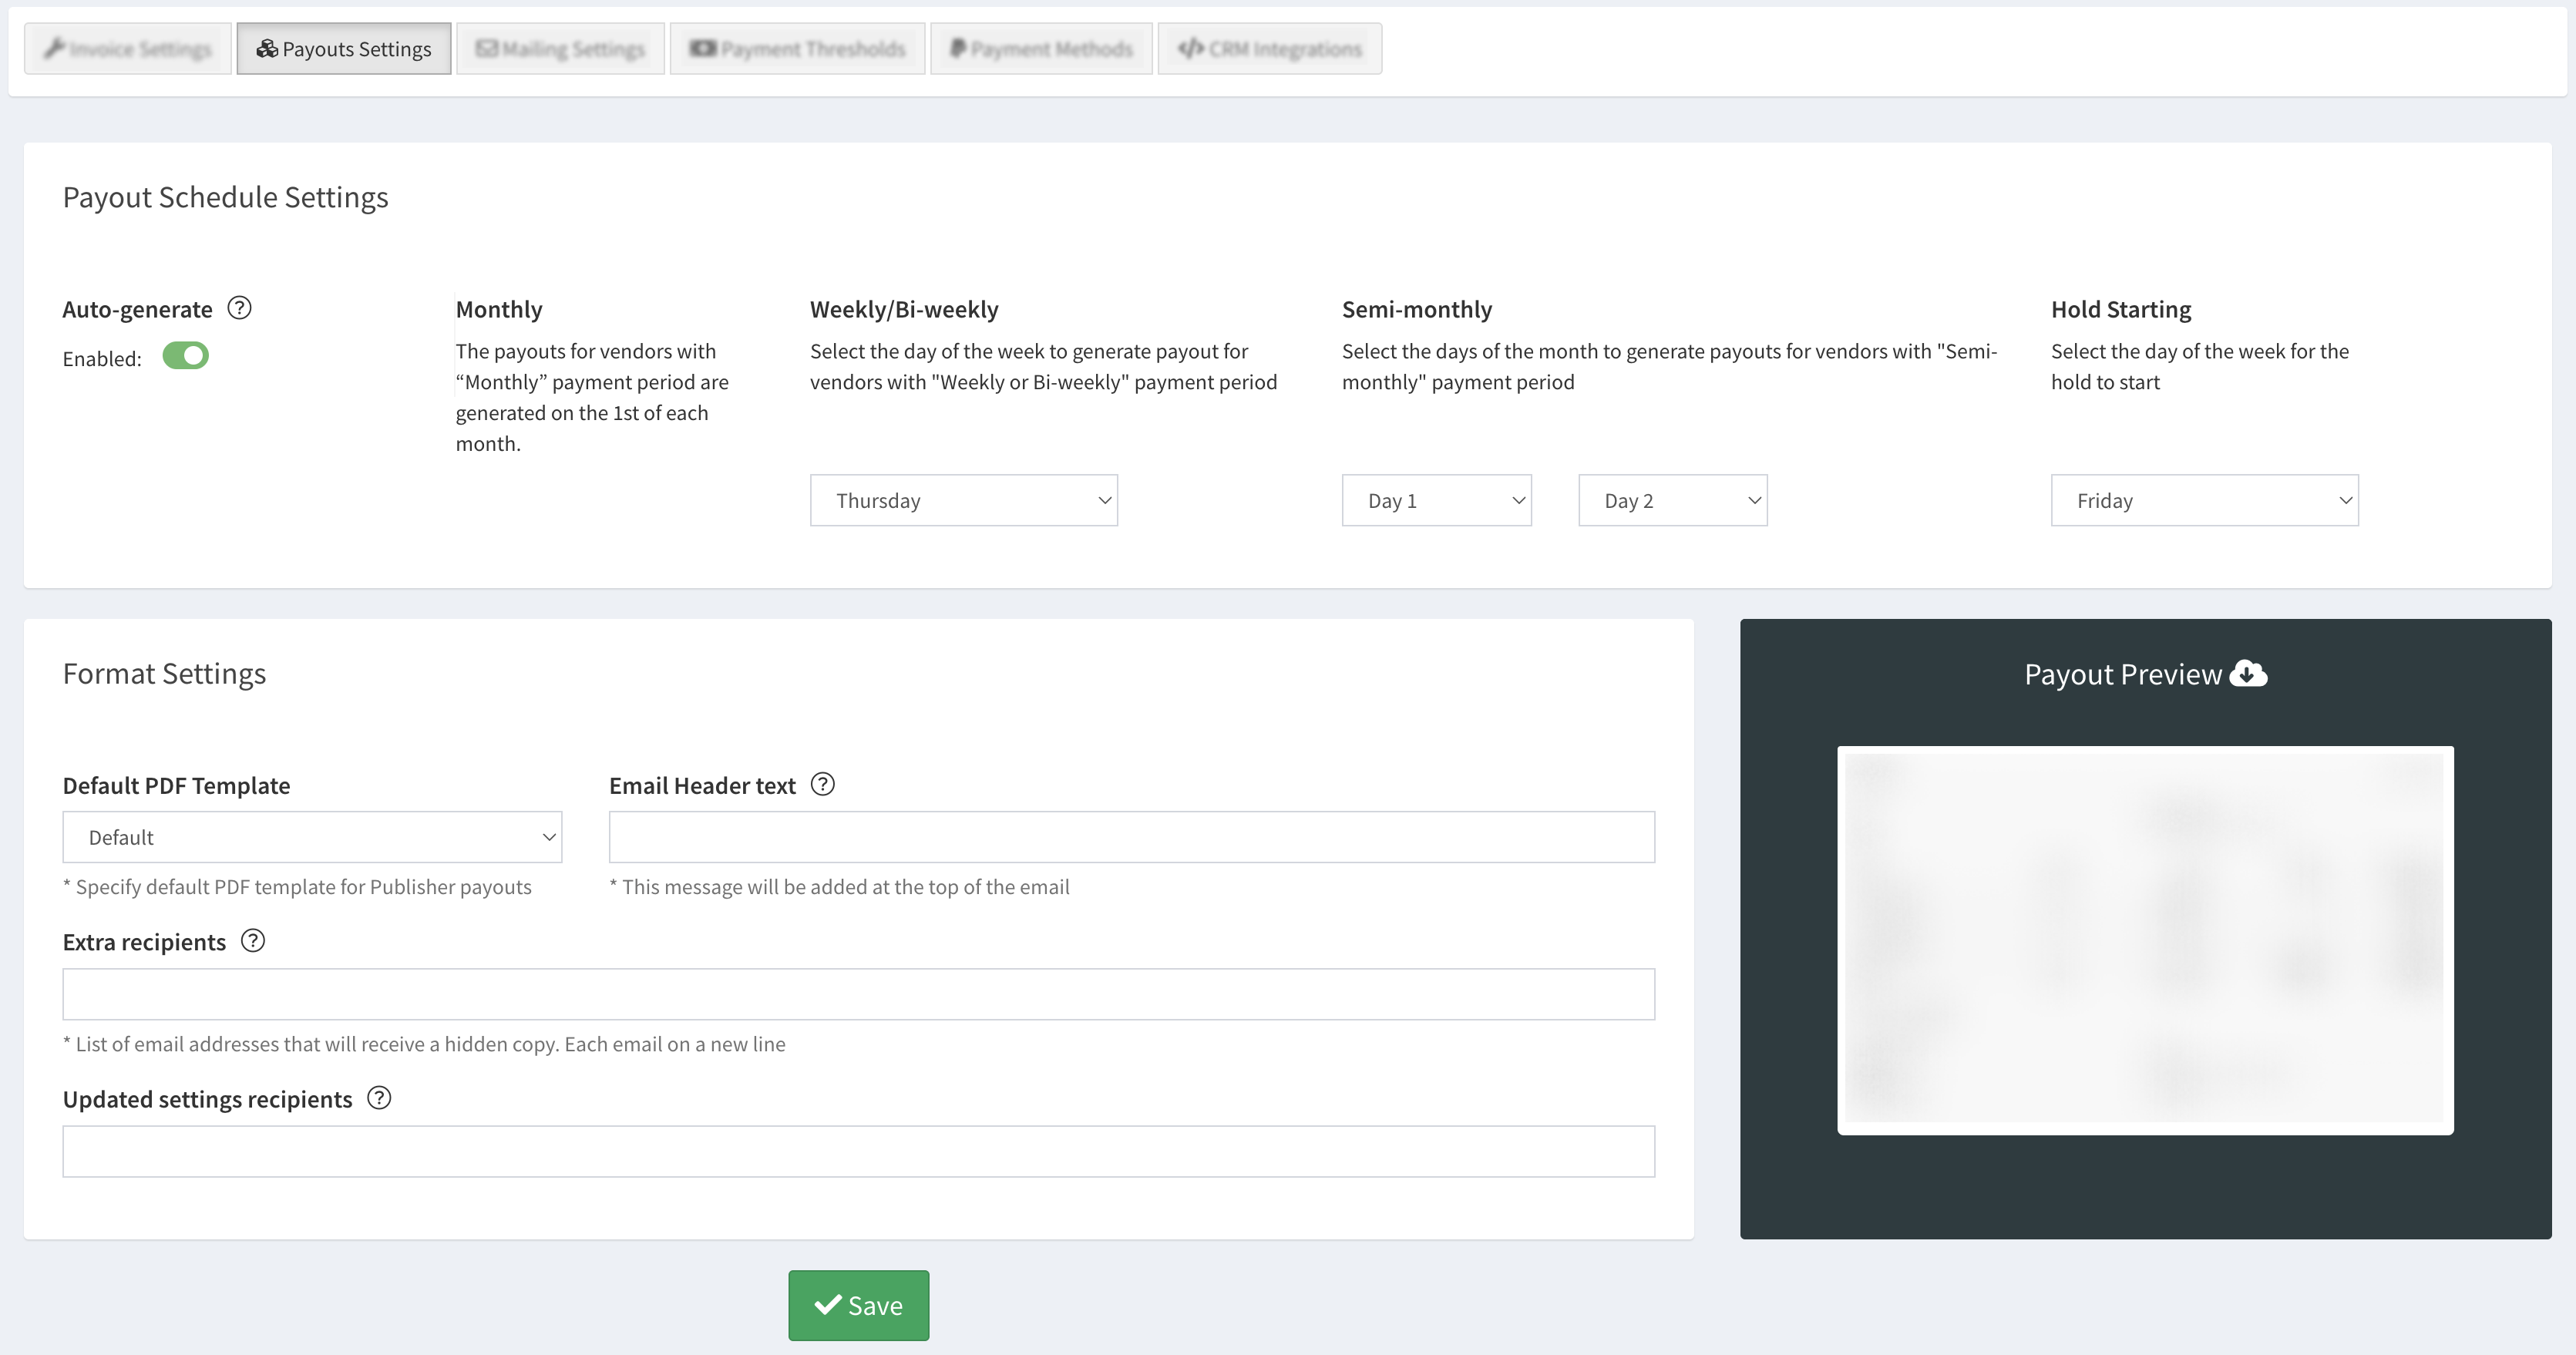
The “Payout Schedule Settings” block allows you to configure the payout schedule. Configure the following fields:
- Auto-generate: Switch the toggle to the “ON” position to enable the automatically generated payouts pulled directly from the system’s component. To generate the payouts manually, leave the feature disabled.
- Monthly: The payouts for vendors with a “Monthly” payment period are generated on the 1st of each month.
- Weekly/Bi-weekly: Select the day of the week to generate a payout for vendors with a "Weekly or Bi-weekly" payment period.
- Semi-monthly: Select the days of the month to generate payouts for vendors with a "Semi-monthly" payment period.
- Hold Starting: Select the day of the week for the hold to start.
The “Format Settings” block allows you to configure the payout format. Fill in the following fields:
- Default PDF Template: Select the default template option for vendor payouts.
- Email Header Text: Enter the text to be displayed at the beginning of the email.
- Extra Recipients: Enter the list of emails to receive a copy of the invoice. Each email should be entered on a new line.
- Updated settings recipients: Enter the list of emails to receive mail when the vendor updates payment settings. Each email should be entered on a new line.
To view and download the preview of the current configuration, check the “Payout Preview” block.
Click the “Save” button to complete.
Mailing Settings
The “Mailing Settings” tab allows you to configure how emails are sent from your account. By default, all outgoing emails (such as notifications and campaigns) are delivered through our managed email system. No further action is required.
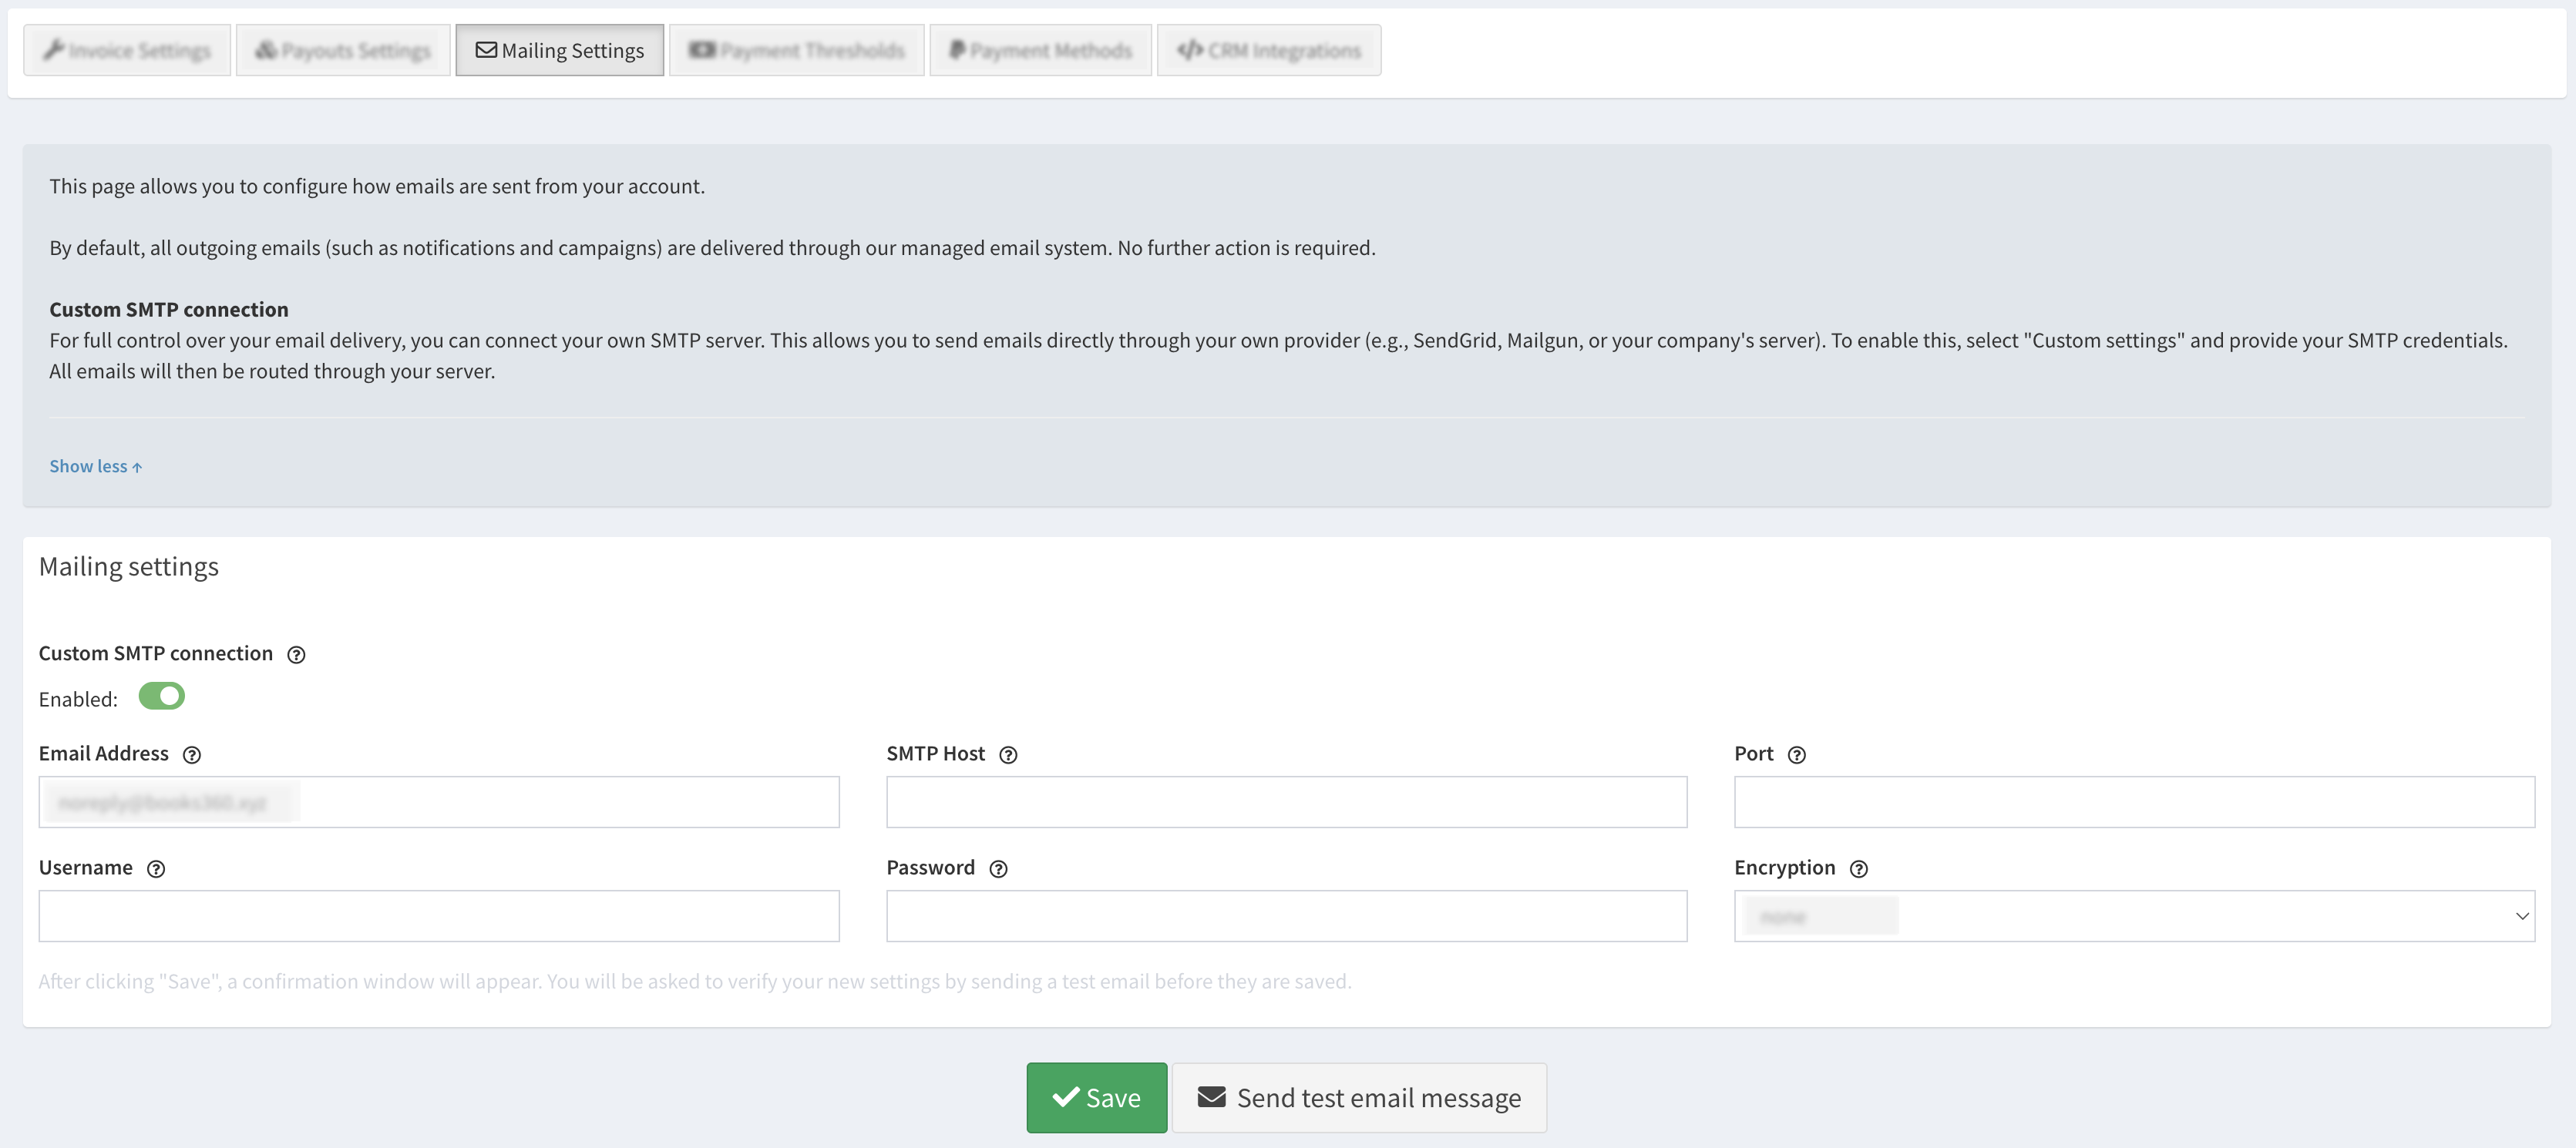
For full control over your email delivery, you can connect your own SMTP server. This allows you to send emails directly through your own provider (e.g., SendGrid, Mailgun, or your company's server). Provide your SMTP credentials, and all emails will then be routed through your server. To do so, configure the following settings via the “Mailing settings” block:
- Custom SMTP Connection: Switch the toggle to the “ON” position to enable the feature.
- Email Address: Enter the email address that will be displayed to your recipients.
- Username: Enter the username for your SMTP server (typically corresponds to your email address).
- SMTP Host: The address of your mail server.
- Password: The password for your SMTP account.
- Port: The port your SMTP server uses (common ports are 587 (TLS), 465 (SSL), or 25).
- Encryption: Select the encryption method required by your provider, usually TLS or SSL.
Click the “Save” button to confirm the changes. To check the test message of the current configuration, click the “Send test email message” button.
Payment Thresholds
The “Payment Thresholds” tab allows you to set the minimum amount bar for the payout processing according to each payment service. To set the payment threshold, select the payment service and fill in the minimum amount in the corresponding field.
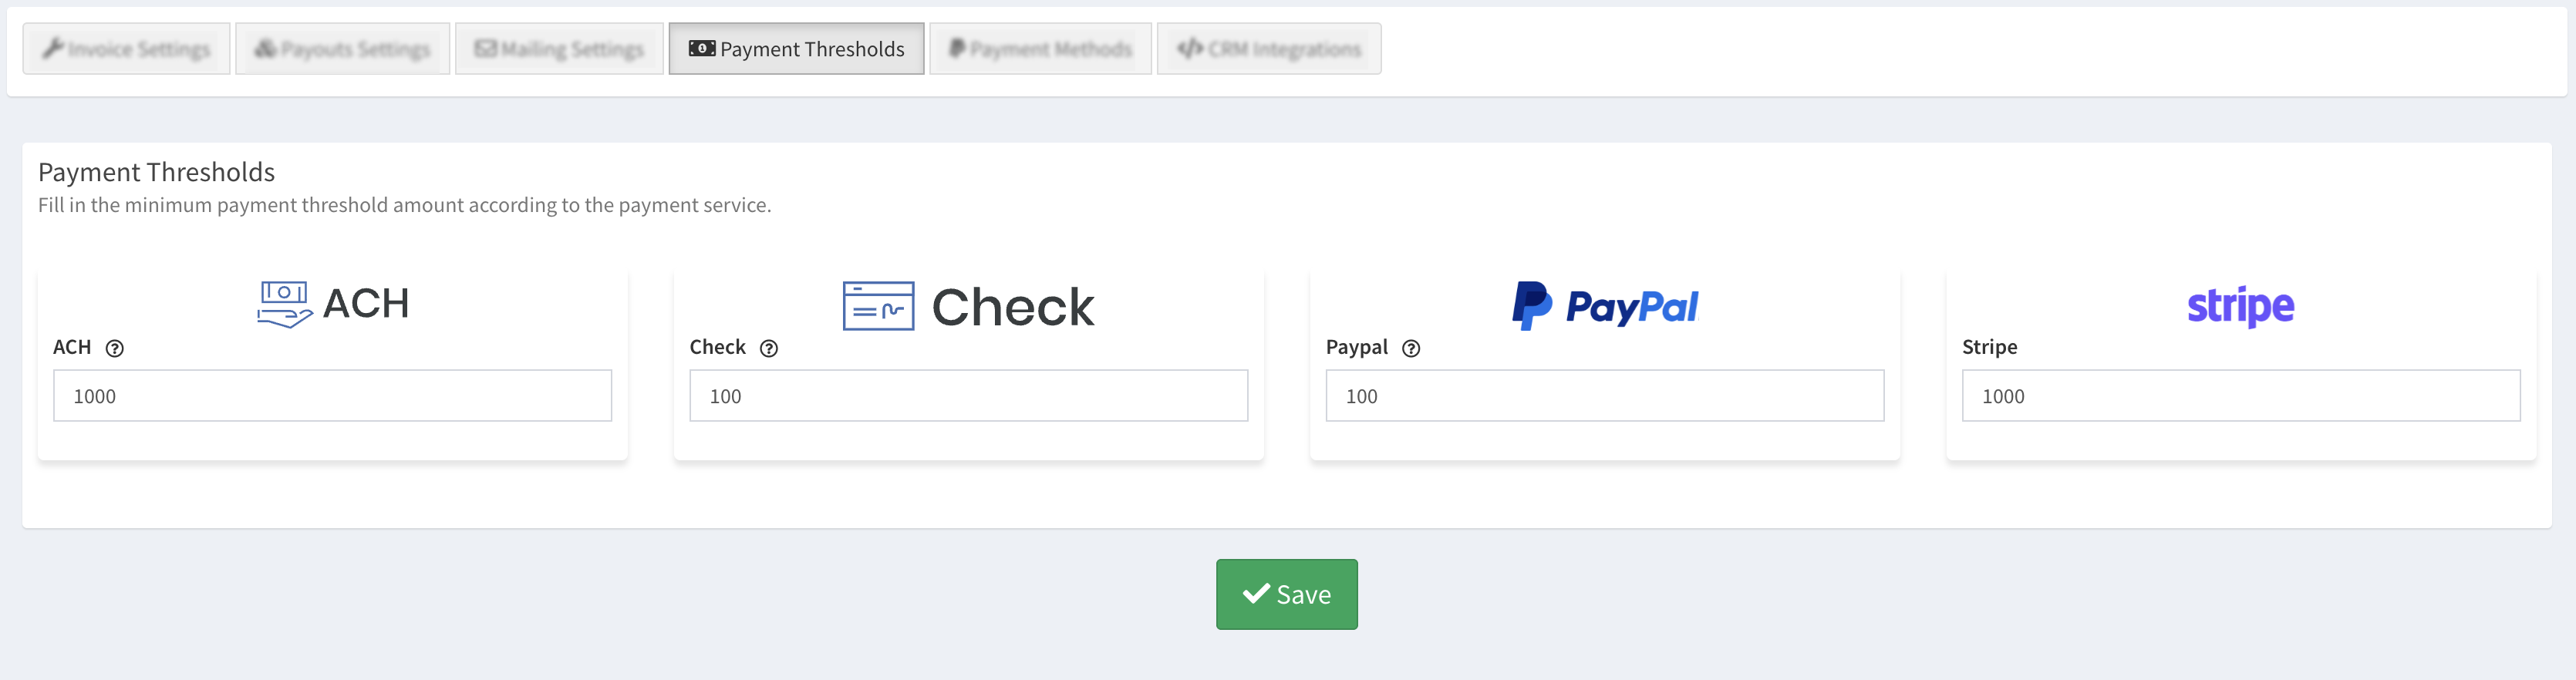
Click the “Save” button to complete.
Payment Methods
The “Payment Methods” tab allows you to view and configure your payment processing platforms for the invoice. The "Payment Methods" tab is divided into sections: "Customer Payment Methods" and "Vendor Payment Methods".
-2.png?hsLang=en) The payment methods list contains the following information:
The payment methods list contains the following information:
- Name: The name of the payment method.
- Status: The availability status (Enabled / Disabled).
To log in to the platform or edit the information, click the “Configure” button in the “Actions” column, and fill in the required information in the pop-up window accordingly.
Note: The fields in the pop-up window will differ for each payment method.
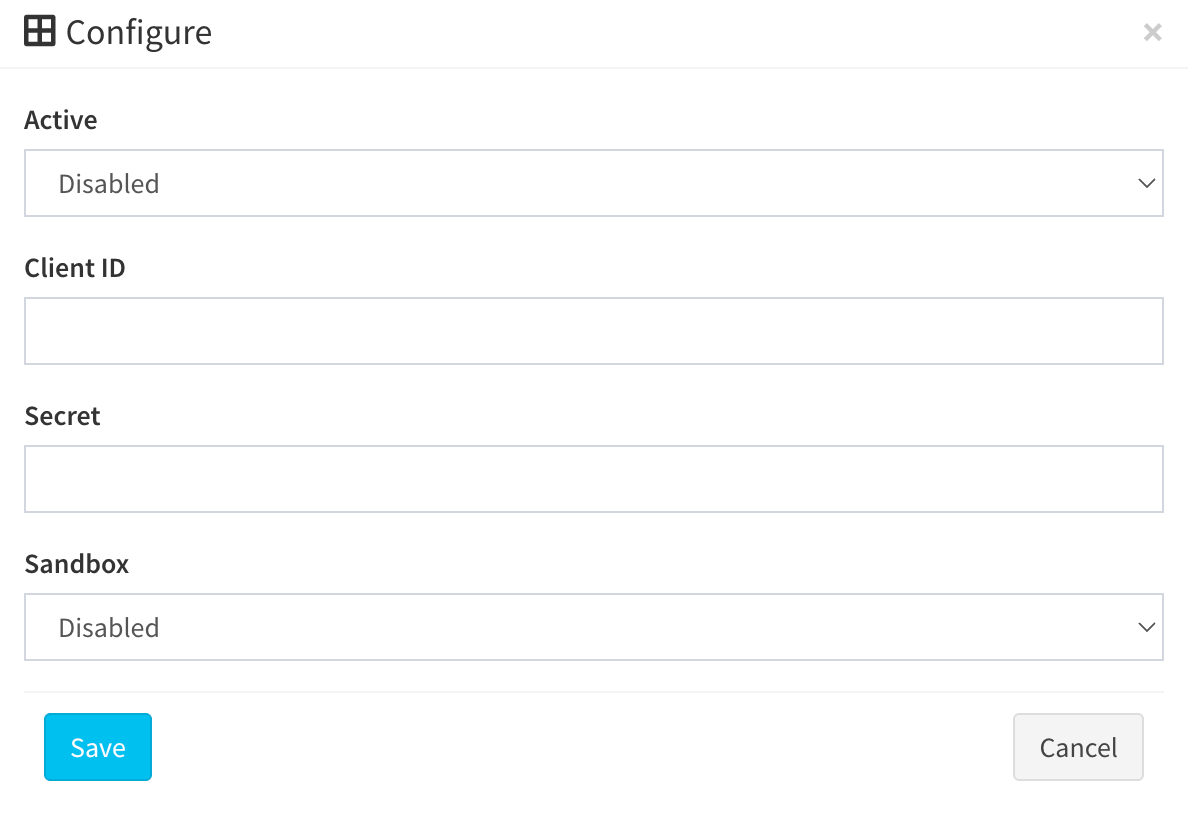 Click the “Save” button to complete.
To check the correctness of the integration with the payment system settings, click the “Healthcheck” button in the “Actions” column. Note: This feature is only available for the “Stripe” payment method.
The system will open a pop-up window with the Secret Key status and with the list of installed webhooks. The correct configuration is highlighted in green, while the incorrect one is highlighted in red.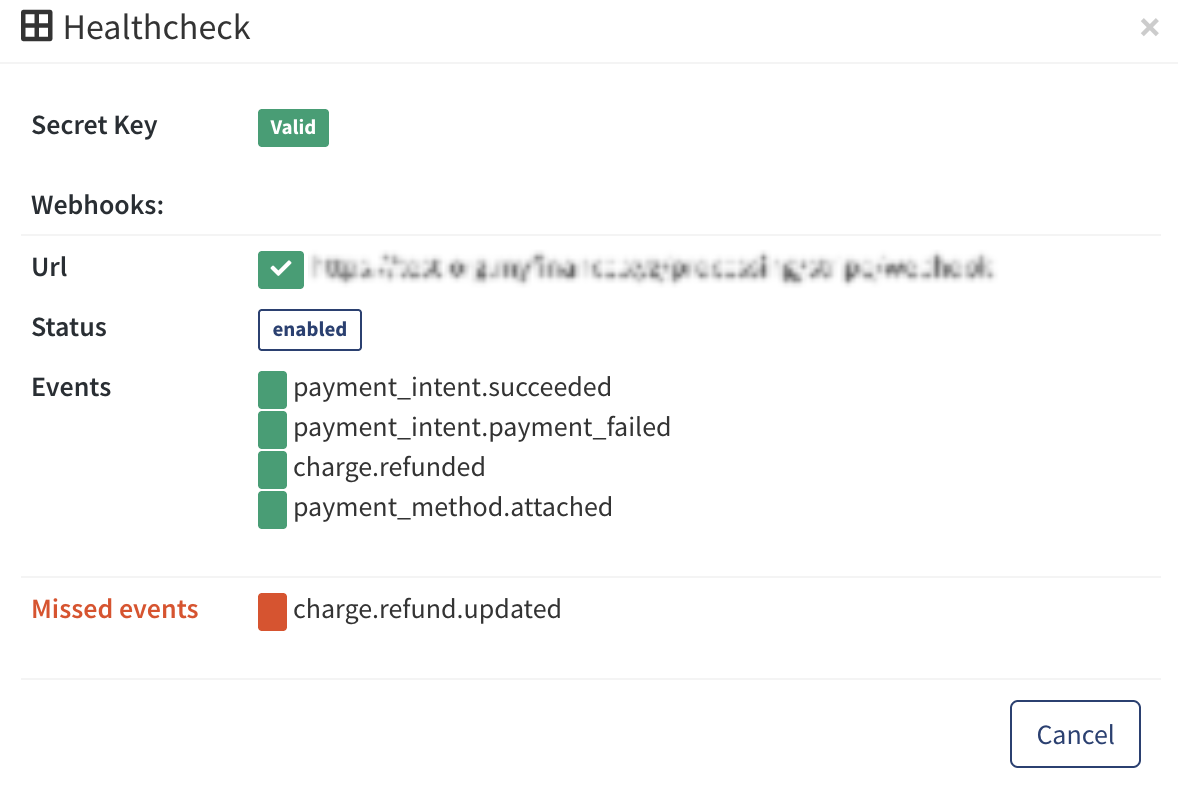
Click the “Cancel” button below to close the “Healthcheck” window.
CRM Integrations
The “CRM Integration” tab allows you to connect and configure the third-party systems for your Books360 component. At the present moment, the QuickBooks integration is available.
Read more about the QuickBooks configuration via this Knowledge Base article.
