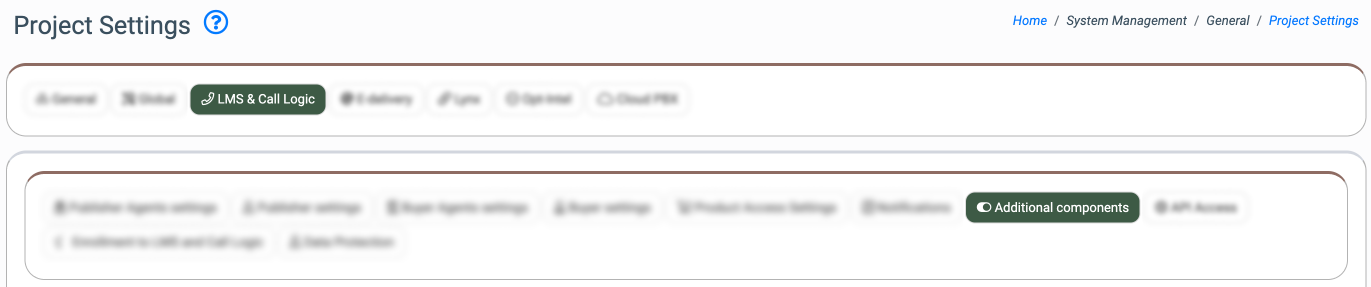
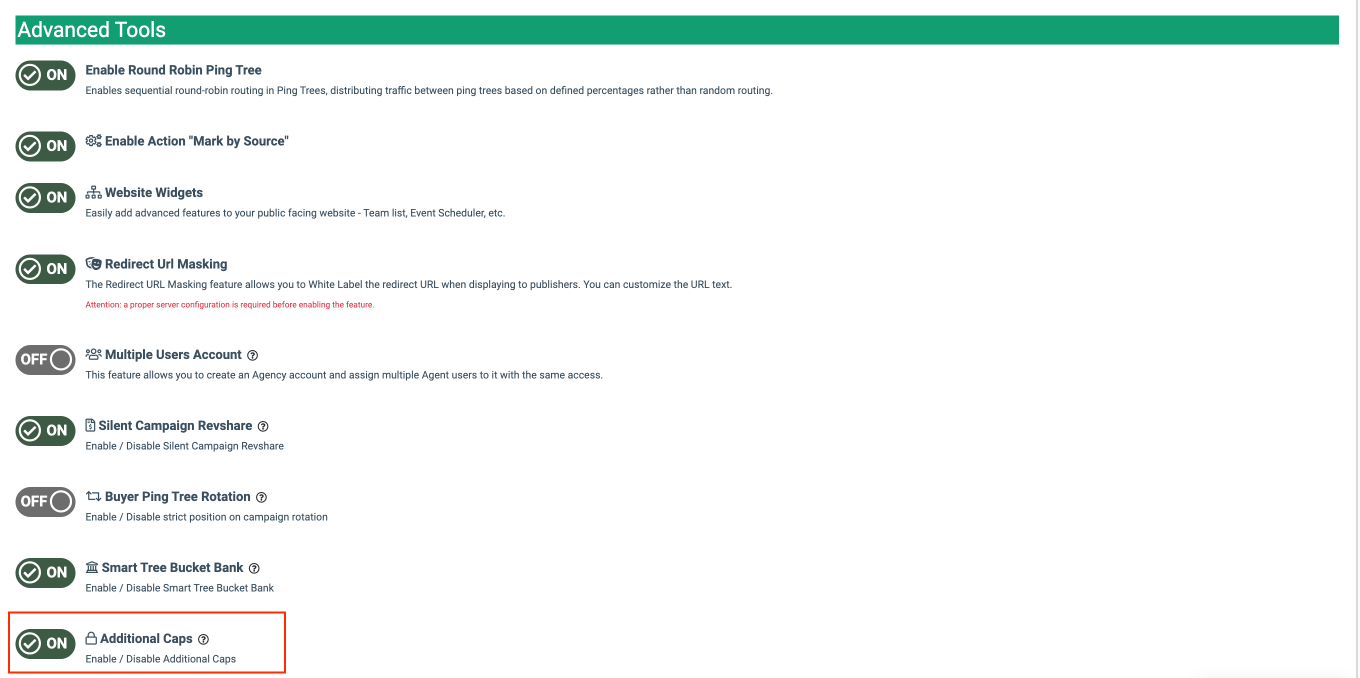
To enable the feature, go to the System Management > General > Project Settings section and choose the “LMS and Call Logic” tab. Select the “Additional Components” tab and enable the “Additional Caps” feature in the “Advanced Tools” block.
To set up and manage the Additional Caps setting for the particular Campaign, go to the Client Management > Campaigns section, select the campaign, and click the “Configure” button in the “Action” column. On the Campaign Setup page, select the “Schedule” tab and choose the “Additional Caps” subtab.

To enable the weekly cap, switch the “ON” button in the “Weekly Caps” field, and enter the cap value in the “Weekly Sold Limit” field. Once the weekly cap is reached, the Campaign will be paused until the following week. A weekly cap begins on Sunday for US locations, starts on Monday for other countries.
To enable the monthly cap, select the “ON” button in the “Monthly Caps” field, and enter the cap value in the “Monthly Sold Limit” field. Once the monthly cap is reached, the Campaign will be paused until the next month’s start date. A monthly cap without a specific start date begins on the first and ends on the last day of the month. To set a custom start day for the monthly cap, enter the value corresponding to the day of the month (1-31) into the “Monthly Caps Start Date” field. Please note that if the settings are updated, it will reset the monthly caps accumulation set before.
Example: If you enter the “5” value into the “Monthly Caps Start Date” field, the monthly caps period will start on every 5th day of the month. Please note, if you set the start date as 31, and the current month consists of 30 days, the new cap period will start on the 1st day of next month.
Click the “Save” button to complete.
When the Additional Cap is reached, the Campaign is transferred to the “Temp Pause” status. To change the Campaign’s status to “Active”, you must increase the cap limitation and enter a new value in the “Weekly Sold Limit” or “Monthly Sold Limit” fields. Please note that the Campaign will be automatically transferred from the “Temp Pause” to the “Active” status if the Additional Caps are applied. The status will be changed to an “Active” regardless of setting the “Temp Block” status.
If the Campaign has multiple caps set up in the “Schedule” tab of the Campaign Setup section, the most detailed setting will be considered first. For example, if the Campaign has daily, weekly, and monthly caps set. The daily cap will be applied first, while the system still considers weekly and monthly limits, then the weekly cap will be applied, followed by the monthly cap.
If the Campaign was transferred to the “Temp Pause” status because of the installed Pause Settings (Campaign Setup section > “Integration” tab > “Campaign Pause Settings” subtab), it can be activated by changing the limits on the Additional Caps.
The counter for the Additional Caps can be reset only by changing the Additional Caps fields’ values. The counter will not be reset by disabling the “Additional Caps” tools in the Project Settings section.