You can upload audio files or folders containing the following file formats: mp3, wav.
To view the list of uploaded audio files and folders, go to the PBX Management > General > Media library section.
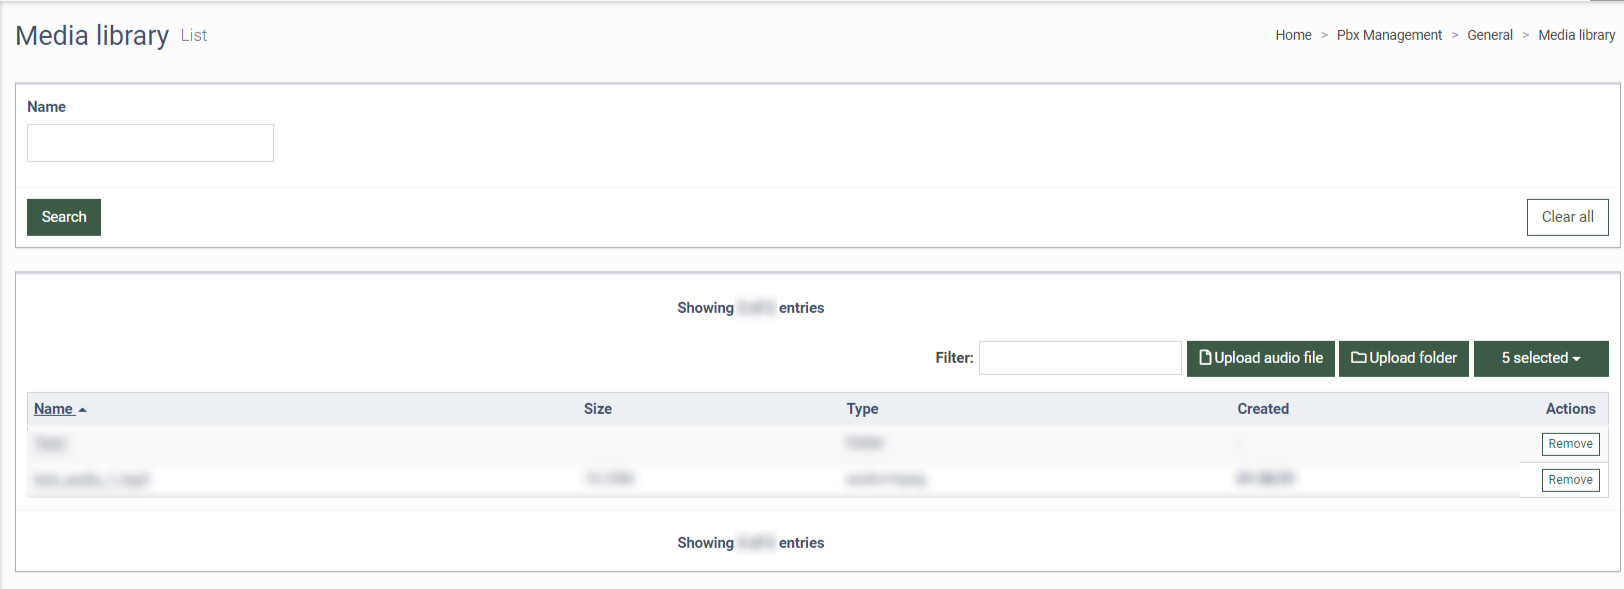
The list of uploaded audio files and file folders contains the following information:
-
Name: The name of the uploaded audio file or folder. To open the uploaded folder, click on the folder name in the list. To play the uploaded audio file, click the file name in the list.
-
Size: The size of the uploaded file.
-
Type: The type of the uploaded file or folder (mp3, wav).
-
Created: The date and time when the file or folder was uploaded.
You can narrow down the search results by using the following filter:
-
Name: Enter the name of the uploaded folder or file.
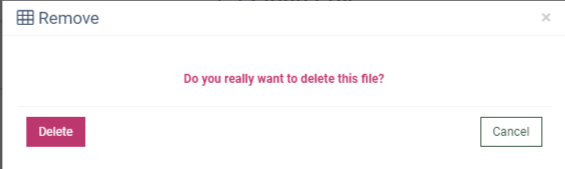
To remove the uploaded file or folder from the list, click the “Remove” button in the “Actions” column and click the “Delete” button in the pop-up window to complete.
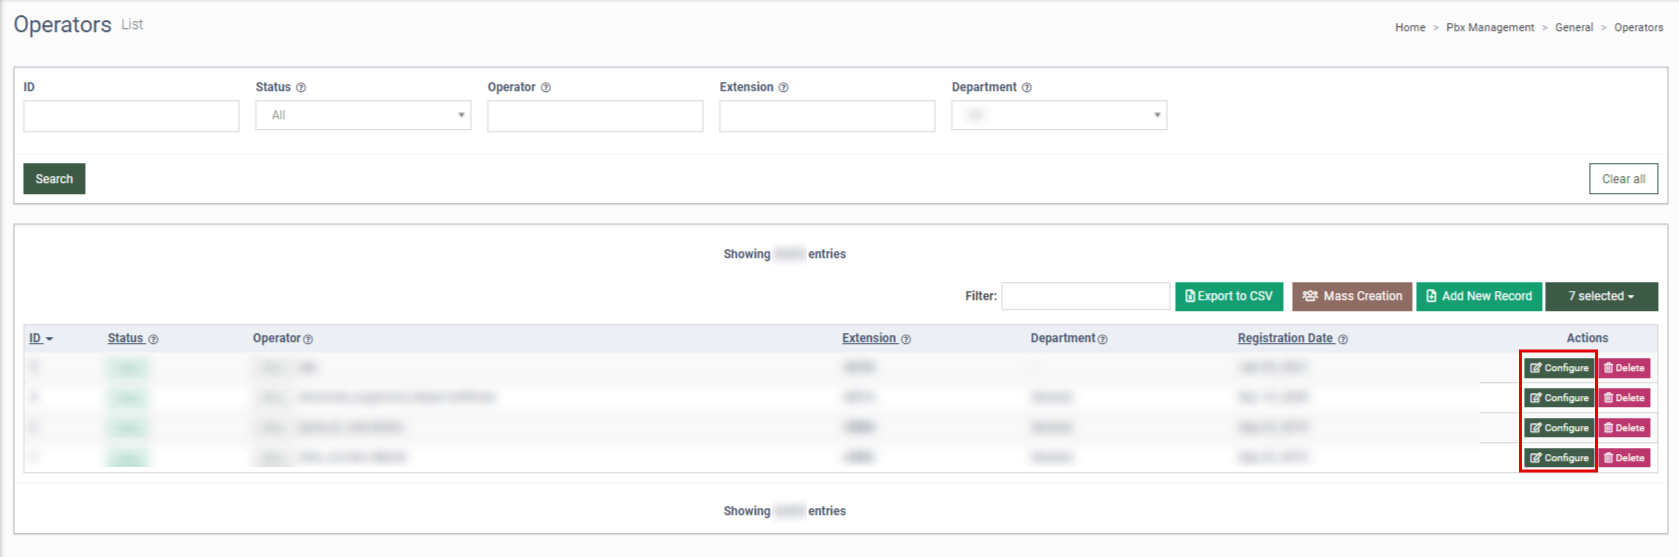
To assign the uploaded media file to the Operator’s voicemail, go to the PBX Management > General > Operators section, select the Operator from the list, and click the “Configure” button in the “Actions” column.
Select the “Voice mail” tab in the Operator section. In the “Source” field, click the “Media library” option, then select the file from the “Media library file” dropdown list.
Click the “Save” button to complete.
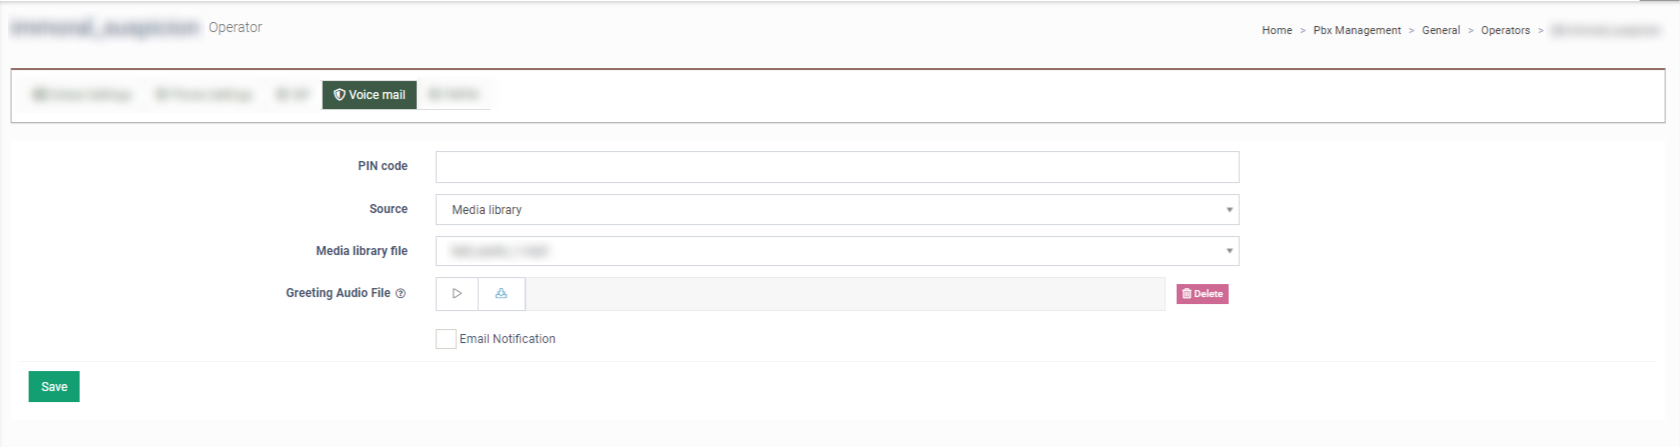
To play the assigned audio file, click the “Play” button in the “Greeting Audio File” field.
To download the assigned audio file, click the “Download” button in the “Greeting Audio File” field.

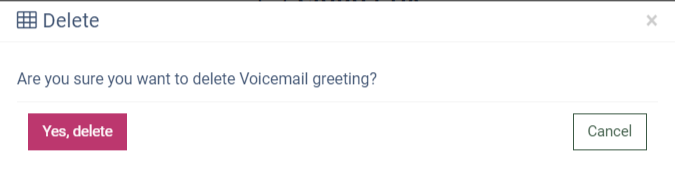
To remove the audio file, click the “Delete” button in the “Greeting Audio File” field, and click the “Yes, delete” button in the “Delete” pop-up window to complete the action.
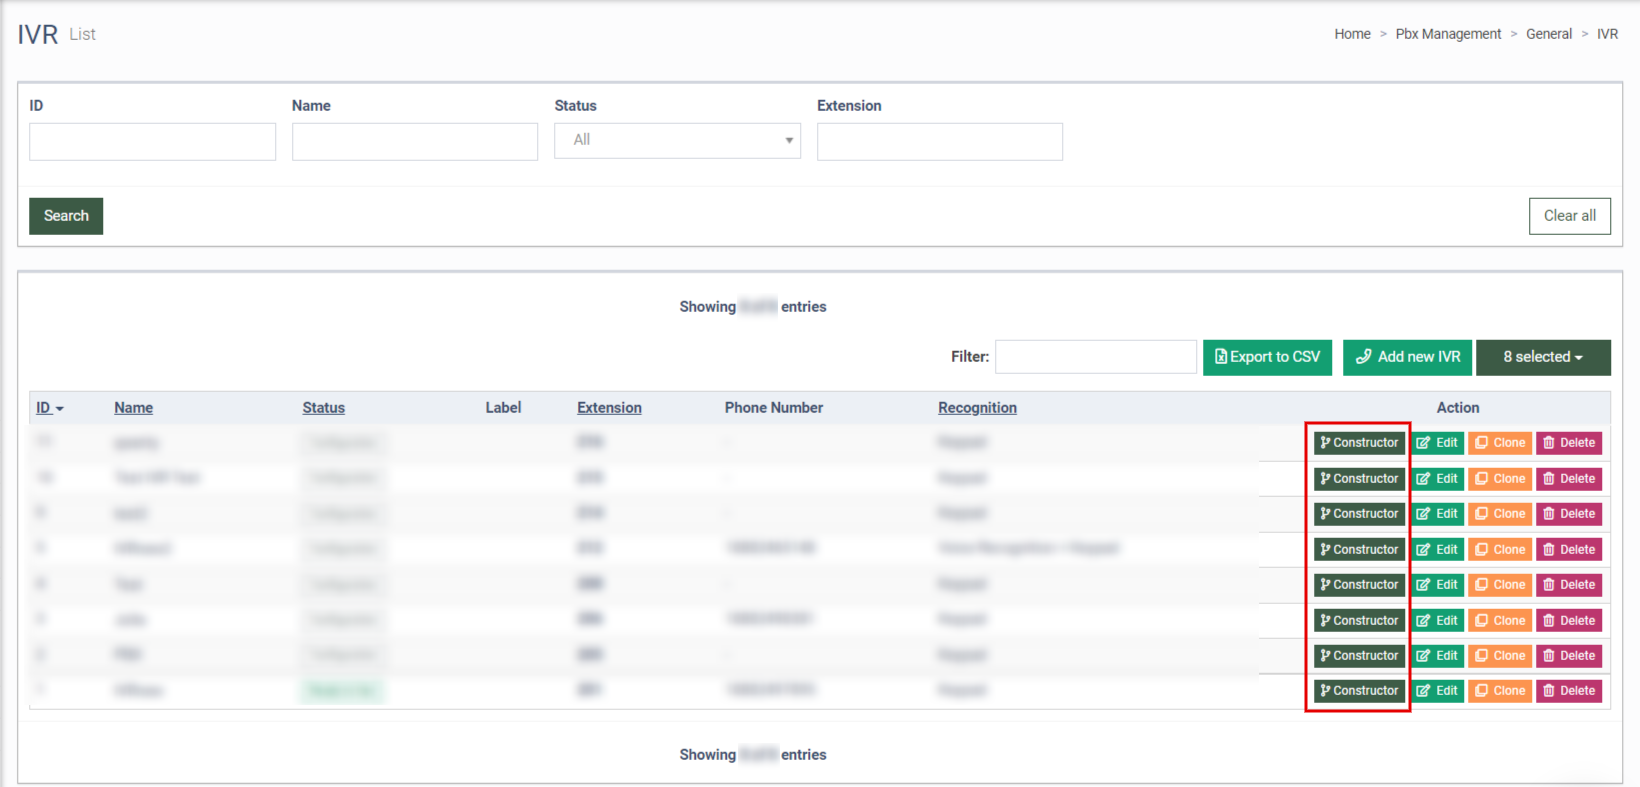
To use the uploaded audio files from the media library during the IVR setup, go to the PBX Management > General > IVR section, select the corresponding IVR, and click the “Constructor” button in the “Action” column.
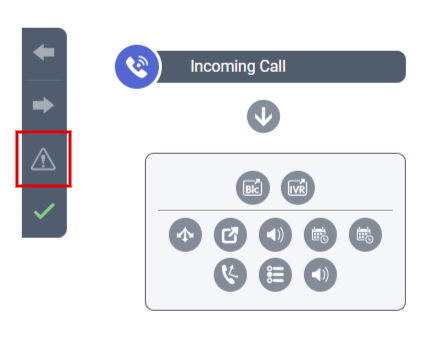
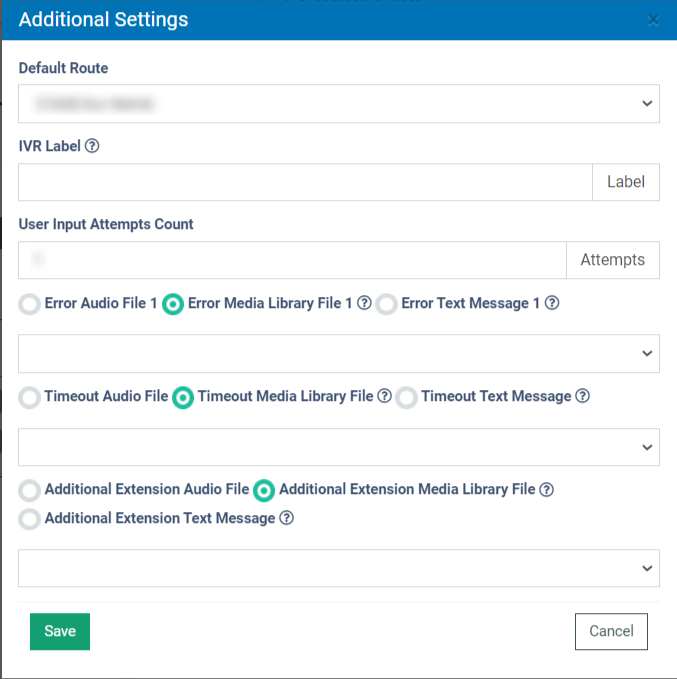
To use audio files while configuring the “Additional Settings” section, in the IVR Constructor section, click the “Additional Settings” button and set up the following settings in the “Additional Settings” pop-up window:
-
To set up the uploaded audio file as a message for the incorrect input on the IVR Branching block, select the “Error Media Library File” radio button and select the file in the corresponding field.
-
To set up the uploaded audio file as an audio that will be played after the timeout for the input reaching, select the “Timeout Media Library File” radio button and select the file in the corresponding field.
-
To set up the uploaded audio file as a play sound before transferring to an additional extension or after pressing the “*” button, select the “Additional Extension Media Library File” radio button and select the file in the corresponding field.
Note: To successfully build the IVR, all fields in the “Additional Settings” pop-up window must be completed.
To use audio files while configuring IVR Blocks, add the block in the IVR Constructor section and click the “Settings” button. Select the “Media Library” radio button and select the audio file in the “Media library file” field in the “Block Settings” pop-up window.
Click the “Save” button to complete.
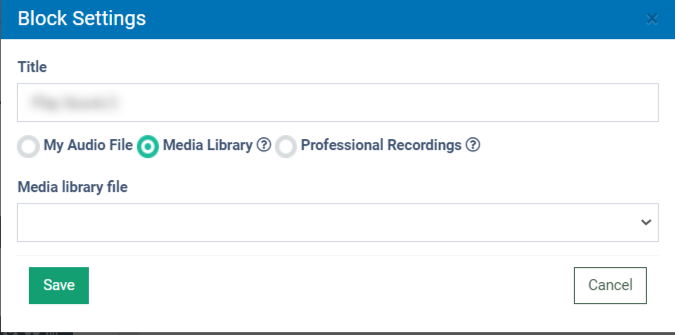
This option is available for the following IVR blocks: IVR Branching, Play Sound, Audio CAPTCHA, Hangup reject message.