
Wondering how to add, configure or remove Labels from the system? Check our short guide to Buyer Defined Labels for more information.
The section contains different types of additional Buyer Defined Labels. You can use labels to filter Buyers in the Buyer List. You can add, configure and remove Labels from the system.
Notice: The option can be set only by Buyer Representative with a special question through completing the Buyer Questionnaire. Admin groups can not change this label themselves.
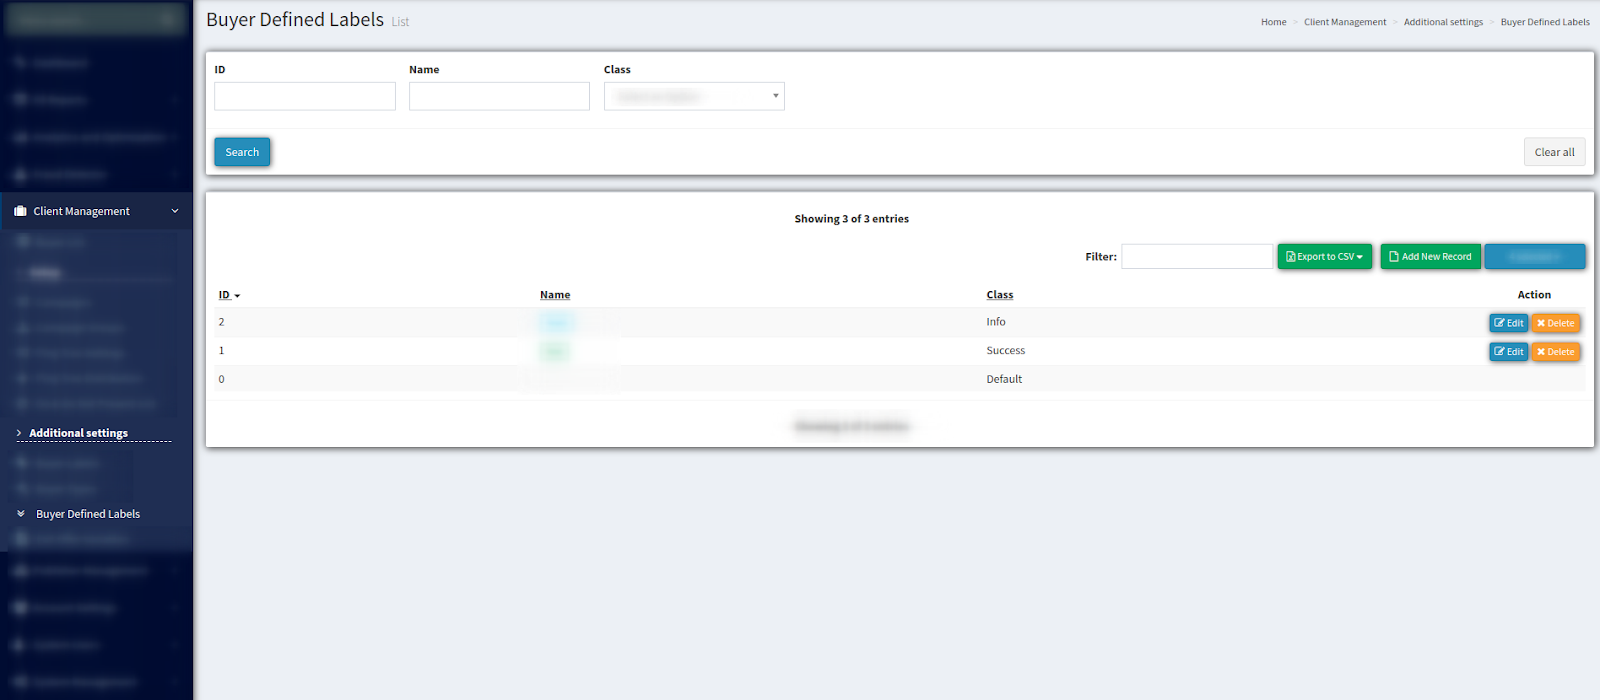
To view the labels list go to the Client Management > Additional settings > Buyer Defined Labels.
To find a specific label fill in the filter fields (ID / Name / Class) and click the “Search” button.
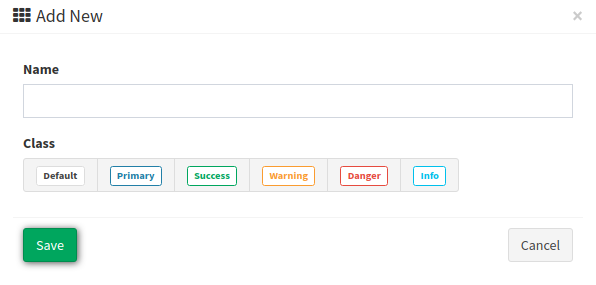
To add a new label to the list, click the “Add New Record” button. Enter the Name of a label and select its Class (Default / Primary / Success / Warning / Danger / Info) in the pop-up window. Click the “Save” button to complete.
To configure the existing label click the “Edit” button in the “Actions” column. Set the changes in the pop-up window and click the “Save” button to complete.

To remove a specific label, select this label from the list and click the “Delete” button in the “Actions” column.