
Find out how to assign, view, and change buyer labels with this step-by-step guide to the Buyer Labels section.
In the Buyer Labels section, you can create, view, and configure the list of buyers and labels they’re assigned to.
In the Buyer Labels section, you can view the list of buyers and labels they’re assigned to. Also, it allows you to configure existing buyer labels. To view the list go to the Client Management > Additional Settings > Buyer Labels section.
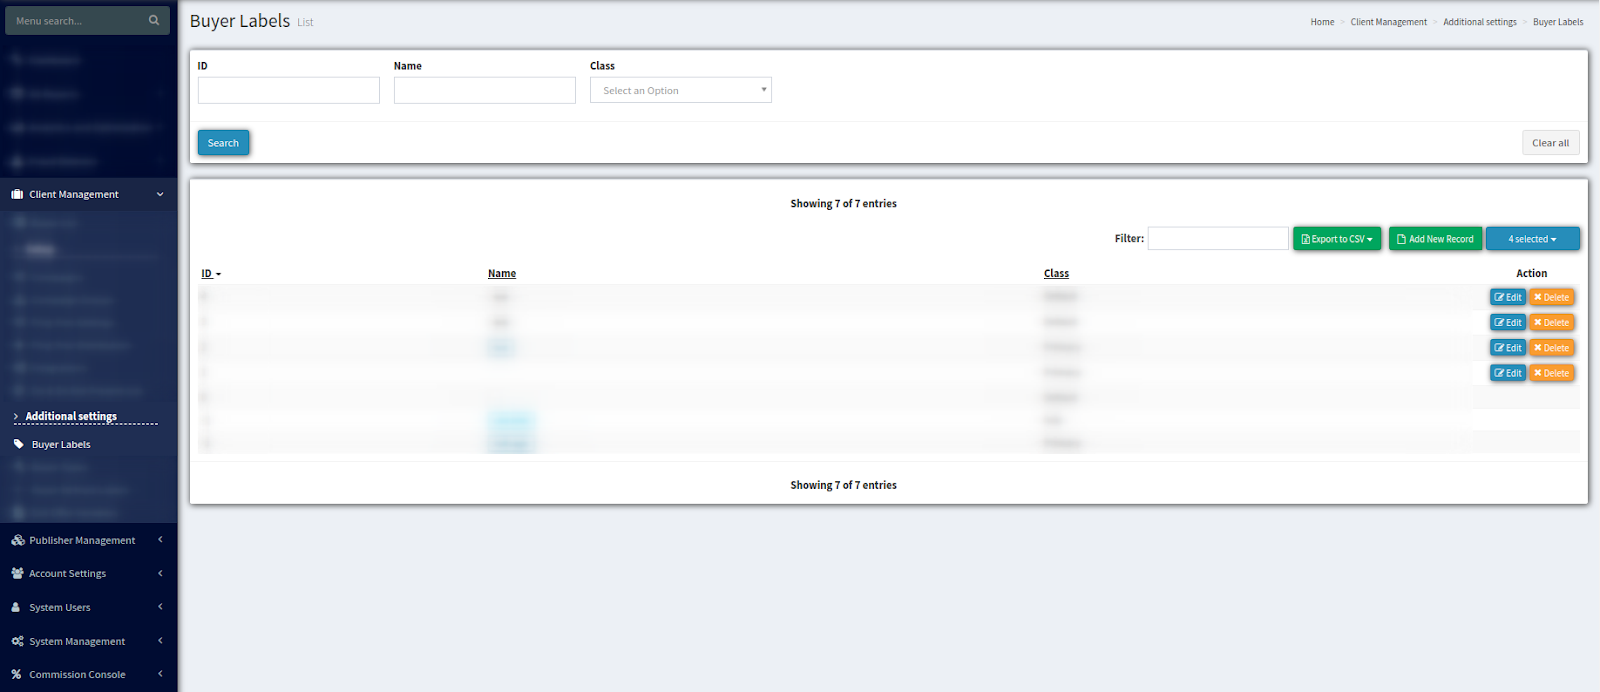
The Buyer Labels list displays the following data:
-
ID - Buyer label identification number
-
Name - the Buyer label name
-
Class - Class which the Buyer label assigned to.
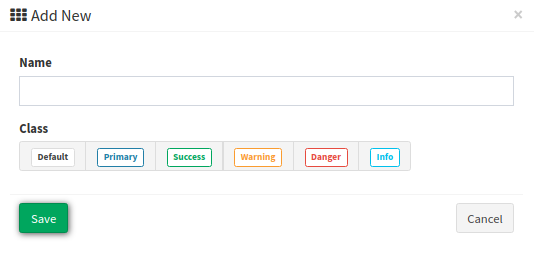
To assign a label to the buyer click the “Add New Record” button. In the pop-up window enter the Buyer’s name and choose one of the available labels. Click the “Save” button to complete.
To change the existing Buyer label click the “Edit” button in the “Action” column. Click the “Save” button when done.

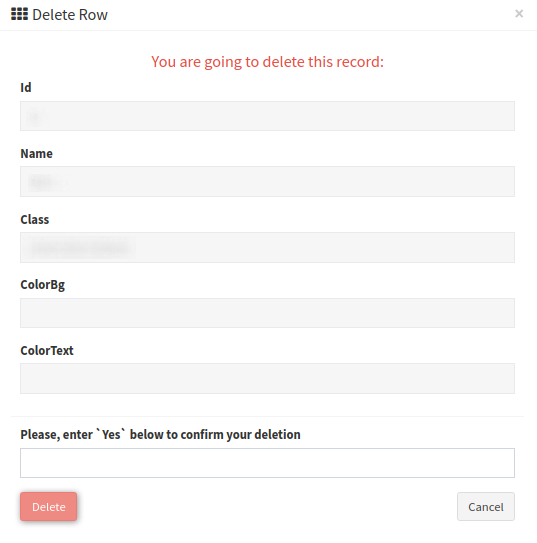
To delete a Buyer label click the “Delete” button in the “Action” column. Enter ‘Yes’ in the required field and click “Delete” to confirm your intention.
To export the report data click the “Export to CSV” button and choose the “Current Page” or “All Pages” type from the drop-down list.