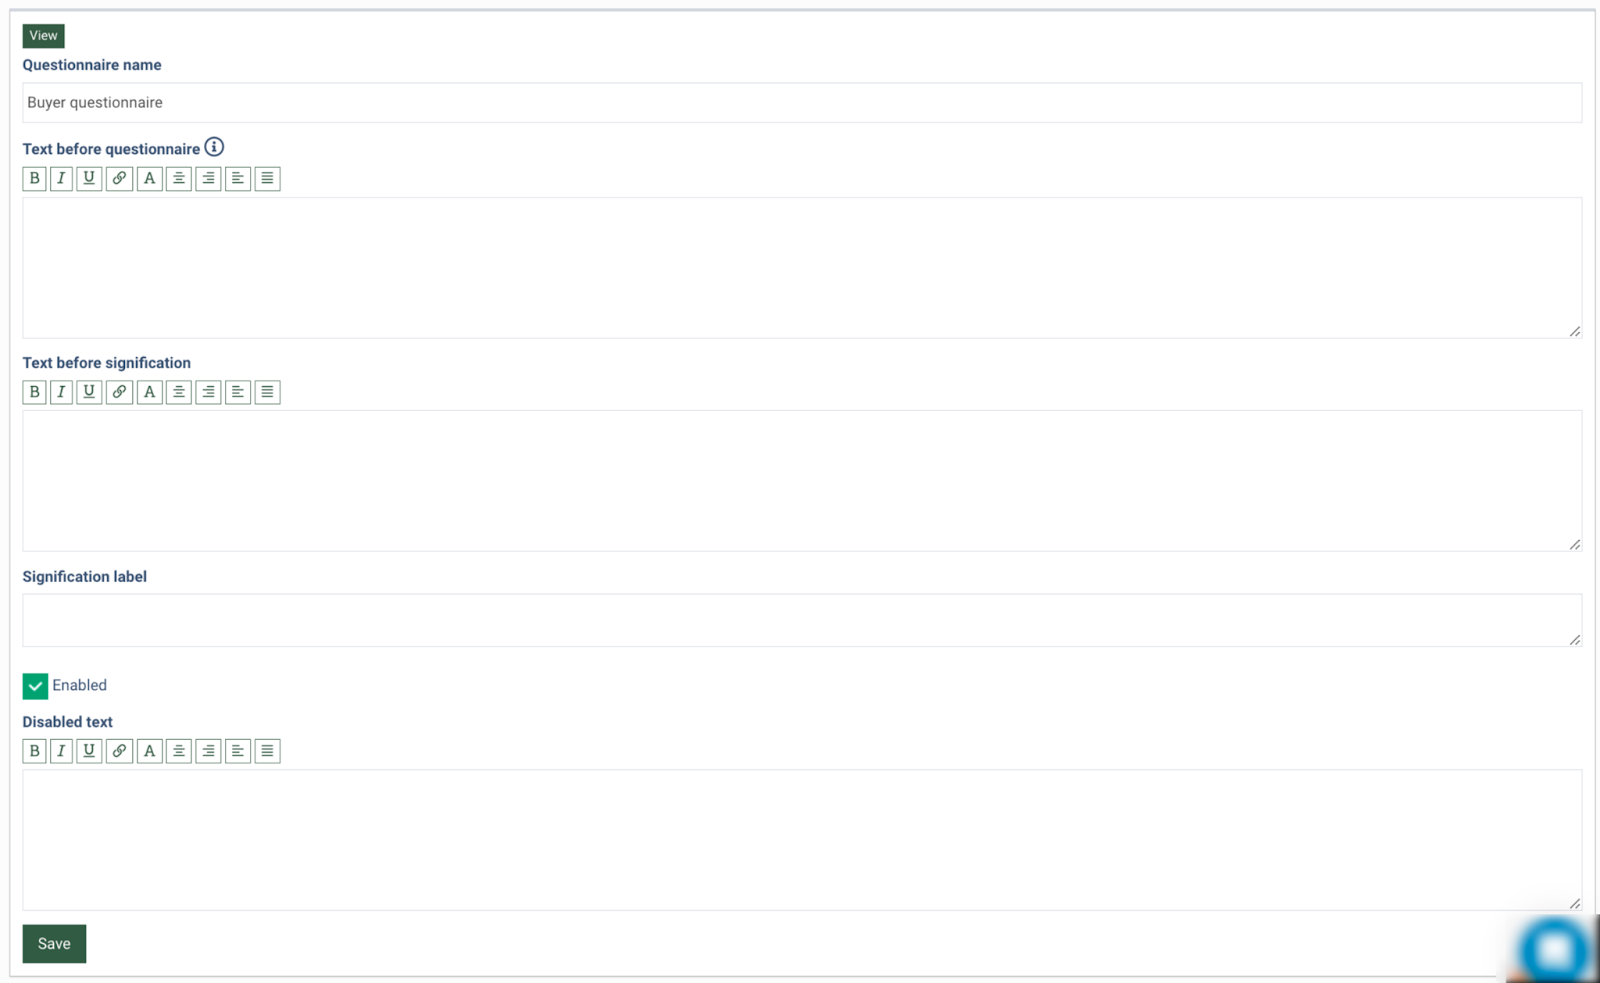
To set and edit the questions, click the “Edit” button in the upper left corner. In the pop-up window fill in the following fields:
-
Questionnaire name
-
Text before questionnaire
-
Text before signification
-
Signification label
-
Disabled text
Click the “Save” button to confirm.
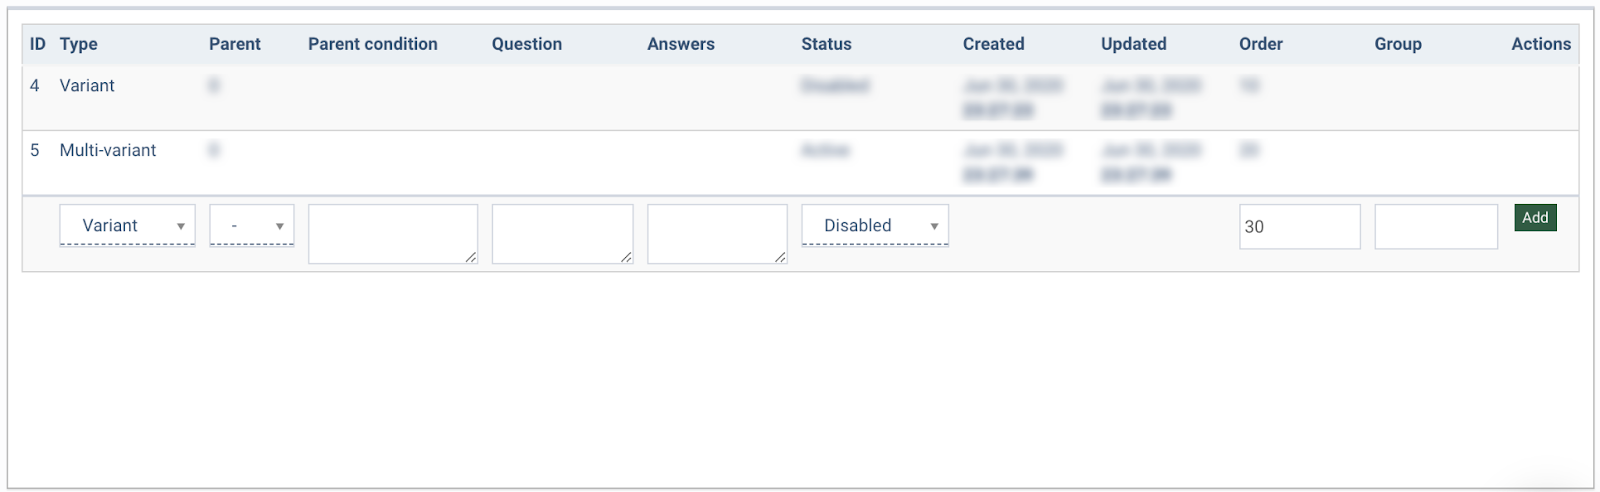
To add a new question to your questionnaire, select the type of the question from the “Type” drop-down list, and fill in the following fields:
-
ID: The question ID.
-
Type: The question type.
-
Parent: The parent question.
-
Parent Condition: The correct answers for the provided questions.
-
Question: The question text.
-
Answers: The answer options. (Variant / Multi-Variant questions only).
-
Status: The status of the question (Active / Disabled).
-
Created: The date when a question is added.
-
Updated: The last edit date.
-
Order: The “weight” appointed to a question for the list sorting. We recommend specifying the order in increments of 10 (10, 20, 30, etc.) so when you add new questions in the middle of the questionnaire, it won’t shift the subsequent questions. When adding a new question you can number it as 11, 12, 13 or 34, 35, 36, etc. This way you will have available numbers between question 10 and question 20.
-
Group: The name for a group of questions. Questions with the same group name will be combined into a collective group with a single title. Questions within one group should be placed sequentially, one under the other.
-
Action: You may save, delete, or add a question.
To view and manage the questionnaire for the specific Buyer, go to the Client Management > Buyer List section.
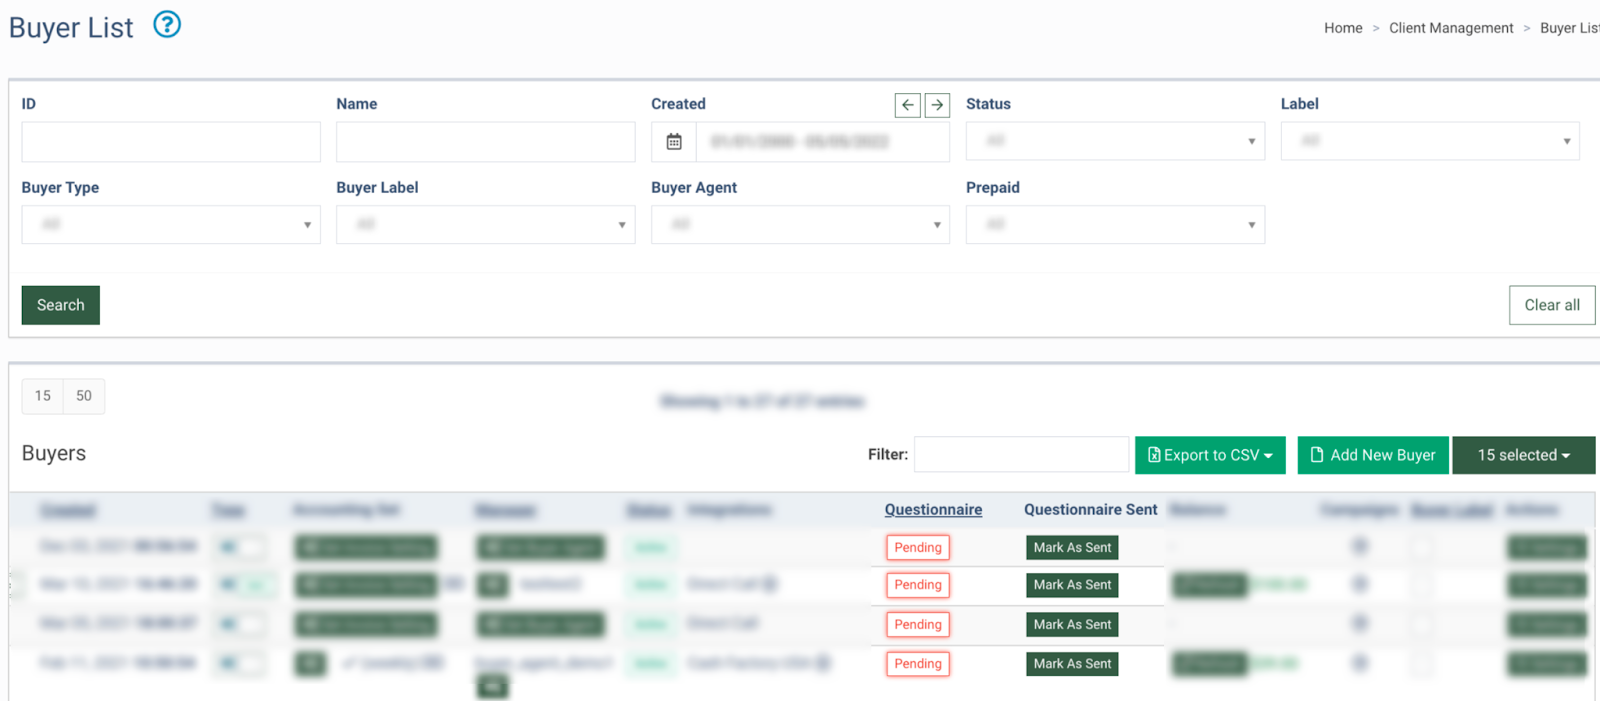
To access and view the Buyer’s questionnaire, click the button in the “Questionnaire” column of the selected Buyer.
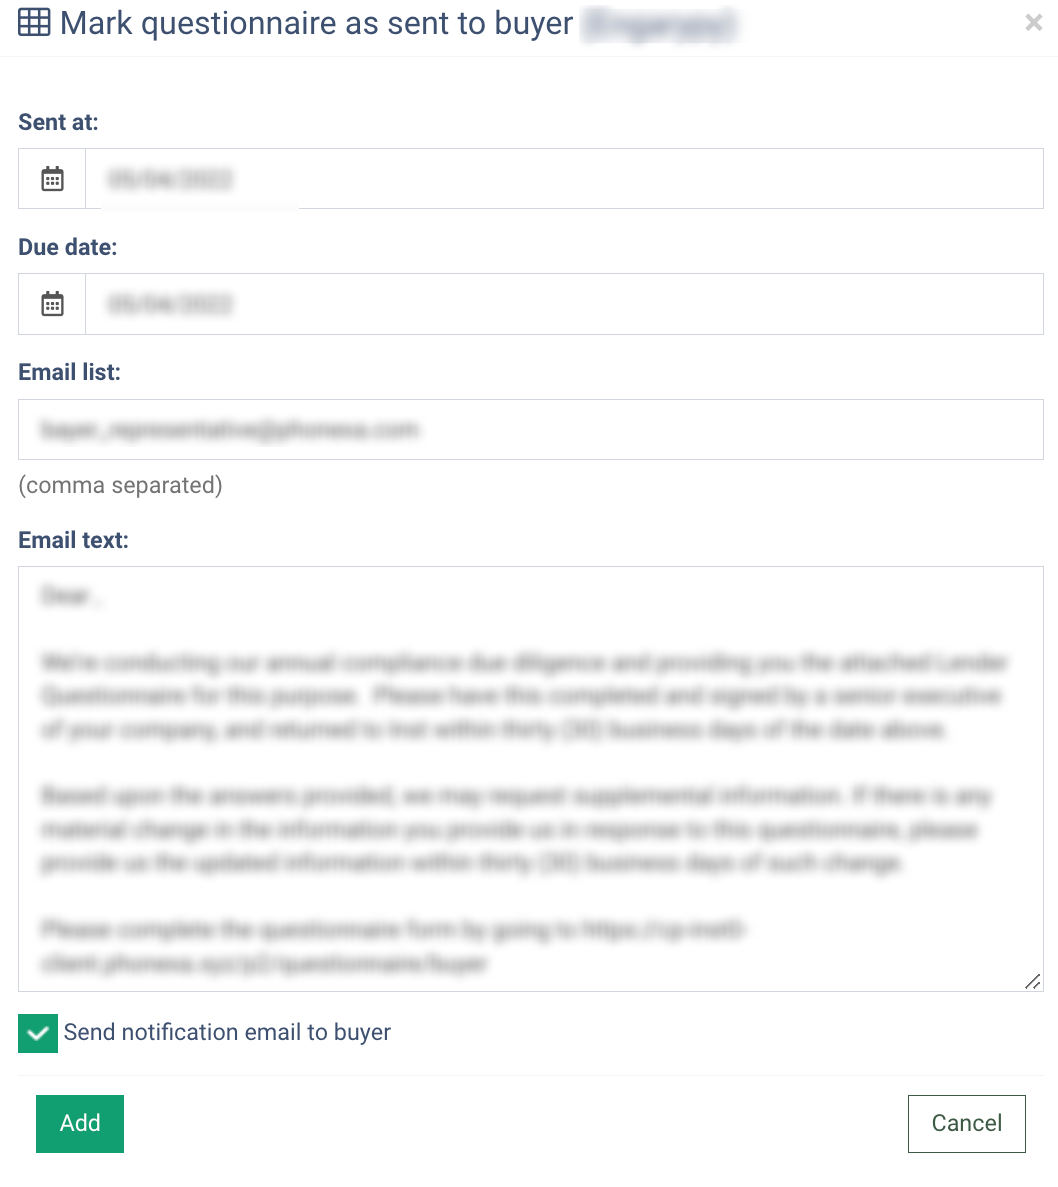
To mark that the questionnaire is sent for the selected Buyer, click the button in the “Questionnaire Sent” column. Fill in the following fields in the pop-up window:
-
Sent At: Select the date the questionnaire was sent.
-
Due Date: Select the due date for the questionnaire's completion.
-
Email List: Enter the email address. Use a comma to enter multiple email addresses.
-
Email Text: Fill in the text of the email. The field is prefilled by default according to the template provided in the Project Settings section. To access the template, go to the System Management > Project Settings section > LMS & Call Logic tab > Notifications tab. Manage the email template in the “Buyer Questionnaire Notification template” field. Click the “Save” button to confirm.
Click the “Add” button to confirm the process of sending the questionnaire.