Collect and record the voice consents. Voice consent collection allows pinging the caller’s phone number when consent is obtained.
The IVR Consent feature allows you to collect and record the caller’s voice Consent in IVR, manage publisher payouts for collected Consent, and ping a caller’s phone number to E-Delivery when the Consent is obtained.
To set up the Voice Consent, go to the Publisher Management > Setup > Call Routing / IVR section and select the IVR Consent tab.

The IVR Consent list contains the following information:
-
ID: The unique identification number of the Consent.
-
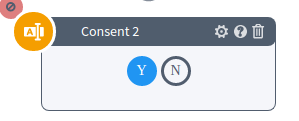
Name: The Consent name, which will be displayed in the “Consent” block.
-
Product: The name of the Product.
-
Status: The Consent status (Active or Disabled).
-
Created Date: The date and time of the Consent creation.
To create a Consent, click the “Create new Consent” button and fill in the following fields:
-
Name: Enter the Consent name.
-
Product: Select the Product from the drop-down list.
Click the "Add" button to create the Consent.

To set up the Consent, click the “Configure” button.
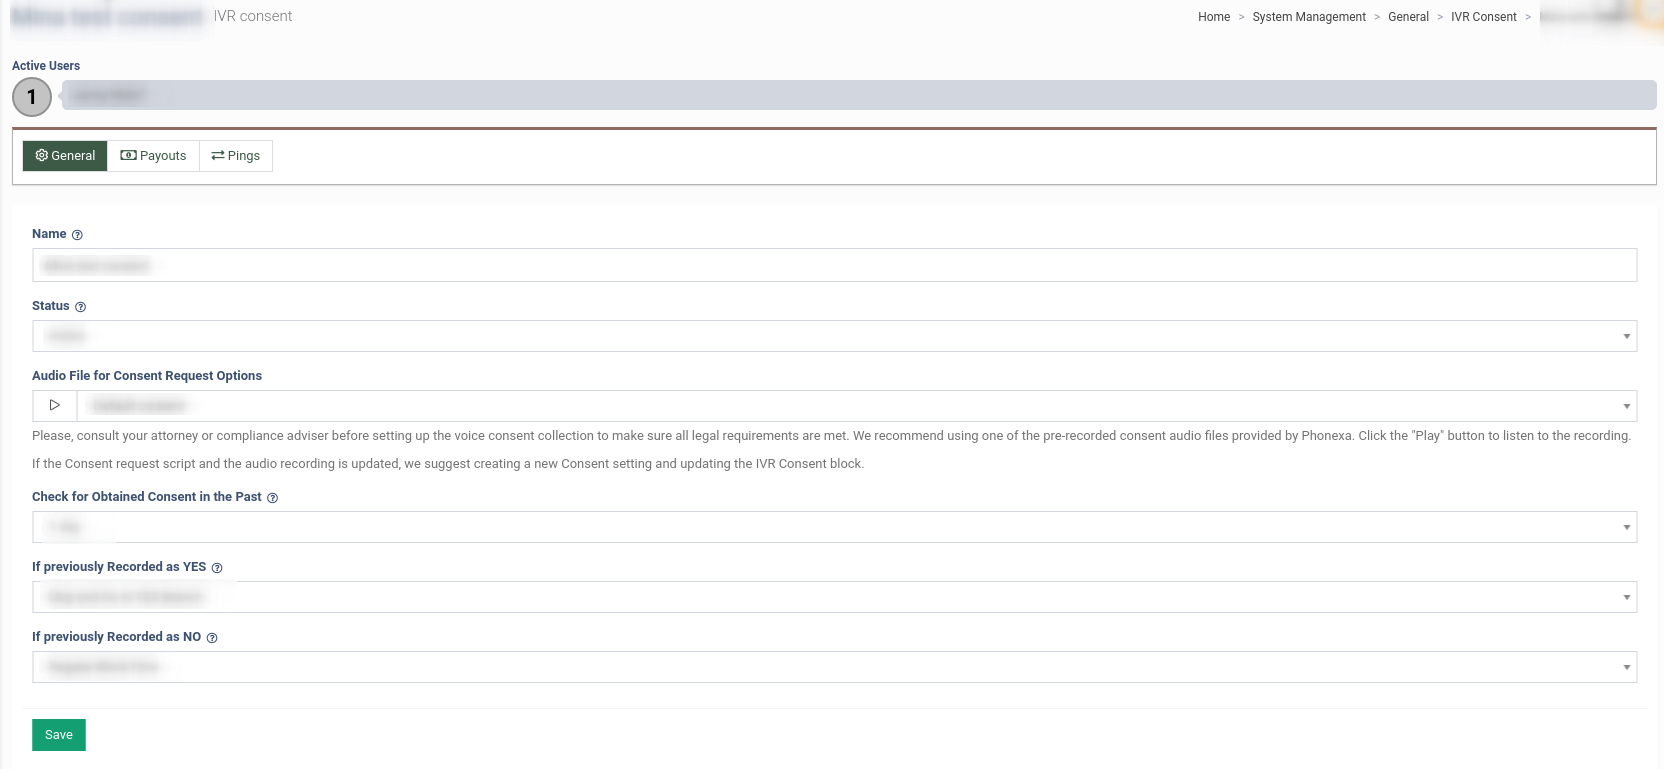
The configuration page contains three tabs. The “General” tab contains the following fields:
-
Name: The field displays the Consent name, which will be displayed in the “Consent” block afterward.
-
Status: Select the status from the drop-down list (Active or Disabled). By default, the Consent is created with the “Disabled” status. Change the status to “Active” to enable it.
-
Audio File for Consent Request Options: The Consent audio files that are pre-recorded by Phonexa. You can select one of the pre-recorded files that will be used as a Consent request language. Then, click the "Play" button to listen to the recording.
Note: Please consult your attorney or compliance advisor before setting up the Voice Consent Collection to ensure all legal requirements are met. We recommend using one of the pre-recorded Consent audio files provided by Phonexa.
-
Check for Obtained Consent in the Past: The time period for the system to check if Consent was requested in the past (Anytime, One day, seven days, 14 days, 30 days, 60 days, 90 days, 180 days).
-
If previously Recorded as YES: Set up the IVR “Consent” block flow when the Consent for the same phone number was obtained within the period specified in the "Check for Obtained Consent in the Past" block.
Select one of the following options:
-
Regular block flow: When the caller hits the block, Consent will always be requested (the system creates or updates the record in the database).
-
Skip and go to the YES branch: The system checks whether the Consent (Yes) was collected earlier and continues along the “Y” branch.
-
Skip and Go to NO branch: The system checks whether the Consent (No) was collected earlier and continues along the “N” branch.
-
If previously Recorded as NO: Set up the IVR “Consent” block flow when the Consent for the same phone number was requested within the period specified in the "Check for Obtained Consent in the Past" block, but the caller declined it and was recorded as “No.”
Click the “Save” button to apply the settings.
Note: If Consent is used in any IVR block, you cannot delete or change its status. When trying to delete or disable the Consent, the following message is displayed: “This Consent can not be disabled as it's currently being used in the following IVR(s)“ with the list of the IVR(s) in which it is selected (clickable).

The “Payouts” tab allows you to configure the Publisher payout settings for the requested Consent.
The Payouts list contains the following information:
-
ID: The unique identification number of the payout setting.
-
Name: The name of the payout setting.
-
Status: The status that displays if the payout setting is active or disabled.
-
Consent Status: The Consent status that defines the first condition for payout (Yes, No, Obtained Earlier, No (Previously)).
-
Lead Status: The lead status that defines the second condition for payout (All, Sold, Reject).
-
Consent Price: The amount for payout.

Example: If the "Consent Status" is "Yes" and the "Lead Status" is "All", then when the caller says "Yes" in a "Consent" block, whether it was sold or rejected, the payout will go through. If the "Lead Status" is "Sold", then the payout will be completed only when the lead is sold.
To add a new payout setting, click the “Add New Record” button and fill in the following fields in the pop-up window:
-
Name: Enter the name of the payout setting.
-
Consent Status: Select the Consent status from the drop-down menu (Yes, No, Obtained Earlier for the Consent obtained in the past, No (Previously) for the dissent obtained in the past).
-
Lead Status: Select the lead status from the drop-down menu (All, Reject, Sold).
-
Price: Enter the payout price (the value should not exceed $500).

To edit the existing payout setting, click the “Edit” button.

To delete the existing Payout setting, click the “Delete” button.

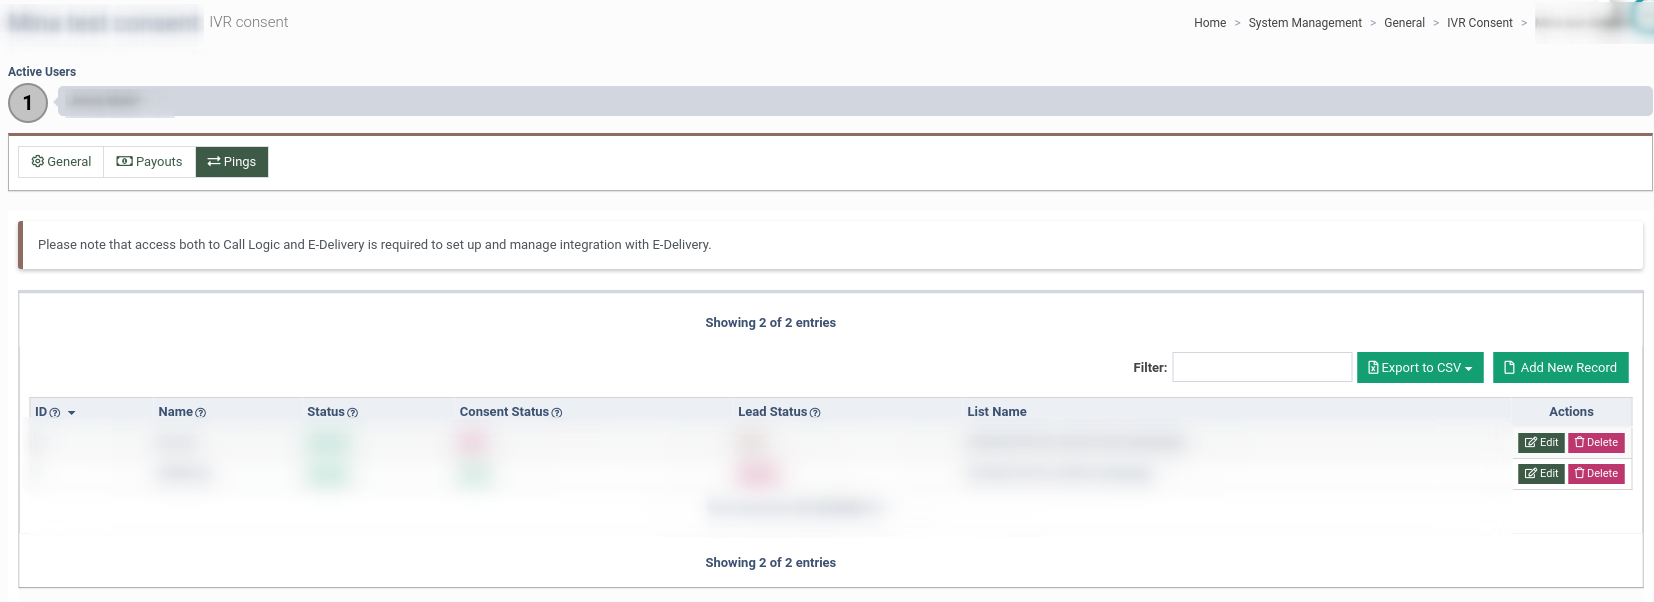
The “Pings” tab allows you to configure the integration with E-Delivery so that when Consent is obtained, data is pinged to E-Delivery if defined conditions are met.
The “Pings” tab contains the following information:
-
ID: The unique identification number of the ping setting.
-
Name: The name of the ping setting.
-
Status: The status that displays if the ping setting is active or disabled.
-
Consent Status: The Consent status that defines the first condition to ping -- Yes, No, Obtained Earlier -- for the Consent obtained in the past, No (Previously) for the dissent obtained in the past.
-
Lead Status: The lead status defines the second condition to ping (All, Sold, Reject).
-
List Name: The E-Delivery contact list name.
Example: If the "Consent Status" is "Yes" and the "Lead Status" is "All", then when the caller says "Yes" in a "Consent" block, whether it was sold or rejected, the phone number will be pinged to the E-Delivery contact list.
To add a new ping, click the “Add New Record” button and fill in the following fields in the pop-up window:
-
Name: Enter the name of the ping setting.
-
Consent Status: Select the Consent status from the drop-down menu -- Yes, No, Obtained Earlier -- for the Consent obtained in the past, No (Previously) for the dissent obtained in the past.
-
Lead Status: Select the lead status from the drop-down menu (All, Reject, Sold).
-
Contact List: Select the E-Delivery contact list from the drop-down menu.
-
Contact List API KEY: Enter the E-Delivery contact list API Key.
To edit the ping, click the “Edit” button.

To delete the existing Ping setting, click the “Delete” button.

To continue configuring the block, go to the Publisher Management > Setup > Call Routing / IVR section, select the “IVR” tab, and click the "Constructor" button.
Read more about the “Call Routing / IVR” section in this Knowledge Base article.

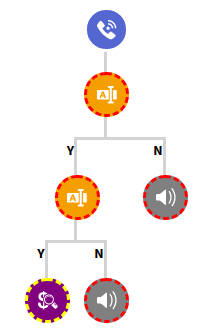
To add the “Consent” block to your IVR, click the “Consent” block icon in the blocks list. To set up the block, click the “Block Settings” button (the button with the gear icon) and fill in the following fields:
-
Title: Enter the name of the block.
-
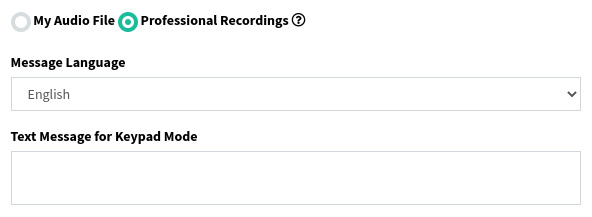
My Audio File / Professional Recordings: Upload a custom audio file or delegate audio file creation to professional artists. When selecting the “Professional Recordings” radio button, the additional fields will appear.
-
Message Language: Select the record language
-
Text Message for Keypad Mode: Enter the text for voice-over.
-

-
Audio File for Consent Request Intro: Upload the intro audio file that will be used as a request for the Consent intro but should not include Consent verbiage. Say “Yes” if you agree, or “No” if you don’t agree is a pre-recorded audio file selected in the Consent Settings. The option is available only when the “My Audio File” radio button is selected.
-
Consent Settings: Select the active IVR Consent in the drop-down menu.
-
Audio File for Error/Timeout 1: The audio file that will be played when the caller has pronounced words other than “Yes or No” or did not enter the value at all. You can select to upload the custom audio file or delegate audio file creation to professional artists.
-
Audio File for Error/Timeout 2: The audio file that will be played when the caller has pronounced words other than "Yes or No" twice or did not enter the value at all. If there is an invalid entry during the second attempt, the system records that the lead did not Consent, and the call is transferred to the “No” branch. You can select to upload the custom audio file or delegate audio file creation to professional artists.
Note: All audio files are required.