In the “Filter By Publishers'' tab, you can set up filtering rules for the campaign: manage the Allow, Cap, and Deny Lists, put the Publisher on a temporary block, define the traffic percentage settings, and manage Phone Number Tag Filter (available only for the Call Logic).
The “Traffic Percent (Global)” tab
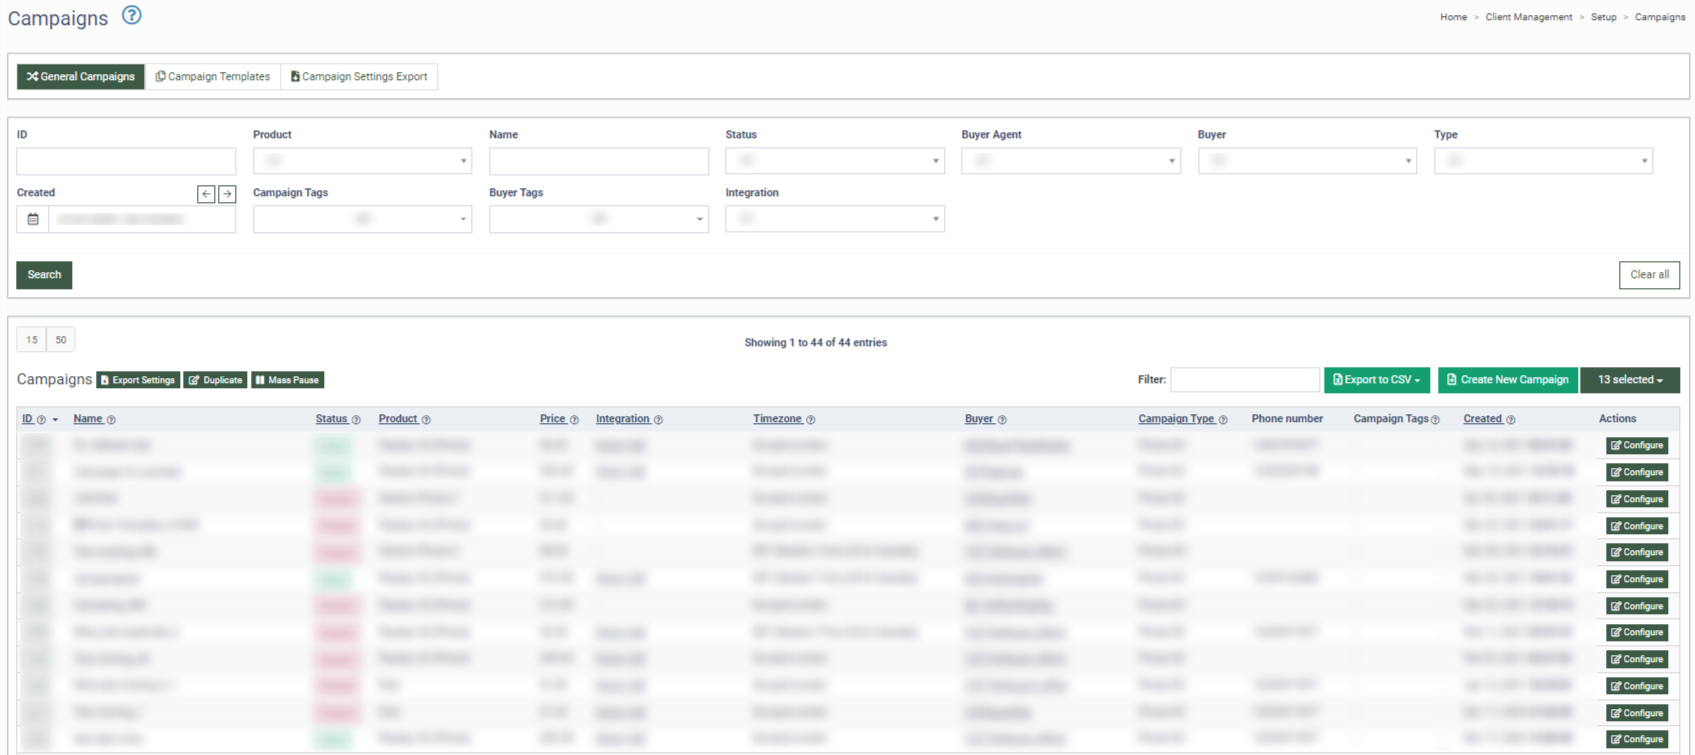
To set the filter by Publisher, go to the Client Management > Setup > Campaigns section, select the “General Campaigns” tab, choose a Campaign, and click the “Configure” button in the “Action” column. Then, on the “Campaign Setup” page, select the “Filters” tab and go to the "Filter by Publishers" subtab.
The “Allow List” tab
The “Allow List'' sub-tab allows you to set Allow lists for the Campaign and add Publishers to it. When the Allow list is set for the Campaign, this Campaign will only accept traffic from the listed Publishers.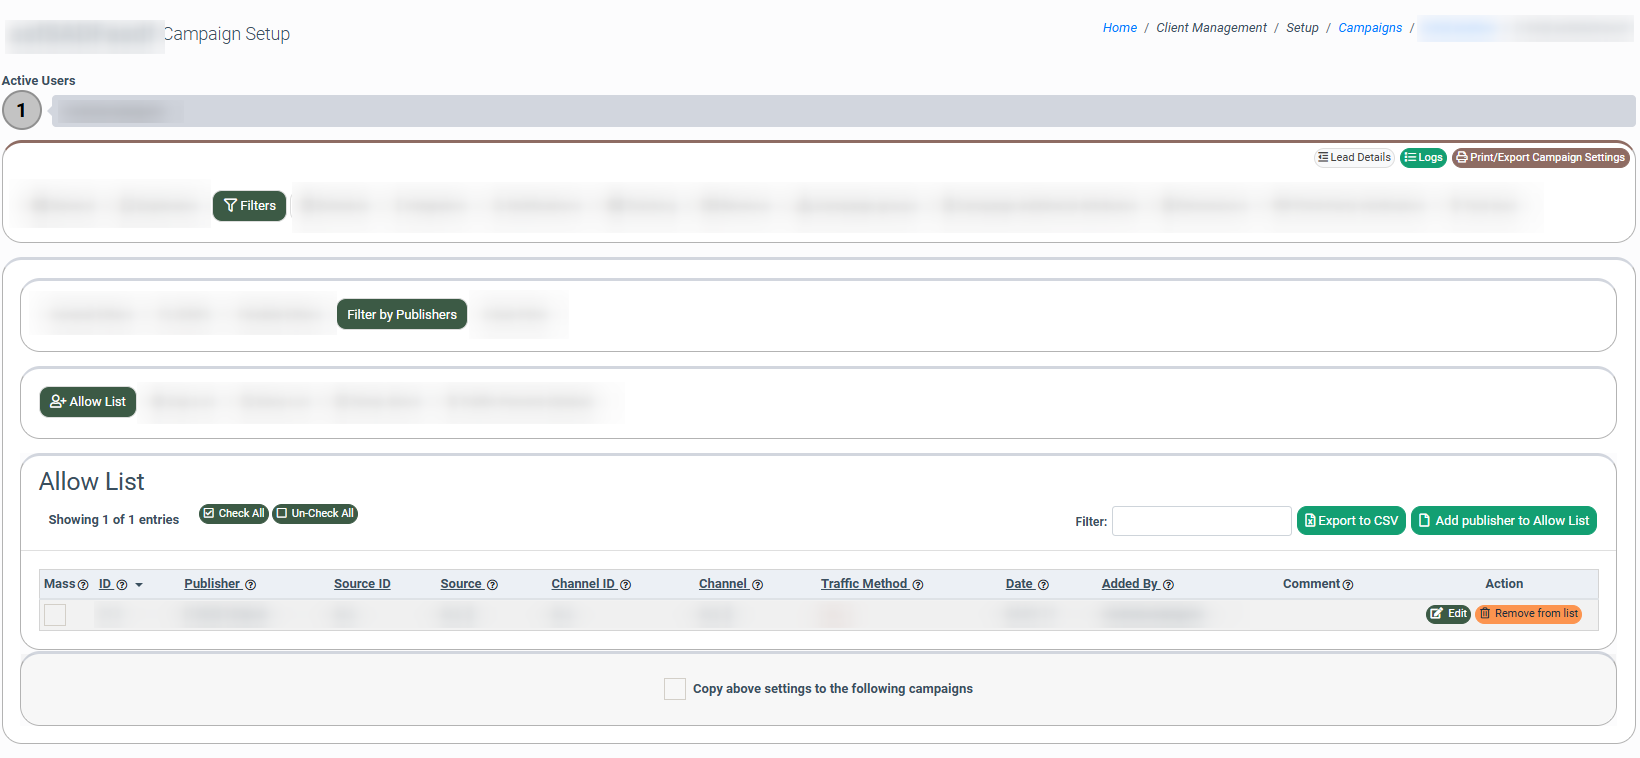
The list contains the following information:
-
Mass: Allows you to select multiple publishers and perform an action on them.
-
Check the box in the “Mass” column to select Publishers.
-
To select all Publishers in the list, click the “Check All” button. The checkbox in the “Mass” column will be selected for each Publisher in the list.
-
To cancel the selection for all Publishers selected in the list, click the “Un-Check All” button. The checkbox selection in the “Mass” field will be canceled for all Publishers selected in the list.
-
-
Remove From List: This allows you to remove selected Publishers from the list.
-
Add to All Allow List: This allows you to add selected Publishers to all campaigns with allow lists set for the selected Product.
-
ID: The unique identification number of the record.
-
Publisher: The name of the Publisher.
-
Source: The name of the Publisher Source (If the setting is applied for all Publisher Sources, the “ALL” value will be displayed).
-
Channel ID: The unique identification number of the Publisher Channel (If the setting is applied for all Publisher Channel, the “ALL” value will be displayed).
-
Channel: The name of the Publisher Channel (If the setting is applied for all Publisher Channel, the “ALL” value will be displayed).
-
Traffic Method: The type of traffic (If the setting is applied for all Publisher Sources, the “ALL” value will be displayed).
-
Date: The date and time of the record creation.
-
Added By: The name of the user that has created the record.
-
Comment: Additional information on the record.
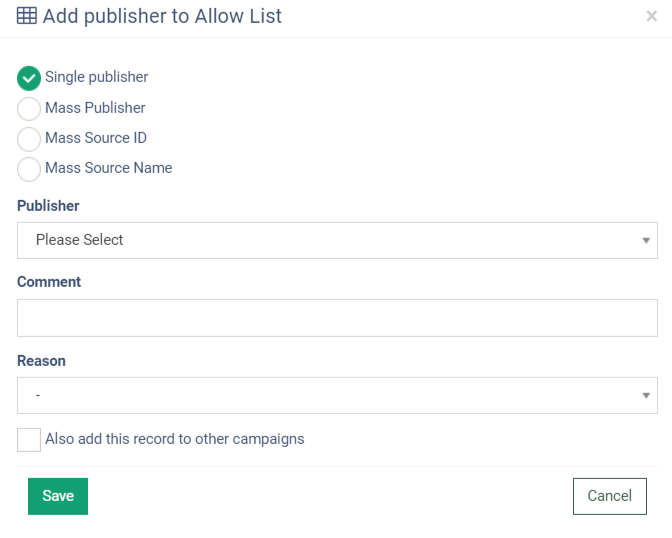
To add a Publisher to the Allow list, click the “Add publisher to Allow List” button and fill in the following fields in the “Add publisher to Allow List” pop-up window:
-
Select the “Single Publisher” option to add one Publisher to the list.
-
Publisher: Select the Publisher from the drop-down list.
-
-
Select the “Mass Publisher” option to add multiple Publishers to the list:
-
Publisher list: Select Publishers from the drop-down list.
-
Publisher IDs (comma-separated): Enter the unique identification number of selected Publishers or a comma-separated list of values.
-
-
Select the “Mass Source ID” option to add multiple Publisher Sources via the unique identification number of the source.
-
Source IDs (comma-separated): Enter the unique identification number of the Publisher Source or a comma-separated list of values. Click the “Search” button to proceed. The list of Publishers related to the specified Publisher Source will be displayed.
-
- Select the “Mass Source Name” option to add multiple Publisher Sources via the name of the source.
- Publisher: Select the Publisher from the drop-down list.
- Channel: Select the Publisher Channel from the drop-down list.
- Source Names (comma-separated): Enter the name of the Publisher Source or a comma-separated list of values. Click the “Search” button to proceed.
-
Comment: Enter a comment for this action record.
-
Reason: Select the reason from the drop-down list.
-
Also add this record to other campaigns: Check the box to apply these settings to other Campaigns.
-
Campaign list: Select the Campaign from the drop-down list.
-
Click the “Save” button to complete the action.
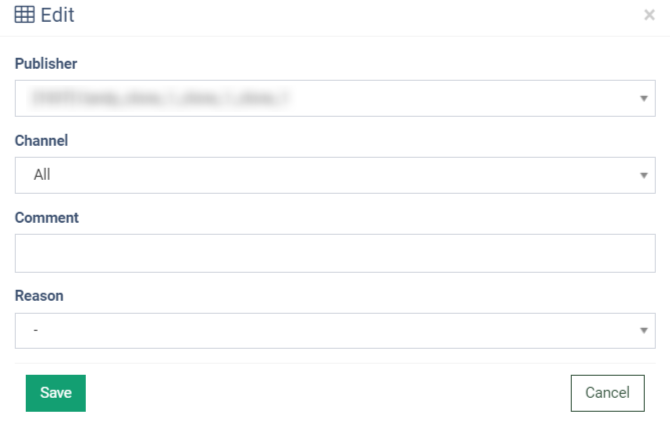
To change the existing record, click the “Edit” button in the “Action” column and change the information in the “Edit” pop-up window. Click the “Save” button to complete the changes.
To remove the Publisher from the list, click the “Remove from list” button in the “Action” column.
The “Cap List” tab
The “Cap List” sub-tab allows you to add the cap rule for a Publisher for the daily number of sent and sold leads and set up the limitation for the percentage ratio of the Publisher traffic.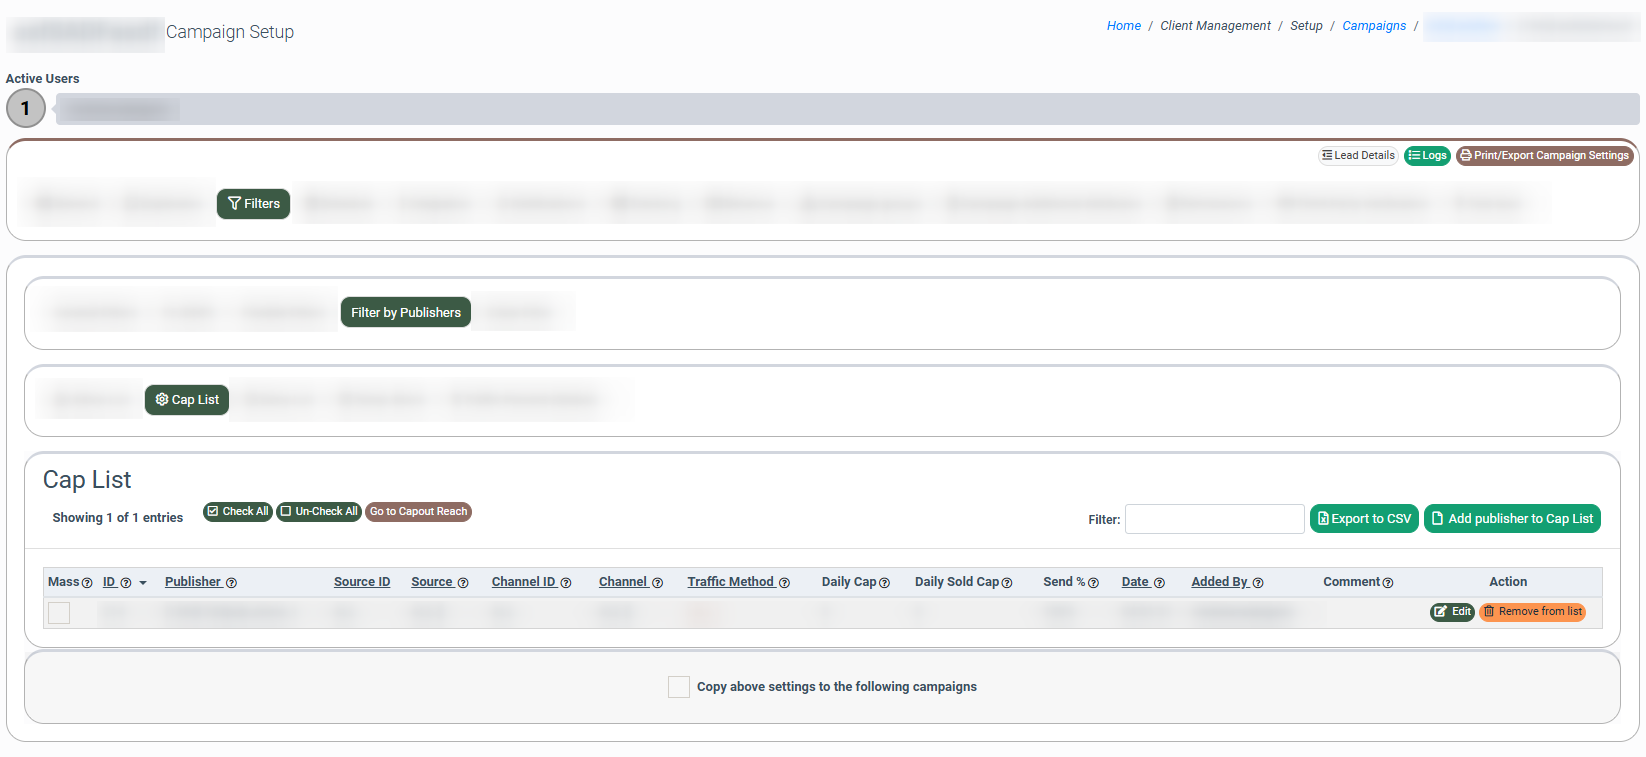
The list of cap rules contains the following information:
-
Mass: Allows you to select multiple publishers and perform an action on them.
-
Check the box in the “Mass” column to select Publishers.
-
To select all Publishers in the list, click the “Check All” button. The checkbox in the “Mass” column will be selected for each Publisher in the list.
-
To cancel the selection for all Publishers selected in the list, click the “Un-Check All” button. The checkbox selection in the “Mass” field will be canceled for all Publishers selected in the list.
-
Once you have made your selection, the following action buttons become available:
-
Remove From List: This allows you to remove selected Publishers from the list.
-
Add To All Cap List: This allows you to add selected Publishers to all campaigns with cap lists set for the selected Product.
-
ID: The unique identification number of the record.
-
Publisher: The name of the Publisher.
-
Source: The name of the Publisher Source (If the setting is applied for all Publisher Sources, the “ALL” value will be displayed).
-
Channel ID: The unique identification number of the Publisher Channel (If the setting is applied for all Publisher Channel, the “ALL” value will be displayed).
-
Channel: The name of the Publisher Channel (If the setting is applied for all Publisher Channel, the “ALL” value will be displayed).
-
Traffic Method: The type of traffic (If the setting is applied for all Publisher Sources, the “ALL” value will be displayed).
-
Daily Cap: The maximum number of leads to be posted to this Campaign from the specified Publishers. The count starts from activation, excluding any posts made before enabling it.
-
Daily Sold Cap: The maximum number of leads to be sold to this Campaign from the specified Publishers. The count starts from activation, excluding any posts made before enabling it.
-
Send %: The percentage ratio of traffic to be sent to this Campaign from the specified Publishers.
-
Date: The date and time of the record creation.
-
Added By: The name of the user that has created the record.
-
Comment: Additional information on the record.
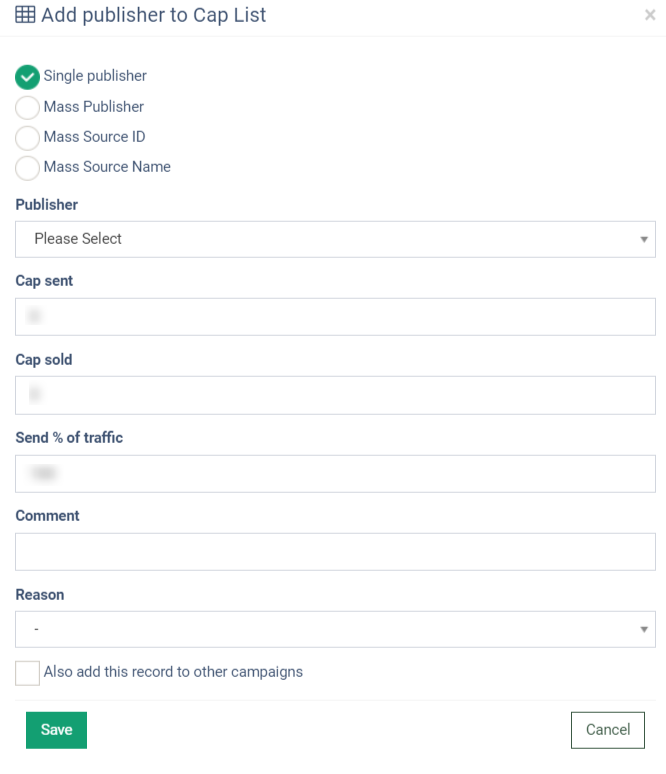
To add a new cap rule to the list, click the “Add publisher to Cap List” button and fill in the following fields in the “Add publisher to Cap List” pop-up window:
-
Select the “Single Publisher” option to add one Publisher to the list
-
Publisher: Select the Publisher from the drop-down list.
-
-
Select the “Mass Publisher” option to add multiple Publishers to the list:
-
Publisher list: Select Publishers from the drop-down list.
-
Publisher IDs (comma-separated): Enter the unique identification number of selected Publishers or a comma-separated list of values.
-
-
Select the “Mass Source ID” option to add multiple Publisher Sources via the unique identification number of the source.
-
Source IDs (comma-separated): Enter the unique identification number of the Publisher Source or a comma-separated list of values. Click the “Search” button to proceed. The list of Publishers related to the specified Publisher Source will be displayed.
-
- Select the “Mass Source Name” option to add multiple Publisher Sources via the name of the source.
-
- Publisher: Select the Publisher from the drop-down list.
- Channel: Select the Publisher Channel from the drop-down list.
- Source Names (comma-separated): Enter the name of the Publisher Source or a comma-separated list of values. Click the “Search” button to proceed.
-
Cap sent: Enter the maximum number of leads to be posted to this Campaign from the specified Publishers.
-
Cap sold: Enter the maximum number of leads to be sold to the Campaign from the specified Publishers.
-
Send % of traffic: Enter the percentage ratio of traffic to be sent to this Campaign from the specified Publishers.
-
Comment: Enter a comment for this action record.
-
Reason: Select the reason from the drop-down list.
-
Also add this record to other campaigns: Check the box to apply these settings to other Campaigns.
-
Campaign list: Select the Campaign from the drop-down list.
-
Click the “Save” button to complete the action.
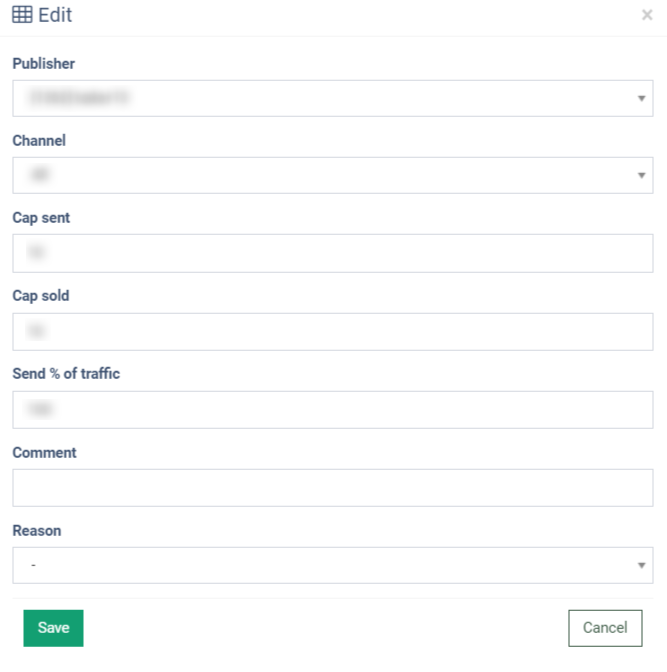
To change the existing record, click the “Edit” button in the “Action” column and change the information in the “Edit” pop-up window. Click the “Save” button to complete the changes.
To remove the Publisher from the list, click the “Remove from list” button in the “Action” column.
To get detailed information and track the applied cap rules, click the “Go To Capout Reach” button. You will be redirected to the Cap-Out Details report (Analytics and Optimization > Buyer Analytics > Cap-Out Details section > Cap-Out Reach tab).
The “Deny List” tab
The “Deny List” sub-tab allows you to set Deny lists for the Campaign and add Publishers to it. When the Deny list is set for the Campaign, this Campaign will not accept traffic from the listed Publishers.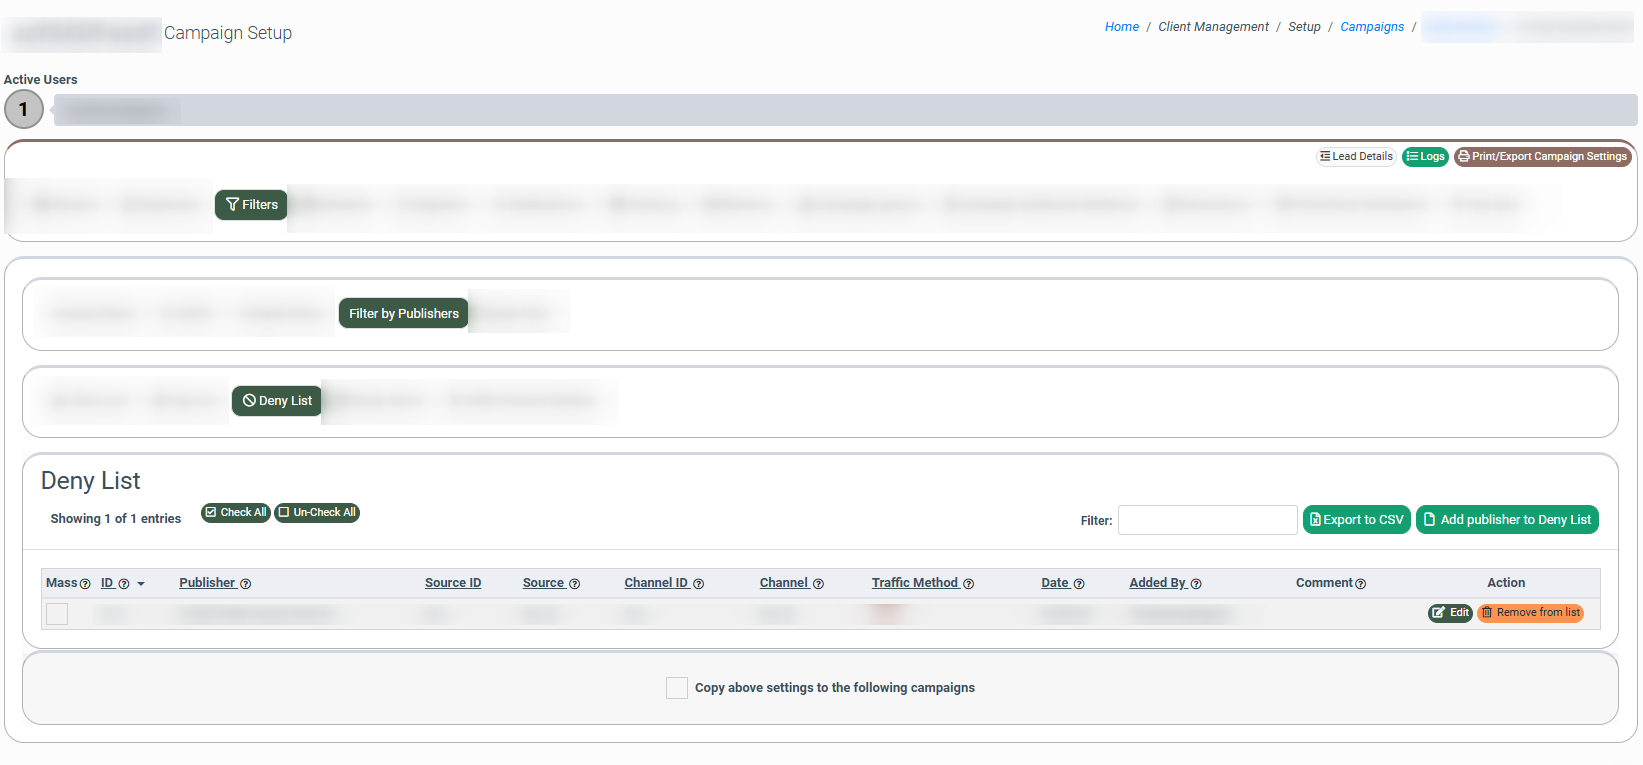
The list contains the following information:
-
Mass: Allows you to select multiple publishers and perform an action on them.
-
Check the box in the “Mass” column to select Publishers.
-
To select all Publishers in the list, click the “Check All” button. The checkbox in the “Mass” column will be selected for each Publisher in the list.
-
To cancel the selection for all Publishers selected in the list, click the “Un-Check All” button. The checkbox selection in the “Mass” field will be canceled for all Publishers selected in the list.
-
Once you have made your selection, the following action buttons become available:
-
Remove From List: This allows you to remove selected Publishers from the list.
-
Add to All Black List: This allows you to add selected Publishers to all campaigns with denylists set for the selected Product.
-
ID: The unique identification number of the record.
-
Publisher: The name of the Publisher.
-
Source: The name of the Publisher Source (If the setting is applied for all Publisher Sources, the “ALL” value will be displayed).
-
Channel ID: The unique identification number of the Publisher Channel (If the setting is applied for all Publisher Channel, the “ALL” value will be displayed).
-
Channel: The name of the Publisher Channel (If the setting is applied for all Publisher Channel, the “ALL” value will be displayed).
-
Traffic Method: The type of traffic (If the setting is applied for all Publisher Sources, the “ALL” value will be displayed).
-
Date: The date and time of the record creation.
-
Added By: The name of the user that has created the record.
-
Comment: Additional information on the record.
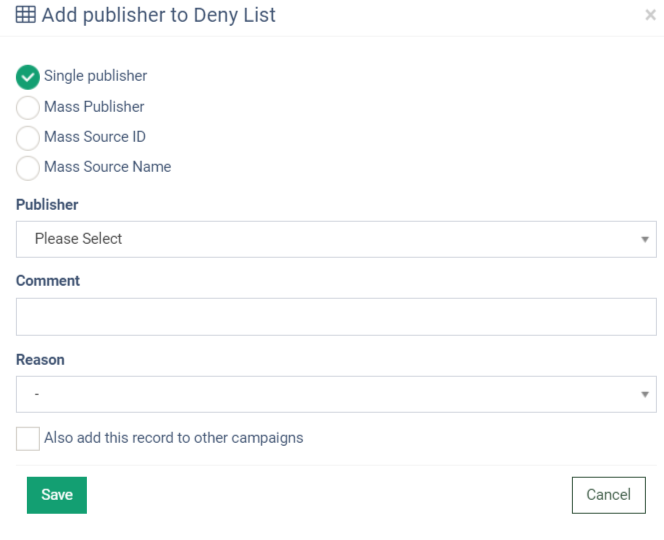
To add a Publisher to the Deny list, click the “Add publisher to Deny List” button and fill in the following fields in the “Add publisher to Deny List” pop-up window:
-
Select the “Single Publisher” option to add one Publisher to the list.
-
Publisher: Select the Publisher from the drop-down list.
-
-
Select the “Mass Publisher” option to add multiple Publishers to the list:
-
Publisher list: Select Publishers from the drop-down list.
-
Publisher IDs (comma-separated): Enter the unique identification number of selected Publishers or a comma-separated list of values.
-
-
Select the “Mass Source ID” option to add multiple Publisher Sources via the unique identification number of the source.
-
Source IDs (comma-separated): Enter the unique identification number of the Publisher Source or a comma-separated list of values. Click the “Search” button to proceed. The list of Publishers related to the specified Publisher Source will be displayed.
-
- Select the “Mass Source Name” option to add multiple Publisher Sources via the name of the source.
- Publisher: Select the Publisher from the drop-down list.
- Channel: Select the Publisher Channel from the drop-down list.
- Source Names (comma-separated): Enter the name of the Publisher Source or a comma-separated list of values. Click the “Search” button to proceed.
-
Comment: Enter a comment for this action record.
-
Reason: Select the reason from the drop-down list.
-
Also add this record to other campaigns: Check the box to apply these settings to other Campaigns.
-
Campaign list: Select the Campaign from the drop-down list.
-
Click the “Save” button to complete the action.
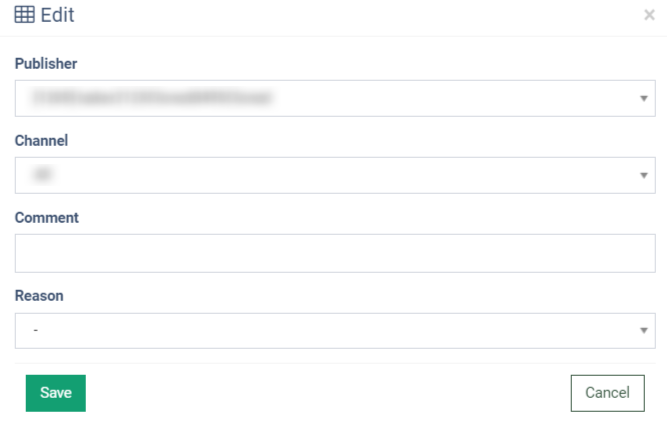
To change the existing record, click the “Edit” button in the “Action” column and change the information in the “Edit” pop-up window. Click the “Save” button to complete the changes.
To remove the Publisher from the list, click the “Remove from list” button in the “Action” column.
The “Temp. Block” tab
The “Temp. Block” sub-tab allows you to pause accepting traffic from selected Publishers for a specified period.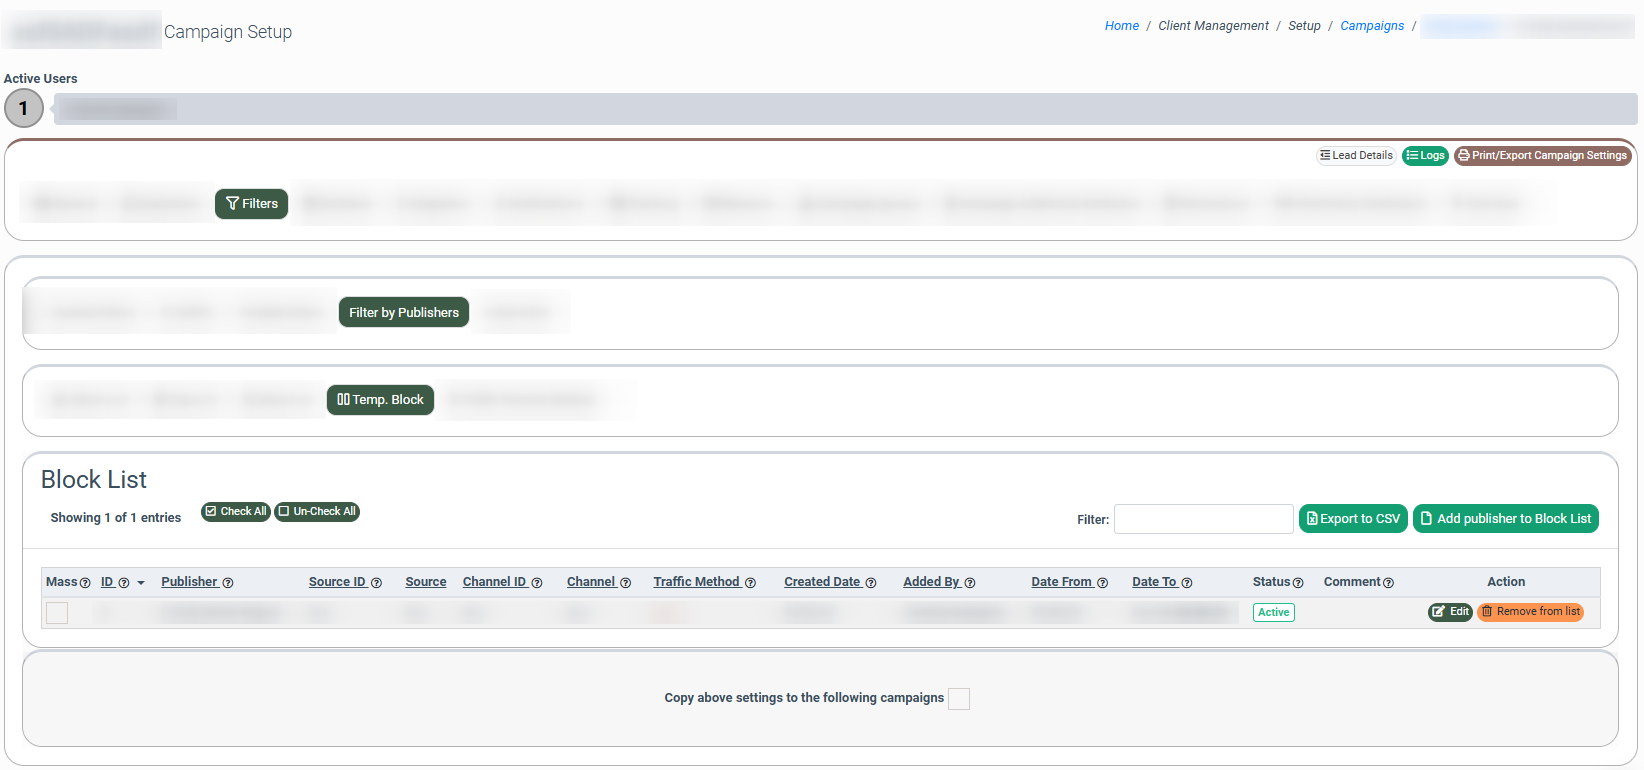
The list of the temporarily blocked Publishers contains the following information:
-
Mass: Allows you to select multiple publishers and perform an action on them.
-
Check the box in the “Mass” column to select Publishers.
-
To select all Publishers in the list, click the “Check All” button. The checkbox in the “Mass” column will be selected for each Publisher in the list.
-
To cancel the selection for all Publishers selected in the list, click the “Un-Check All” button. The checkbox selection in the “Mass” field will be canceled for all Publishers selected in the list.
-
Once you have made your selection, the following action buttons become available:
-
Remove From List: This allows you to remove selected Publishers from the list.
-
Add to All Block List: This allows you to add selected Publishers to all campaigns with a temporary block list set for the selected Product.
-
ID: The unique identification number of the record.
-
Publisher: The name of the Publisher.
-
Source: The name of the Publisher Source (If the setting is applied for all Publisher Sources, the “ALL” value will be displayed).
-
Channel ID: The unique identification number of the Publisher Channel (If the setting is applied for all Publisher Channel, the “ALL” value will be displayed).
-
Channel: The name of the Publisher Channel (If the setting is applied for all Publisher Channel, the “ALL” value will be displayed).
-
Traffic Method: The type of traffic (If the setting is applied for all Publisher Sources, the “ALL” value will be displayed).
-
Created Date: The date and time of the record creation.
-
Added By: The name of the user that has created the record.
-
Date From: The start date and time of the temporary block period.
-
Date To: The end date and time of the temporary block period.
-
Status: The current status of the temporary block rule.
-
Comment: Additional information on the record.
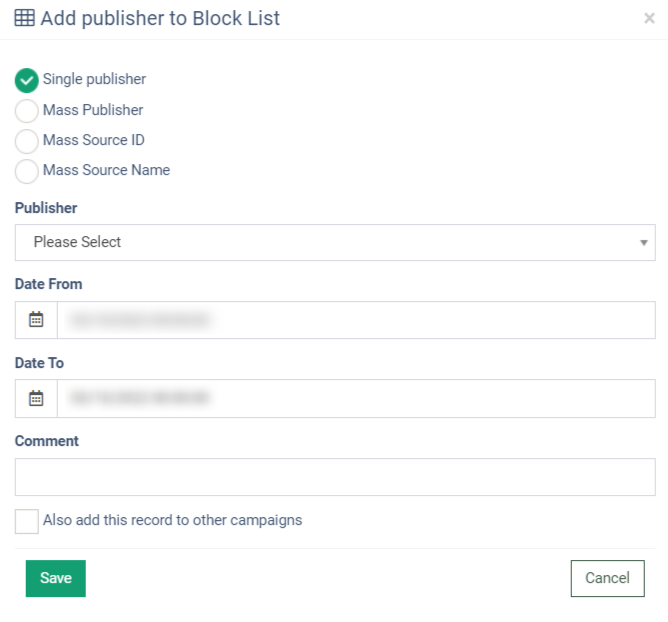
To add a rule, click the “Add publisher to Block List” button and fill the following fields in the “Add publisher to Block List” pop-up window:
-
Select the “Single Publisher” option to add one Publisher to the list.
-
Publisher: Select the Publisher from the drop-down list.
-
-
Select the “Mass Publisher” option to add multiple Publishers to the list:
-
Publisher list: Select Publishers from the drop-down list.
-
Publisher IDs (comma-separated): Enter the unique identification number of selected Publishers or a comma-separated list of values.
-
-
Select the “Mass Source ID” option to add multiple Publisher Sources via the unique identification number of the source.
-
Source IDs (comma-separated): Enter the unique identification number of the Publisher Source or a comma-separated list of values. Click the “Search” button to proceed. The list of Publishers related to the specified Publisher Source will be displayed.
-
- Select the “Mass Source Name” option to add multiple Publisher Sources via the name of the source.
- Publisher: Select the Publisher from the drop-down list.
- Channel: Select the Publisher Channel from the drop-down list.
- Source Names (comma-separated): Enter the name of the Publisher Source or a comma-separated list of values. Click the “Search” button to proceed.
-
Channel: Select the Publisher Channel from the drop-down list.
-
Date From: Set the start date and time of the temporary block period.
-
Date To: Set the end date and time of the temporary block period.
-
Comment: Enter a comment for this action record.
-
Also add this record to other campaigns: Check the box to apply these settings to other Campaigns.
-
Campaign list: Select the Campaign from the drop-down list.
-
Click the “Save” button to complete the action.
To change the existing record, click the “Edit” button in the “Action” column and change the information in the “Edit” pop-up window. Click the “Save” button to complete the changes.

To remove the Publisher from the list, click the “Remove from list” button in the “Action” column.
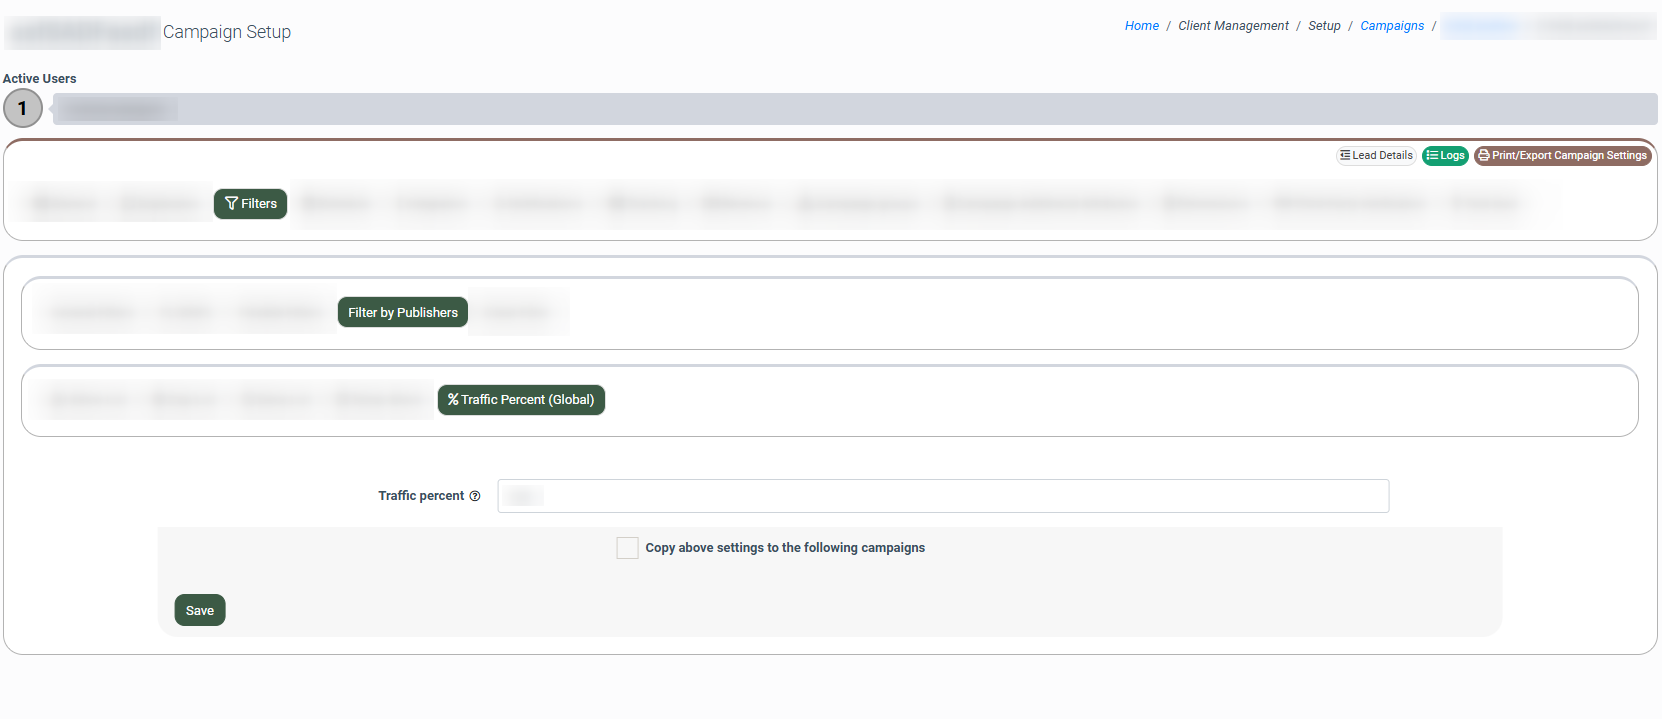
The “Traffic Percent (Global)” tab
The “Traffic Percent (Global)” sub-tab allows you to set the percentage ratio of lead traffic to be sent to this Campaign when other requirements are met.
Set the percentage value in the “Traffic percent” field and click the “Save” button to complete the action.
The “Phone Tag Filter” tab
The “Phone Tag Filter” tab allows you to add rules to filter calls based on the phone number tag.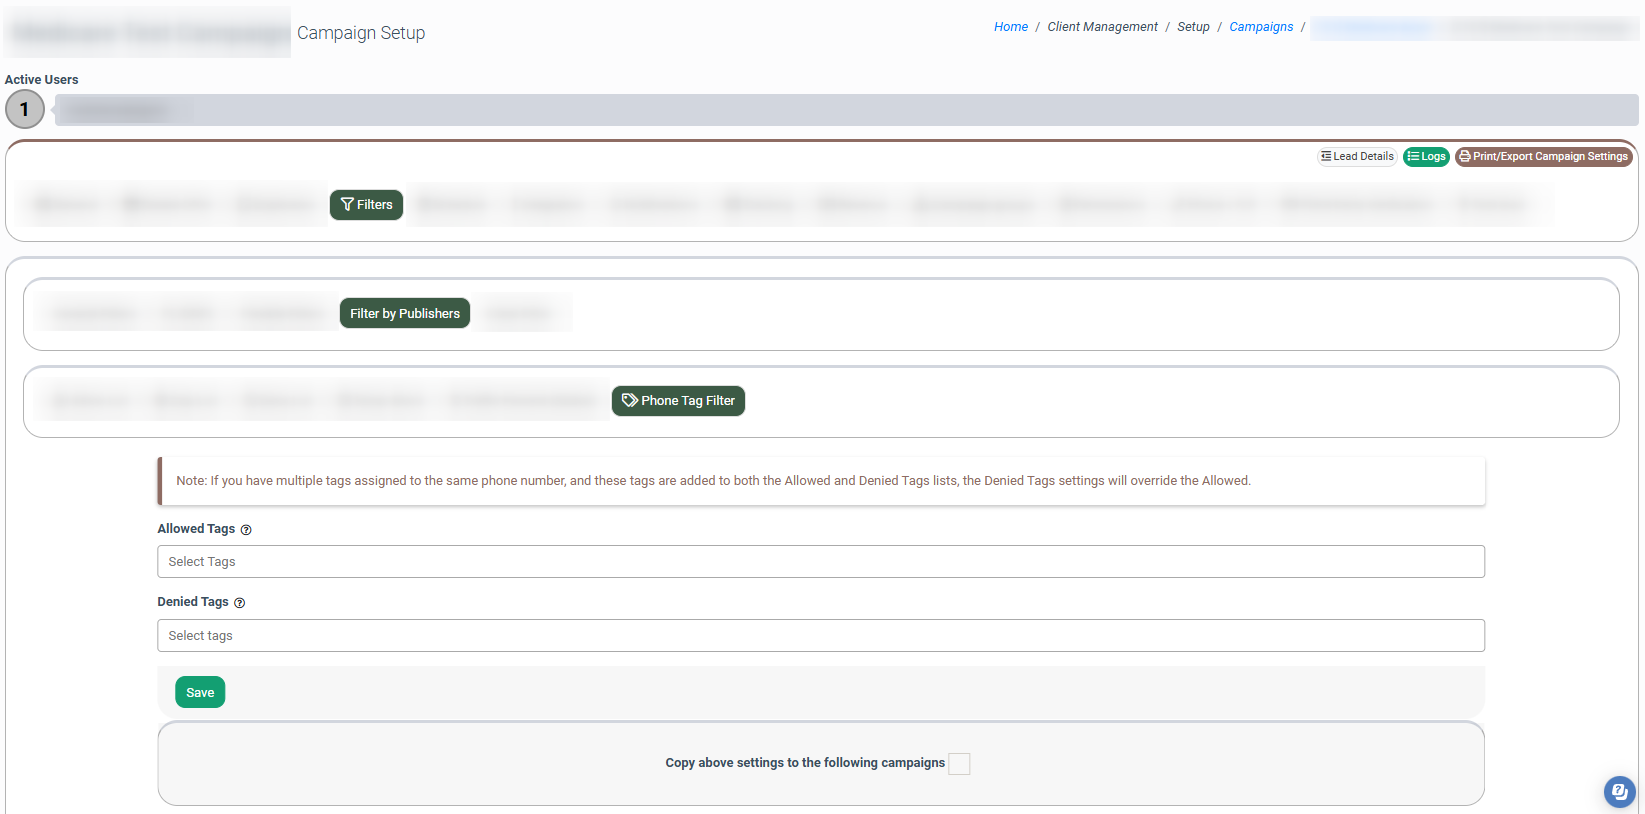
The following settings are available:
-
Allowed Tags: Select the Phone Number Tag to add the Publisher to the allowlist. When the allowed tags are set for the Campaign, this Campaign will only accept traffic from the phone numbers with the listed tags.
-
Denied Tags: Select the Phone Number Tag to add the Publisher to the Deny list. When the denied tags are set for the Campaign, this Campaign will only accept traffic from the phone numbers with the listed tags.
Click the “Save” button to complete the settings.
To copy current “Filter by Pubs” settings to other Campaigns, check the box in the “Copy above settings to the following campaigns” field in any sub-tab. In the “Select More Campaigns” field, select Campaigns that you’d like to copy the settings to, and click the “Apply” button to complete the action.
