The PL/DNPL tab allows you to configure Present or Do Not Present Lists for a Campaign and use them to filter leads based on the list of set parameters.
Read more information about the Do & Do Not Present Feature in this article.
To configure Do & Do Not Present Lists on the Campaign level, go to the Client Management > Setup > Campaigns section. For the selected campaign, click the “Configure” button in the “Actions” column and go to the “Filters” tab. Select the "PL/DNPL" subtab.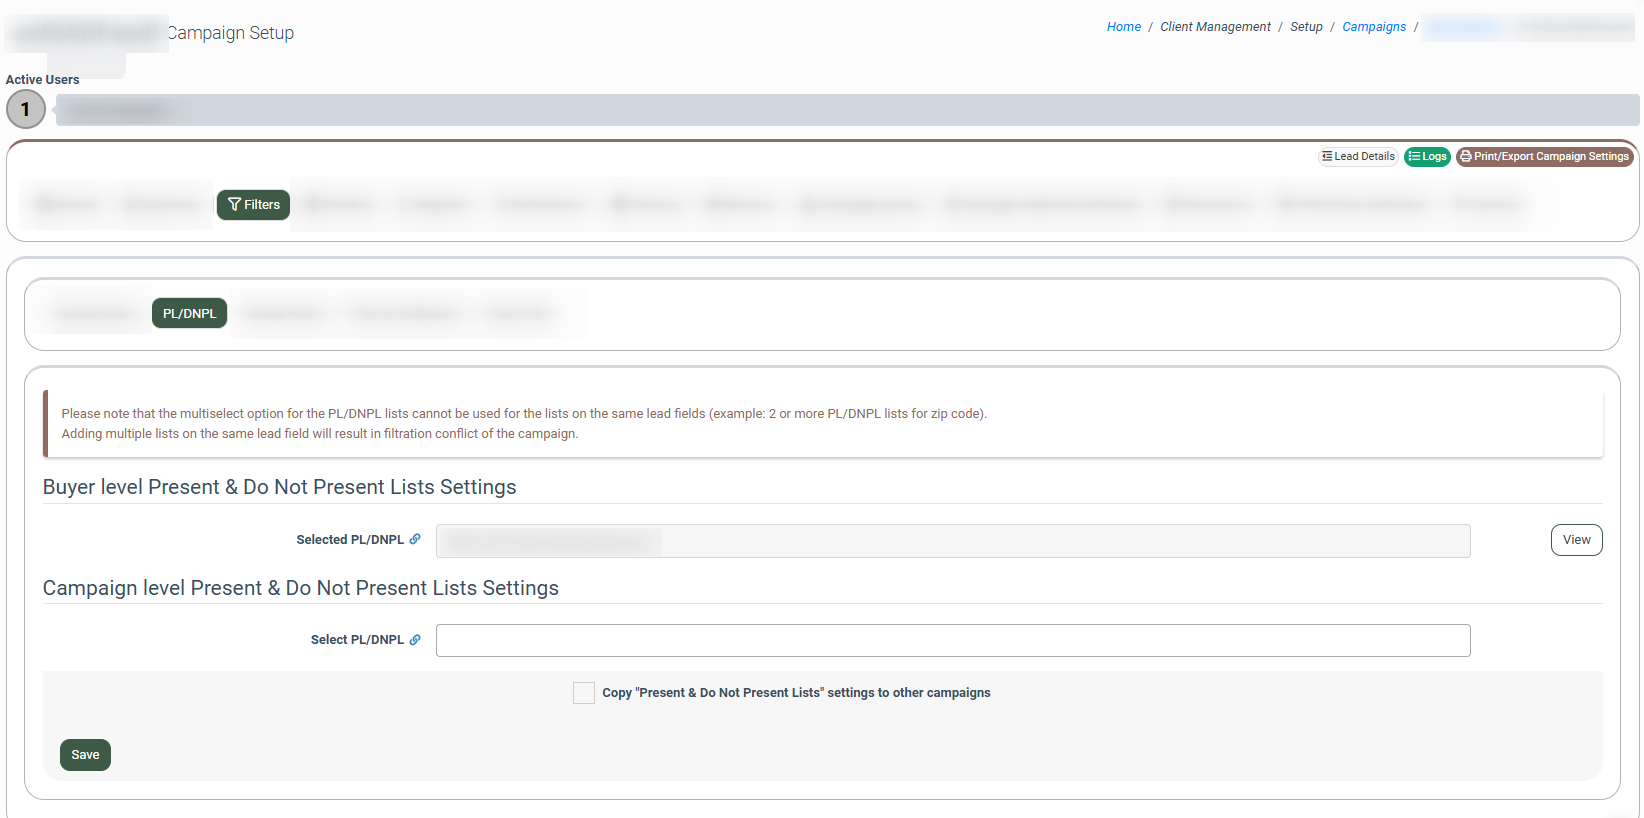
-
Buyer level Present & Do Not Present Lists Settings: The block shows the list of present or do not present lists applied on the Buyer level to all Campaigns created for this buyer. Read more information about the Do & Do Not Present Lists on the Buyer level in this Knowledge Base article.
-
Campaign level Present & Do Not Present Lists Settings: Select the present or do not present list(s) you want to be applied to the current Campaign.
Additionally, Do & Do Not Present Lists can be applied on the product level. Read about the Do & Do Not Present Lists on the Product level in this Knowledge Base article.
Check the “Copy above settings to the following campaigns” box to copy the PL/DNPL settings of the current campaign to the list of the selected campaigns:
-
Select more campaigns: Select campaigns from the drop-down list.