The Campaigns section allows you to view and manage Campaigns in the system.
To view the list of campaigns, go to the Client Management > Setup > Campaigns section. Use the following tabs to manage campaigns:
- General Campaigns displays a list of campaigns with the Redirect or Silence type.
- Exit & Comparison Campaigns displays a list of campaigns with the ExitOffer or ExitPage type.
- Campaign Templates displays a list of campaign templates.
- Campaign Settings Export displays a list of campaign settings export files.
General Campaigns
The “General Campaigns” tab allows you to view the list of Campaigns with the Redirect or Silence type. You can create, duplicate, manage, export, and delete campaigns.

The Campaign list contains the following information:
- ID: The unique identification number of the Campaign.
- Name: The name of the Campaign.
- Status: The status of the Campaign (Active, Deleted, Disabled, Paused, Temp Paused).
- Product: The name of the Product.
- Price: The minimum price of the Campaign.
- Integration: The integration selected for the Campaign.
- Timezone: The timezone of the Campaign.
- Buyer: The name of the Buyer.
- Campaign Type: The type of the Campaign (Redirect, Silent).
- Campaign Tags: The name of the Campaign Tag.
- Buyer Tags: The name of the Buyer Tag.
- Created: The creation date of the Campaign.
- Last Traffic: The date and time when the Campaign last received traffic.
You can narrow down the search results by using the following filters:
- ID: Enter the unique identification number of the Campaign.
- Name: Enter the name of the Campaign.
- Product: Select the Product.
- Status: Select the status of the Campaign (Active, Deleted, Disabled, Paused, Temp Paused).
- Buyer Agent: Select the Buyer Agent.
- Buyer: Select the Buyer.
- Type: Select the Campaign type (Redirect, Silent).
- Created: Select the creation date.
- Campaign Tags: Select the Campaign Tag.
- Buyer Tags: Select the Buyer Tag.
- Integration URL: Enter the integration URL.
- Last Traffic Within: Select the timeframe for the last traffic received by the Campaign (Week / Two Weeks / Month / Three Months / Six Months / Year).
- No Traffic For More Than: Select the timeframe during which there was no traffic coming to the Campaign (Week / Two Weeks / Month / Three Months / Six Months / Year).
- Integration: Select the integration.
- Created from template: Check the box to display only Campaigns created from a template.
To create a new Сampaign, click the “Create New Campaign” button and fill in the following fields in the pop-up window:
- Name: Enter the name of the Campaign.
- Product: Select the Product.
- Buyer: Select the Buyer.
- Campaign type: Select the type of the Campaign (Redirect, Silent, Direct Call).
- Timezone: Select the Timezone.
- Min price: Enter the minimum price for the Campaign.
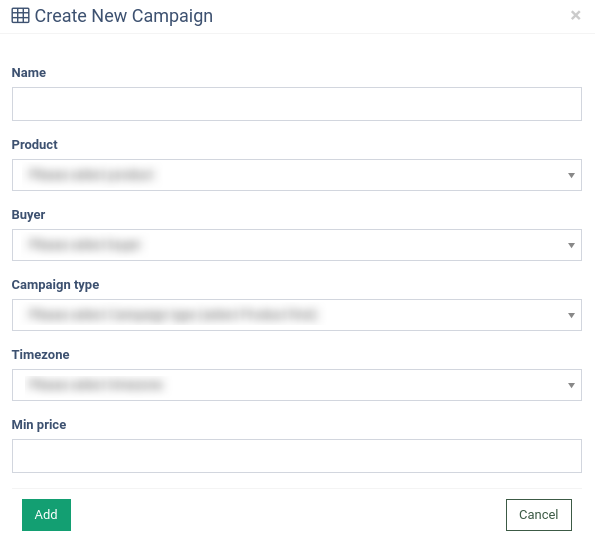
Click the “Add” button to complete. Click the “Cancel” button to discard the changes.
To set up a Сampaign, click the “Configure” button in the “Actions” column, and the system will redirect you to the Campaign setup page.
Read more about how to set up a Campaign in LMS in the following Knowledge Base article.
Read more about how to set up a Campaign in Call Logic in the following Knowledge Base article.
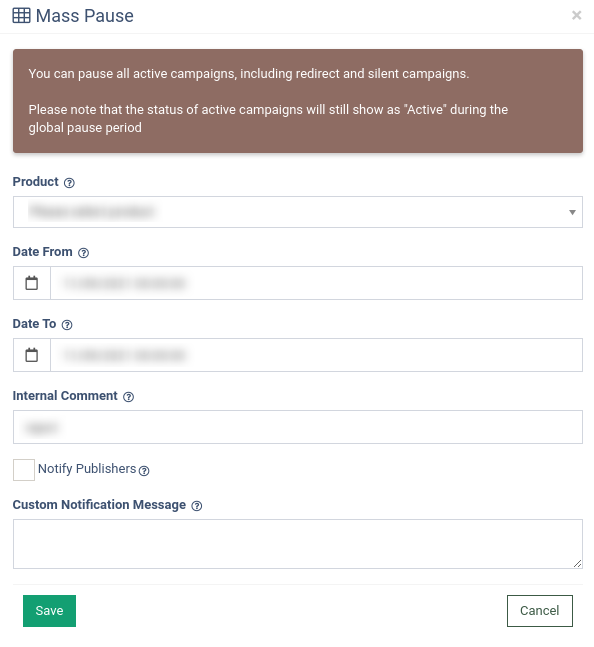
To pause all Campaigns related to one Product, click the "Mass Pause" button on the top left corner of the report and fill in the following fields in the “Mass Pause” pop-up window:
- Product: Select the Product to put all Campaigns assigned to it on a temporary pause.
- Date From: Select the time and the date to pause Campaigns.
- Date To: Select the time and the date to unpause Campaigns.
- Internal Comment: Enter the comment that will appear in the System logs.
- Notify Publishers: Select the checkbox to send the notification to the publishers.
- Custom Notification Message: Enter the Custom Notification Message.

Click the “Save” button to confirm. Click the “Cancel” button to discard the changes.
Read more about the Mass Pause feature in the Knowledge Base article.
To create a duplicate of a specific Campaign, click the “Duplicate” button on the top left of the report table and fill in the following fields in the pop-up window:
- Origin Campaign: Select the Campaign you want to copy.
- New Name: Enter the name for a new Campaign.
- Min Price: Enter the minimum price for a new Campaign.
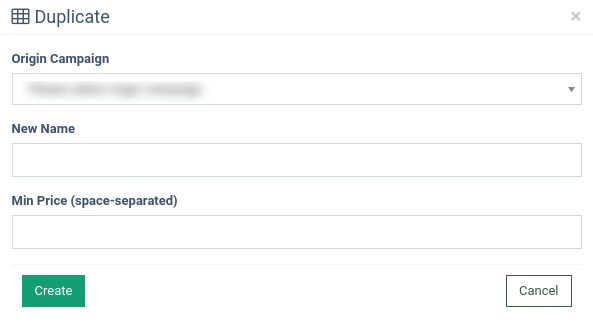
Click the “Create” button to complete. Click the “Cancel” button to discard the changes. Note: While the Campaign is being duplicated, the “Duplicating” status will be reflected, and you will not be able to open the configuration page and make changes to it.
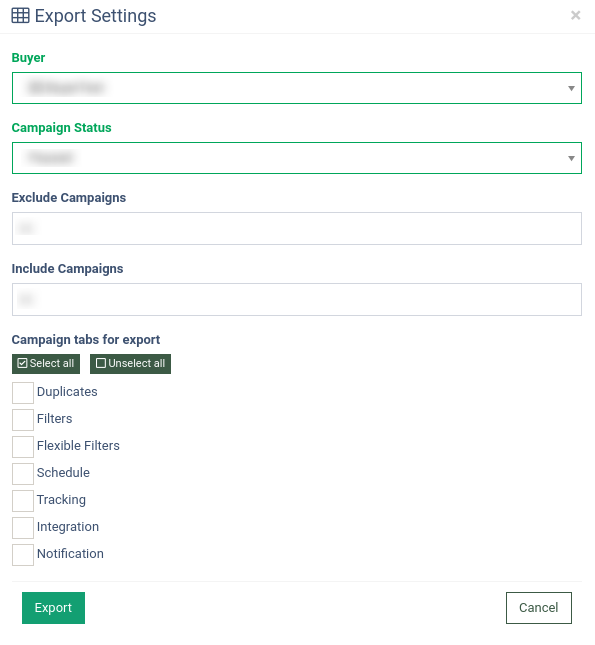
To export the file with campaign settings, click the “Export Settings” button on the top left of the report table and fill in the following fields in the pop-up window:
- Buyer: Select the Buyer.
- Campaign Status: Select the status of the Campaign (Active, Paused).
- Exclude Campaigns: Select the Campaigns you want to exclude.
- Include Campaigns: Select the Campaigns you want to include.
- Campaign tabs for export: Select the tabs for export.

Click the “Export” button to confirm. Click the “Cancel” button to discard the changes.
After confirming the action, the export is sent to the “Planned Tasks” section and after processing can be downloaded in the “Campaign Settings Export” tab.
To download the file, go to the Campaign Settings Export tab or follow the link in the pop-up window.
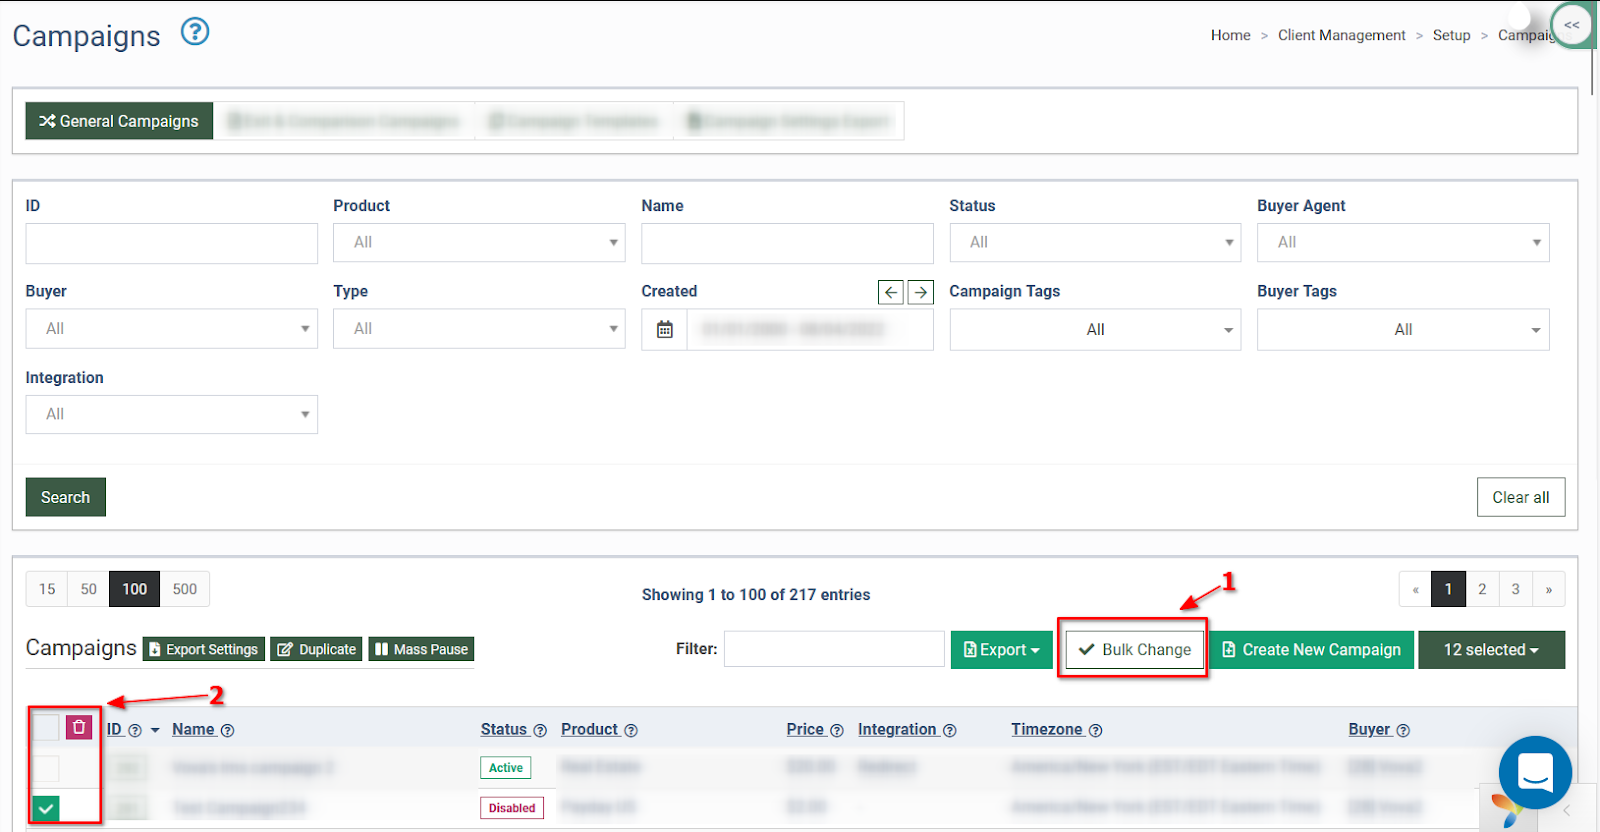
To bulk remove the Campaigns, use Mass Campaigns Removal.
Click the “Bulk change” button (1) and check the boxes (2) of the Campaigns you want to delete. Click the “Remove” (red “bin”) button to delete all the selected Campaigns.
Type ‘Yes’ in the appropriate field in the pop-up window to confirm your intention.
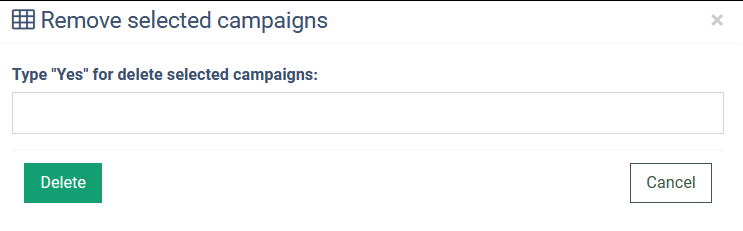
Click the “Delete” button to finish.
Note: You can remove Campaigns only with the ‘Disabled’ status.
Read more about the Scheduled Report Export in this Knowledge Base article.
Exit & Comparison Campaigns
The “Exit & Comparison Campaigns” tab contains a list of Campaigns with ExitOffer or ExitPage type. You can create, duplicate, manage, export, and delete campaigns.
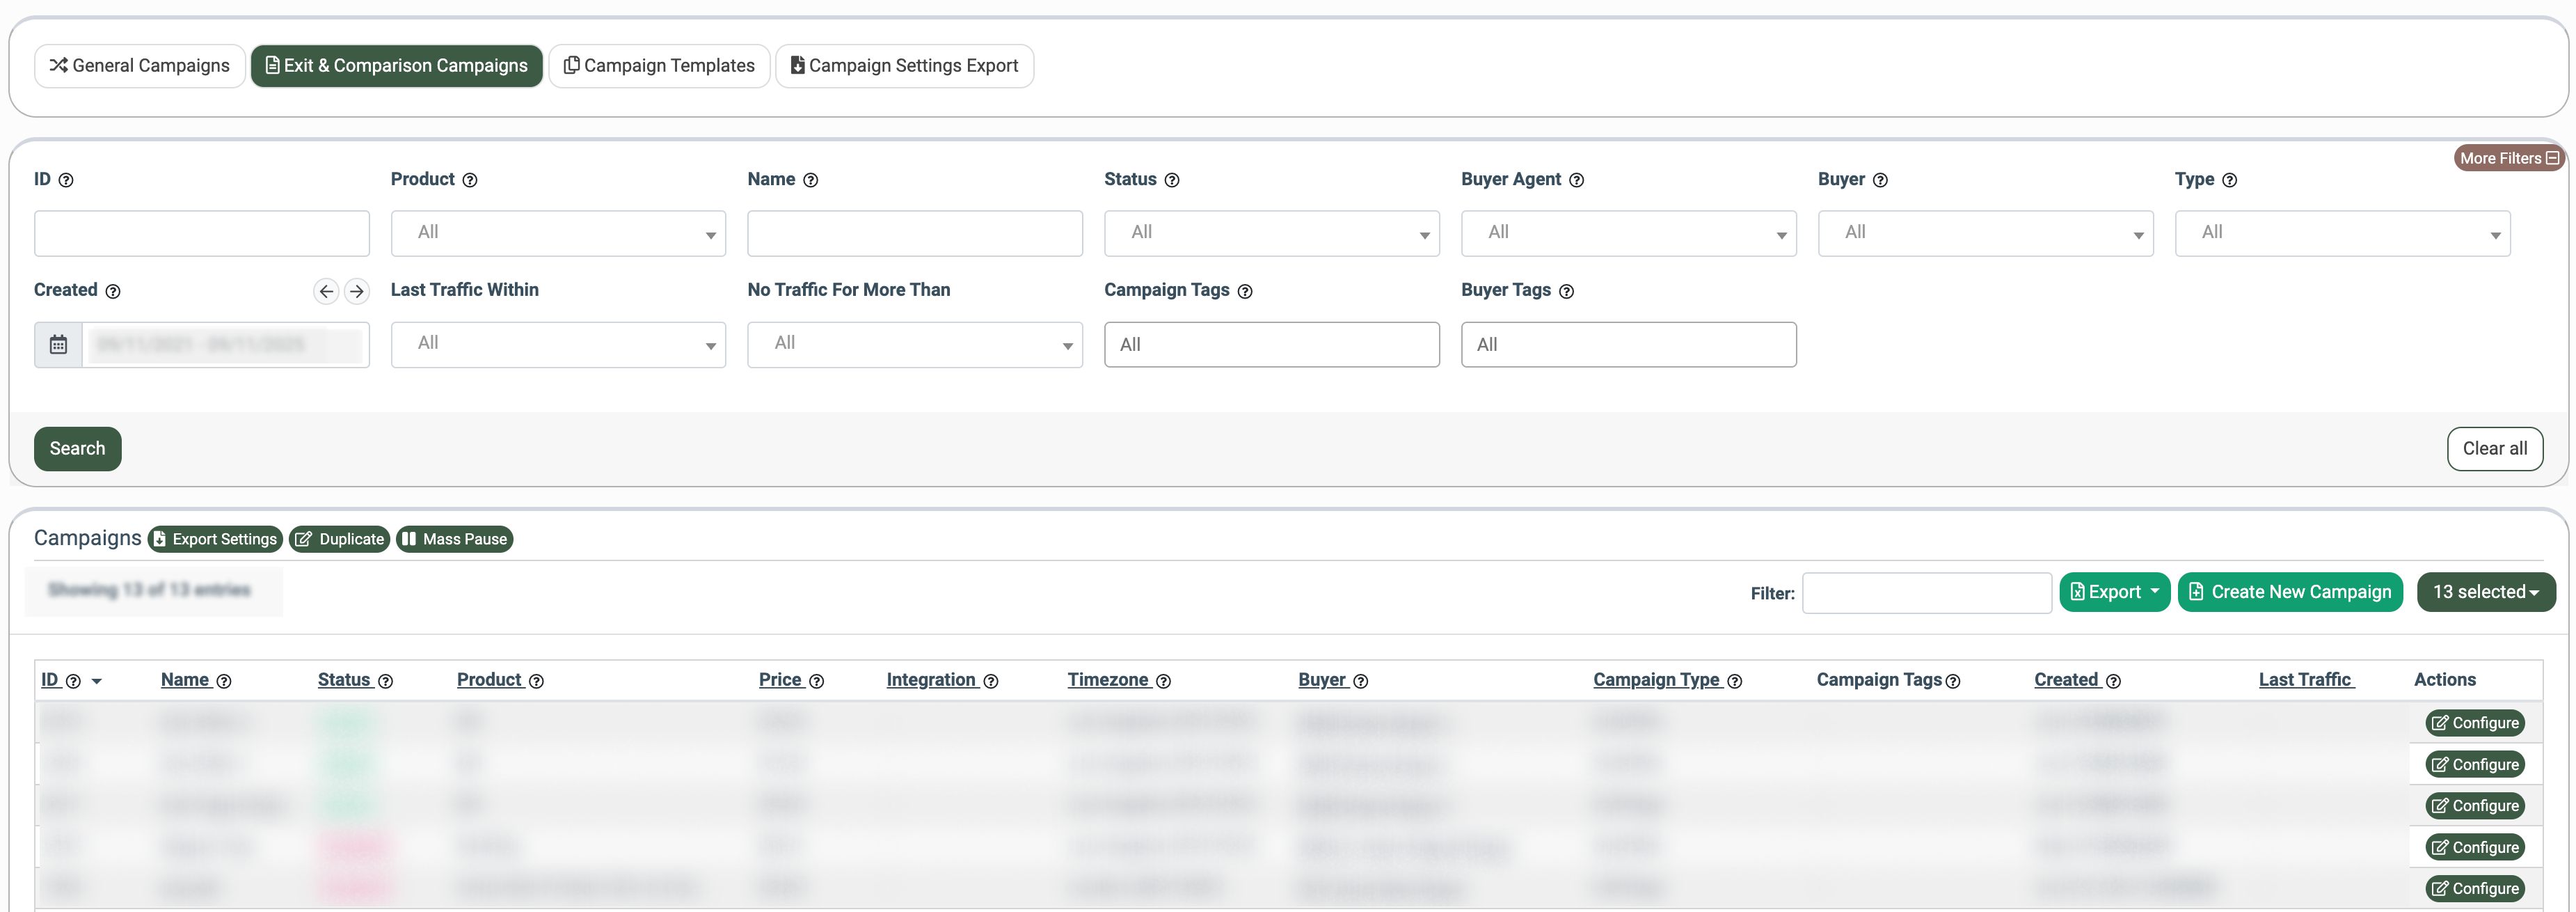
The Campaign list contains the following information:
- ID: The unique identification number of the Campaign.
- Name: The name of the Campaign.
- Status: The status of the Campaign (Active, Deleted, Disabled, Paused, Temp Paused).
- Product: The name of the Product.
- Price: The minimum price of the Campaign.
- Integration: The integration selected for the Campaign.
- Timezone: The timezone of the Campaign.
- Buyer: The name of the Buyer.
- Campaign Type: The type of the Campaign (ExitOffer, ExitPage).
- Campaign Tags: The name of the Campaign Tag.
- Buyer Tags: The name of the Buyer Tag.
- Created: The creation date of the Campaign.
- Last Traffic: The date and time when the Campaign last received traffic.
You can narrow down the search results by using the following filters:
- ID: Enter the unique identification number of the Campaign.
- Product: Select the Product.
- Name: Enter the name of the Campaign.
- Status: Select the status of the Campaign (Active, Deleted, Disabled, Paused, Temp Paused).
- Buyer Agent: Select the Buyer Agent.
- Buyer: Select the Buyer.
- Type: Select the Campaign type (ExitOffer, ExitPage).
- Created: Select the creation date.
- Last Traffic Within: Select the timeframe for the last traffic received by the Campaign (Week / Two Weeks / Month / Three Months / Six Months / Year).
- No Traffic For More Than: Select the timeframe during which there was no traffic coming to the Campaign (Week / Two Weeks / Month / Three Months / Six Months / Year).
- Campaign Tags: Select the Campaign Tag.
- Buyer Tags: Select the Buyer Tag.To create a new Сampaign, click the “Create New Campaign” button on the top right of the report table and fill in the following fields in the pop-up window:
- Name: Enter the name of the Campaign.
- Product: Select the Product.
- Buyer: Select the Buyer.
- Campaign type: Select the type of the Campaign (ExitOffer, ExitPage).
- Timezone: Select the Timezone.
- Min price: Enter the minimum price for the Campaign.

Click the “Add” button to complete. Click the “Cancel” button to discard the changes.
To set up a Сampaign, click the “Configure” button in the “Actions” column, and the system will redirect you to the Campaign setup page.
Read more about how to set up a Campaign in LMS in the following Knowledge Base article.
Read more about how to set up a Campaign in Call Logic in the following Knowledge Base article.
To pause all Campaigns related to one Product, click the "Mass Pause" button in the top left corner of the report and fill in the following fields in the “Mass Pause” pop-up window:
- Product: Select the Product to put all Campaigns assigned to it on a temporary pause.
- Date From: Select the time and the date to pause Campaigns.
- Date To: Select the time and the date to unpause Campaigns.
- Internal Comment: Enter the comment that will appear in the System logs.
- Notify Publishers: Select the checkbox to send the notification to the publishers.
- Custom Notification Message: Enter the Custom Notification Message.
Click the “Save” button to confirm. Click the “Cancel” button to discard the changes.
Read more about the Mass Pause feature in the Knowledge Base article.
To create a duplicate of a specific Campaign, click the “Duplicate” button on the top left of the report table and fill in the following fields in the pop-up window:
- Origin Campaign: Select the Campaign you want to copy.
- New Name: Enter the name for a new Campaign.
- Min Price: Enter the minimum price for a new Campaign.

Click the “Create” button to complete. Click the “Cancel” button to discard the changes.
Note: While the Campaign is being duplicated, the “Duplicating” status will be reflected, and you will not be able to open the configuration page and make changes to it.
To export the file with campaign settings, click the “Export Settings” button on the top left of the report table and fill in the following fields in the pop-up window:
- Buyer: Select the Buyer.
- Campaign Status: Select the status of the Campaign (Active, Paused).
- Exclude Campaigns: Select the Campaigns you want to exclude.
- Include Campaigns: Select the Campaigns you want to include.
- Campaign tabs for export: Select the tabs for export.
Click the “Export” button to confirm. Click the “Cancel” button to discard the changes.
To download the file, go to the Campaign Settings Export tab or follow the link in the pop-up window.
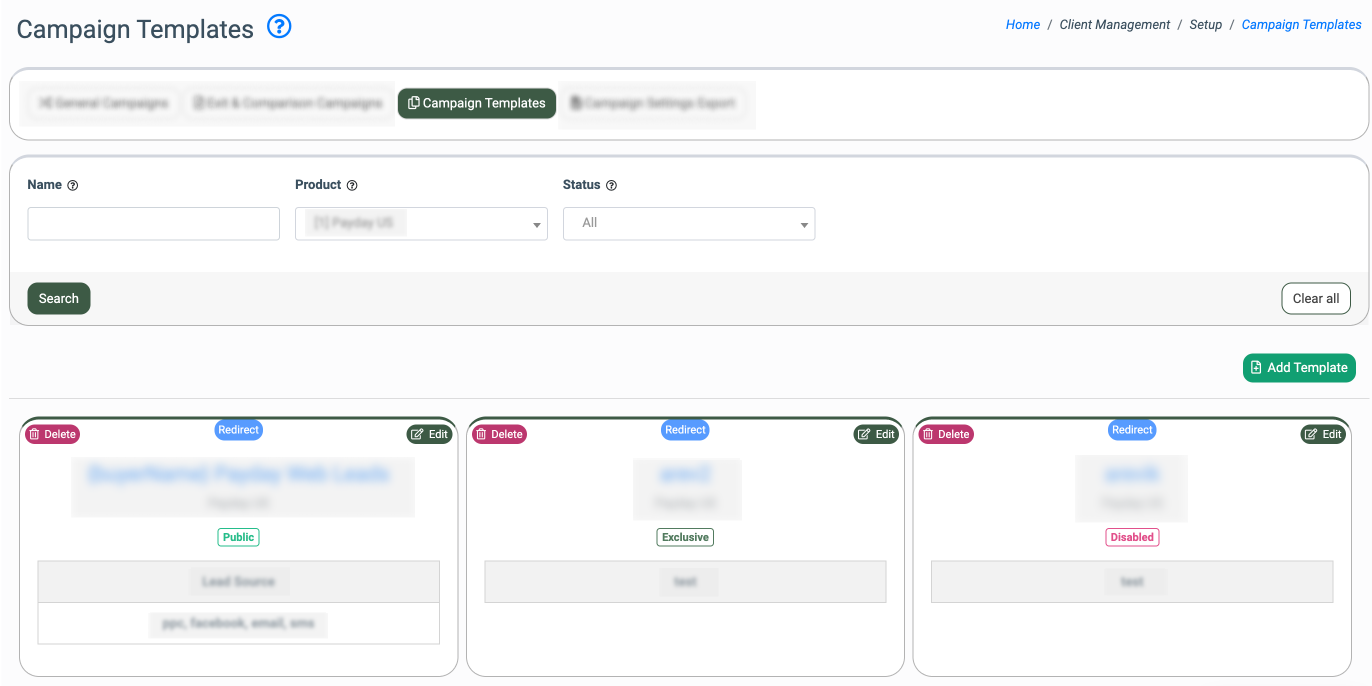
Campaign Templates
The “Campaign Templates” tab contains a list of campaign templates. You can create and manage existing templates in this tab.

You can narrow down the search results by using the following filters:
- Name: Enter the name of the Template.
- Product: Select the Product indicated in the Template.
- Status: Select the Status indicated in the Template (Disabled, Public, Exclusive).
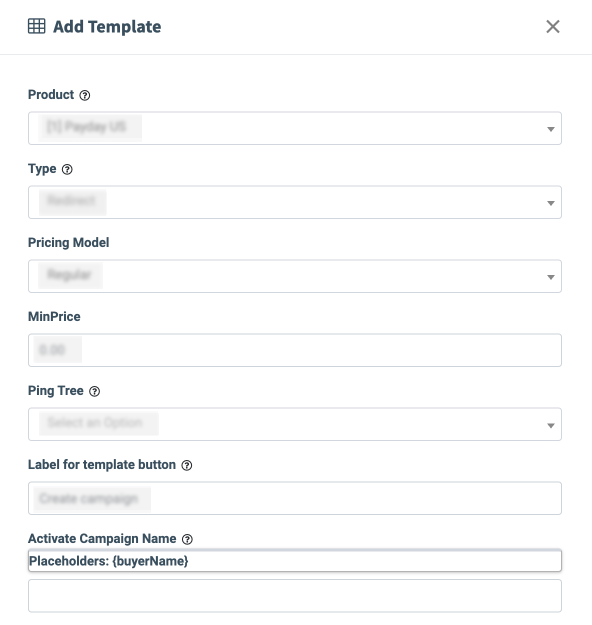
To create a new Сampaign Template, click the “Add Template” button on the top right and fill in the following fields in the pop-up window:
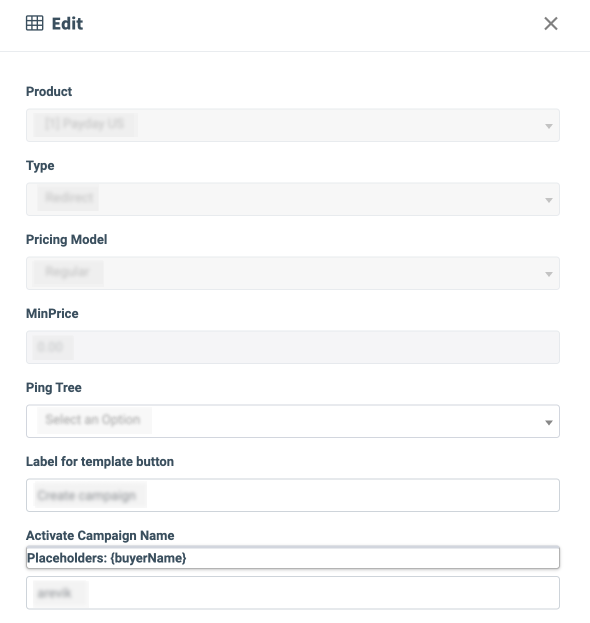
- Product: Select the Product of the Campaign.
- Type: Select the type of the Campaigns (Redirect, Silent, Direct Call).
- Pricing Model: Select the pricing model applied to the Campaign (Regular, Dynamic Bidding). Read more about the Dynamic Bidding Campaigns in the following Knowledge Base article.
- If the “Regular” option is selected:
- Min Price: Enter the min price for the Campaign.
- If the “Dynamic Bidding” option is selected:
- Base Price: Enter the price to which the minimum price of the campaign will be changed after being enabled in the dynamic bidding model. So it will be the starting price for the dynamic bidding.
- Min Allowed Bid: Enter the minimum amount the campaign will buy a lead for. The bid this campaign will offer can not be less than the value set in this field. The value can be in the range from 0 up to Base Price.
- Max Allowed Bid: Enter the maximum amount the campaign will buy a lead for. The bid this campaign will offer can not be higher than the value set in this field. The value range is unlimited, but it is recommended to set it higher than the x10 Base Price value. The value could not be lower than the Base Price.
- Round the Number: Select the rounding option for the final price obtained after the modification (Disabled, Round to nearest dollar, Round to nearest 1/10th of a dollar).
- If the “Round to nearest dollar” option is selected, the final price will be rounded to the nearest dollar. If the decimal value is less than 0.5, it rounds down; if it is 0.5 or greater, it rounds up.
- If the “Round to nearest 1/10th of a dollar” option is selected, the final price will be rounded to the nearest tenth of a dollar. If the decimal value is less than 0.05, it rounds down; if it is 0.05 or greater, it rounds up.
- If the “Regular” option is selected:
- Ping Tree: Select the Ping Tree in which the Campaign will be included.
- Label for template button: Enter the label for the template.
- Activate Campaign Name: Enter the name of the Campaign.
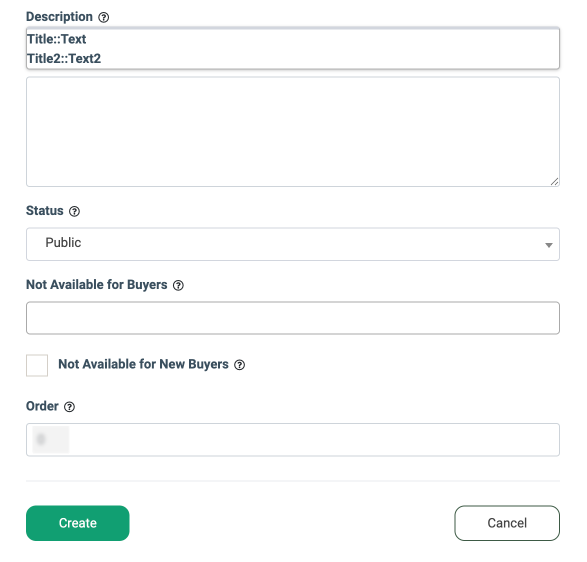
- Description: Enter the description for the Campaign. Note: This field is optional.
- Status: Select the status of the Campaign (Disabled, Public, Exclusive).
- Not Available for Buyers: Select Buyers who can not see the template (for Public templates only).
- Not Available for New Buyers: Check the box to make the template unavailable for new Buyers (for Public templates only). The system defines the Buyer as new if it was created after this box was checked.
- Available for buyers: Select Buyers who will be able to see the template (for Exclusive templates only).
- Order: Enter the order of the Template in the Template’s list.
Click the “Create” button to complete. Click the “Cancel” button to discard the changes.
To edit the existing Campaign Template, select the one from the list and click the “Edit” button. Change the required information in the “Edit” pop-up window and click the “Save” button to complete the changes. Note that some fields can not be changed while editing the Campaign Template.
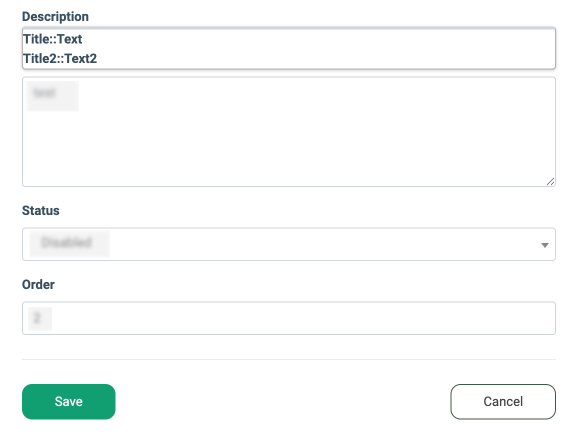
To remove the template, click the “Delete” button at the Template icon.
Click the “Delete” button to complete. Click the “Cancel” button to discard the changes.
Campaign Settings Export
The “Campaign Settings Export” tab displays a list of campaign settings exports requested through the “Export Settings” button in the “General Campaigns” tab.
To create a request for the export, go to the “General Campaigns” tab and click the “Export Settings” button.
Once the request is sent, the system will process it, and the file with the campaign settings will appear in the “Campaign Settings Export” list.
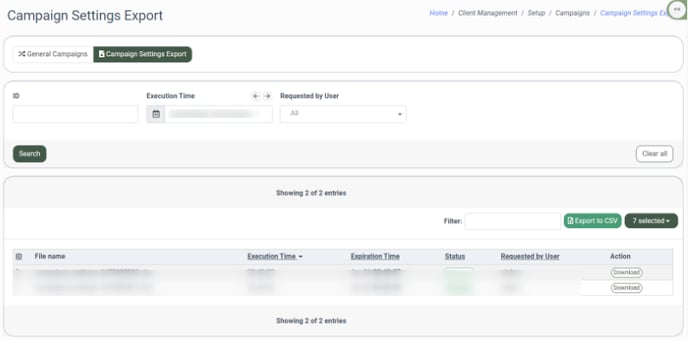
The Campaign Settings Export list contains the following information:
- ID: The unique identification number of the Campaign Settings Export.
- File Name: The name of the Campaign Settings Export.
- Execution Time: The time of the export execution.
- Expiration Time: The date and time of the export expiration.
- Status: The status of the export (Aborted, Deleted, Error, Pending, Processing, and Success).
- Requested by User: The name of the user who requested the export.
- ID: Enter the unique identification number of the Campaign Settings Export.
- Execution Time: Select the period of the export execution.
- Requested by User: Select the name of the user who requested the creation of the export.