Cloud PBX SIP Trunking
SIP Trunking (Session Initiation Protocol Trunking) is a technology that allows users to make and receive calls over the Internet instead of using traditional phone lines. It connects your PBX (Private Branch Exchange) directly to the telephone network via the internet, replacing costly physical lines with a flexible, scalable digital solution. In other words, a SIP trunk is the internet-based connection (a virtual phone line) between your PBX and the public telephone network, enabling inbound and outbound calls.
With SIP Trunking, you can reduce telephony costs, simplify infrastructure, and easily scale the number of concurrent calls to match demand since each virtual number can have an unlimited number of channels (Trunks). This means lower costs for local, long-distance, and international calls and the ability to expand operations without installing new lines or hardware.
From the Phonexa side, we are providing only the SIP Trunk entity with the corresponding credentials. Additional settings should be performed by the Tech Team and specialists from the client's side.
To set up trunks through the Cloud PBX platform, go to the PBX Management > Additional Settings> SIP Trunks section.
The “SIP Trunks” section
The “SIP Trunks” section allows you to view, add, and manage all SIP trunks.
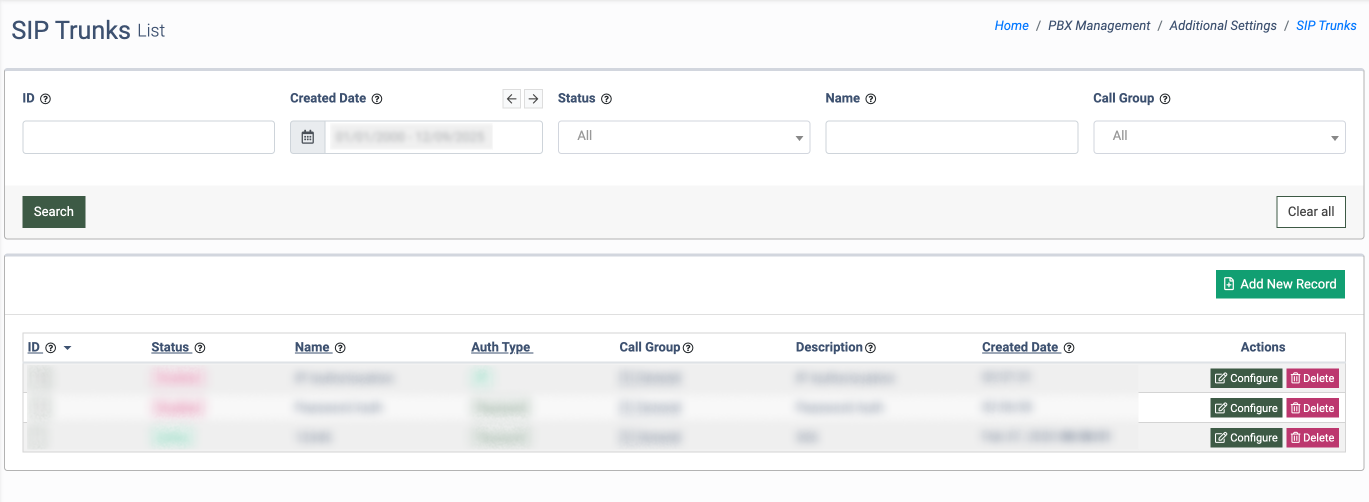
You can narrow down the search results by using the following filters:
- ID: Enter the unique identification number of the SIP Trunk.
- Created Date: Select the date range of the SIP Trunk creation.
- Status: Select the ongoing status of the SIP Trunk (Active (in-use trunks), Disabled).
- Name: Enter the name of the SIP Trunk.
- Call Group: Select the related Call Group.
The SIP Trunks list contains the following information:
- ID: The unique identification number of the SIP Trunk.
- Status: The ongoing status of the SIP Trunk (Active (in-use trunks), Disabled).
- Name: The name of the SIP Trunk.
- Auth Type: The authorization method selected for the SIP Trunk.
- Call Group: The related Call Group.
- Description: The description that is attached to the SIP Trunk.
- Created Date: The date and time of the SIP Trunk creation.
To create a new SIP Trunk, click the “Add New Record” button and fill in the following fields in the “Add New” pop-up window:
- Name: Enter the name of the SIP Trunk.
- Description: Enter a description that should be attached to the SIP Trunk.
- Call Group: Select the related Call Group.
- Auth Type: Select the authorization method for the SIP Tunk (Password Authorization, IP Authorization).
- Authorized IP: Enter the IP address that will be authorized for the SIP Trunk usage.
- Transport: Select the protocol used for transmitting SIP signaling between the Cloud PBX and the SIP provider (UDP, TCP).
Click the “Add” button to complete the action.

To remove the SIP Trunk from the list, click the “Delete” button in the “Actions” column.
The “SIP Trunk configuration” section
To set and configure the existing SIP Trunk, click the “Configure” button in the “Actions” column.
The “SIP Trunk configuration” section contains four tabs:
The “General” tab
The “General” tab contains the general settings of the SIP Trunk.
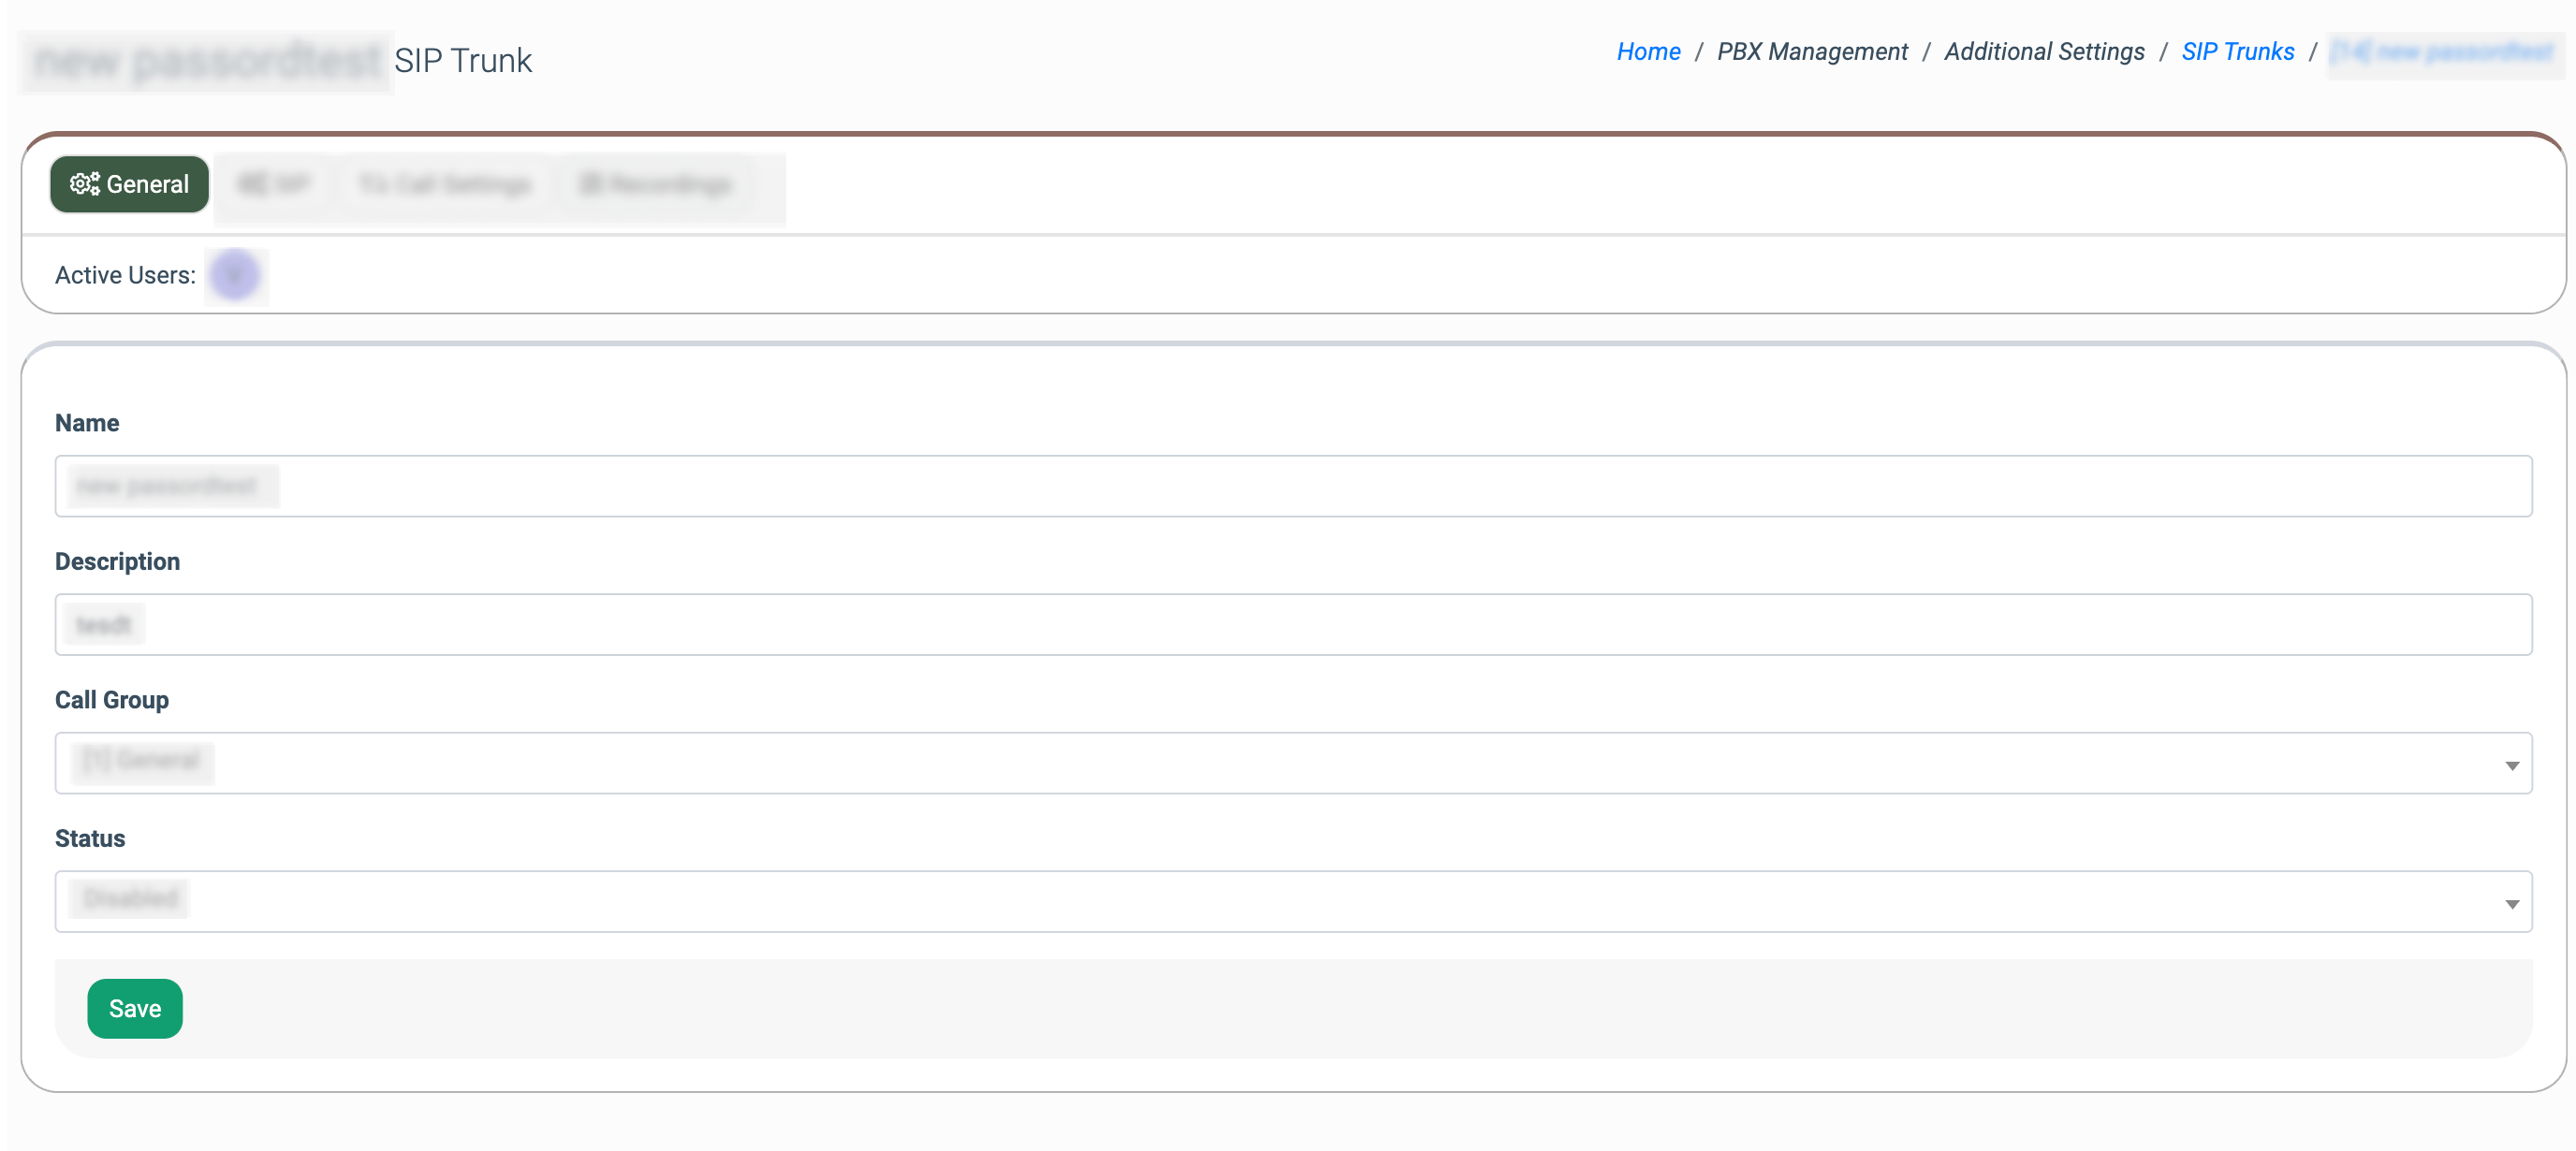 The following general settings are available:
- Name: Enter the name of the SIP Trunk.
- Description: Enter a brief description for the SIP Trunk.
- Call Group: Select a Call Group that is related to the SIP Trunk.
- Status: Select the ongoing status of the SIP Trunk (Active (in-use trunks), Disabled).
Click the “Save” button to complete the settings.
The “SIP” tab
The SIP tab contains the core connection settings required for your SIP trunk to communicate with your VoIP provider. These settings are used to authenticate your PBX with the SIP service and establish the connection for inbound and outbound calls.
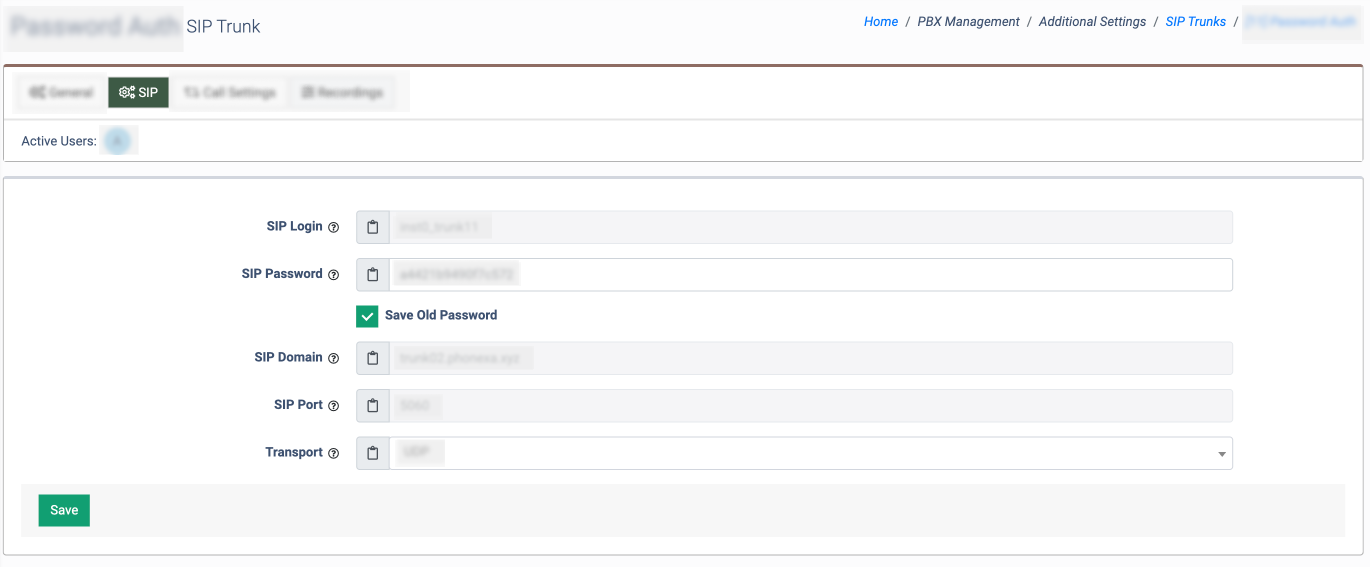
The following information and settings are available:
- SIP Login: The username or login ID assigned by the SIP provider, used for authentication.
- SIP Password: The password associated with your SIP Login, required for authentication and generated automatically. Note: For security reasons, it is recommended to change the SIP Trunk Password once a year.
- Save Old Password: Check the box to save the old password for the SIP Trunk. This setting allows you to keep the SIP Trunk in an active status during the time gap for the new password application. When the new password is not applied to the Trunk, but to have access to it, both passwords will be applicable. It helps to keep the Trunk alive.
- Authorized IP: Enter the IP address that will be authorized for the SIP Trunk usage.
- SIP Domain: The SIP server address (domain) where your calls are routed. Provided by the SIP provider.
- Transport: The protocol (UDP) used for transmitting SIP signaling between the PBX and the SIP provider.
- SIP Port: The network port used for SIP communication. The default SIP port is 5060 unless the SIP provider specifies otherwise.
Click the “Save” button to complete the settings.
Note: The availability of the settings changes depends on the set connection type.
The “Call Settings” tab
The “Call Settings” tab defines which types of calls can be processed through the SIP trunk and allows you to manage the settings for the phone numbers used for calls on the active SIP Trunk.
The following settings for call processing are available:
- Call options: Select the type of calls that can be processed via the ongoing SIP Trunk (All, Inbound, Outbound).
- All: Allows both inbound and outbound calls through this SIP trunk.
- Inbound: Restricts the SIP trunk to receive calls only.
- Outbound: Restricts the SIP trunk to make calls only.
- Caller ID type: Determines how the outbound caller ID is presented for calls made through this SIP trunk (Single, Random).
- Single: All outbound calls display the same first phone number configured in the Caller IDs table. Note that the first phone number is defined as the first phone number in the list.
- Random: The caller ID number is chosen randomly from the available configured caller IDs for each call in the Caller IDs table.
The “Call Settings” block contains the list of phone numbers used for calls on the active SIP Trunk. The list of available phone numbers contains the following information:
- ID: The unique identification number of the phone number.
- Caller ID: The phone number itself.
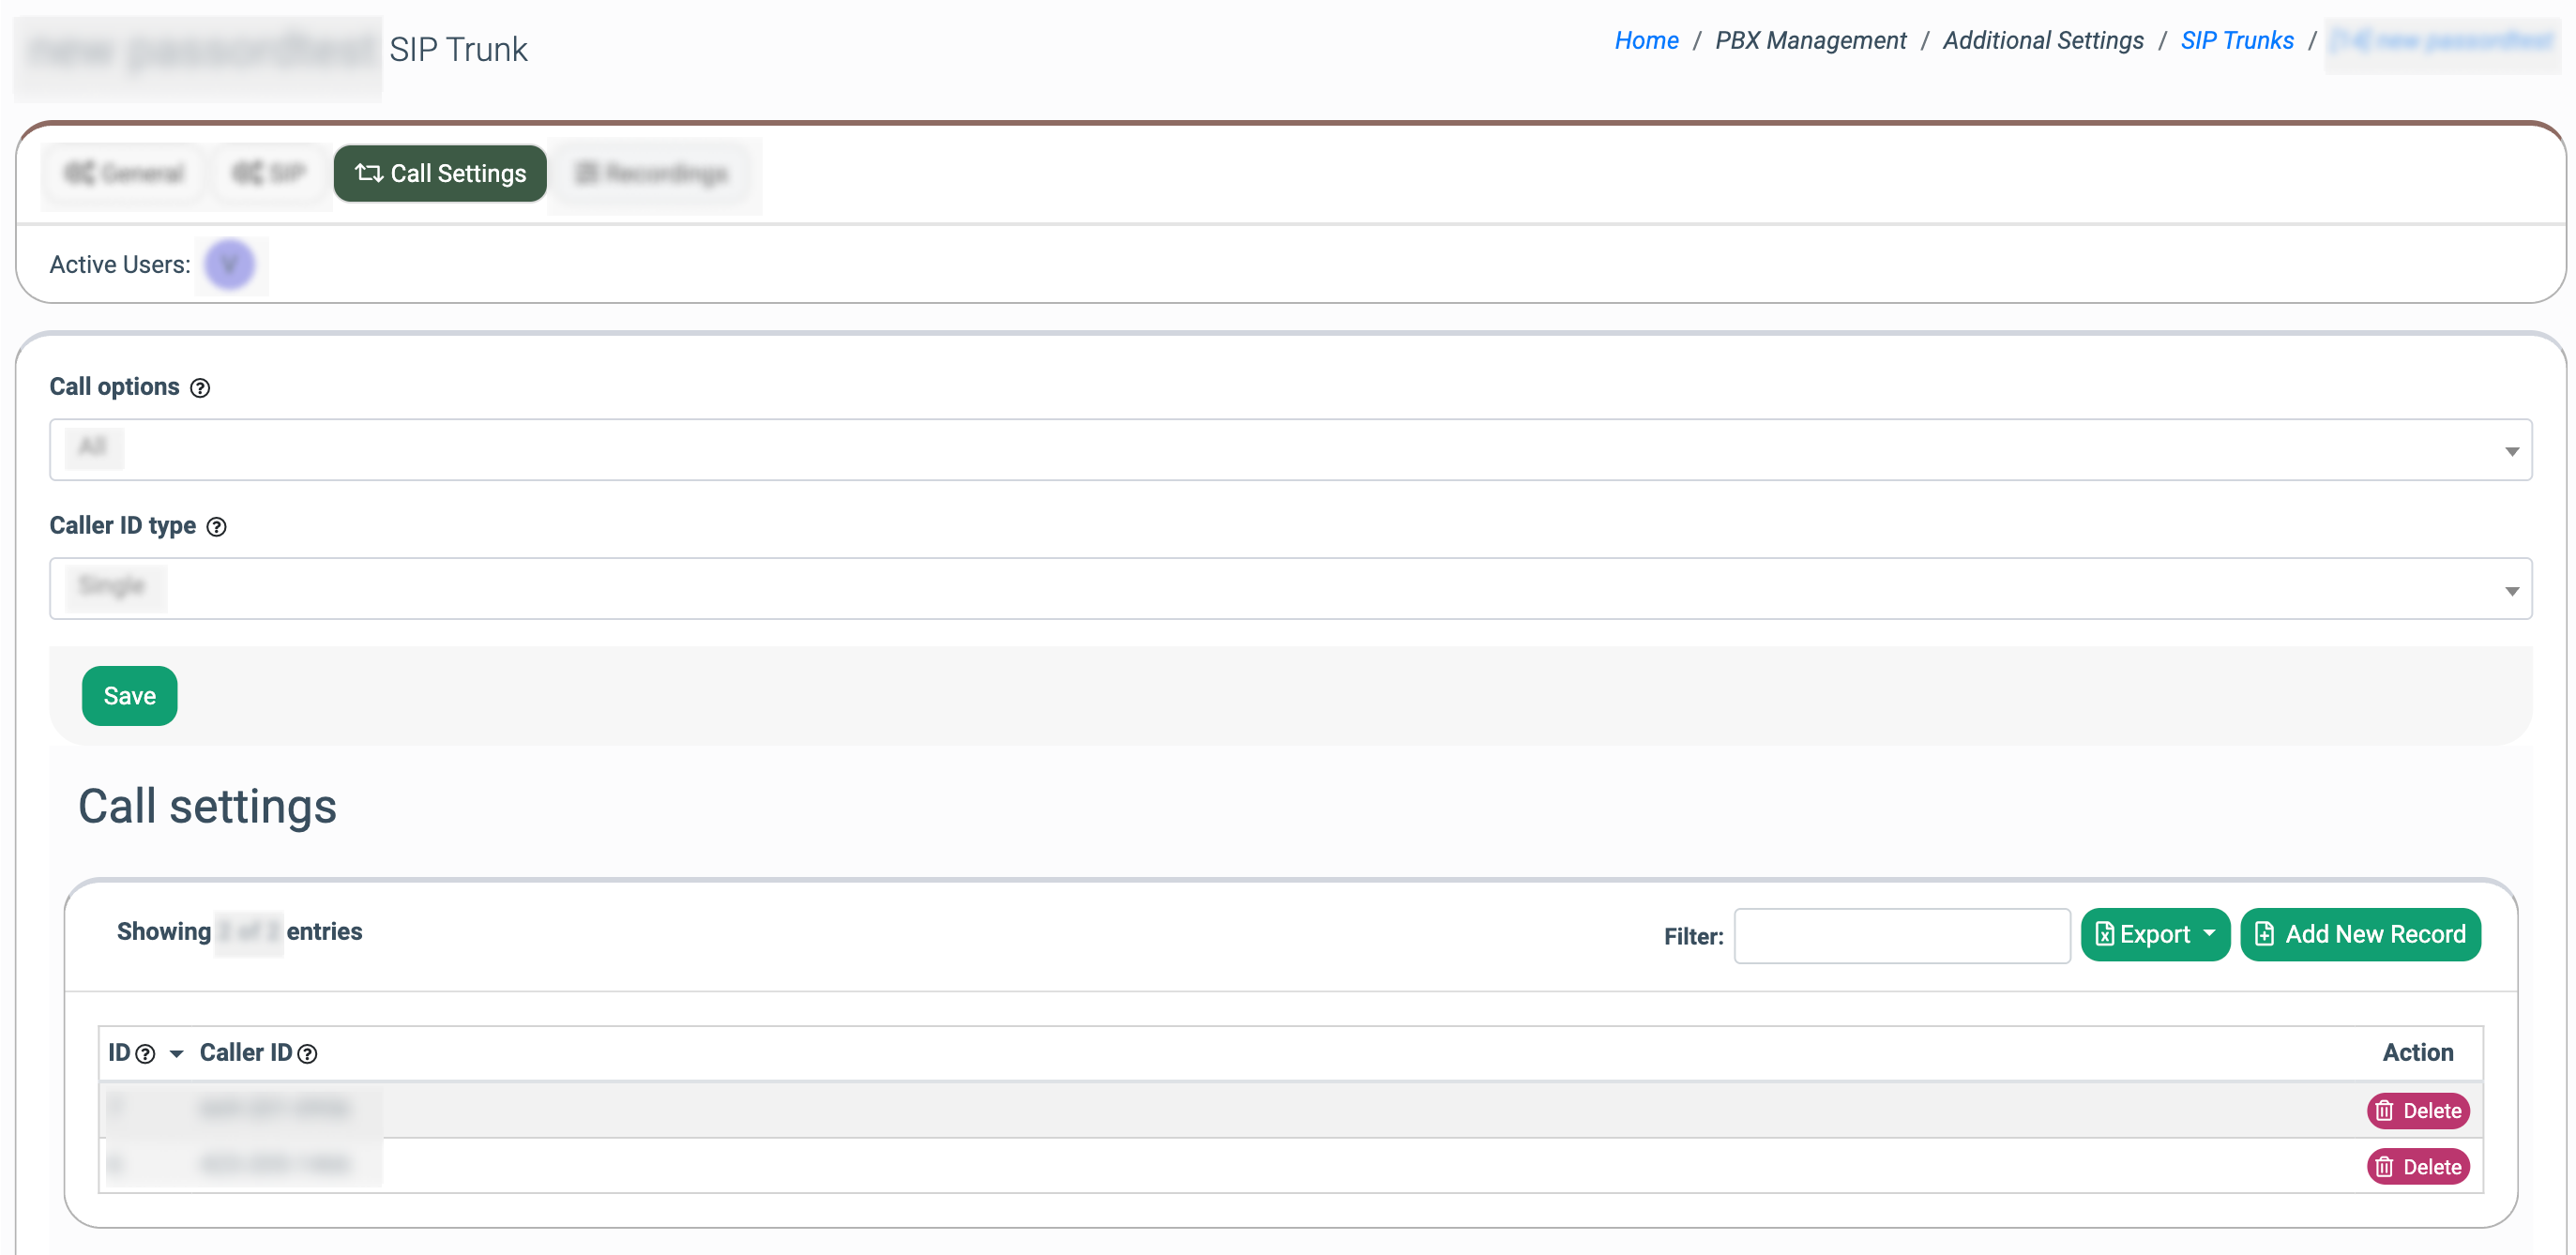
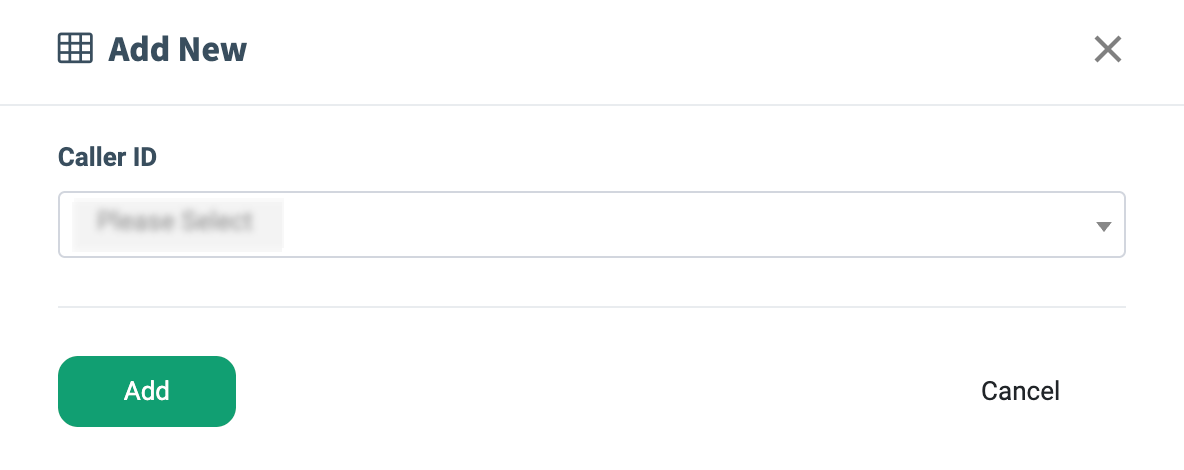
To add a new phone number, click the “Add New Record” button, select the phone number in the “Caller ID” field of the “Add New” pop-up window, and click the “Add” button to complete the action.
To remove the phone number from the list, click the “Delete” button in the “Action” column and confirm the deletion operation by clicking the “Delete” button in the “Delete” pop-up window.
The “Recordings” tab
The “Recordings” tab allows you to manage the call recording preferences and related security options for the selected SIP trunk. These settings determine how calls are recorded, whether sensitive numerical data is redacted, and if keyword-based search is available for recordings. You can choose to follow the existing Call Group settings or override them for this specific trunk.
Note: The corresponding additional features, such as Call Recording, Keyword Search, Numerical Data Redaction, and Speech to Text, should be enabled in the System Subscription section before enabling them on the SIP Trunk level.
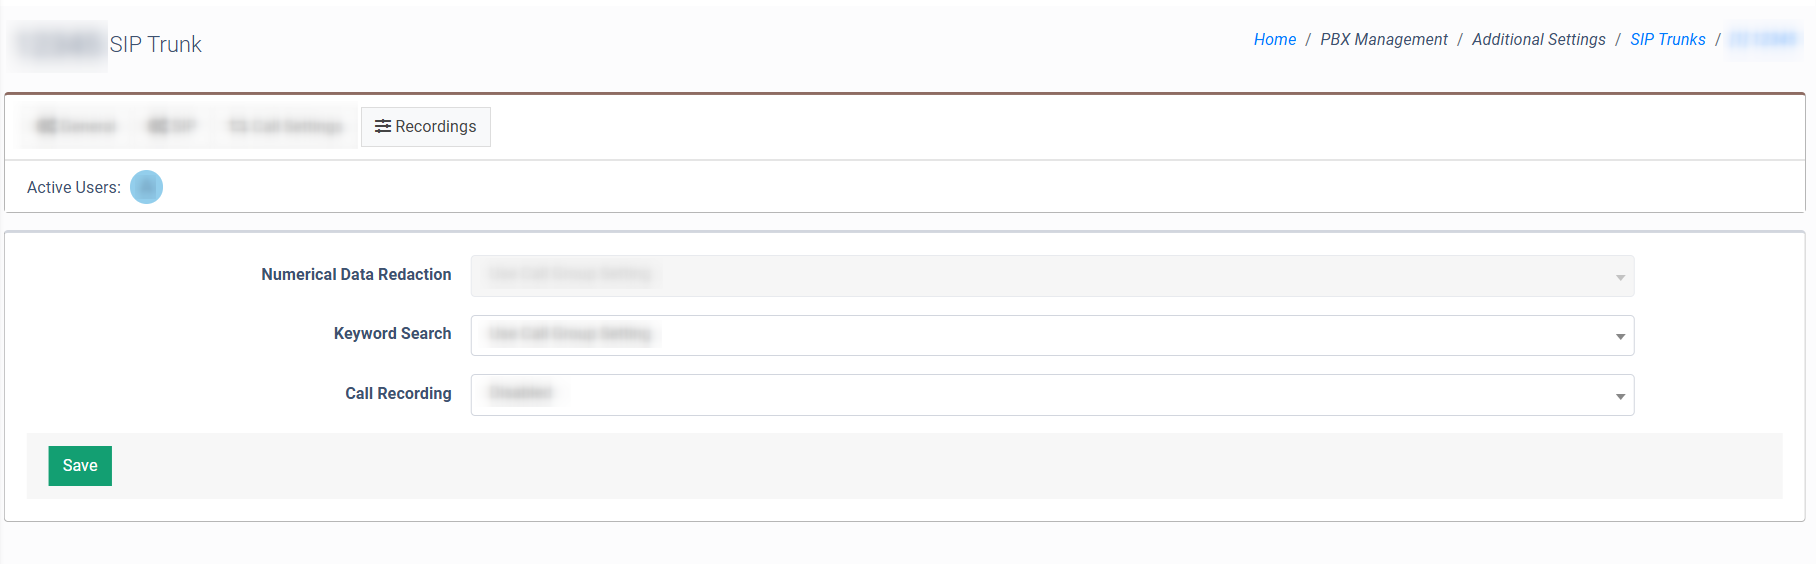
- Numerical Data Redaction: Automatically detects and hides any numeric data, such as bank account, credit card, or social security numbers in call recording. Can be set to use the Call Group default or overridden for this trunk by selecting the “Enabled” or “Disabled” options, respectively.
- Keyword Search: Allows you to search within call recordings for phrases or specific keywords. To activate the feature, you need to have Speech to Text enabled. Can be set to use the Call Group default or overridden for this trunk by selecting the “Enabled” or “Disabled” options, respectively.
- Call Recording: Controls whether calls made through this SIP trunk are recorded. Can be enabled for incoming, outgoing, or both types of calls, disabled it entirely, or follow the Call Group default setting (Use Call Group Setting, All, Disabled, Incoming, Outgoing).
Note: The priority of the above settings applied on the SIP Trunk level is higher than the one set on the Call Group level.
Click the “Save” button to complete the settings.