The checklist of the required actions is generated according to the registration settings set for the Publisher on the Project level.
To view the checklist of the required actions for completing the activation, the Publisher goes to the available component, then to the Account Settings > Complete Activation section.
If the “Important Documents for review” pop-up window appears before accessing any available component, the Publisher should review and sign the corresponding documents by clicking on the links.
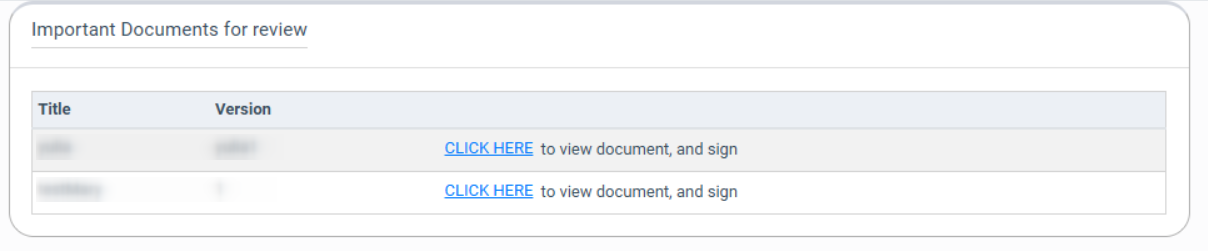
As soon as the Publisher reviews and signs the corresponding documents, he will get access to the “Complete Activation” section.
The list of required actions contains the following information:
- Number of steps.
- The description of the required action.
- The information that is obtained from the new Publisher.
- The mark of the action completion (green thumbs up, red thumbs down).
- The buttons for completion of the corresponding action.

To complete the particular required action, the Publisher clicks the corresponding button in the column with available actions and follows the instructions.
As soon as the Publisher completes all required steps, the “Get Full Access” button will appear. The Publisher should click this button and he will be provided with the corresponding access to the system, and the “Complete Activation” section will disappear.
Note: The list of required actions may vary depending on the Publisher’s registration settings applied on the Project Settings level.
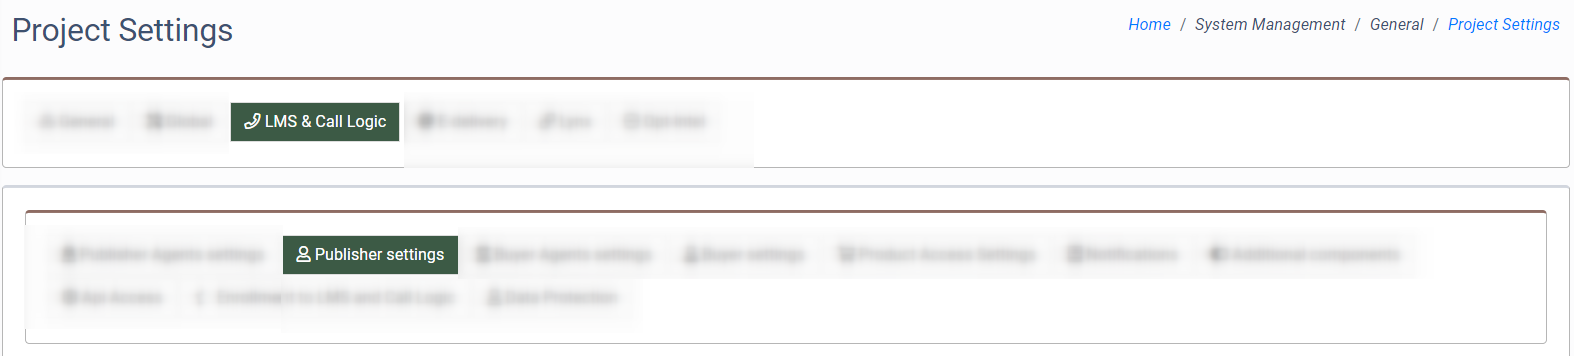
To view the registration settings for new Publishers, go to the System Management > Project Settings section, select the “LMS & Call Logic” tab, and go to the “Publisher settings” sub-tab.
The following settings for the Publisher registration process will be displayed in the “Registration Process” block:
- Enable Publisher Registration: Enable or disable the Publisher registration through the global registration page.
- Registration Page Name: Enter the Publisher registration page name.
- Publisher registration URL: The clickable URL for the Publisher registration.
- Default Users Language (if not set via registration): Select a language for the registration process.
- Parameter for Referral ID: Add a parameter to the registration URL to track new Publishers referred by a URL.
- Publisher's Address Requirement: Select to enable or disable the option of the Publisher address field during the registration.
- Publisher Phone Number Confirmation: Select to enable or disable the option of Publisher phone number confirmation during the registration.
- Publisher Questionnaire: Select to enable or disable the option of the Publisher Questionnaire requirement during the registration.
- Manual approval of Publisher by Agent or Admin: Select to enable or disable the option of manual approval of the Publisher by agent.
- Document requirement on the registration form: Select to enable or disable the option of Publisher document submission during the registration.
- Allowlisted IPs: Enter white-listed IP addresses for new Publisher registrations. This will allow registrations from those IP addresses only.
- List of blocked IP addresses: The list of the blocked IP addresses.
