SMTP/IMAP Connection Settings
The Connection Settings section allows you to add, edit, and remove email server accounts (SMTP/IMAP) that the system uses for email notifications.
Connection setting
To view the connection settings, go to the System Management > System Notifications > Connection settings section.

The Connection settings report list contains the following information:
- ID: The unique identification number of the Connection Setting.
- Name: The name of the Connection Setting.
- Type: The type of the Connection Setting (SMTP - Simple Mail Transfer Protocol / IMAP - Internet Message Access Protocol).
You can narrow down the search results by using the “Filter” field. Enter the ID, name, or type of connection (SMTP/IMAP) and click the “Enter” button to proceed with the filtration.
To add the new SMTP Connection Setting, click the “Add SMTP connection” button and fill in the following fields in the “Add SMTP connection” pop-up window:
- Connection Name (for your reference): Enter the name of the Connection Setting for your reference.
- Server host or ip: Enter the name of the server host or IP address.
- Login: Enter your login.
- Password: Enter the app password from your Google account. Note: You should generate a new password for each connection to set it up. You cannot use the general password from your Google account due to updates to the Google security policy.
- Port: Enter the port value. Note: The port value must be an integer.
- From: Enter the From email address.
- Encryption: Select the encryption type (None/ SSL/ TLS/STARTTLS).
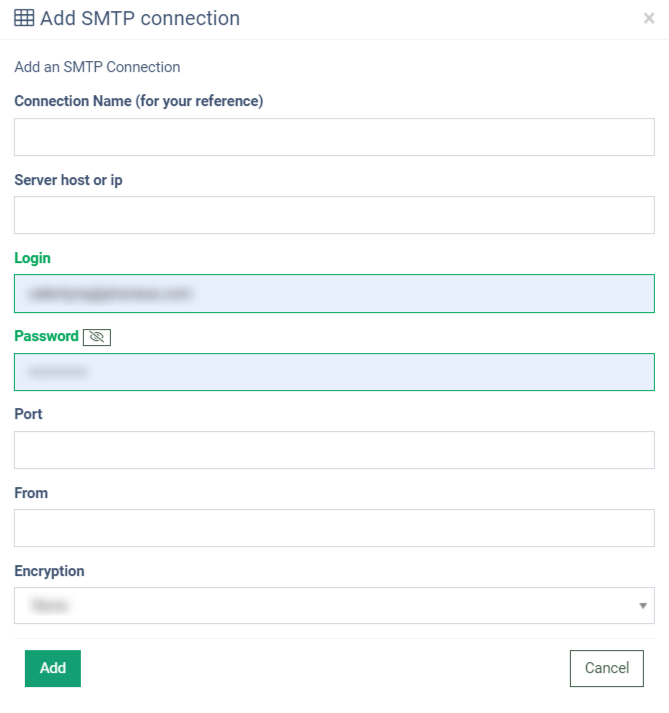
Click the “Add” button to save the new setting connection, or click the “Cancel” button to dismiss.
To add an SMTP connection for Gmail, please use credentials from the following examples:
Example 1:
Host: smtp.gmail.com
Port: 587
Encryption: TLS
Example 2:
Host: smtp.gmail.com
Port: 465 Encryption
Encryption: SSL Encryption
To add the new IMAP Connection Setting, click the “Add IMAP connection” button and fill in the following fields in the “Add IMAP connection” pop-up window:
- Connection Name (for your reference): Enter the name of the Connection Setting for your reference.
- Server host or ip: Enter the name of the server host or IP address.
- Login: Enter your login.
- Password: Enter your password.
- Port: Enter the port. Note: The port value must be an integer.
- From: Enter the From email address.
- Encryption: Select the encryption type (None/ SSL/ TLS).
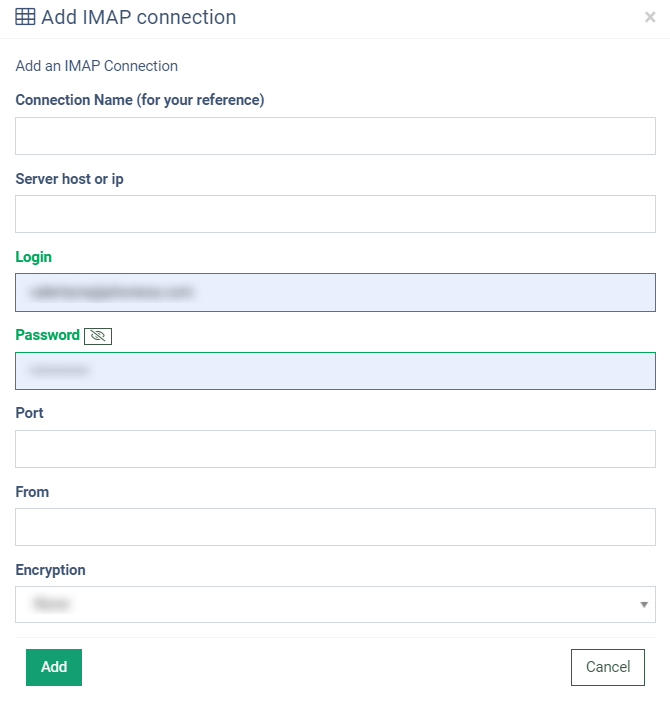
Click the “Add” button to save the new setting connection, or click the “Cancel” button to dismiss.
To edit the existing Setting connection, click the “Edit Connection Settings” button in the “Action” column and edit in the following fields in the “Edit Connection Settings” pop-up window:
- Connection Name (for your reference): Enter the name of the Connection Setting for your reference.
- Server host or ip: Enter the name of the server host or IP address.
- Login: Enter your login.
- Password: Enter your password.
- Port: Enter the port value. Note: The port value must be an integer.
- From: Enter the From email address.
- Encryption: Select the encryption type (None/ SSL/ TLS/STARTTLS).
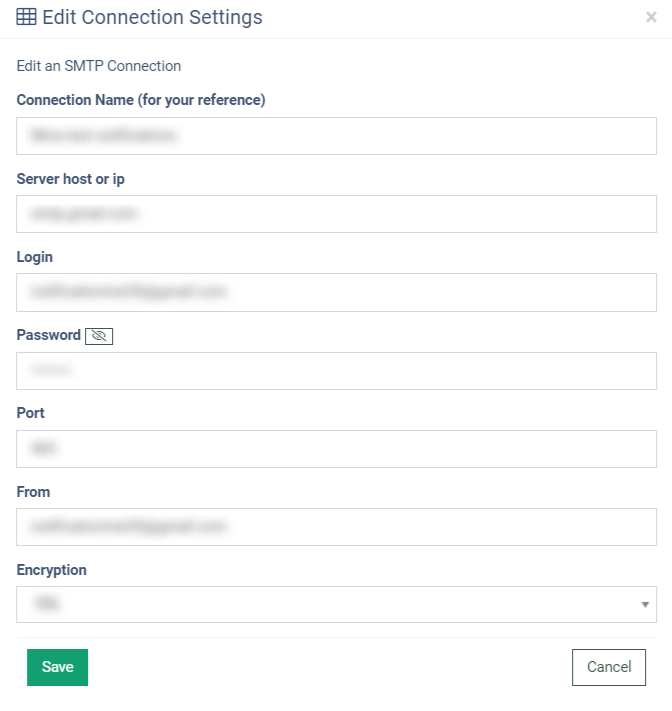
Click the “Save” button to proceed with the changes, or click the “Cancel” button to dismiss.
To delete the Setting Connection, click the “Delete” button in the “Action” column and click the “Yes” button to confirm the deletion in the “Delete” pop-up window.

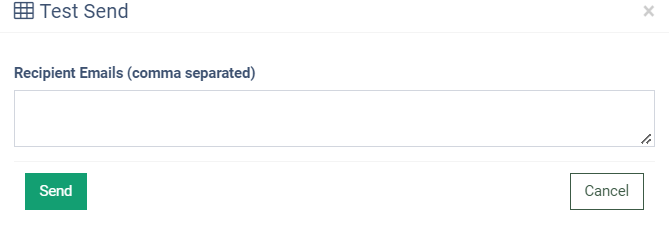
Click the “Test Send” button in the “Actions” column to send a test email. Enter email addresses in the “Recepient Emails” field of the “Test Send” pop-up window. Click the “Send” button to complete the process.
App password
Note: The user must be the Admin of the account to generate the gmail password.
To generate the app password in your Google account, follow the instructions:
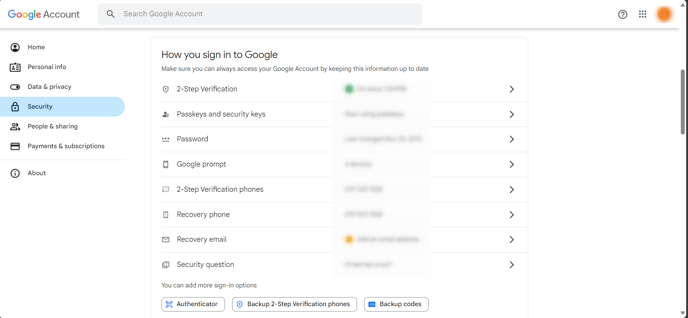
1. Log into your Google account and go to the account settings.
2. Go to the “Security” section of the settings and set up the 2-Step Verification.
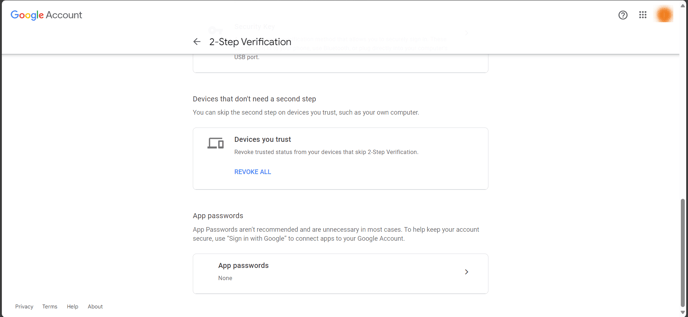
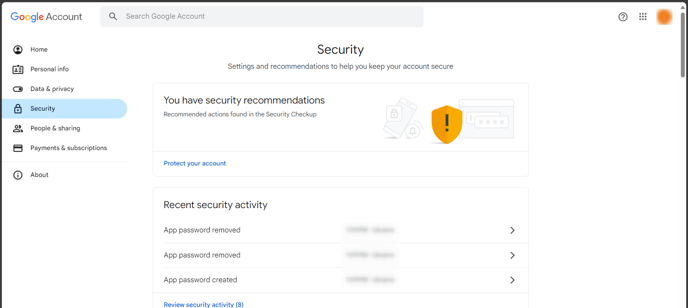 3. When the verification is set, go to its settings page.
4. Scroll down to the “App passwords” section.
 5. Enter the name of the new application and click the “Create” button.
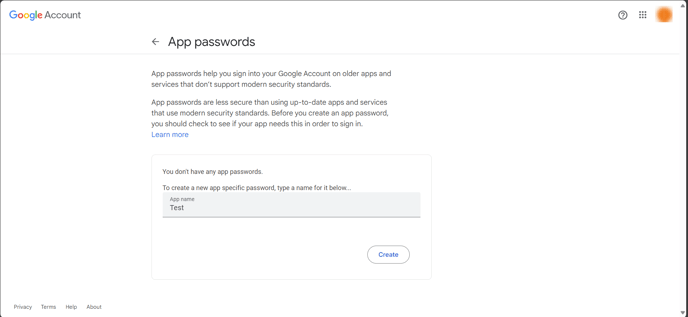
6. Copy or save the generated password to add it to the SMTP connection settings in the system.
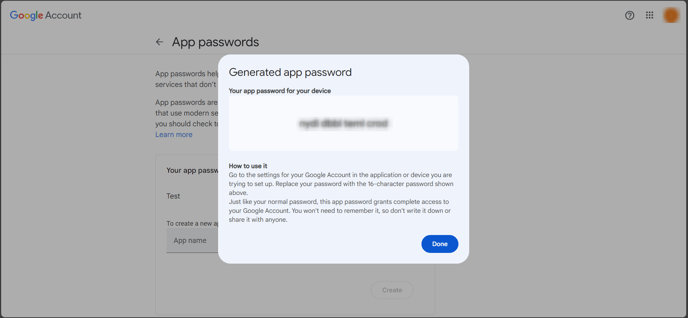 Read more about the Google App Passwords in this article.
