To access the list, go to the Customer Management > Invoices section.
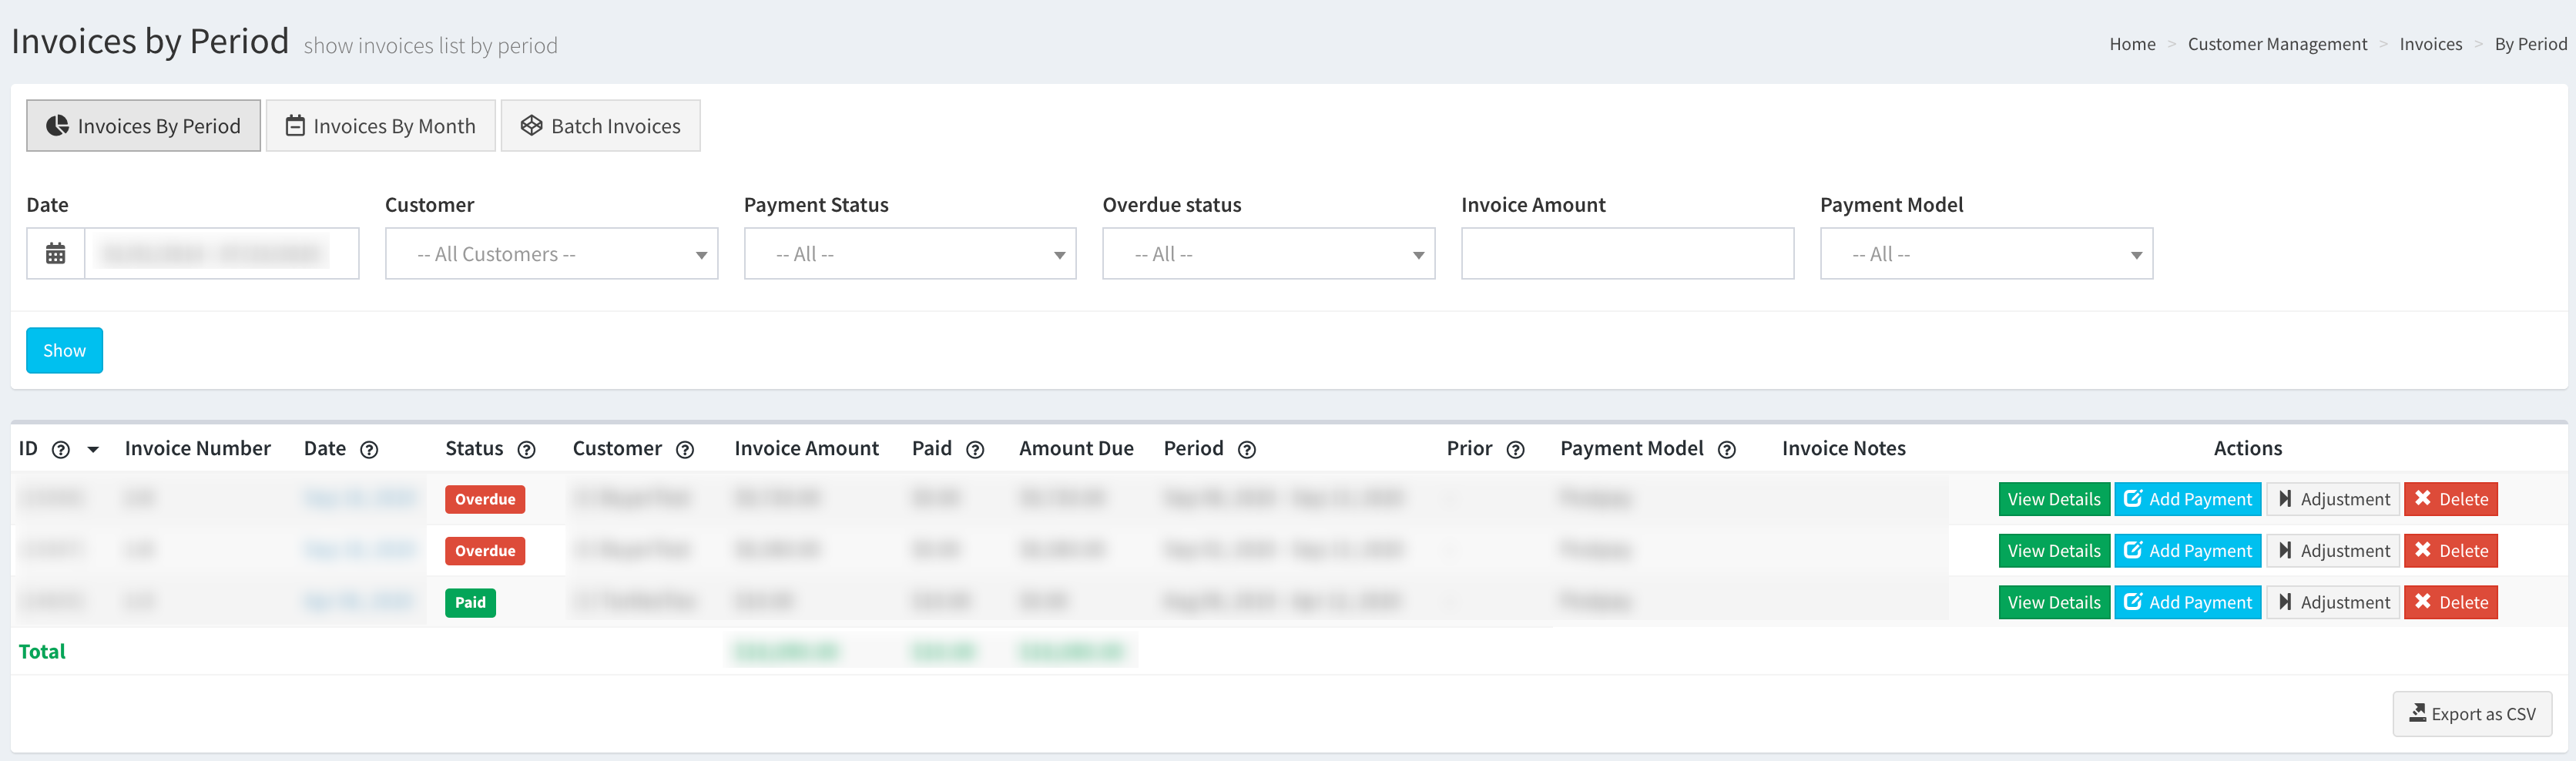
Invoices By Period
The “Invoices By Period” tab allows you to view all the client invoices in the system according to the selected date range.
You can narrow down the search results by using the following filters:
- Filter Date: Select the date range for the invoices.
- Customer: Select the specific Customer.
- Paid Status: Select the payment status (Paid / Not Paid).
- Overdue Status: Select if the payment is overdue or not.
- Amount: Enter the specific invoice amount.
- Payment Model: Select the preferred payment model (Postpay / Prepay).
The list contains the following information:
- ID: The invoice number in the system.
- Number: The invoice number.
- Date: The date the invoice is created.
- Status: The status of the invoice (Paid / Not Paid / Overdue).
- Customer: The name of the Customer in the system.
- Amount: The total invoice amount.
- Paid: The amount that is already paid according to the invoice.
- Due: The outstanding amount.
- Period: The period that is included in the invoice calculation.
- Prior: The date of the previous invoice.
- Payment Model: The Customer’s chosen payment model (Postpay / Prepay).
- Invoice Notes: Additional information about the invoice.
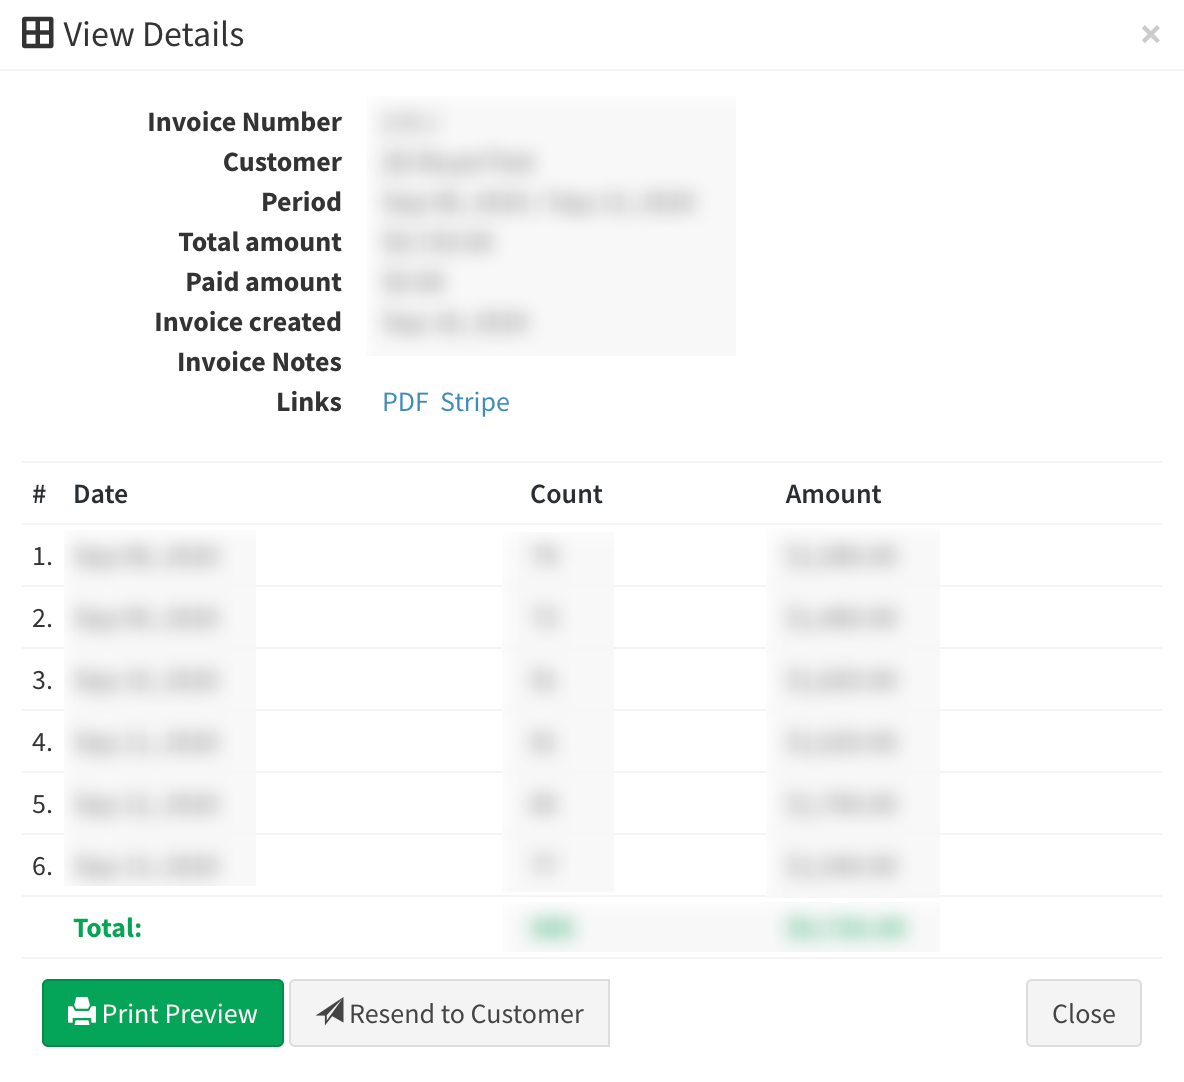
To view more detailed information about the specific invoice, select the invoice record from the list and click the “View Details” button in the “Actions” column. To print and preview the invoice document, click the “Print Preview” button in the pop-up window. To send the invoice document to the client, click the “Resend to Client” button.

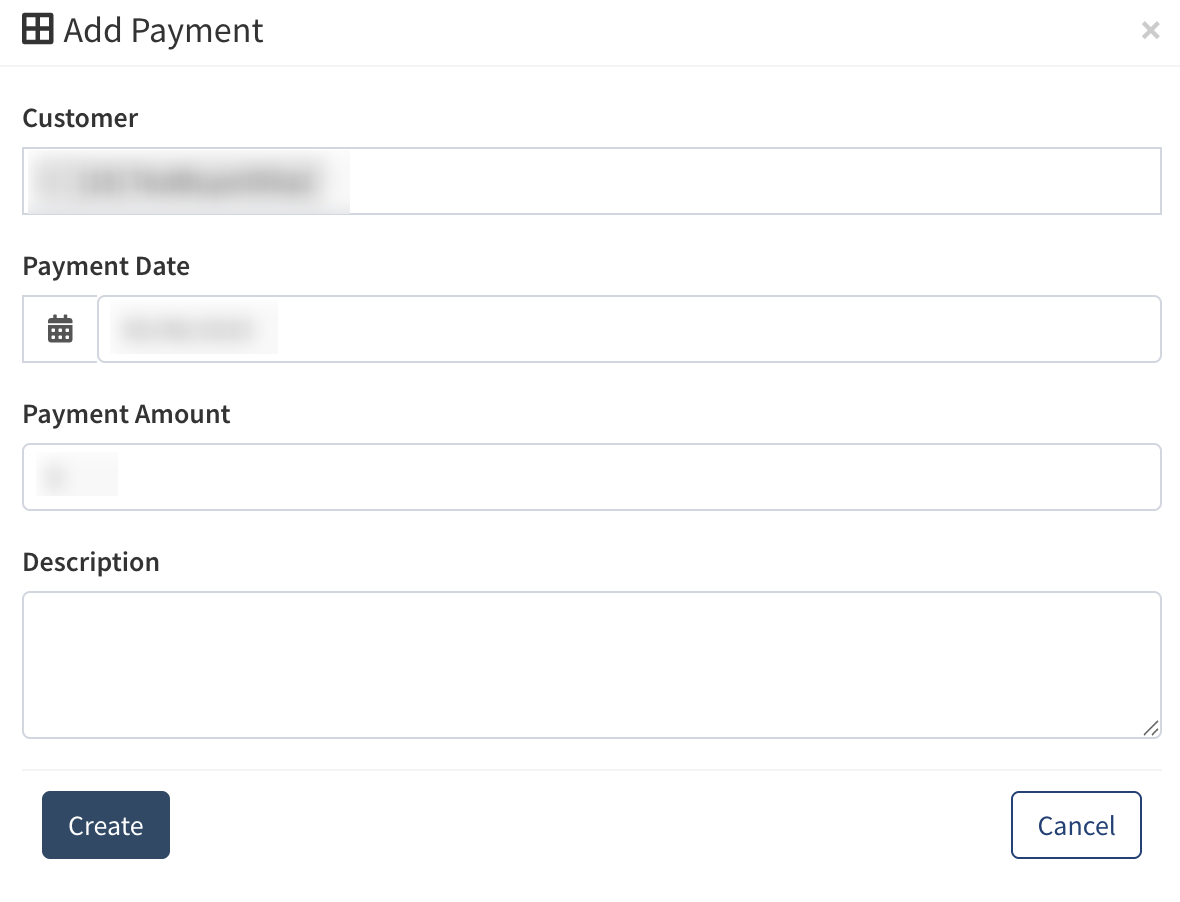
To add the payment for the specific invoice, select the invoice from the list and click the “Add Payment” button in the “Actions” column. Fill in the following information in the pop-up window:
- Customer: The name of the Customer.
- Payment Date: Select the date of the payment.
- Payment Amount: Enter the payment amount.
- Description: Enter additional information about the payment.
Click the “Create” button to complete.
Note: If there are other unpaid invoices for the customer, you will see a list of those invoices along with the option to pay multiple invoices.
To adjust the amount set for the invoice, select the invoice record from the list and click the “Adjustment” button in the “Actions'' column. Fill in the following information in the pop-up window:
- Adjustment Date: Select the specific date for the invoice amount adjustment.
- Amount: Enter the amount you would like to adjust the invoice total for. To increase the invoice amount, use a positive number. To credit a Customer, use a negative number.
- Description: Enter additional information for the adjustment record.
Click the “Add Adjustment” button to complete.

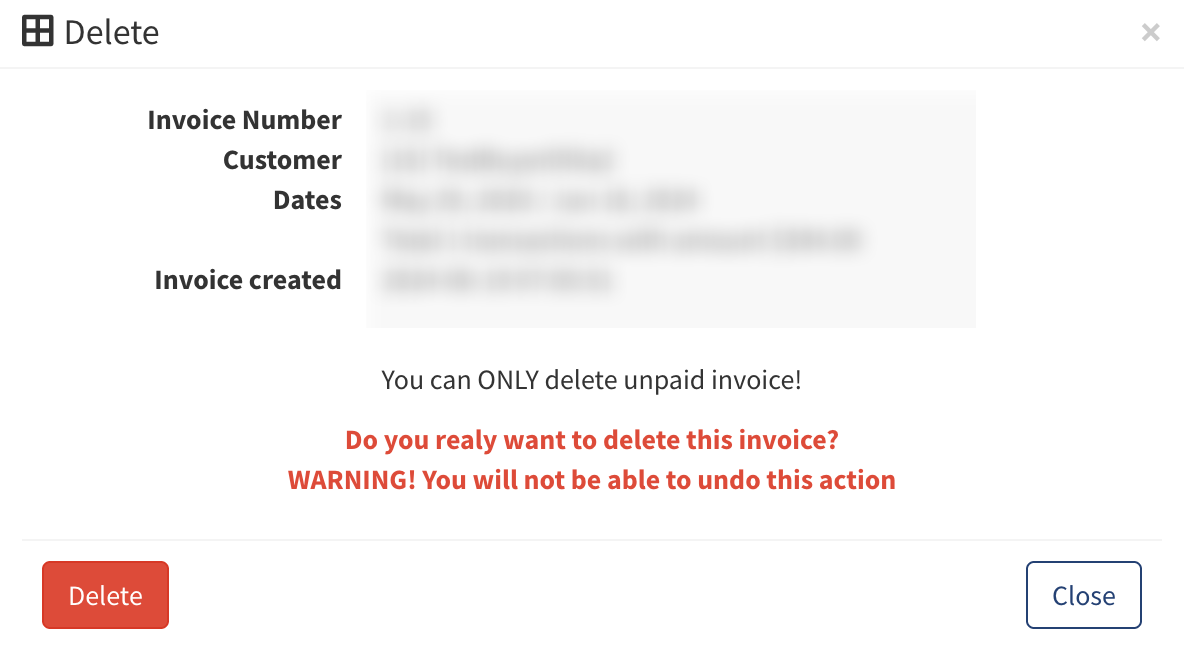
To delete the invoice record from the system, select the invoice from the list and click the “Delete” button in the “Actions” column. Confirm the action by clicking the “Delete” button in the pop-up window.
Invoices By Month
The "Invoices By Month" tab displays customer invoices organized by month and specific days for each Customer.
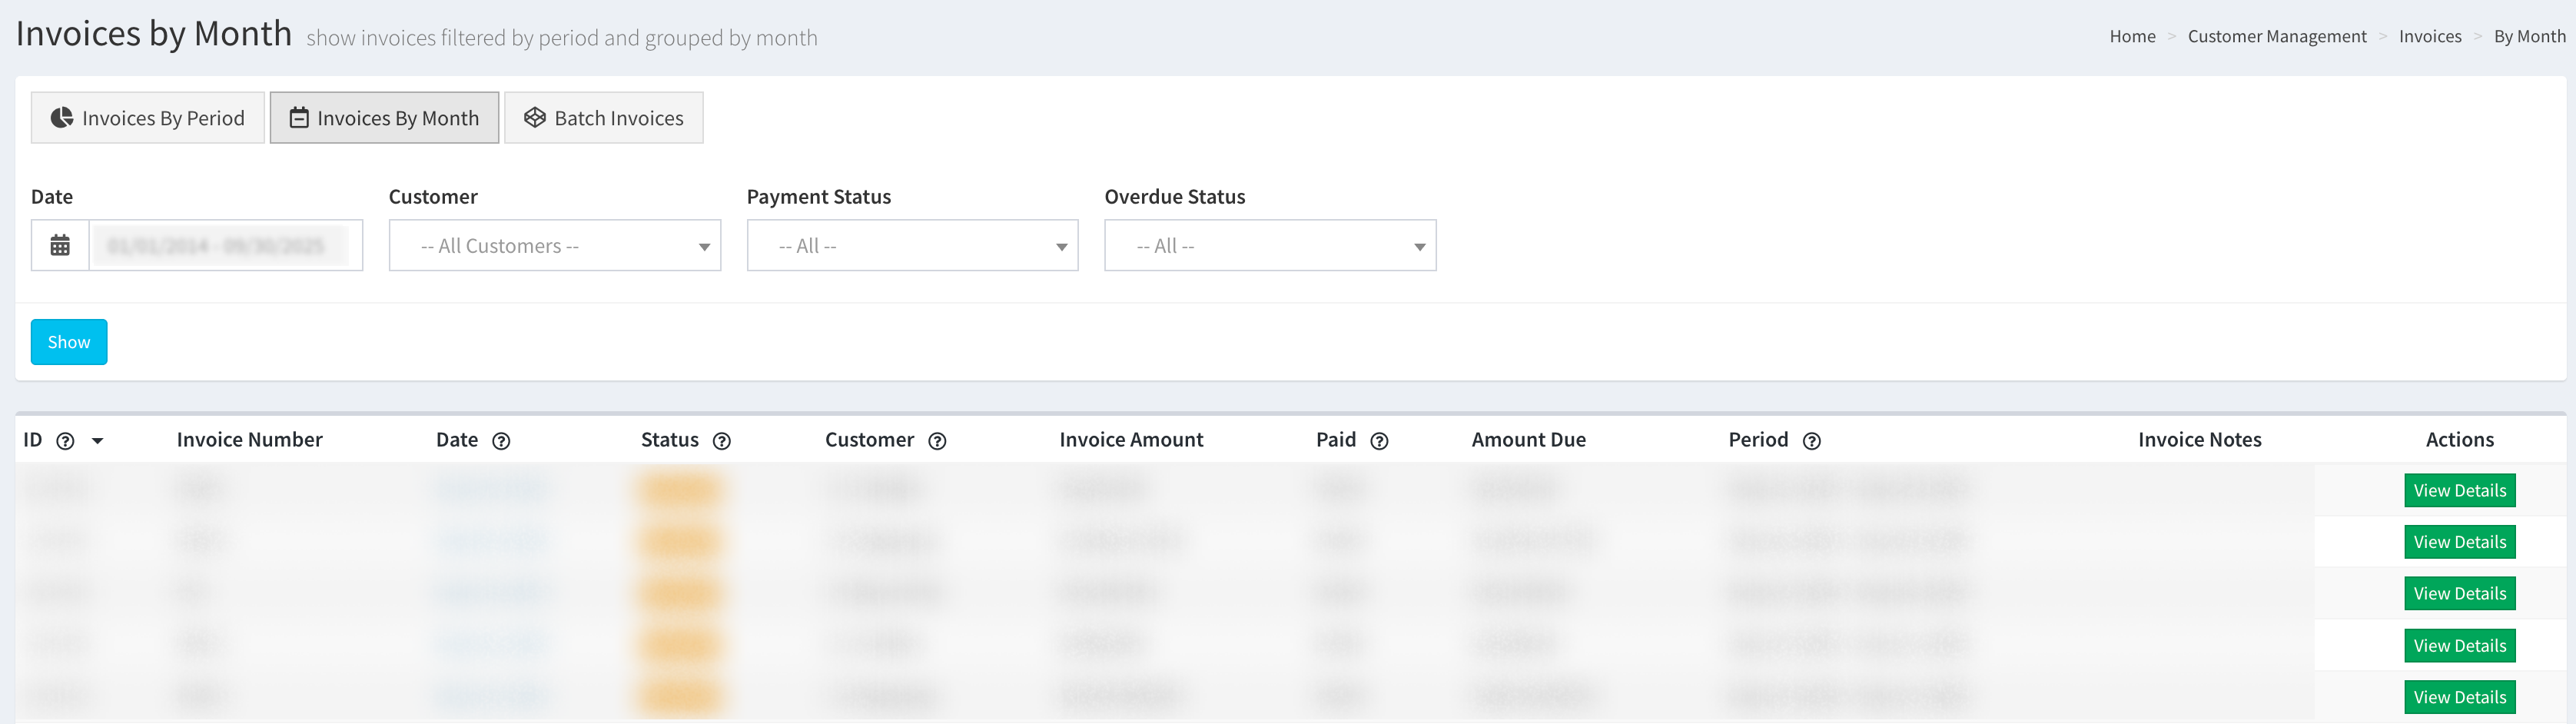
You can narrow down the search results by using the following filters:
- Filter Date: Select the preferred date range.
- Customer: Select the specific Customer.
- Paid Status: Select the payment status (Paid / Not Paid).
- Overdue Status: Select the "Yes" option to show the overdue invoices.
The list contains the following information:
- ID: The record number in the system.
- Invoice Number: The invoice number.
- Date: The date the invoice is created.
- Status: The status of the invoice (Overdue / Paid / Not Paid).
- Customer: The name of the Customer in the system.
- Invoice Amount: The total invoice amount to be paid by the Customer.
- Paid: The amount that is already paid by the Customer.
- Amount Due: The outstanding amount that the customer has not yet paid.
- Period: The period for which the Customer is charged.
- Invoice Notes: Additional information about the invoice.
To view more detailed information about the specific invoice, select the invoice record from the list and click the “View Details” button in the “Actions” column. To print and preview the invoice document, click the “Print Preview” button in the pop-up window. To send the invoice document to the client, click the “Resend to Client” button.
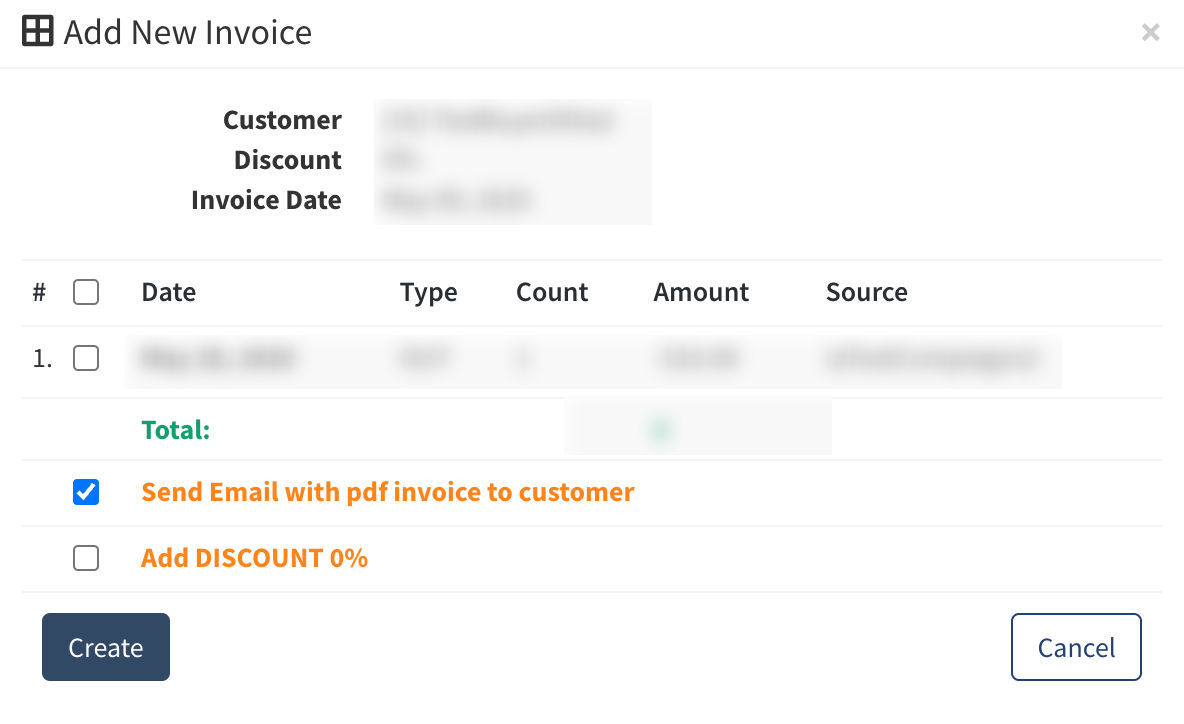
Batch Invoices
The “Batch Invoices” tab allows you to create Customer invoices for multiple selected days simultaneously.
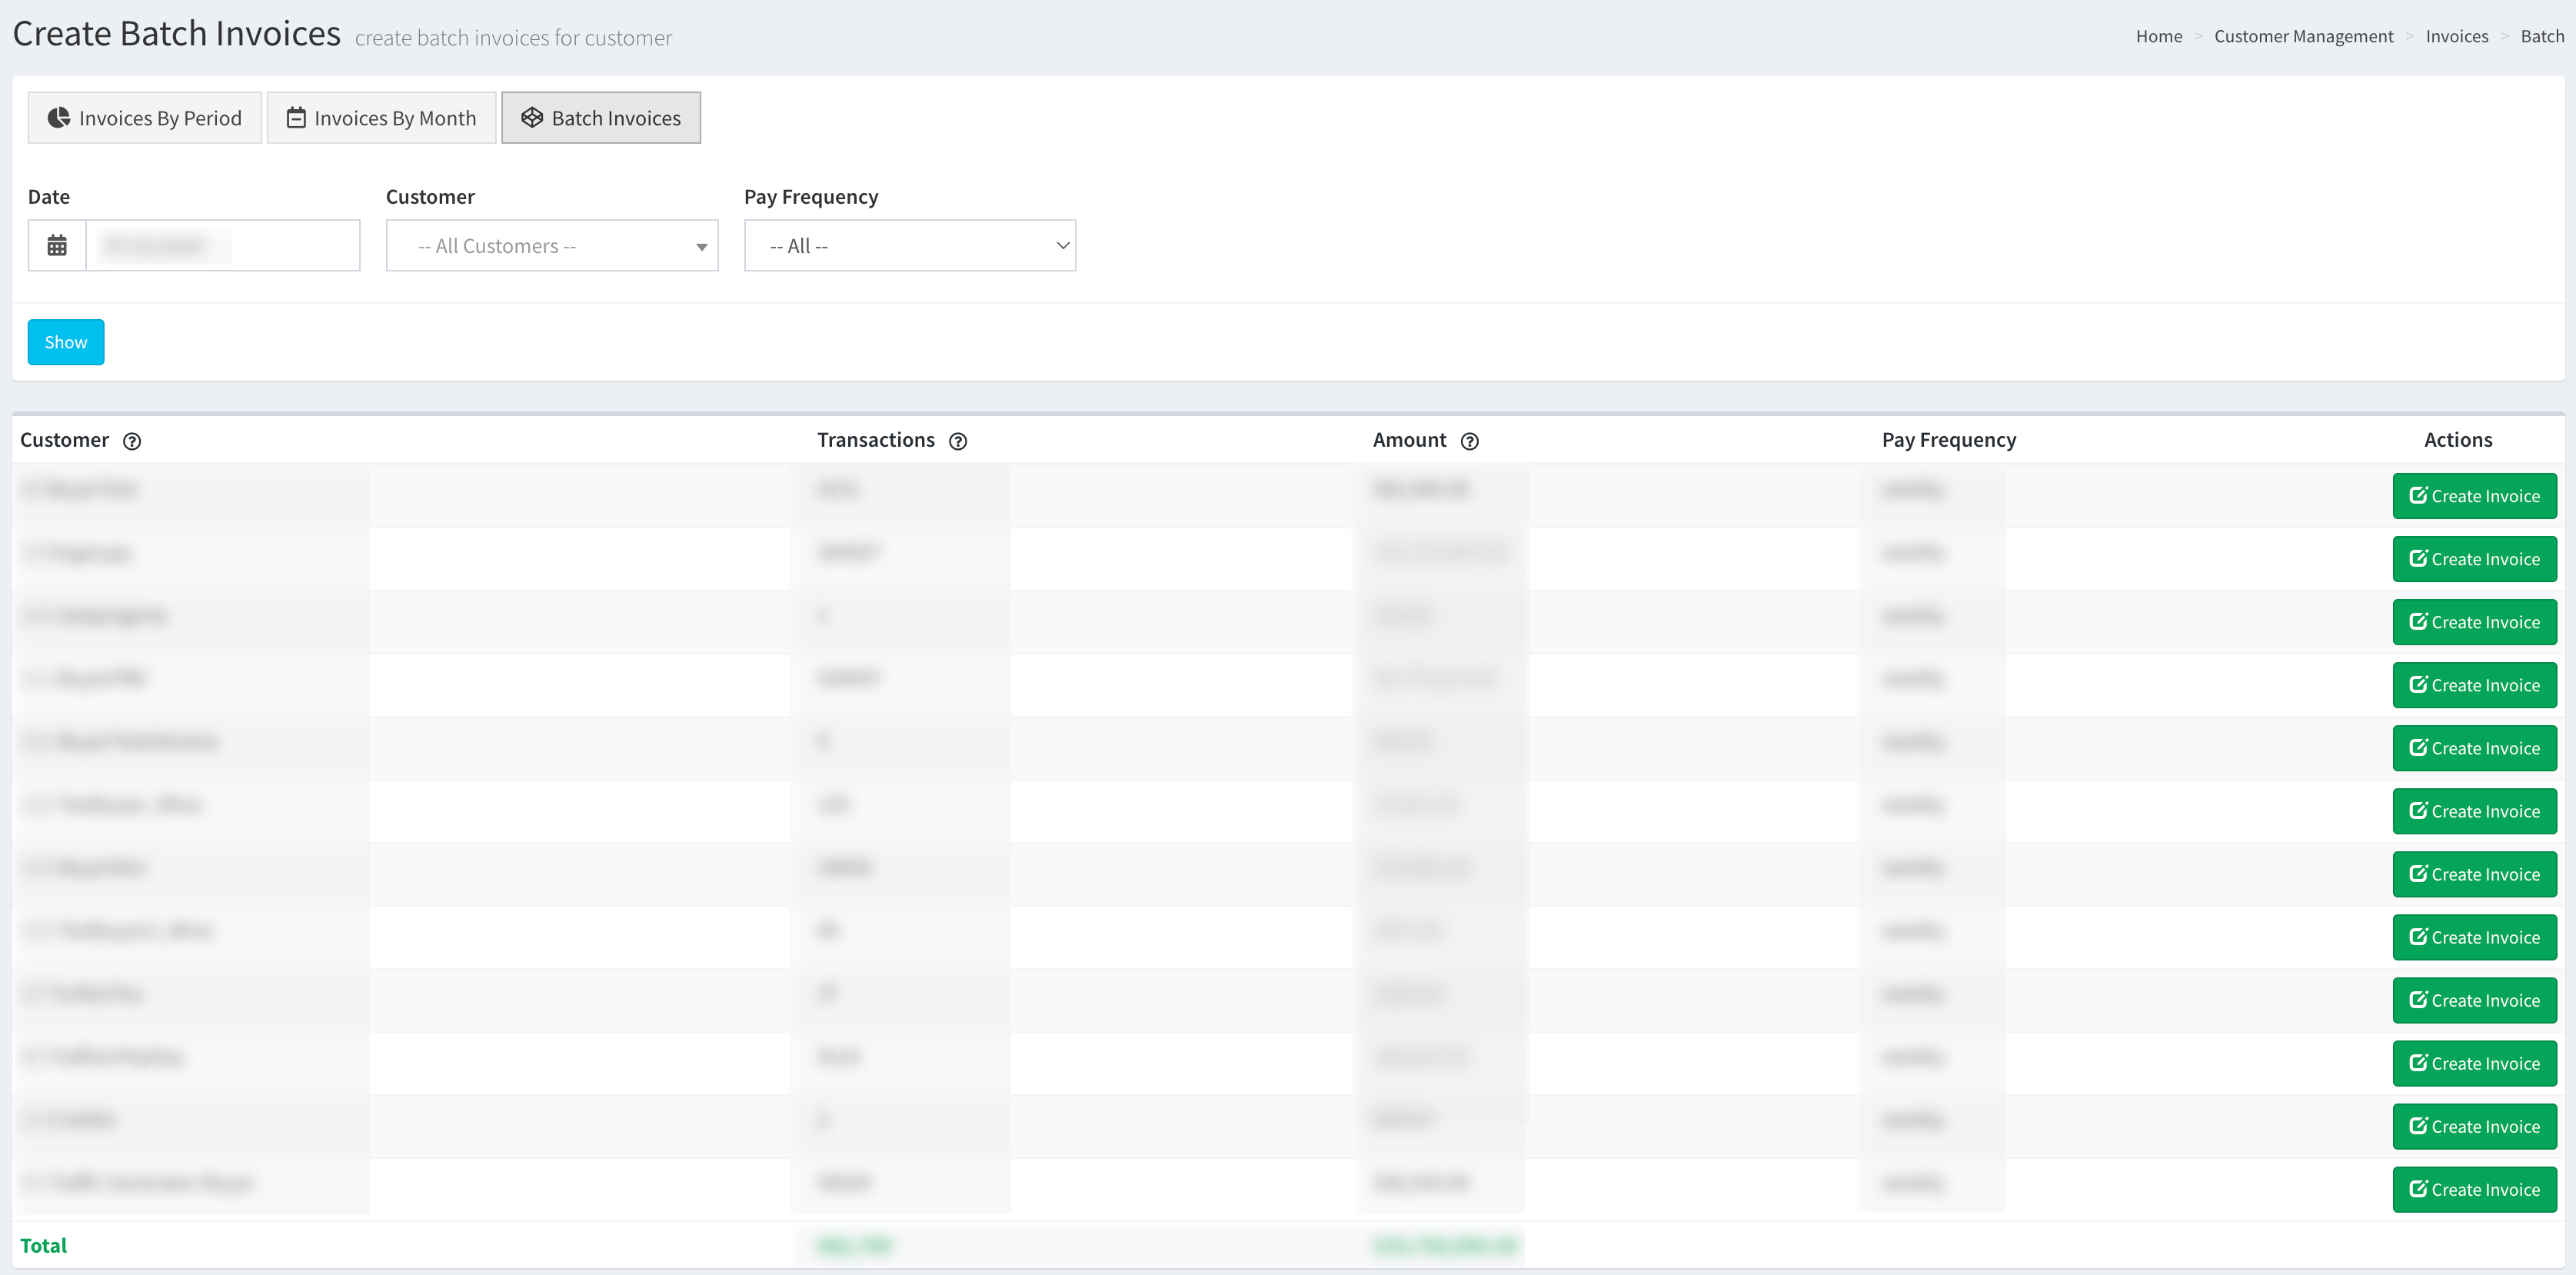
You can narrow down the list by using the following filters:
- Current Invoice Date: Select the invoice date.
- Customer: Select the Customer from the list.
- Frequency: Select the invoice frequency set for the Customer (Biweekly / Manual / Monthly / Semi-Monthly / Weekly).
The list contains the following information:
- Customer: The name of the Customer in the system.
- Transactions: The total number of the Client’s transactions.
- Amount: The total amount to be charged for the invoice.
- Frequency: The frequency of the invoice submission (Biweekly / Manual / Monthly / Semi-Monthly / Weekly).
To create a batch invoice, select the Customer from the list and click the “Create Invoice” button in the “Actions” column. Select the dates you would like to include in the invoice and click the “Create” button in the pop-up window to confirm.