To open the email Templates, go to the Email Campaigns > Settings > Templates section.
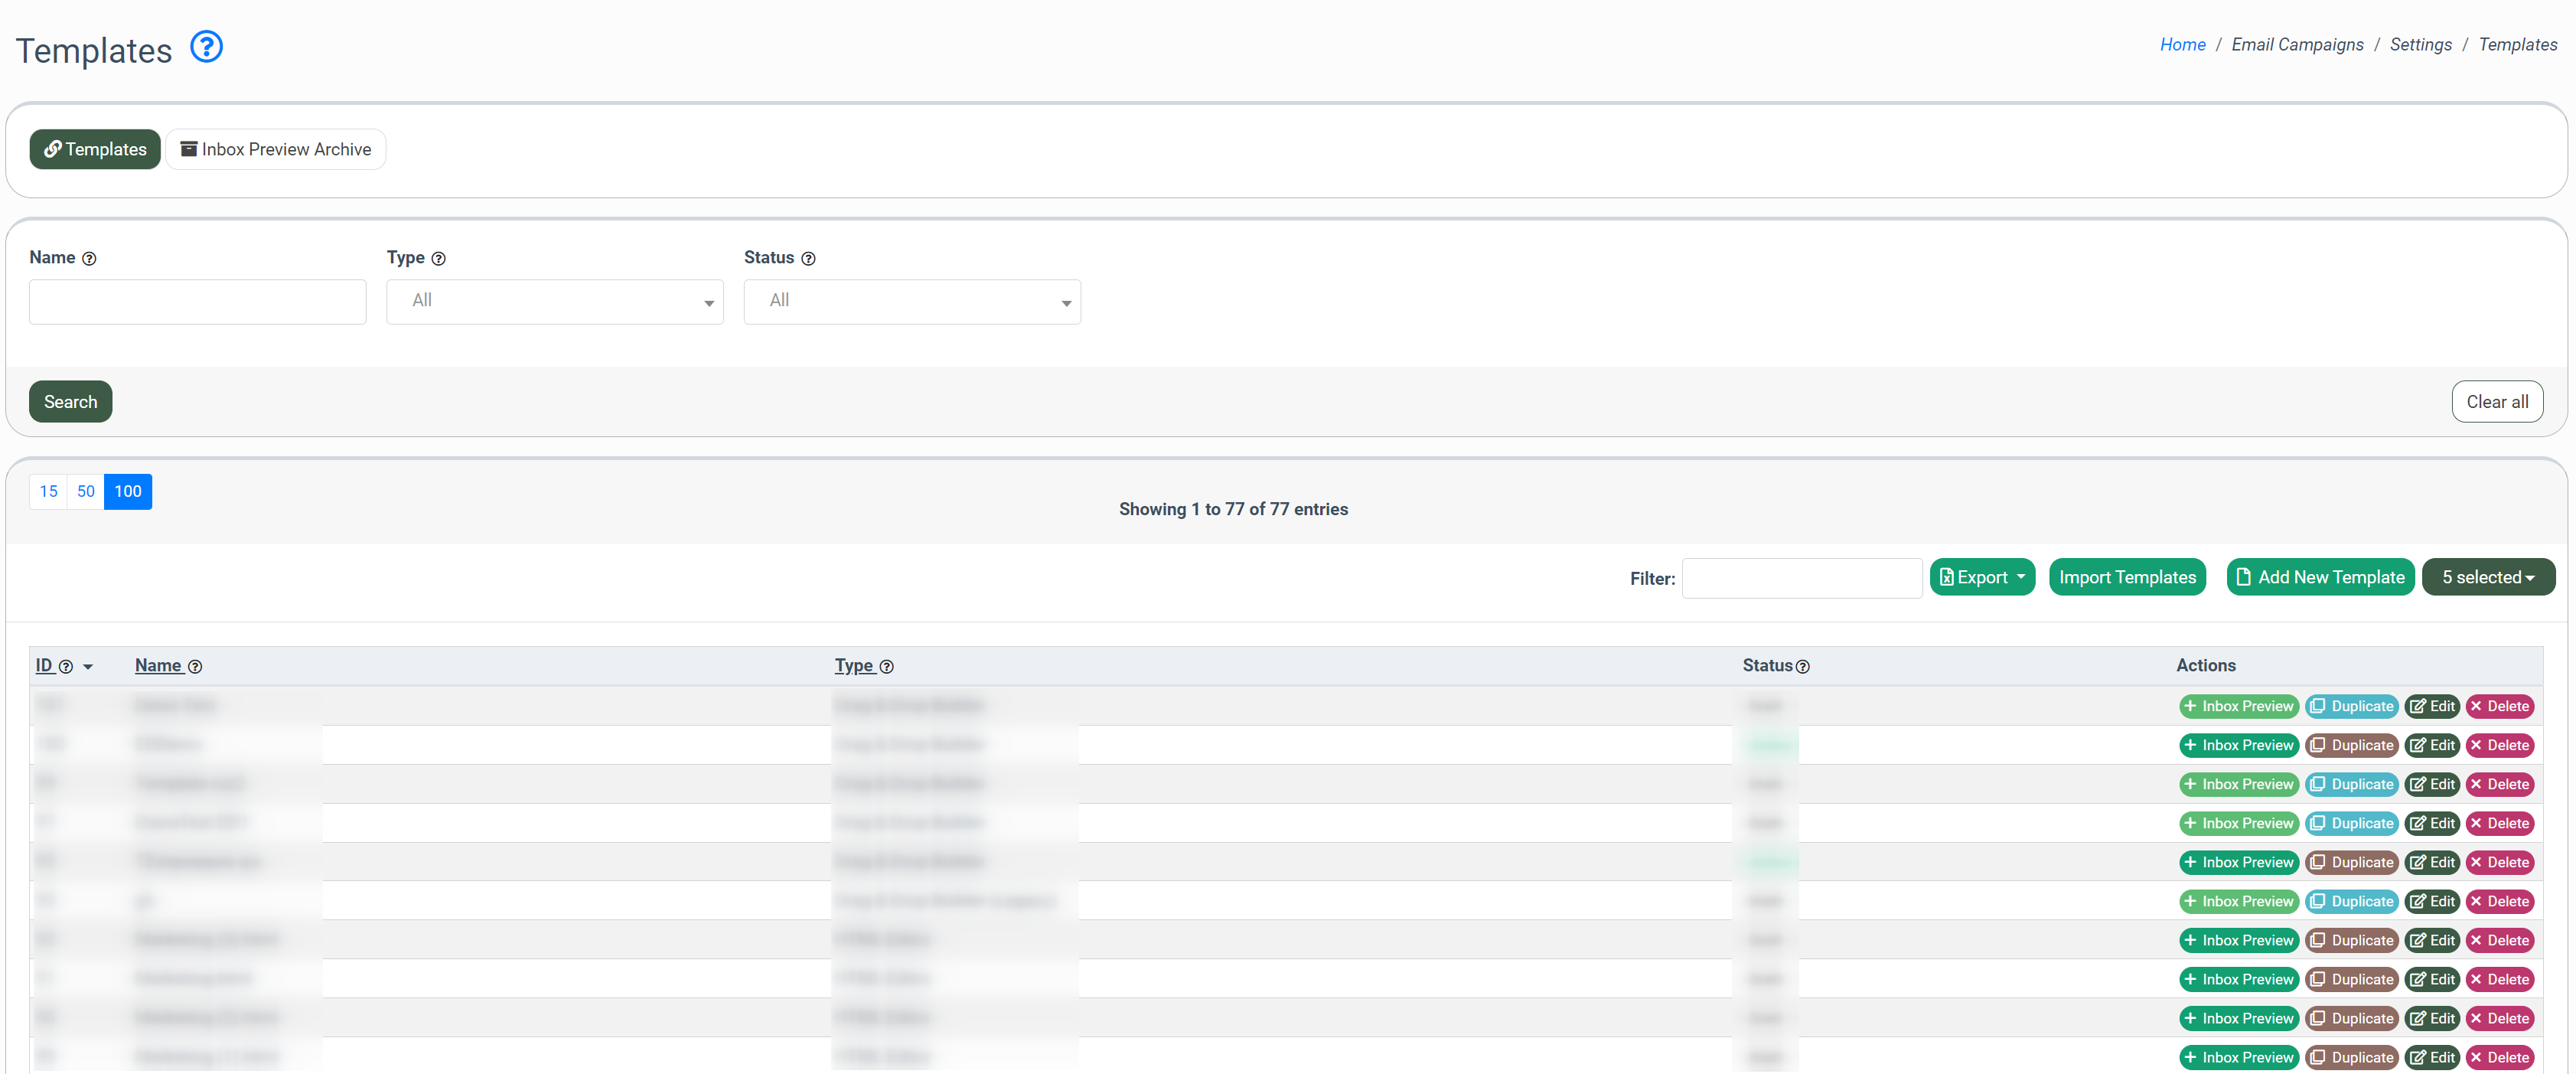
You can narrow down the search results by using the following filters:
- Name: Enter the name of the Template.
- Type: Select the type of the Template (Drag & Drop Builder, HTML Editor).
- Status: Select the status of the Template (Draft, Active, Deleted).
The Template list contains the following information:
- ID: The unique identification number of the Template.
- Name: The name of the Template.
- Type: The type of the Template (Drag & Drop Builder, HTML Editor).
- Header Set: The header set of the Template.
- Status: The status of the Template (Active, Draft, Not active).
To add a new Template, click the “Add New Template” button and fill in the following fields in the pop-up window:
- Name: Enter the name for a new Template.
- Type: Select the new Template type (Drag & Drop Builder/HTML Editor).
Click the “Add” button to save.
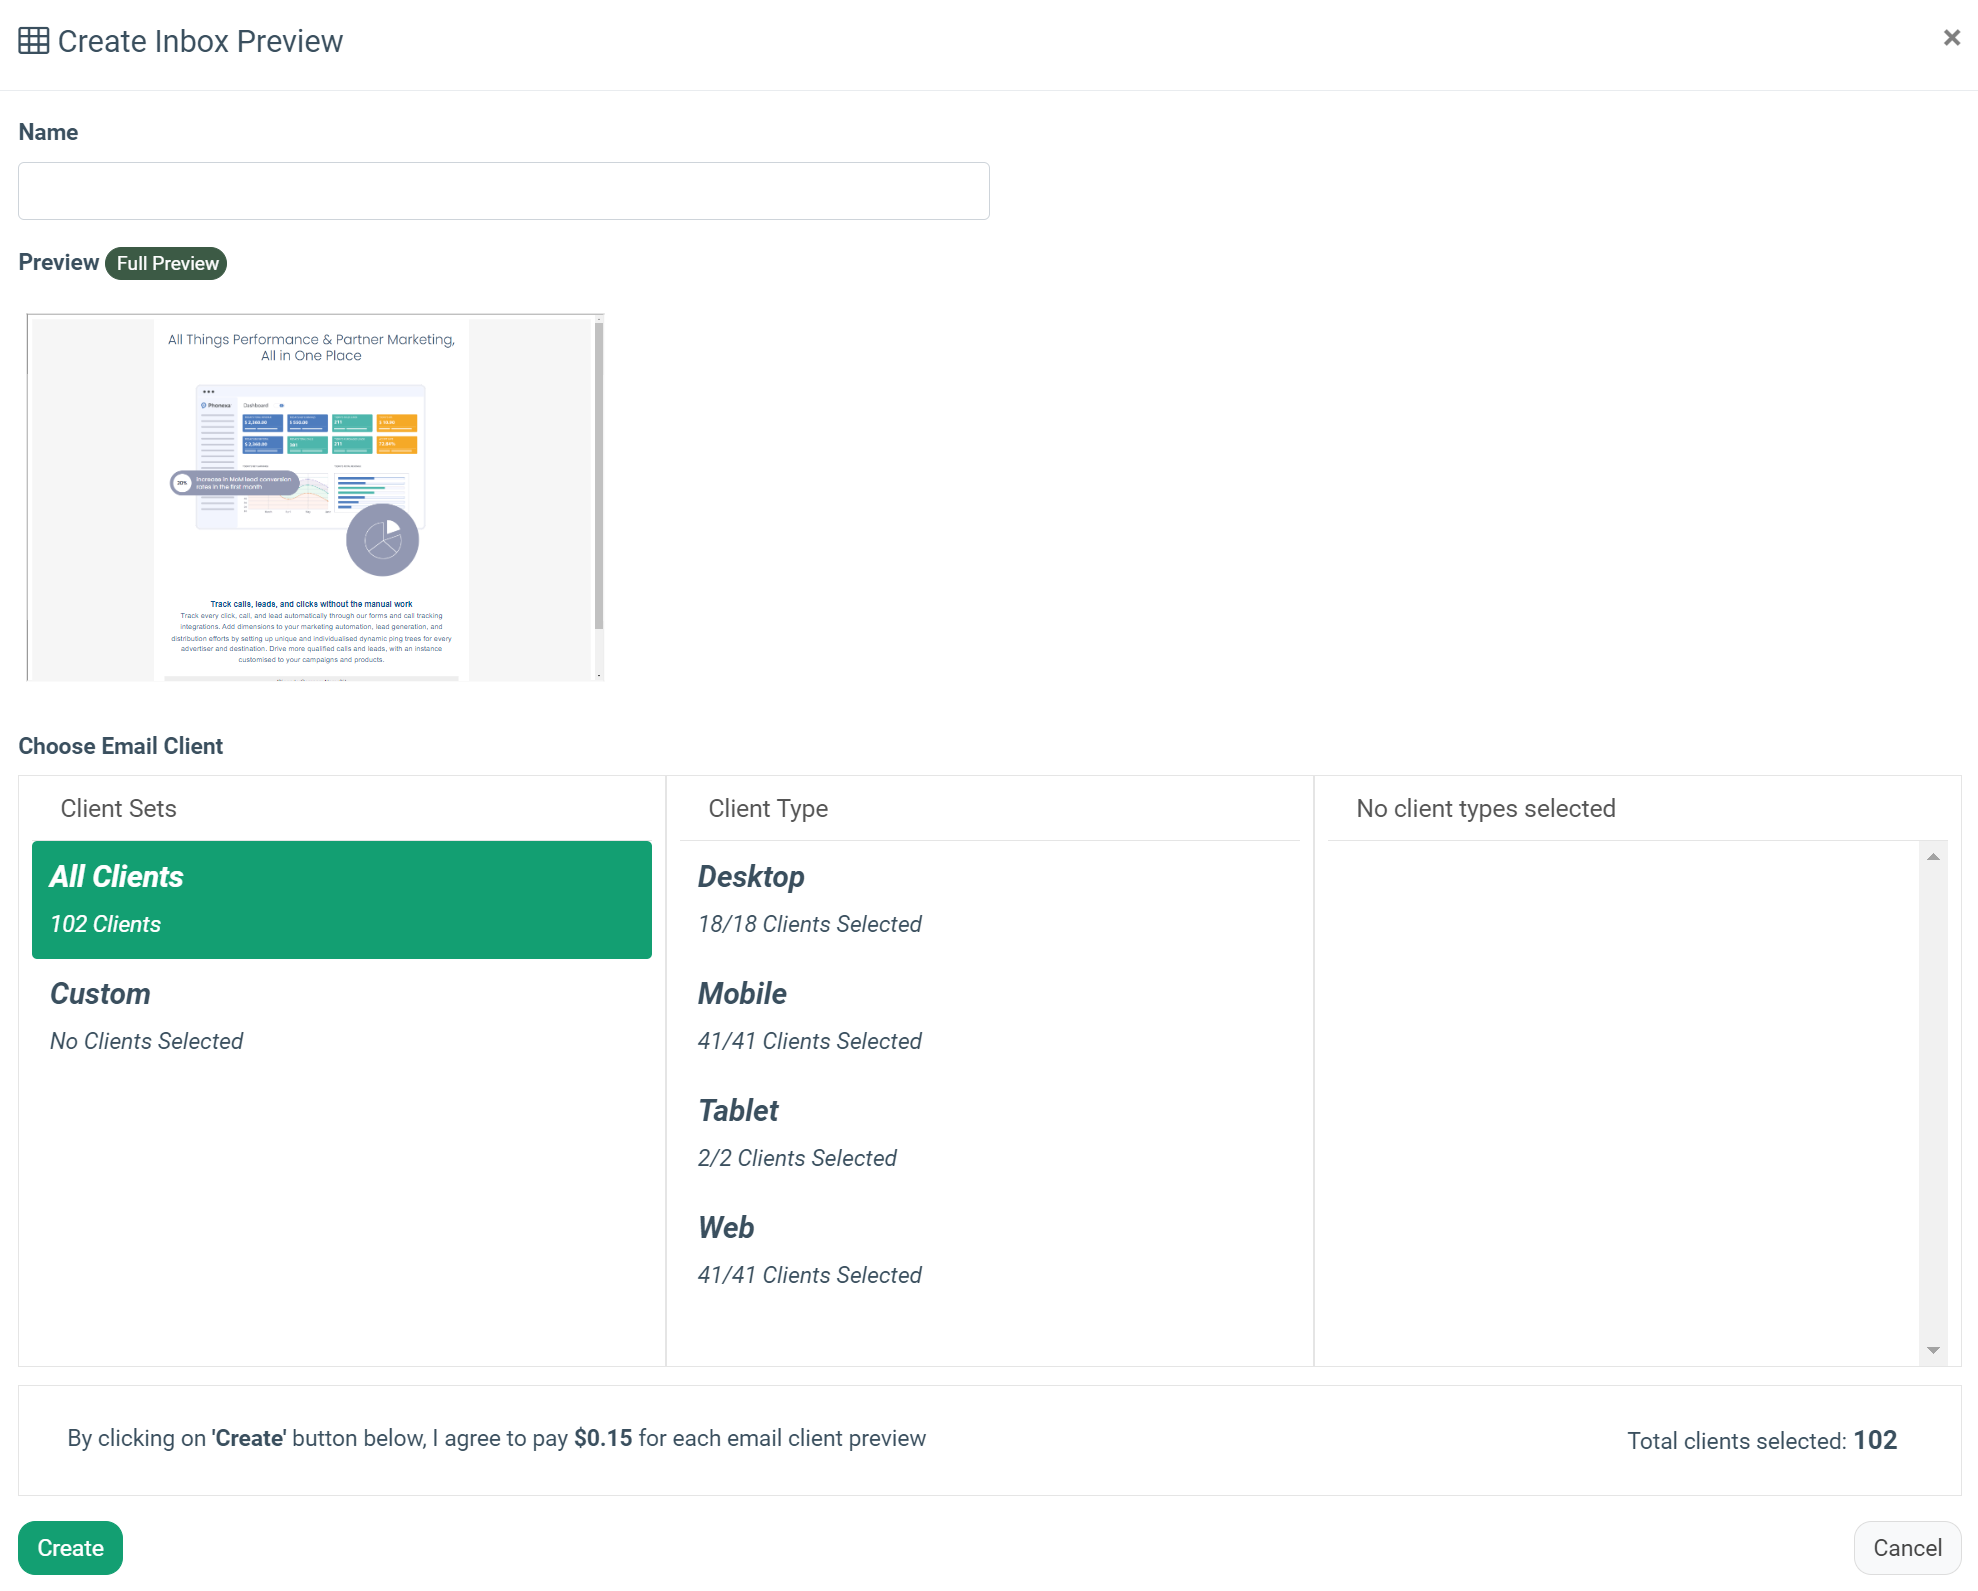
To see how the email will be rendered on different devices and applications, click the “Inbox Preview” button in the “Actions” column. Select “All Clients” to generate a preview for all available email clients.
Select “Custom” to generate a preview for manually chosen email clients. In the “Client Type” field, select the client type and then select the clients from the list.
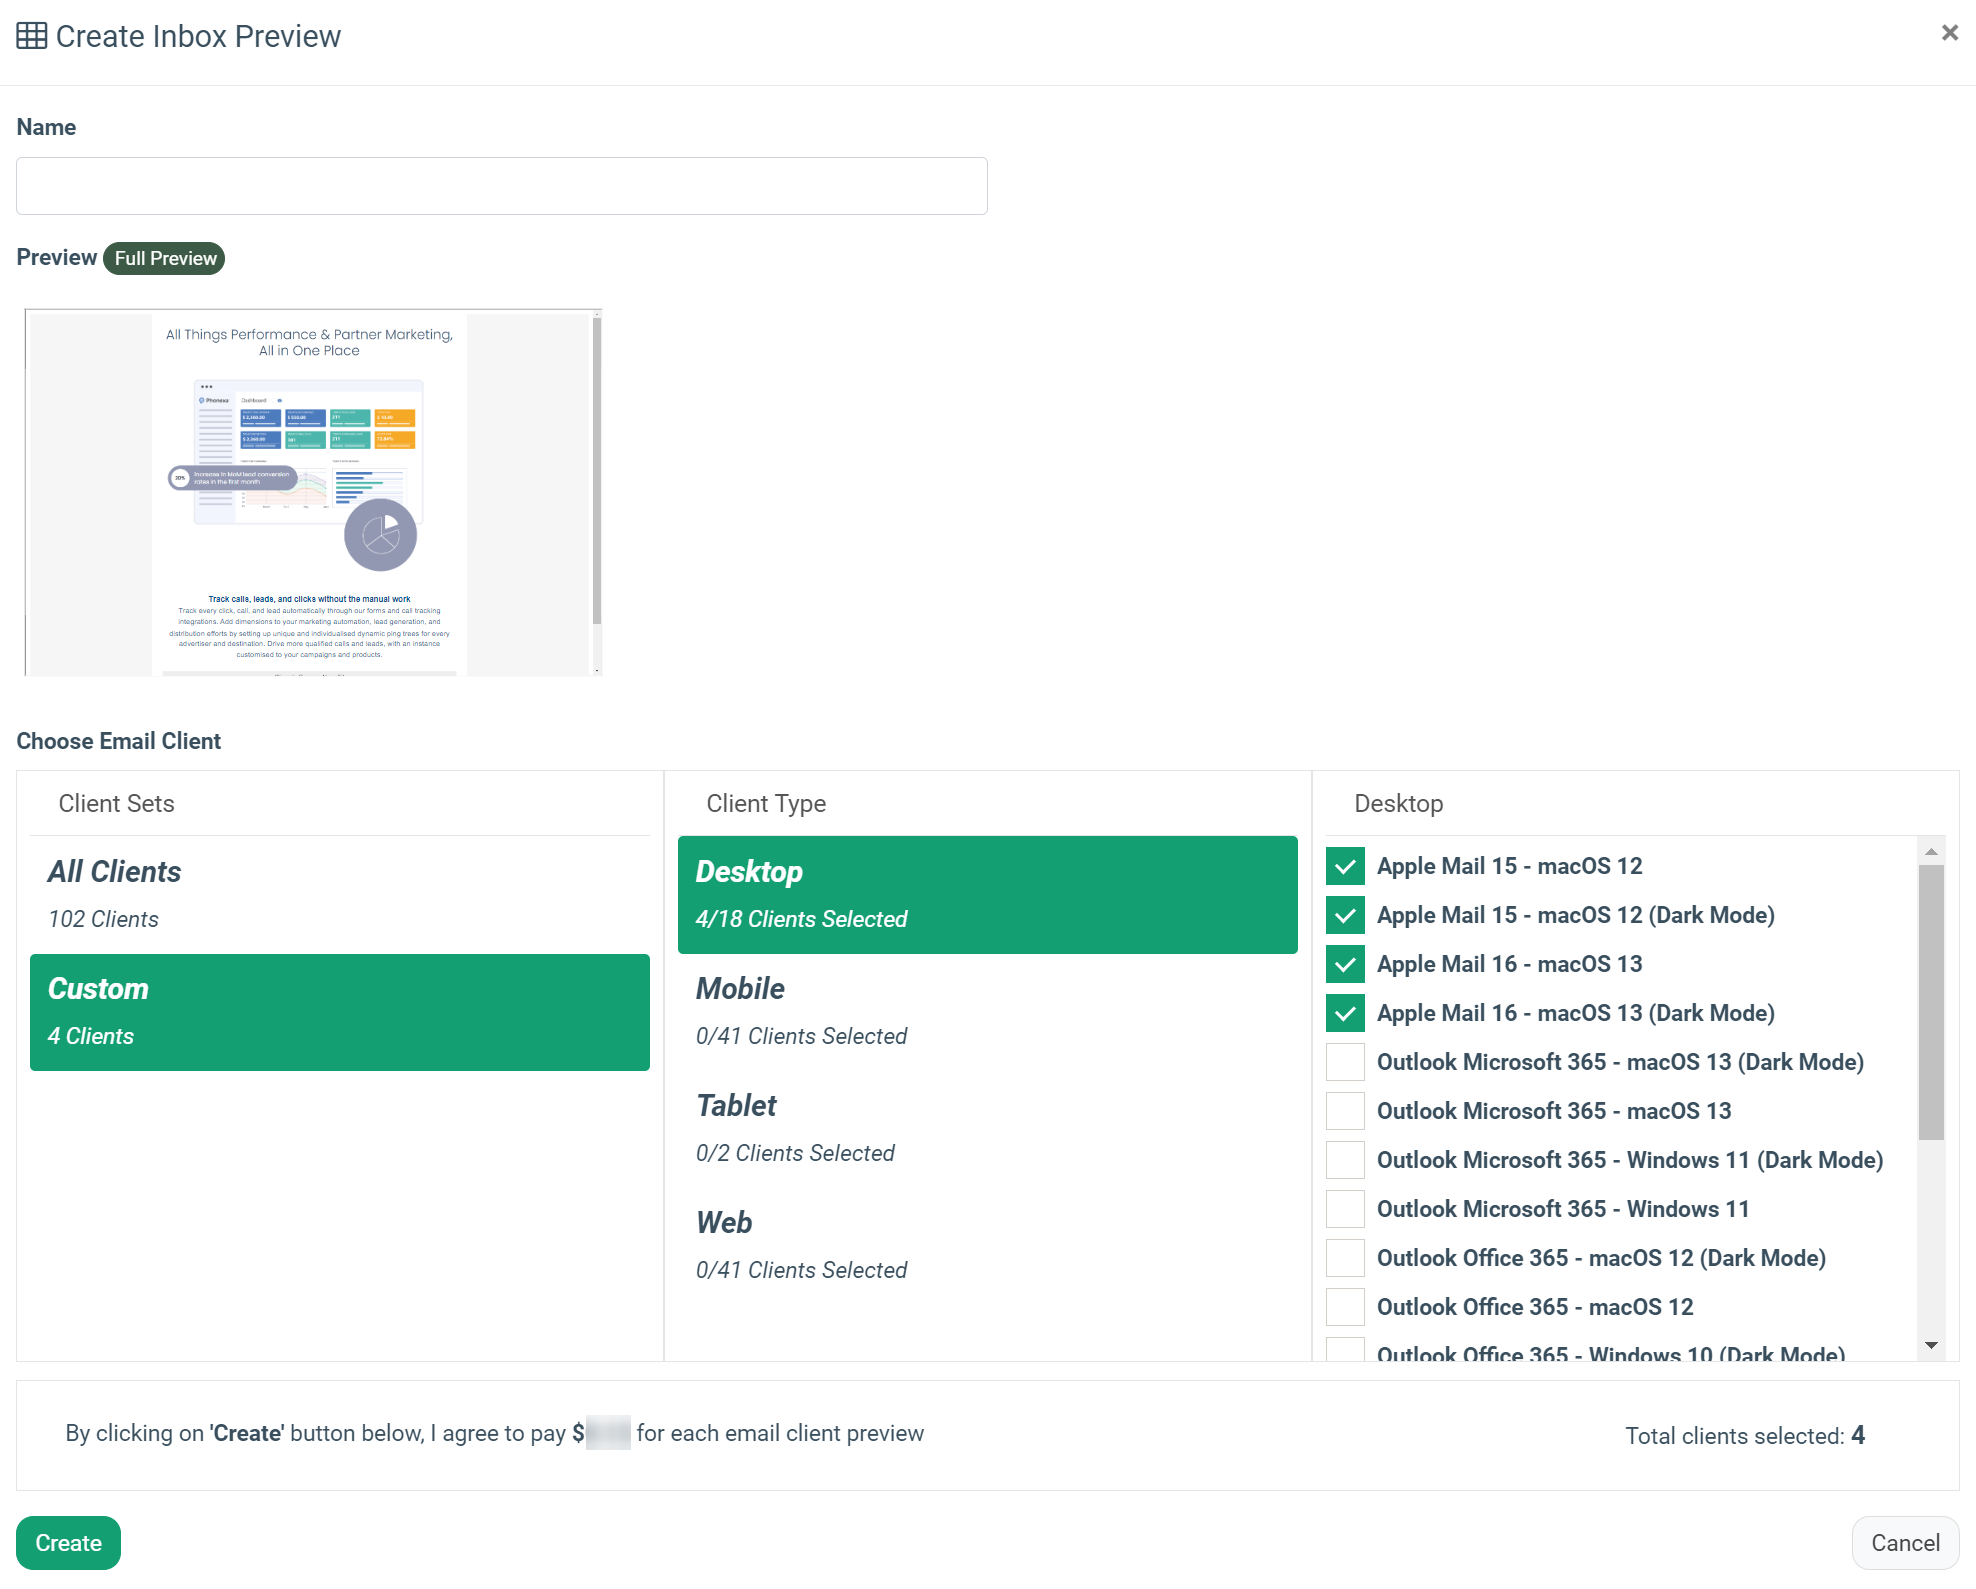 Click the “Create” button to confirm. Click the “Go to Preview” button in the confirmation window to see the preview.

To duplicate an existing Template, click the “Duplicate” button in the “Actions” column and enter the name of a new Template. Click the “Copy” button to confirm.

To delete the Template, click the “Delete” button in the “Actions” column. Click the “Delete” button to confirm.

To edit an existing Template, click the “Edit & Delete” button in the “Actions” column. The system will redirect you to the “Edit Template in HTML Editor” page. You can configure the following data fields:
- Template Name: Enter the name of the Template.
- Subject fields contain:
- Contact fields: Select the fields to be displayed as contact fields (Email, Phone, First Name, Country, Zip, etc.).
- System fields: Select the fields to be displayed as system fields (Year, Month name, Current date, etc.)
Note: You can activate Emojis to be displayed inside the Subject field. They are available on demand. To activate them, contact your Account Manager. It may take some time to enable this function.
The system will display the emoji(s) during the addition of the "Subject" field inside the template. Once you click the "Save" button, it will disappear.
- Pre-Header fields contain:
-
- Contact fields: Select the fields to be displayed as contact fields (Email, Phone, First Name, Country, Zip, etc.).
-
- System fields: Select the fields to be displayed as system fields (Year, Month name, Current date, etc.)
- Header Set Template (optional): Select the Header Set Template from (optional). Note: Read more about the Header Sets in this Knowledge Base article.
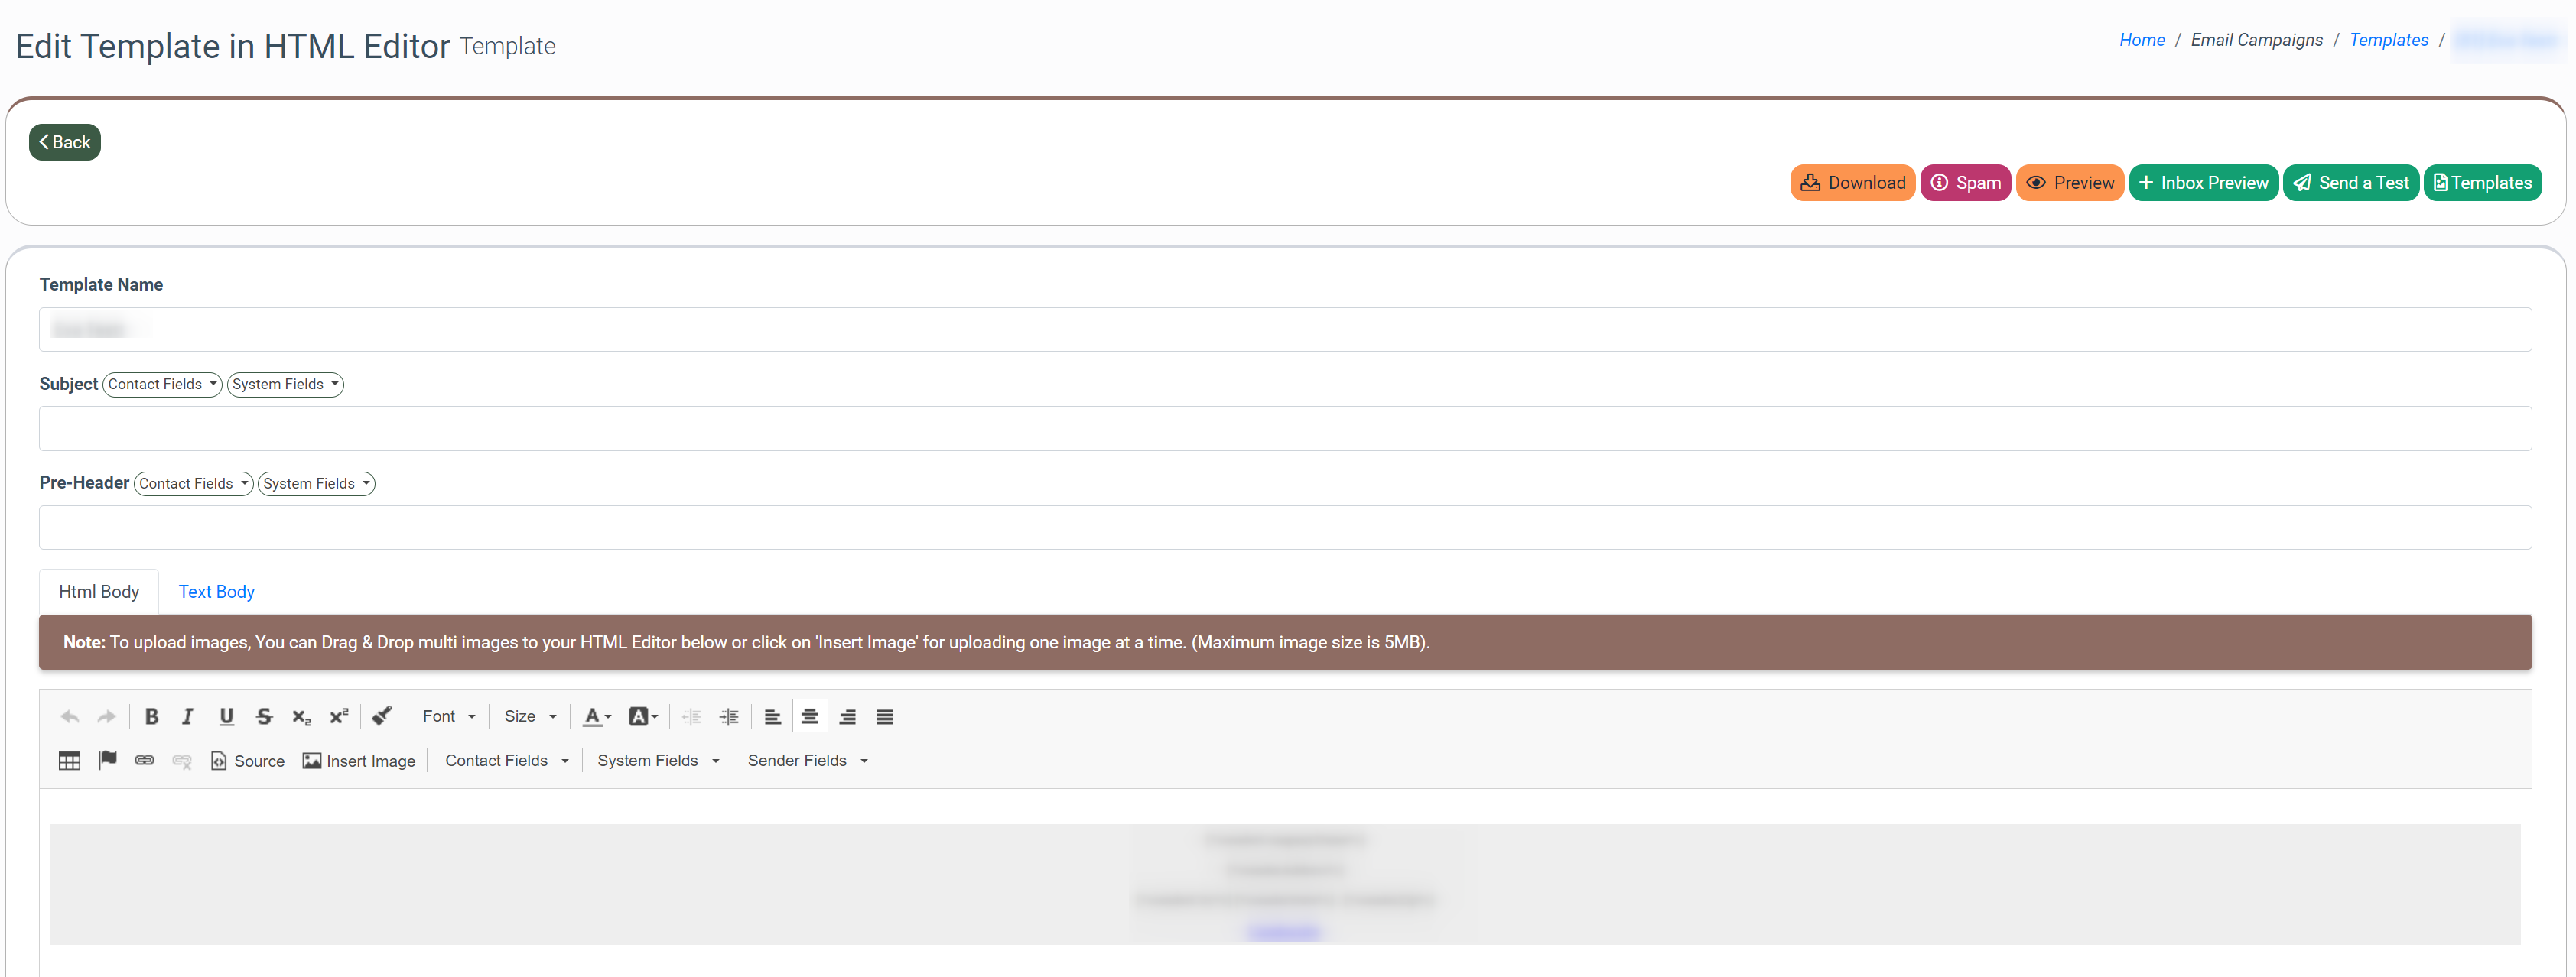
To edit the “Text body” of the Template, select the appropriate tab and fill in the data in the text block.
- Click the “Download” button to download the Template.
- Click the “Spam” button to check the Template for spam.
- Click the “Preview” button to preview the Template.
- Click the “Inbox Preview” button to preview the template on different clients.
- Click the “Templates” button to review available standard Templates.
- Click the “Test Send” button to utilize the Emai Tester feature. The purpose of the Email-Tester feature is to enable email senders to assess and refine their email configuration and delivery processes to ensure messages successfully reach recipients' inboxes. This tool offers comprehensive insights into various aspects including spam detection, authentication, headers, DNS settings, links, and other pertinent details.
Note: This feature requires payment per each test message.
Fill in the following fields in the “Test Send” pop-up window:
- Delivery Channel: Select the Channel.
- Sender: Select the sender (Sender address).
- Email: Enter the contact’s email address.
- Phone: Enter the phone number of the contact.
- First Name: Enter the first name of the contact person.
- Last Name: Enter the last name of the contact person.
- Country: Enter the contact’s country.
- City: Enter the contact’s city.
- Address: Enter the contact’s address.
- State: Enter the contact’s state.
- Zip: Enter the contact’s ZIP code.
- Date Of Birth: The contact’s date of birth.
Click the “Send to Mail Tester” button to confirm.

The system will redirect you to the “Test Send” popup window. Click the “Show results” button to view the detailed tester results.

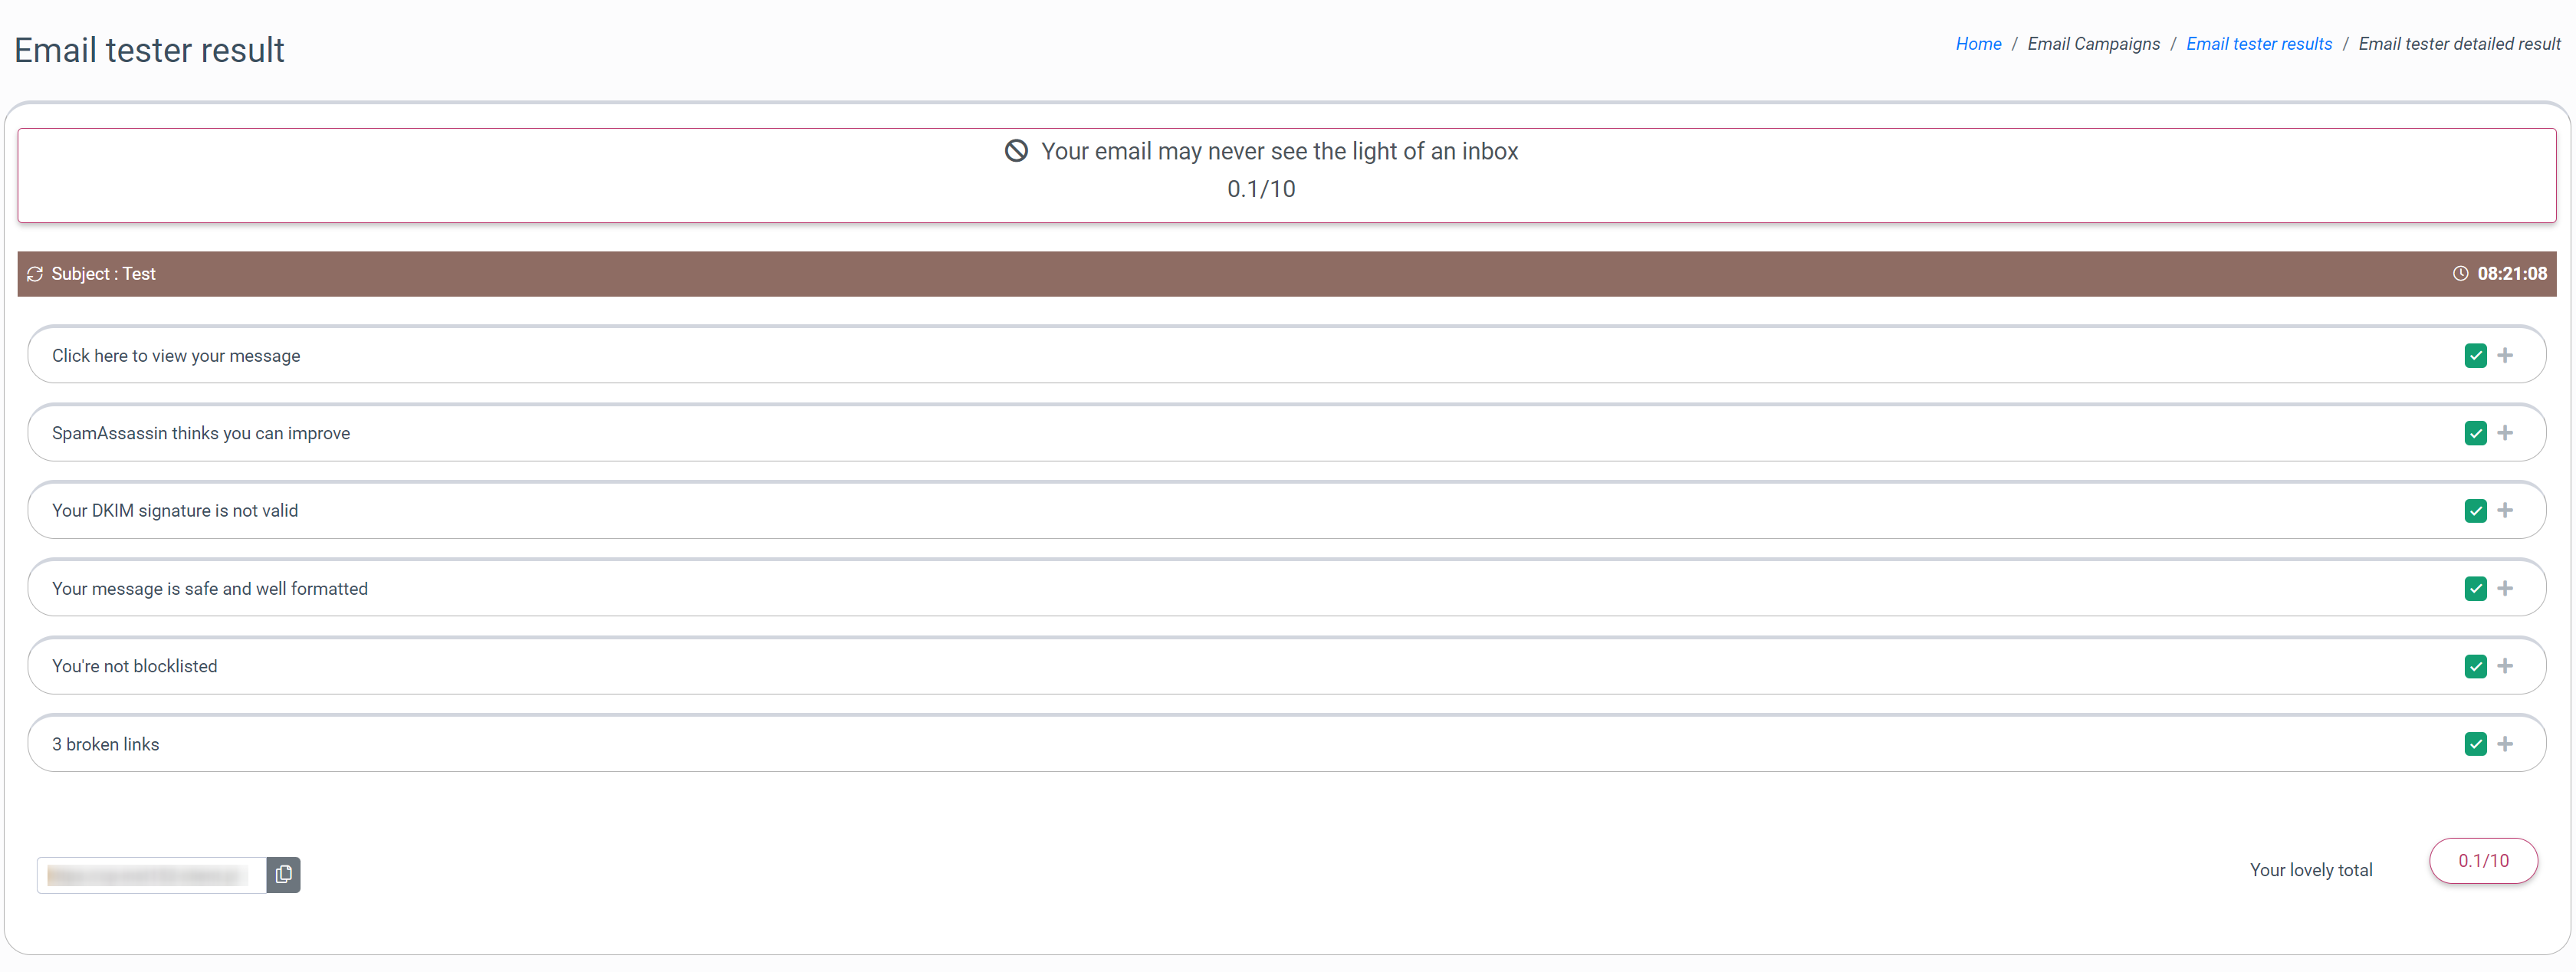
Note: You can view the Email test results log group by each email. Go to the E-Delivery > Email Campaigns > Logs > Email tester results.