You can view detailed instructions on how to create/edit an email or SMS global suppression List.
Please follow this guide for creating/editing an email or SMS global suppression List.
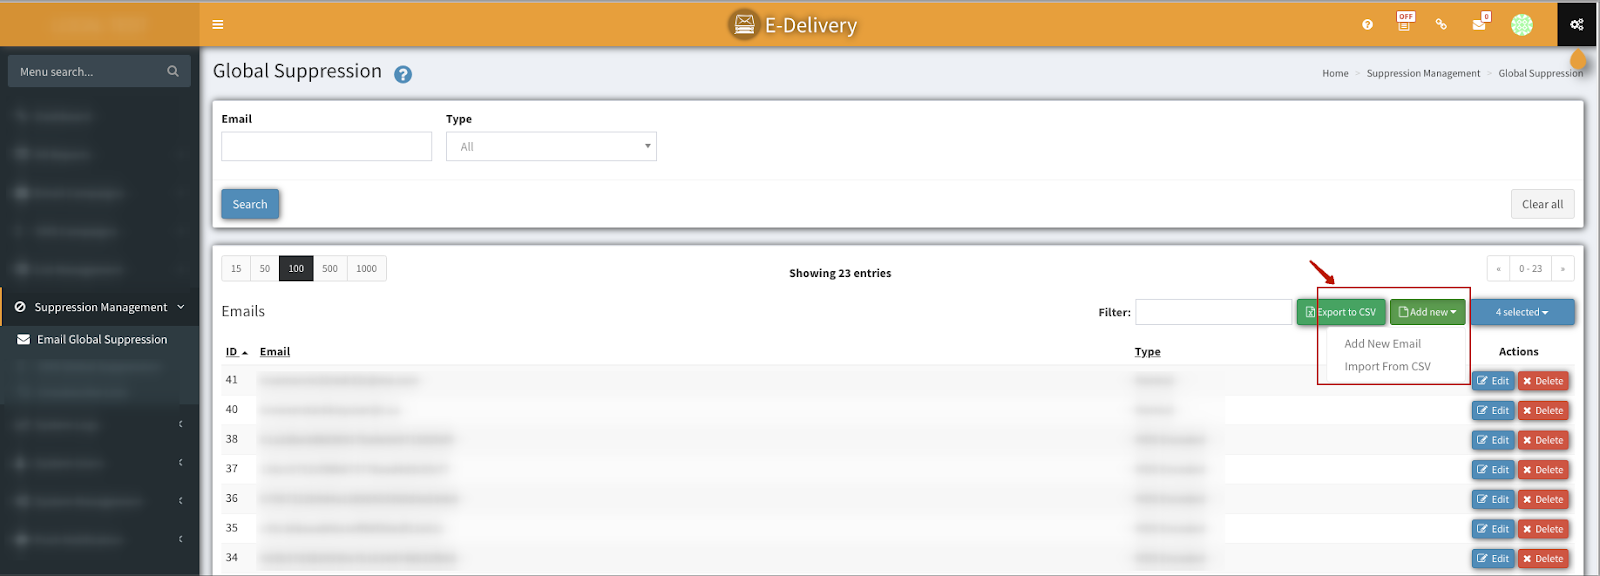
Email Global Suppression List
-
To add an email to ‘Email Global Suppression’, go to Suppression Management > Email Global Suppression section. Click on ‘Add new’, you have the option to ‘Add a New Email’ manually or ‘Import from CSV’.
(A). Add a New Email: from the popup type in the Email you want to add to suppression list or the MD5 format of that email. Then click on ‘Add’.
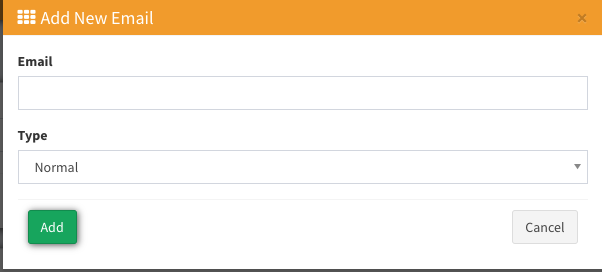
Note: If the email already exists in ‘ALL Contacts’ section, then the Email status will be changed to ‘Suppressed’. If the email does not exist, then the system will create a new contact with an email status ‘Suppressed’
(B). Import from CSV: from the popup,
(1). Choose a file from your computer where you have a list of either emails or MD5 format emails
(2). Check this option if your CSV contains only MD5 format emails
(3). You can download a sample file for easy formatting.
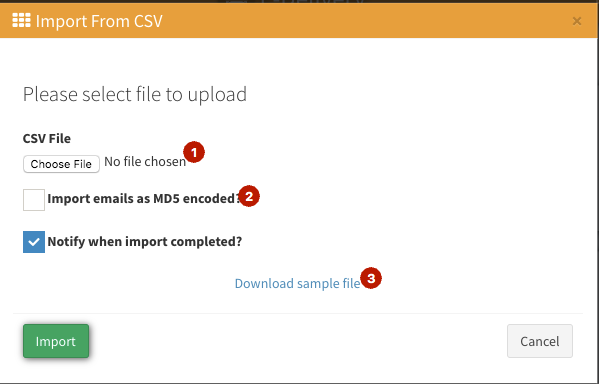
2. Once the CSV file is chosen, click on ‘Import’. You will see a CSV Field vs Import To mapping. Choose the correct mapping from your file.
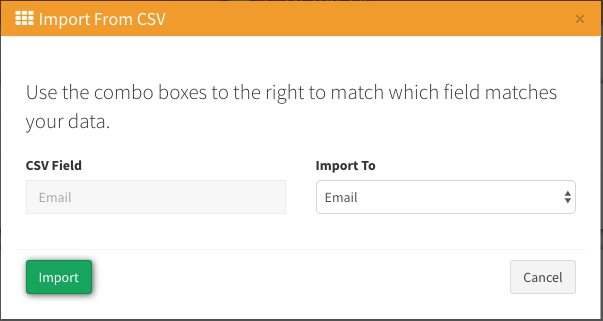
3. Once the mapping is done, click on ‘Import’ again to process your import request. In order to see the status of this import you can either go to System Logs > Cron tasks section or List Management > All Contacts > ‘Contacts Imports History’ tab
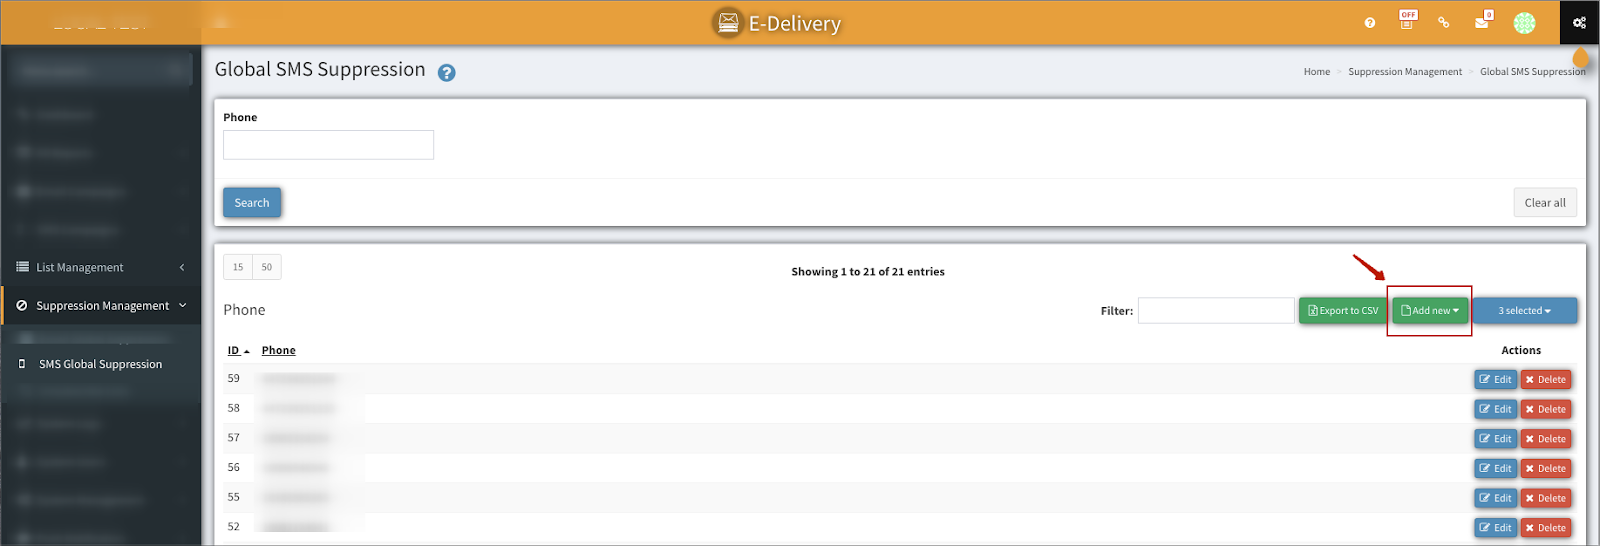
SMS Global Suppression List
-
To add a phone to ‘SMS Global Suppression’, go to Suppression Management > SMS Global Suppression section. Click on ‘Add new’, you have the option to ‘Add a New Phone’ manually or ‘Import from CSV’.
(A). Add a New Phone: from the popup type in the Phone you want to add to the suppression list. Currently, we support the US or UK phone numbers. Then click on ‘Add’.
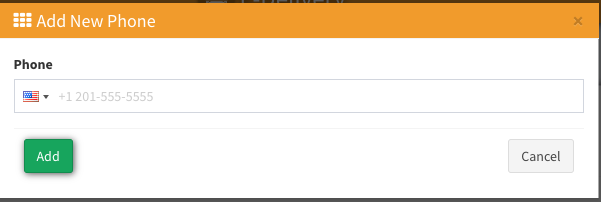
Note: If the email already exists in ‘ALL Contacts’ section, then the Phone Status will be changed to ‘Suppressed’. If the email does not exist, then the system will create a new contact with a phone status ‘Suppressed’
(B). Import from CSV: from the popup,
(1). Choose a file from your computer where you have a list of phones
(2). Check this option if you want to be notified when the import is done by email
(3). You can download a sample file for easy formatting.
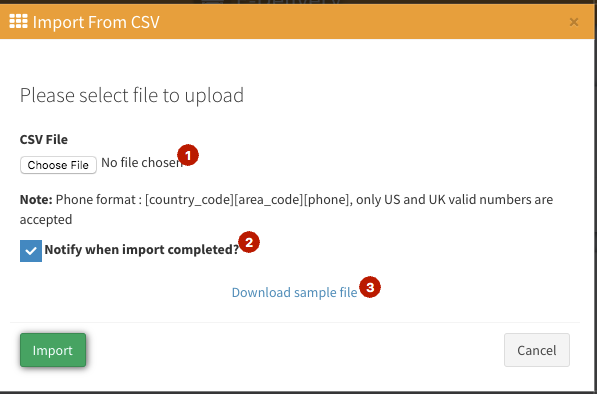
4. Once the CSV file is chosen, click on ‘Import’. You will see a CSV Fields vs Import To mapping. Choose the correct mapping from your file.

5. Once the mapping is done, click on ‘Import’ again to process your import request. In order to see the status of this import you can either go to System Logs > Cron tasks section or List Management > All Contacts > ‘Contacts Imports History’ tab.