Read more about the Event Tracking feature and its configuration in the “Event Tracking (LMS / Call Logic)” Knowledge Base article.
Google Sheet settings
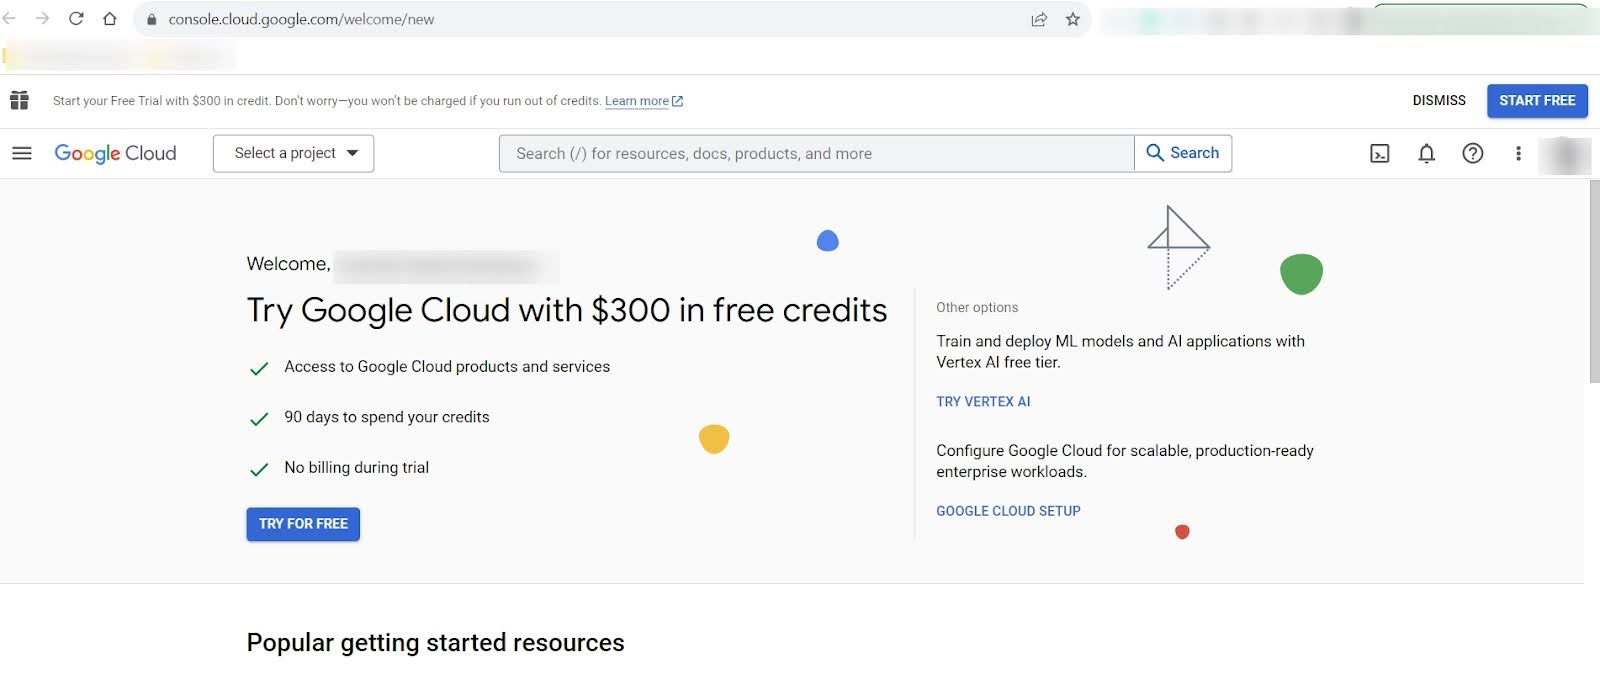
To set a specific Google Sheet that will be used for the tracking rule, go to the Google Cloud: https://console.cloud.google.com/
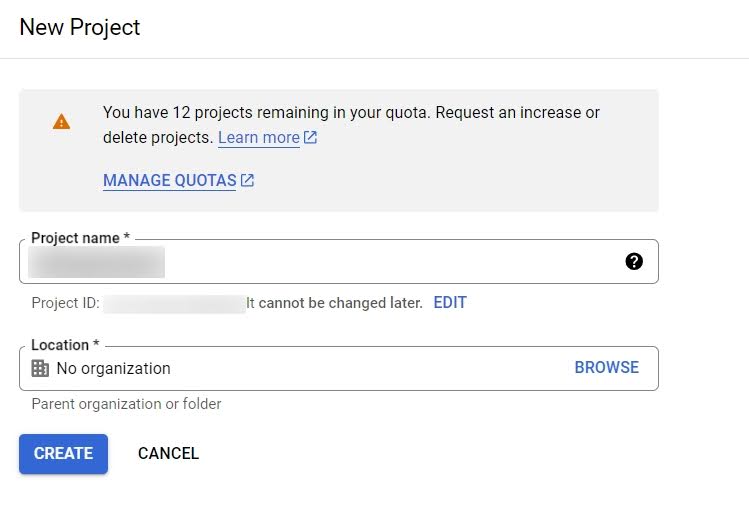
 Click the “Select a project” drop-down list, select the “New Project” option, and click the “NEW PROJECT” button in the pop-up window.
 Fill in the necessary fields and click the “CREATE” button to complete the action.
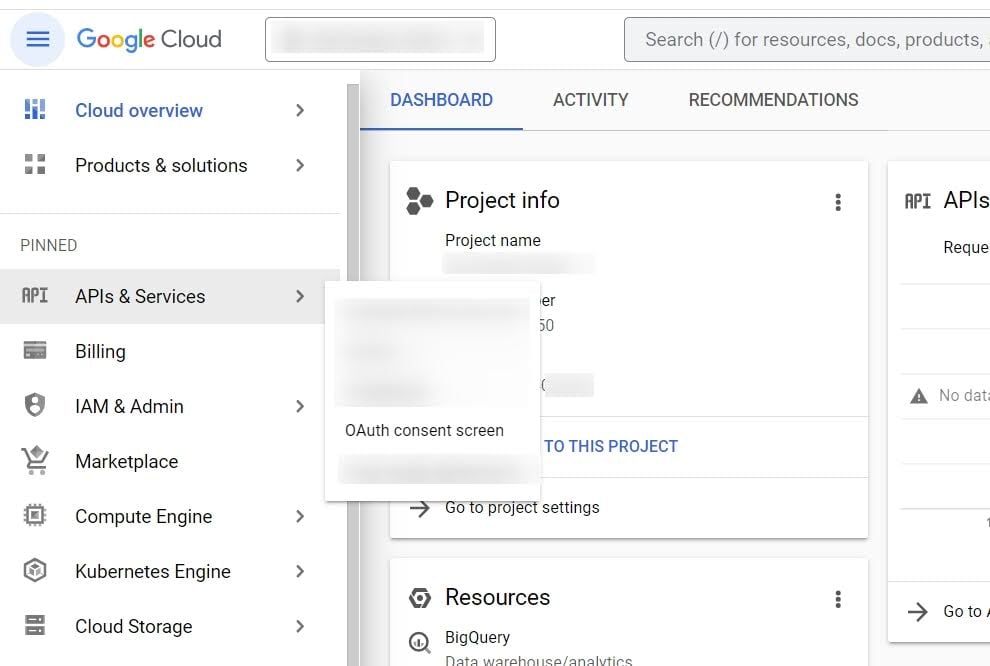
 Select the APIs & Services > OAuth consent screen section, select the User Type (it is recommended to use the “EXTERNAL” type), and click the “CREATE” button.
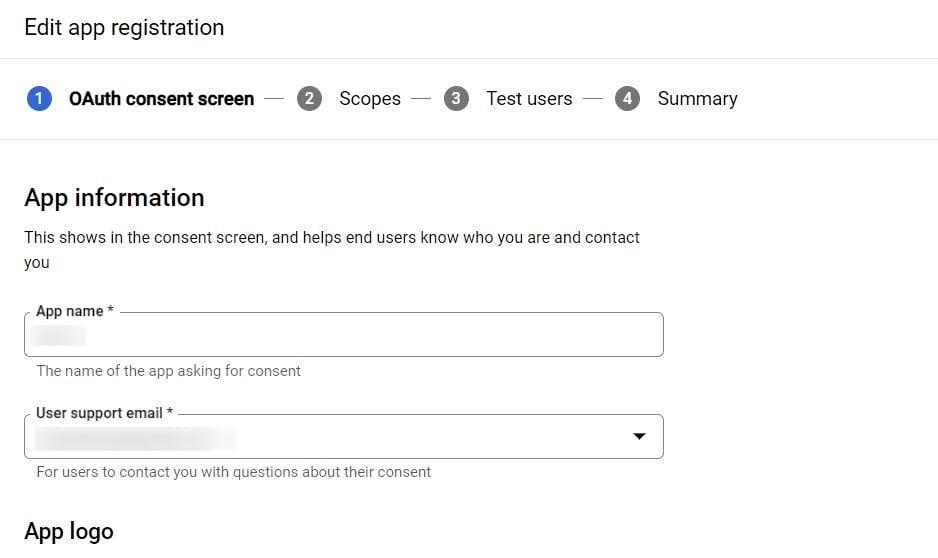
 In the “OAuth consent screen” section, fill in all necessary fields and click the “SAVE AND CONTINUE” button to proceed.
 In the “Scope” section, click the “ADD OR REMOVE SCOPES” button and click the “Google API Library” link to enter the API Library in the pop-up window.
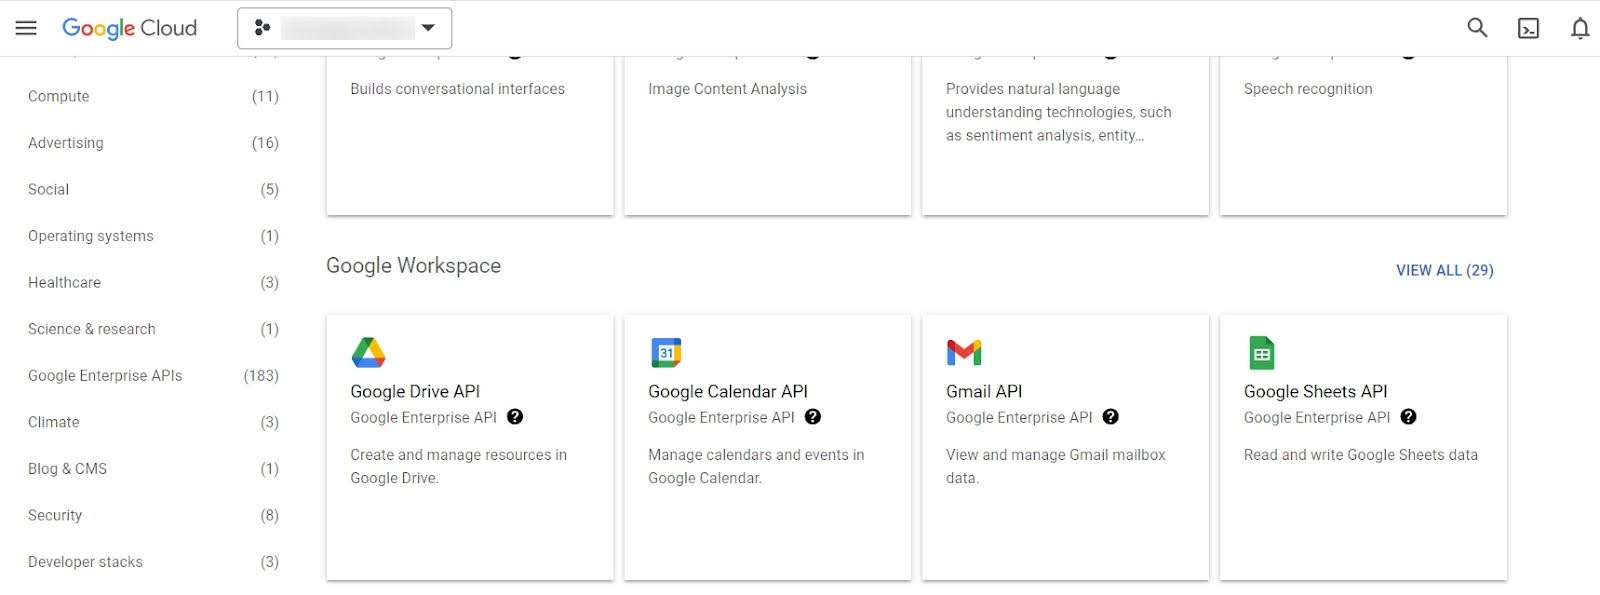
 Scroll down to the Google Workspace block, click the “Google Sheets API” widget, and click the “Enable” button.
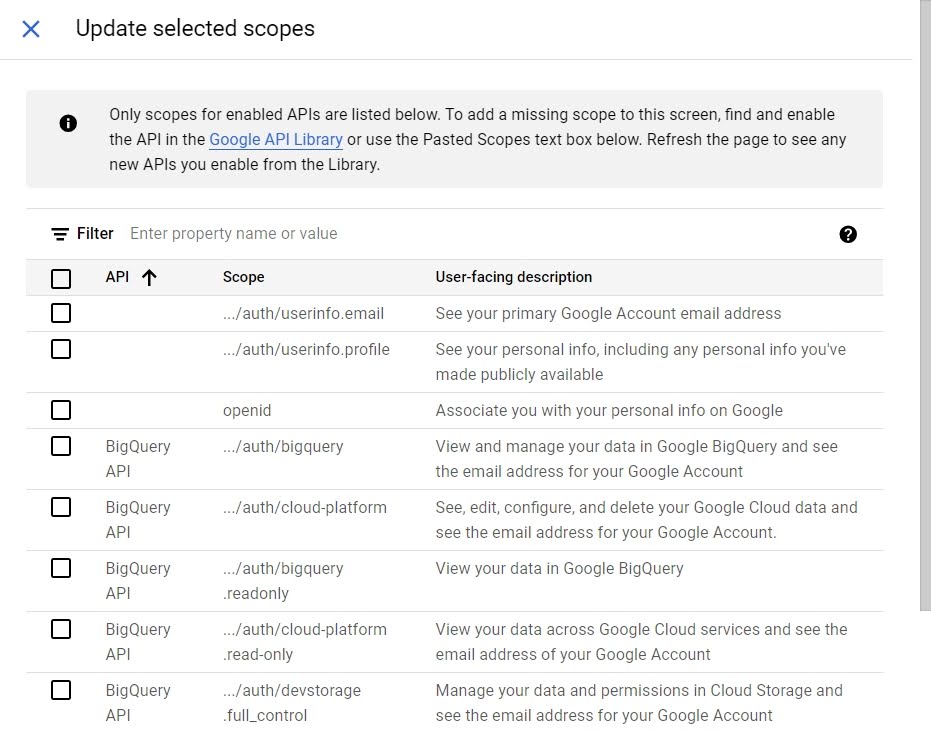
 Go back to the “Scope” section, refresh the page, and click the “ADD OR REMOVE SCOPES” button. In the “Update selected scopes” pop-up window select the .../auth/spreadsheets from the list and click the “UPDATE” button to complete the action. Click the “SAVE AND CONTINUE” button to proceed.
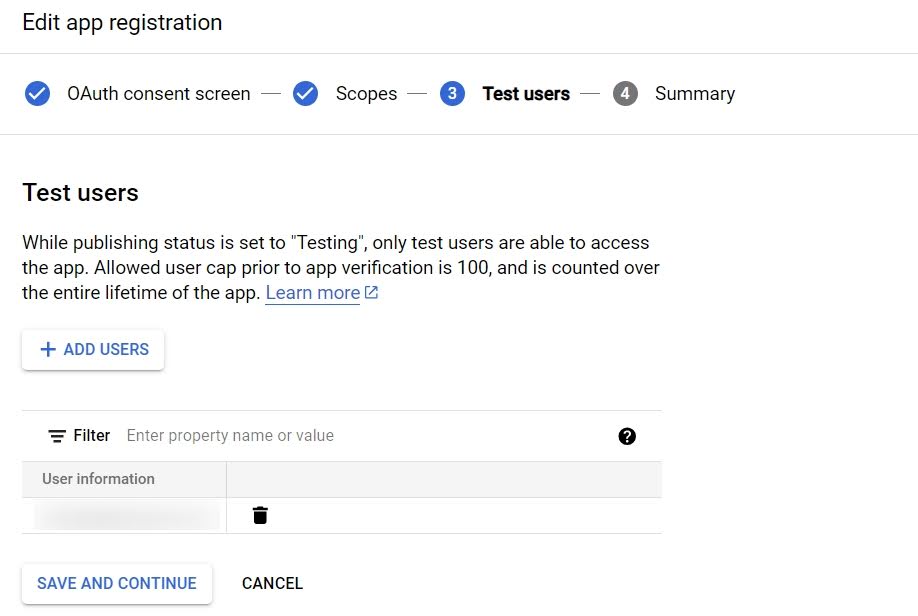
 In the “Test users” section, you can add the same email address as you did in the “OAuth consent screen” section. To add a user, click the “ADD USERS” button, enter the email address, and click the “ADD” button to complete the action. Click the “SAVE AND CONTINUE” button to proceed.
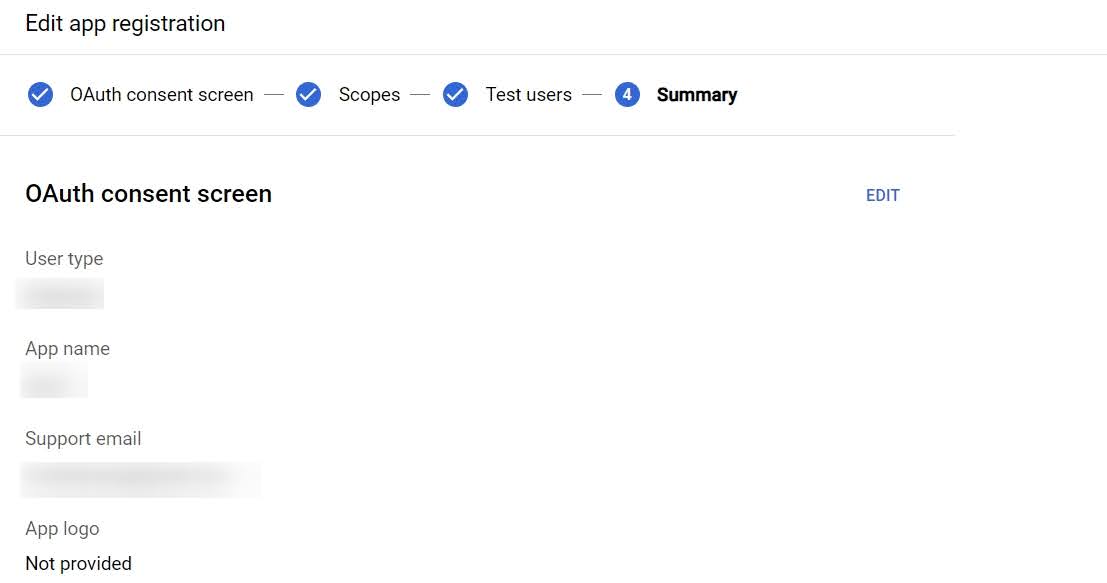
 In the “Summary” section, you can check and edit the information if necessary. Click the “BACK TO DASHBOARD” button to complete the app registration.
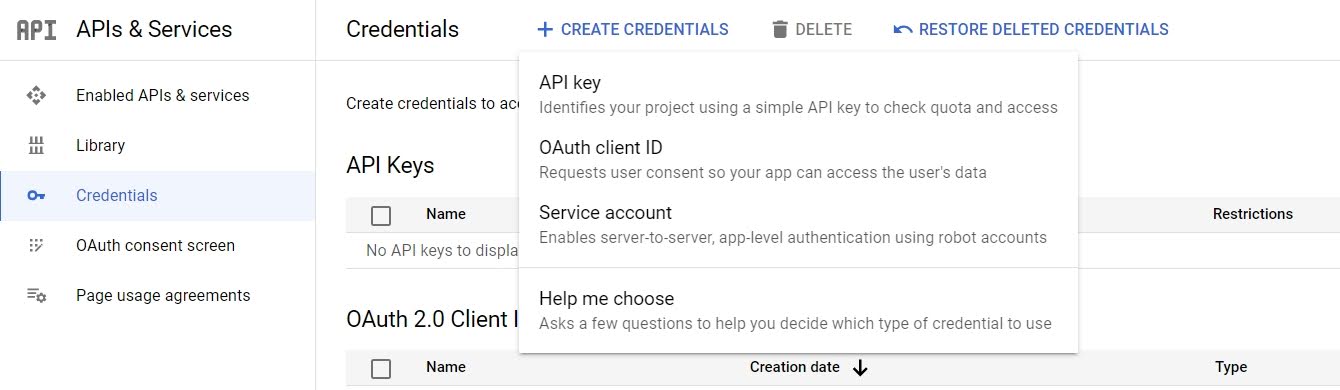
 Go to the “Credentials” section, click the “CREATE CREDENTIALS” drop-down list, and select the “Service account” option.
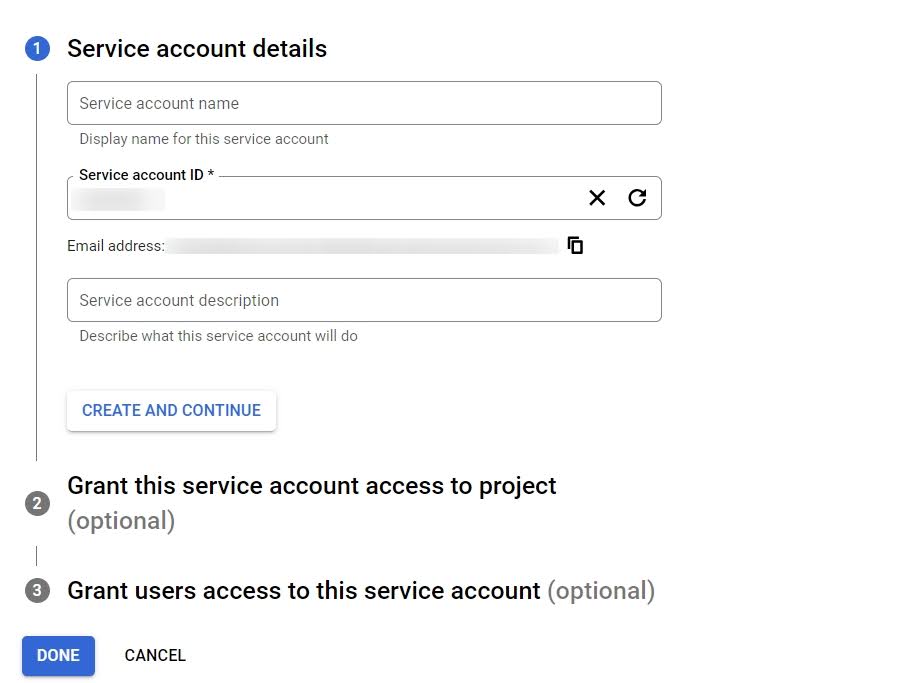
 Enter an account ID (any alphanumerical string) that will be displayed in the service email address and click the “DONE” button to proceed.
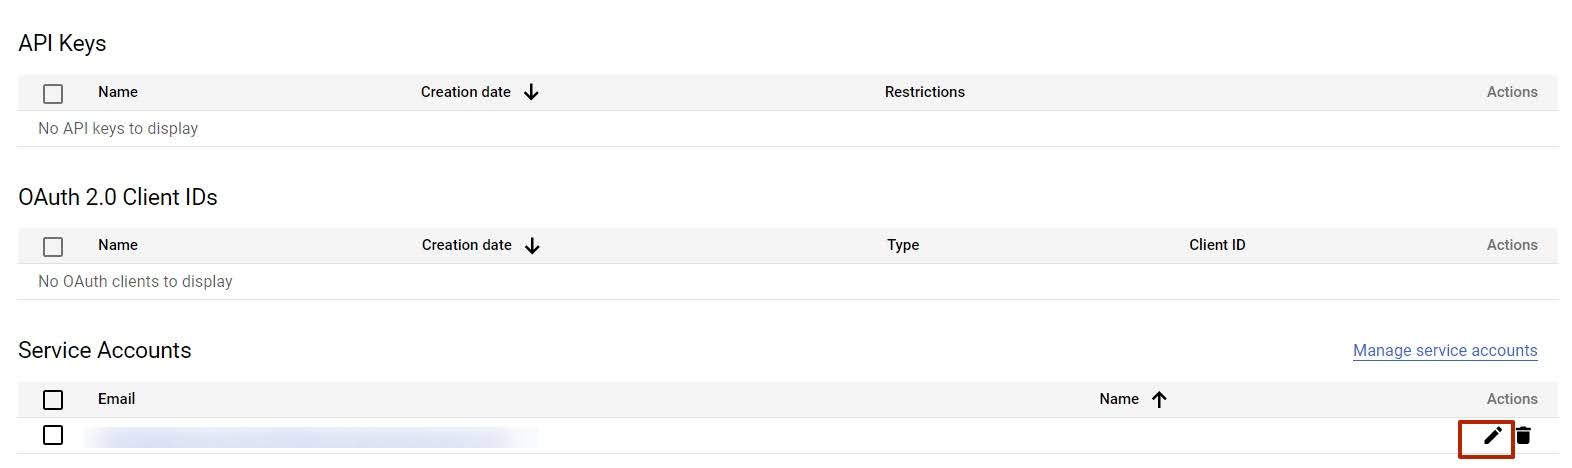
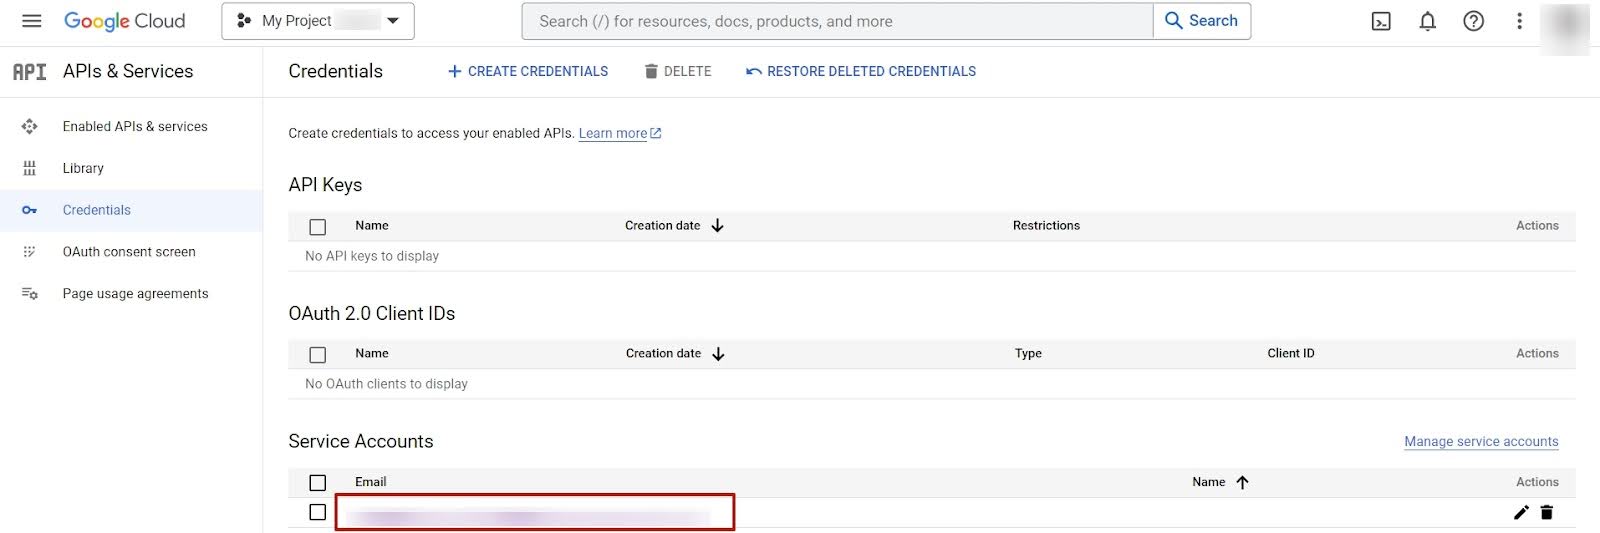
 In the Service Accounts block, click the “Edit” icon in the “Actions” column.
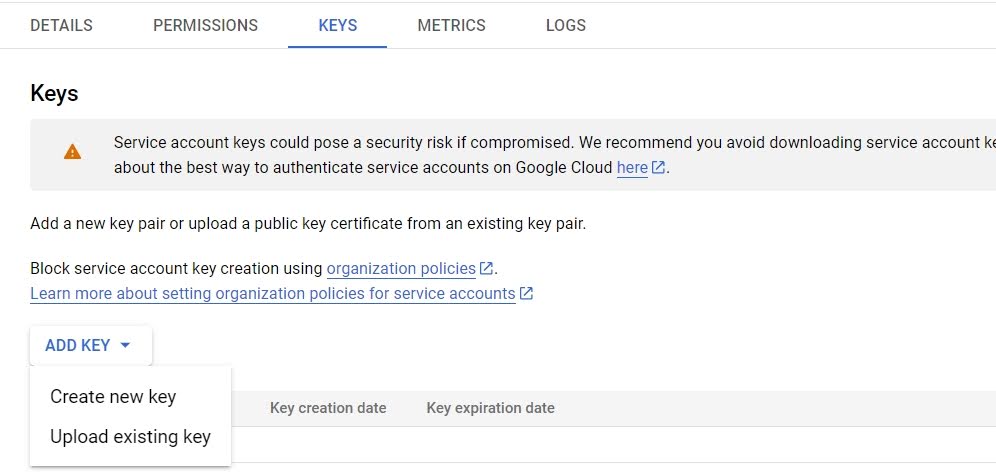
 Go to the “KEYS” tab, click the “ADD KEY” drop-down list, and select the “Create new key” option. Select the JSON option, click the “CREATE” button, and save the generated key.
Note: After creating the API Key, it will automatically download as a file that you will need to configure tracking. If you lose the file containing the key, you will not be able to download it again. In this case, you will need to create a new key.
 Go to the Google Sheets https://docs.google.com/spreadsheets and create a new sheet. Share this Google Sheet with the service email address created in previous steps (To view the service email address, go to My Project > APIs & Services > Credentials). Note: It is recommended to use the “Editor” type of the access.
Tracking Rule settings
This rule can be configured on Product, Publisher, and Campaign levels.
Read more about Tracking Rule setting up on the Product level in this Knowledge Base article.
Read more about Tracking Rule setting up on the Campaign level in this Knowledge Base article.
Read more about Tracking Rule setting up on the Publisher level in this Knowledge Base article.
To create this tracking rule, fill in the following fields in the “Add Rule” pop-up window:
- Trigger: Select the event that triggers the action:
- [LMS] Lead Sold: The lead is sold through the Campaign.
- [LMS] Lead Rejected: The lead is not accepted by any Campaign.
- [LMS] Post Reject: The post was rejected (for Ping-Post products only).
- [LMS] Campaign Rejected: The Campaign has rejected the lead.
- [LMS] Publisher Earning Received: The Publisher has received earnings.
- [LMS] Campaign Sold: The lead was sold to the Сampaign.
- [LMS] Revenue Ping Back: The revenue pingback has been sent.
- [LMS] Lead Offer Received: The lead status changed to "Offer Received" after a successful ping (for Ping Post Products only).
- [Call Logic] Lead Sold: The lead was sold to the Publisher.
- [Call Logic] Lead Rejected: The lead was rejected by the Publisher.
[Call Logic] Campaign Rejected: The Campaign has rejected the lead. - [Call Logic] Campaign Accepted: The Campaign has accepted the lead.
- [Call Logic] Campaign Sold: The lead was sold to the Campaign.
- [Call Logic] Call Recorded: Call recorded and ready to download.
- [Call Logic] Publisher Earning Received: Fires every time the Publisher gets earning (Direct Sold / Revenue Post-back).
- [Call Logic] Buyer Response: The Buyer has answered the call.
- [Call Logic] Disposition Updated: Buyer Disposition has been updated.
- [Call Logic] Publisher Earning Adjusted: Lead Adjustment happens.
- [Call Logic] Lead Return: Lead Return happens.
- [Call Logic] Lead Partial Return: Lead Partial Return happens.
-
- [Call Logic] Duration to sell reached: The lead has reached the "Duration to sell" time.
- [Call Logic] AMD: The answering machine is detected on the Buyer's side.
- [Call Logic] Revenue Postback: Revenue Postback sent.
- Action: Select the “[TPS] Google Sheets” option.
Once you select the preferable event, click the “Next” button to proceed with the setup.
The “Trigger Settings” block allows you to set up additional filters for the selected event. The filter fields are optional. If no filters are set up, the action will be triggered for all the leads that fit the event trigger.
Depending on the user role, platform, and configuration level, the following filters for trigger settings are available:
- Method: Select the Method (POST/FORM).
- Publisher: Select the Publisher.
- Publisher Exclude: Select the Publisher to exclude from the rule.
- Channel: Select the Channel.
- Channel Exclude: Select the Publisher Channel to exclude from the rule.
- Call Tracking Pool: Select the call tracking pool (available only for Call Logic triggers).
- Source: Select the Source.
- Source Exclude: Select the Source to exclude from the rule.
- Buyer: Select the Buyer.
- Campaign: Select the Campaign.
- Pingtree: Select the Pingtree.
- Price Restrictions: Select the Price restrictions (Price is greater than 0, Price is greater than a certain value, Price is greater than or equal to a certain value, Price is lower than a certain value, Price is lower than or equal to a certain value, Price range inclusive). Note: The “Price range inclusive” value is available only for the “Lead Sold” and “Campaign Sold” triggers.
- Price Restriction Value: Enter the price value.
- Min Price: Enter the minimum price value to trigger the rule by the price range (available only for the “Price range inclusive” value in the “Price Restrictions” field).
- Max Price: Enter the maximum price value to trigger the rule by the price range (available only for the “Price range inclusive” value in the “Price Restrictions” field).
-1.png?hsLang=en)
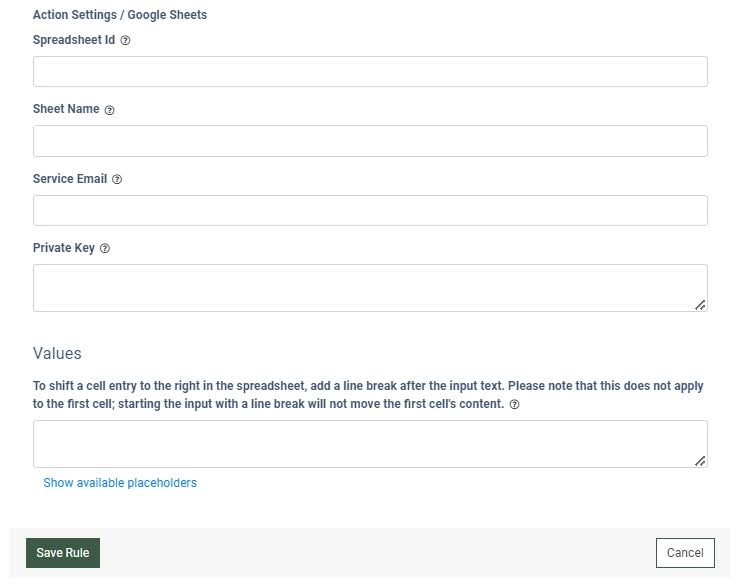
The “Action Settings / Google Sheets” block allows you to configure the action required for the rule setup:
- Spreadsheet Id: Enter the unique identification number of the spreadsheet (the ID can be retrieved from the spreadsheet URL).
- Sheet Name: Enter the name of the sheet. Please note, that it must be exactly the name of the sheet in the document, but not the document name.
- Service Email: Enter the service email address.
- Private Key: Enter the key from your service account. You can find it in your Google Cloud account, the “KEYS” tab.
- Values: Enter the placeholders to define the data that should be added to the spreadsheet.
Click the “Save Rule” button to confirm.