Read more about the Event Tracking feature and its configuration in this Knowledge Base article.
This rule can be configured at the Product and Campaign levels.
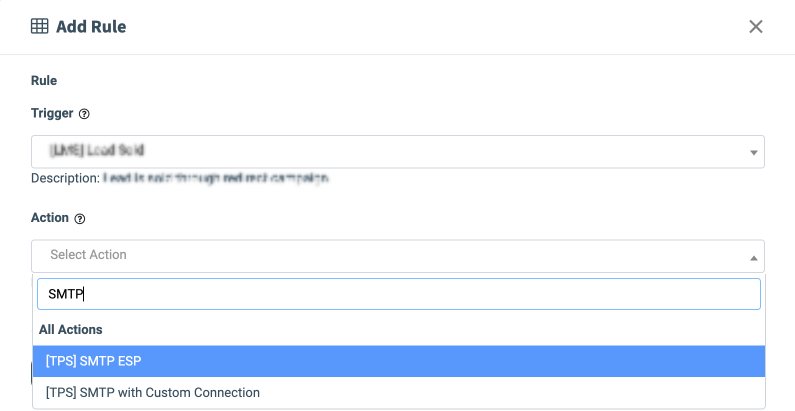
Note: This rule offers two options: “SMTP ESP” to send an email using a predefined ESP connection, and “SMTP with Custom Connection” to send an email via a custom SMTP server when the selected trigger occurs. Choose the option that best fits your business needs.
Read more about the Tracking Rule setup at the Product level in this Knowledge Base article.
Read more about the Tracking Rule setup at the Campaign level in this Knowledge Base article.
To create this tracking rule, fill in the following fields in the “Add Rule” pop-up window:
- Trigger: Select the event that triggers the action:
- [LMS] Lead Sold: The lead is sold through the Campaign.
- [LMS] Lead Rejected: The lead is not accepted by any Campaign.
- [LMS] Campaign Rejected: The Campaign has rejected the lead.
-
- [LMS] Publisher Earning Received: The Publisher has received earnings.
- [LMS] Campaign Sold: The lead was sold to the Сampaign.
- [LMS] Revenue Ping Back: The revenue pingback has been sent.
-
- [LMS] Lead Offer Received: The lead status changed to "Offer Received" after a successful ping (for Ping Post Products only).
- [Call Logic] Lead Sold: The lead was sold to the Publisher.
- [Call Logic] Lead Rejected: The lead was rejected by the Publisher.
- [Call Logic] Campaign Rejected: The Campaign has rejected the lead.
- [Call Logic] Campaign Accepted: The Campaign has accepted the lead.
- [Call Logic] Campaign Sold: The lead was sold to the Campaign.
- [Call Logic] Publisher Earning Received: Fires every time the Publisher gets earning (Direct Sold / Revenue Post-back).
- [Call Logic] Buyer Response: The Buyer has answered the call.
- [Call Logic] Disposition Updated: Buyer Disposition has been updated.
- [Call Logic] Publisher Earning Adjusted: Lead Adjustment happens.
- [Call Logic] Lead Return: Lead Return happens.
- [Call Logic] Lead Partial Return: Lead Partial Return happens.
-
- [Call Logic] Duration to sell reached: The lead has reached the "Duration to sell" time.
- [Call Logic] AMD: The answering machine is detected on the Buyer's side.
- [Call Logic] Revenue Postback: Revenue Postback sent.
- Action: Select the “[TPS] SMTP” option.
![]()
Once you select the preferred event, click the “Next” button to proceed with the setup.
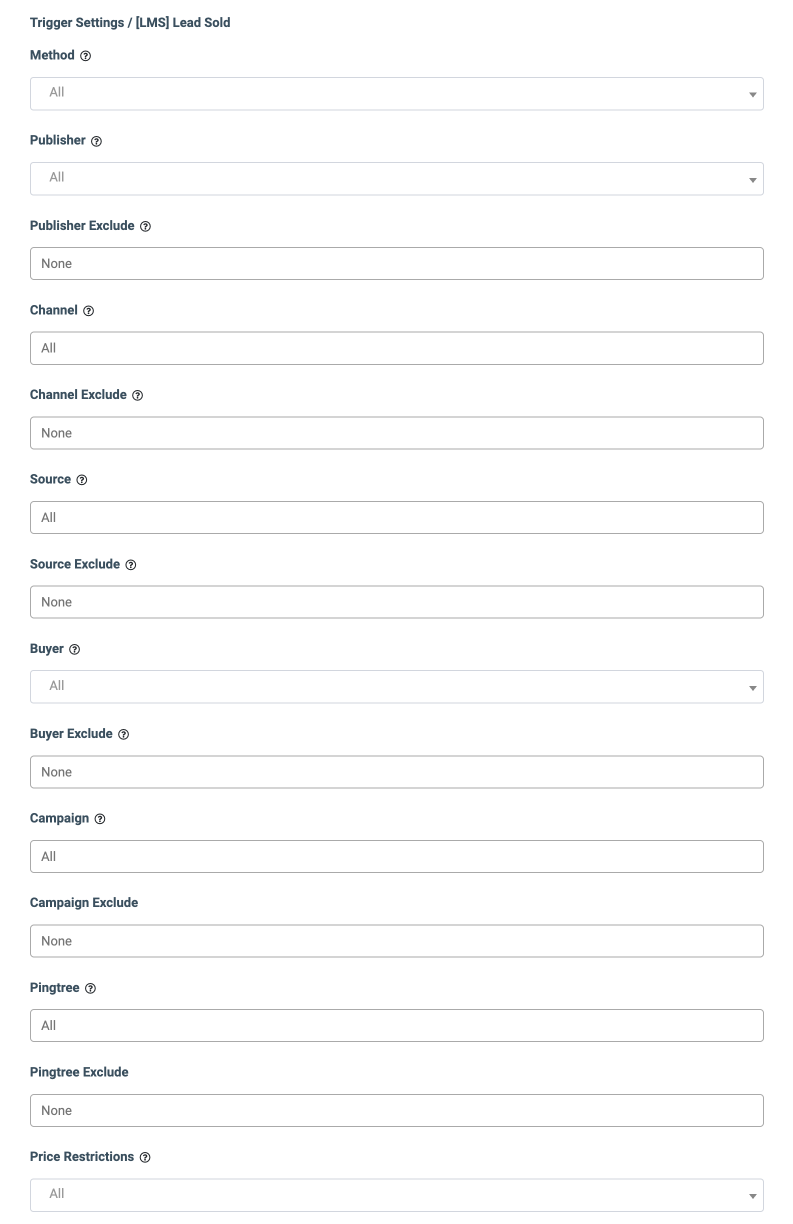
The “Add Rule” window allows you to set up additional filters for the selected event. The list of available filters may vary based on the user role, platform, and configuration level. The filter fields are optional. If no filters are set up, the action will be triggered for all the leads that fit the event trigger.
Depending on the user role, platform, and configuration level, the following filters for trigger settings are available:
- Method: Select the Method (POST/FORM).
- Tracking Strategy: Select the tracking strategy (Direct Sold Only / PingBack Only).
- Publisher: Select the Publisher.
- Publisher Exclude: Select the Publisher to exclude from the rule.
- Channel: Select the Channel.
- Channel Exclude: Select the Publisher Channel to exclude from the rule.
- Call Tracking Pool: Select the call tracking pool (available only for Call Logic triggers).
- Source: Select the Source.
- Source Exclude: Select the Source to exclude from the rule.
- Buyer: Select the Buyer.
- Buyer Exclude: Select the Buyer to exclude from the rule.
- Campaign: Select the Campaign.
- Campaign Exclude: Select the Campaign to exclude from the rule.
- Pingtree: Select the Pingtree.
- Pingtree Exclude: Select the Pingtree to exclude from the rule.
- Price Restrictions: Select the Price restrictions (Price is greater than 0, Price is greater than a certain value, Price is greater than or equal to a certain value, Price is lower than a certain value, Price is lower than or equal to a certain value, Price range inclusive). Note: The “Price range inclusive” value is available only for the “Lead Sold” and “Campaign Sold” triggers.
- Price Restriction Value: Enter the price value.
- Min Price: Enter the minimum price value to trigger the rule by the price range (available only for the “Price range inclusive” value in the “Price Restrictions” field).
- Max Price: Enter the maximum price value to trigger the rule by the price range (available only for the “Price range inclusive” value in the “Price Restrictions” field).
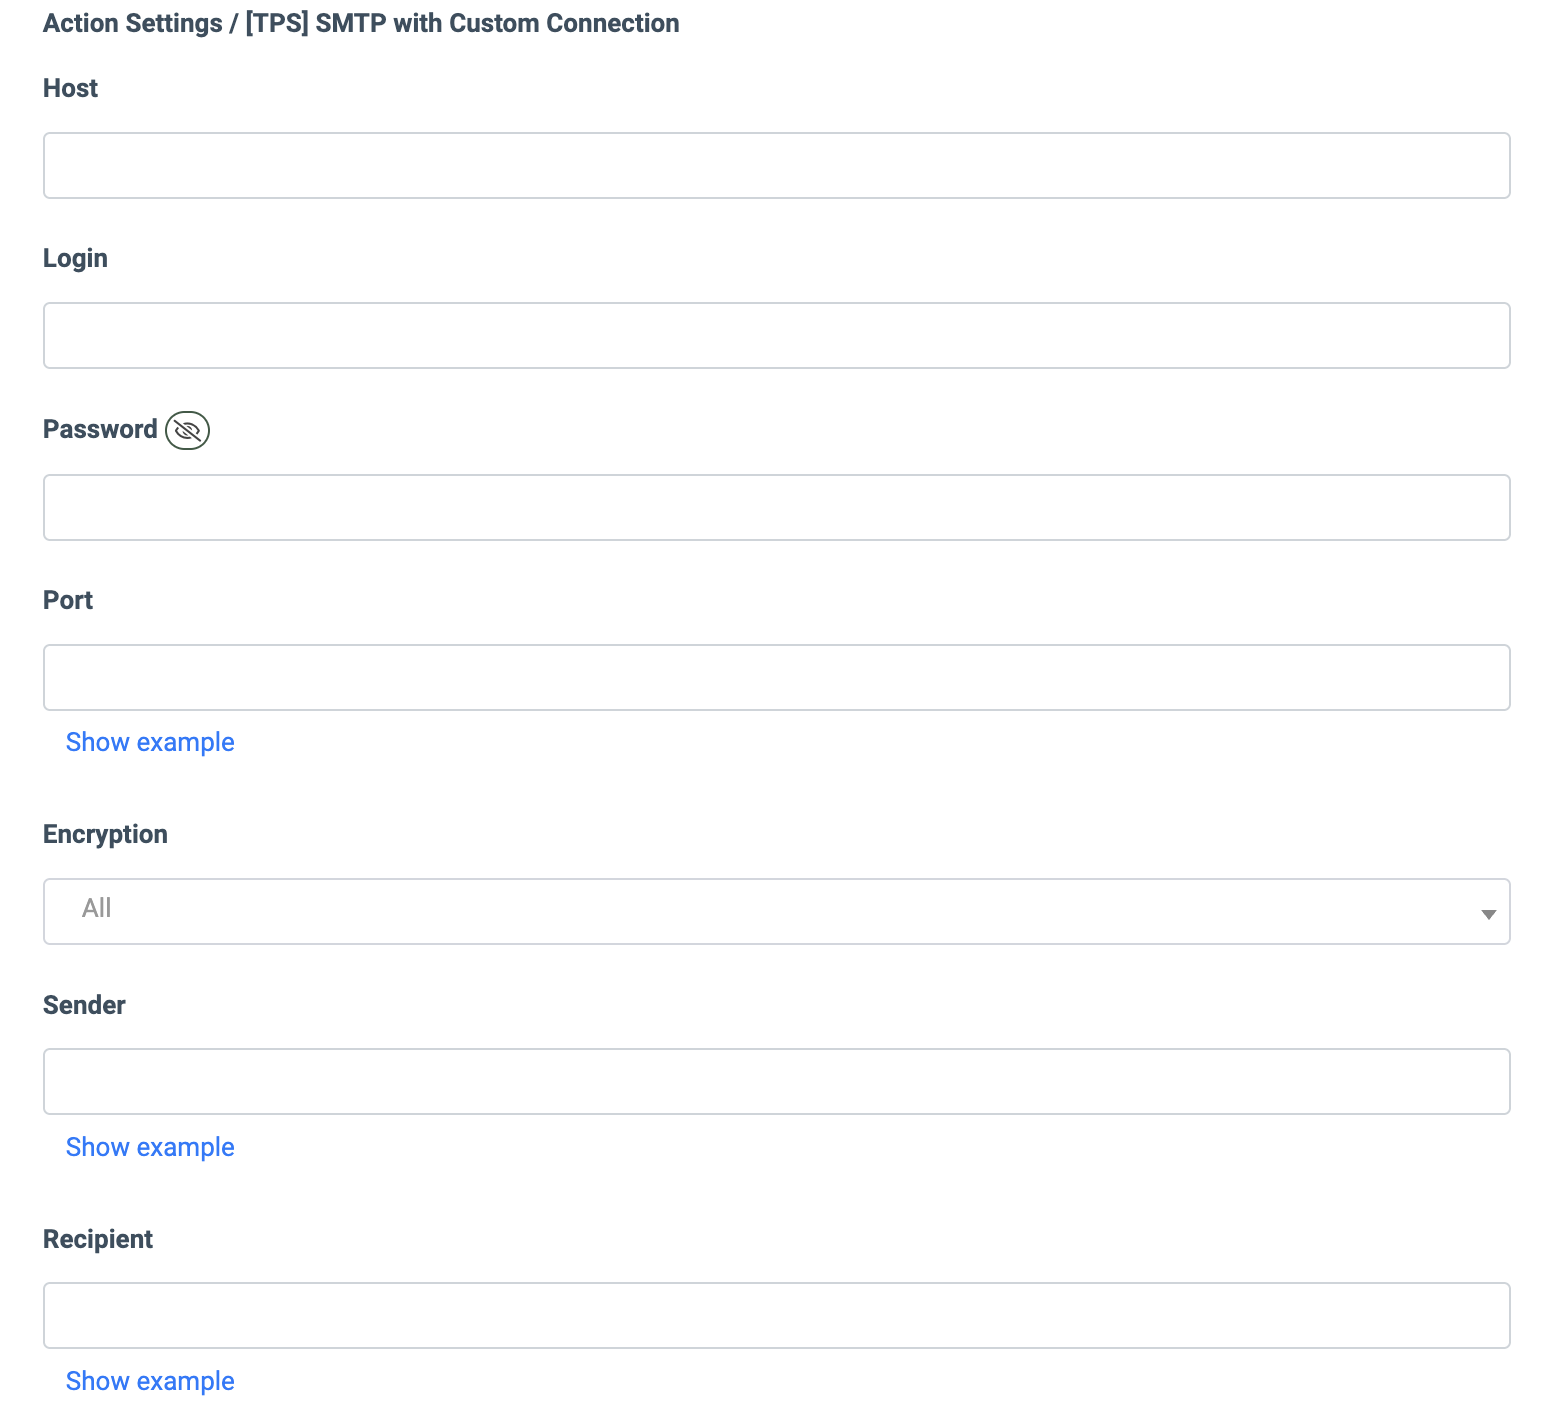
The “Action Settings / [TPS] SMTP” block allows you to configure the action required for the rule setup:
- SMTP-connection: Select the type of connection (Manual connection / ESP Service). Note: The available option depends on the rule type selected (SMTP ESP / SMTP with Custom Connection).
- Host: Enter the name of the host (Manual Connection only).
- Login: Enter your login (Manual Connection only).
- Password: Enter your password (Manual Connection only).
- Port: Enter the port code (Manual Connection only).
- Encryption: Select the encryption type (No encryption/Use TLS encryption/Use SSL encryption), (Manual Connection only).
- Sender Name: Enter the sender’s email address and name (the name is optional). To view the example, click the “Show example” button.
- Recipient: Enter the recipient’s email address and name (the name is optional). To view the example, click the “Show example” button.
- Check Connection: Click the button to verify if the connection is valid.
- Use Twig Engine: Select the “Yes” option to use the Twig Engine.
- Subject: Enter the subject of the email. You can add placeholders to the subject. To view available placeholders, click the “Show available placeholders” button.
- Body: Enter the body of the email. You can add placeholders to the body. To view available placeholders, click the “Show available placeholders” button.
- Content Type: Select the content type (Text / HTML / All).
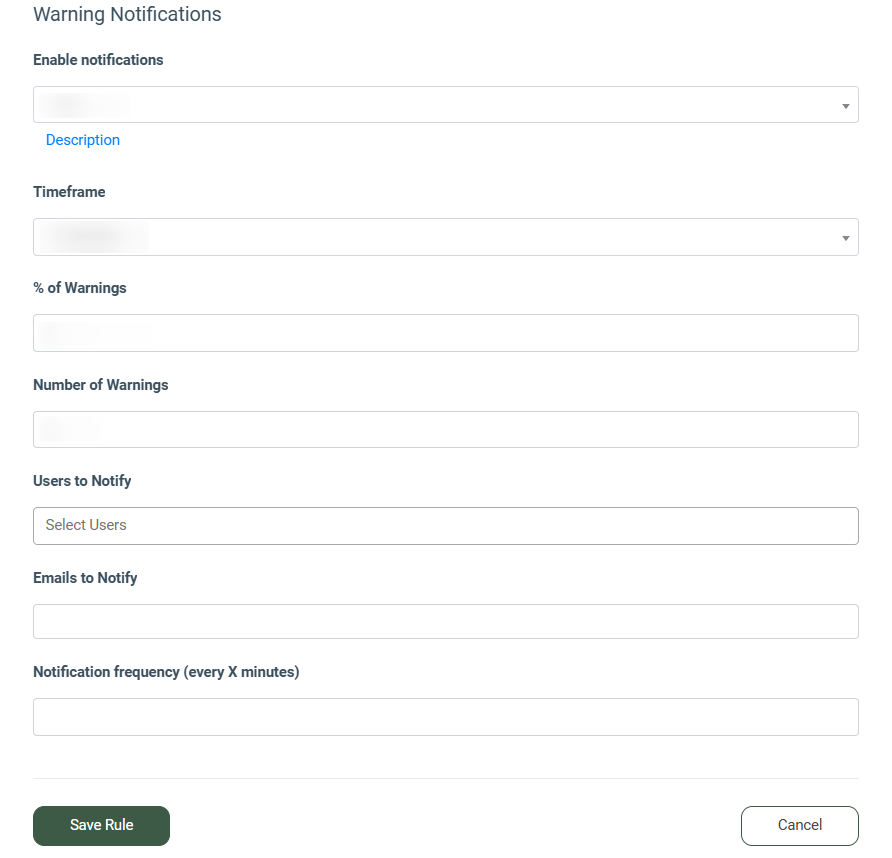
The “Warning Notifications” block allows you to set up the email notifications for cases when processing the rules, errors appear:
- Enable notifications: Select the option to enable the warning notifications and receive automatic email alerts when too many warnings are detected within a selected timeframe (Yes / No). Example: Enable notifications and set the Timeframe to “1 hour,” % of Warnings to “10,” and Number of Warnings to “100.” If, within one hour, more than 10% of your events or over 100 total warnings occur, the system will send an alert to the listed Emails so you can investigate the issue quickly. Note: Enabling notifications will incur an additional charge of $0.0001 on top of the regular price.
- Timeframe: Select the time period within which the warning data will be analyzed (5 minutes / 3 hours / 6 hours).
- % of Warnings: Enter the percentage of events with warnings that must exceed this value within the selected timeframe.
- Number of Warnings: Enter the number of warnings that must exceed this value within the selected timeframe.
- Users to Notify: Select the users to whom the system will send the warning notification.
- Emails to Notify: Enter the email addresses of notification recipients, separated by a comma.
- Notification frequency (every X minutes): Enter the value for the notification frequency in minutes.