Exit Offer
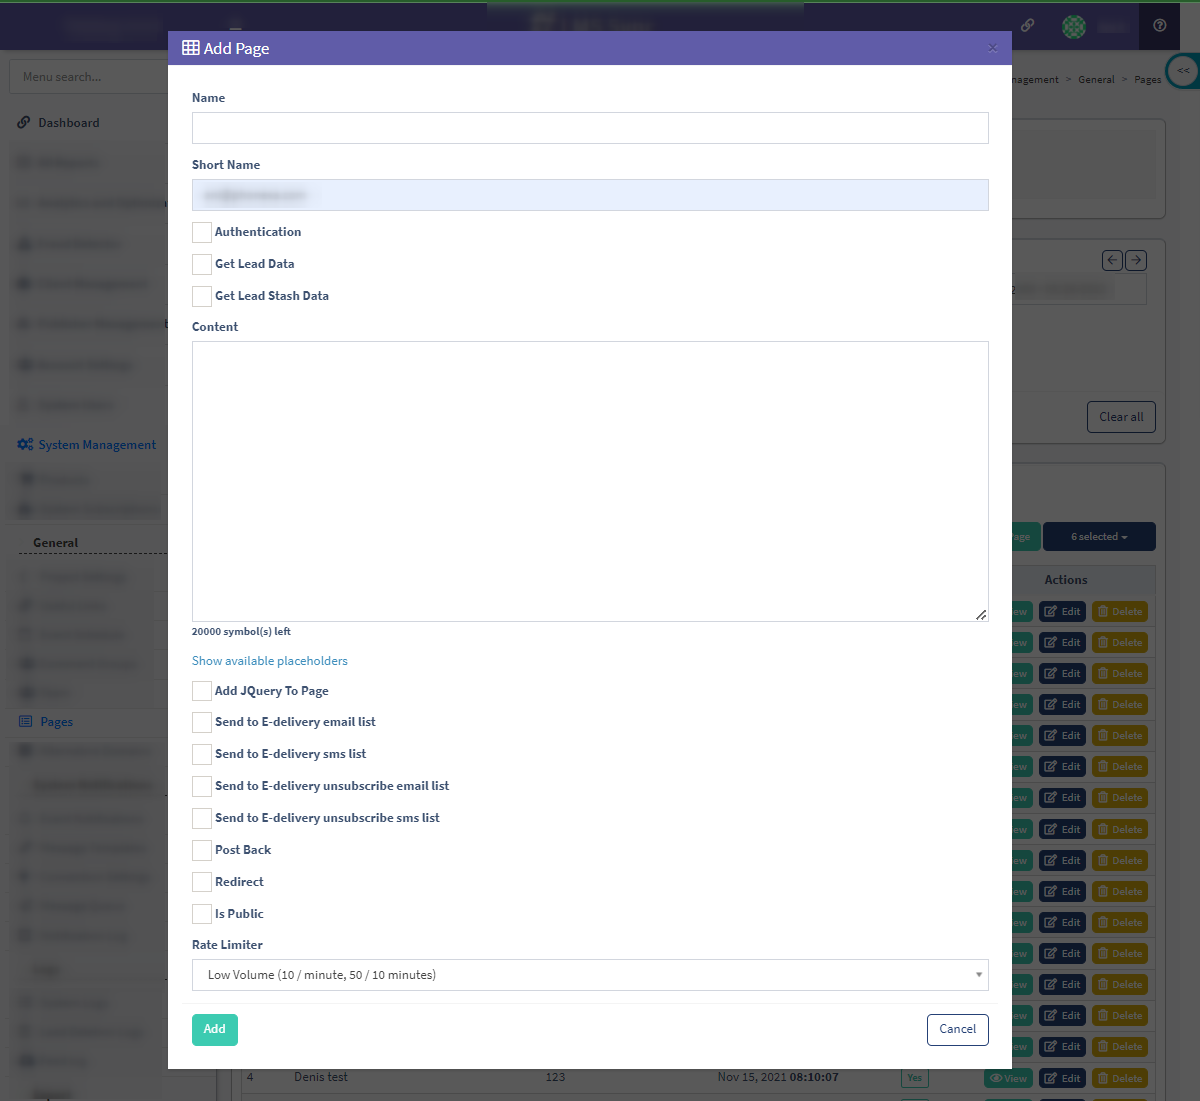
To set up an Exit Offer, go to the System Management > General > Pages section and click the” “Add Page” button.
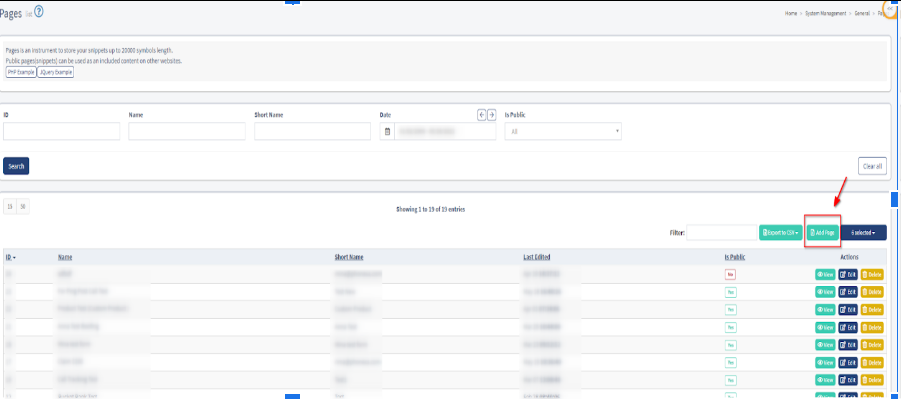
Fill in the “Name” and “Short Name” fields and set the “In Public” parameter.
Click the “Add” button to save.
Exit Page Campaign
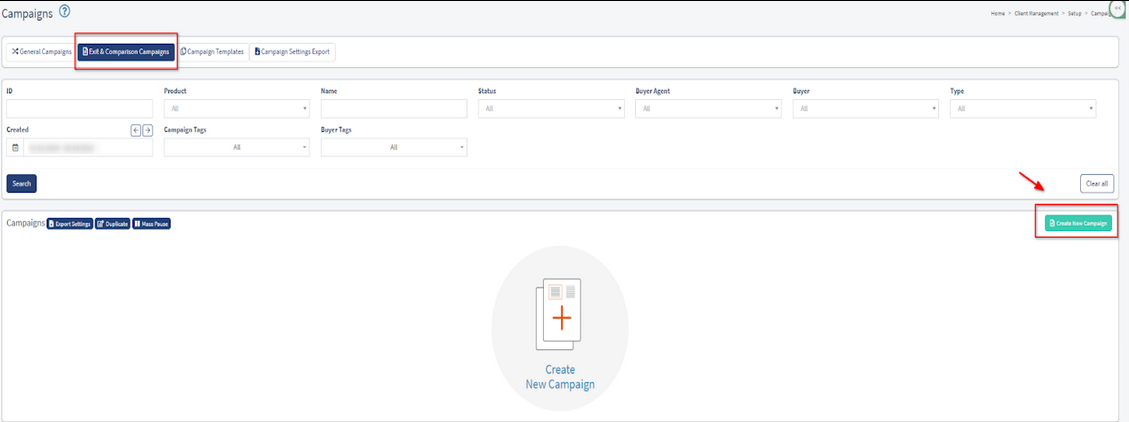
To create an Exit Page Campaign, go to the Client Management > Setup > Campaigns, then select the Exit & Comparison Campaigns tab.
Click the green “Create New Campaign” button.
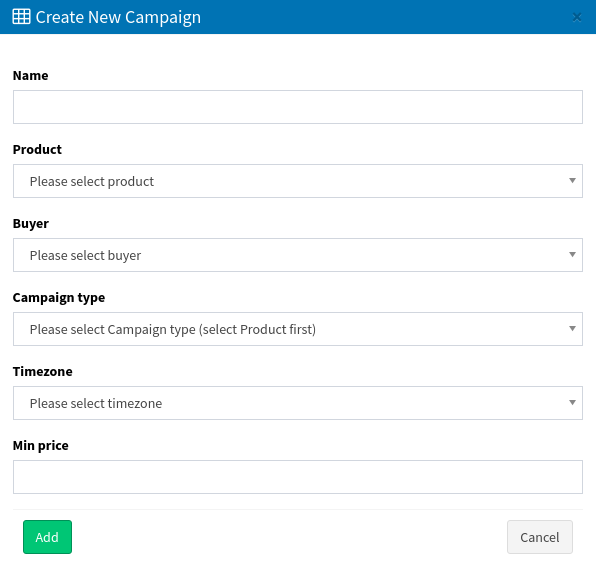
Fill in the required fields and select the Exit Page Campaign in the Campaign Type field. Click the “Add” button to proceed.
To set up the Exit Page Campaign, go to the Client Management > Setup > Campaigns > Exit & Comparison Campaigns tab. Click the “Configure” button, and the system will forward you to the required page.
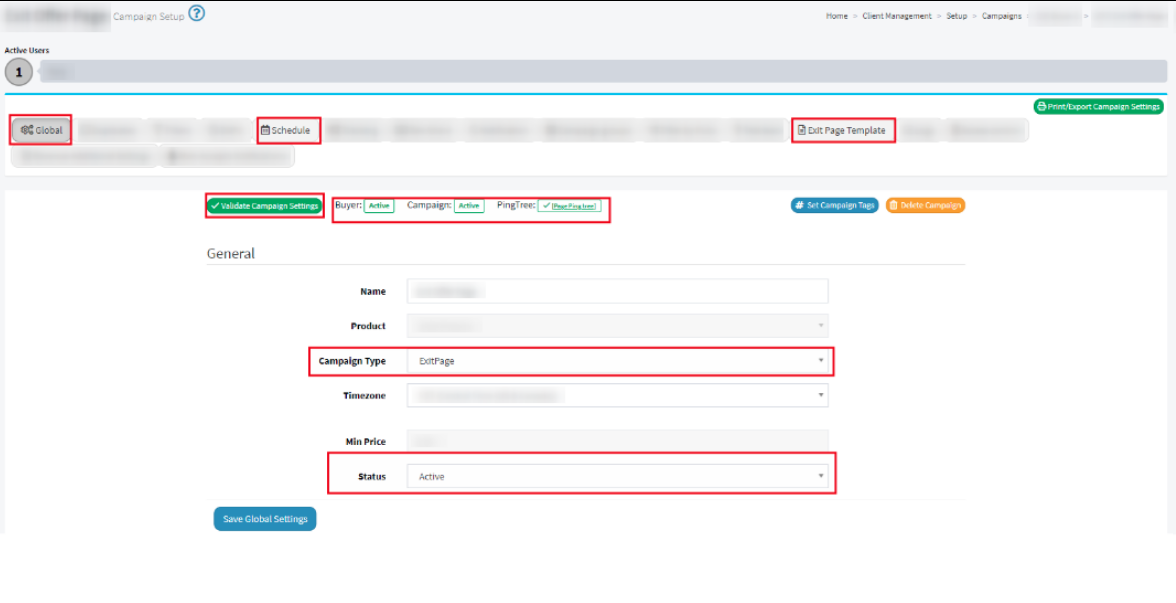
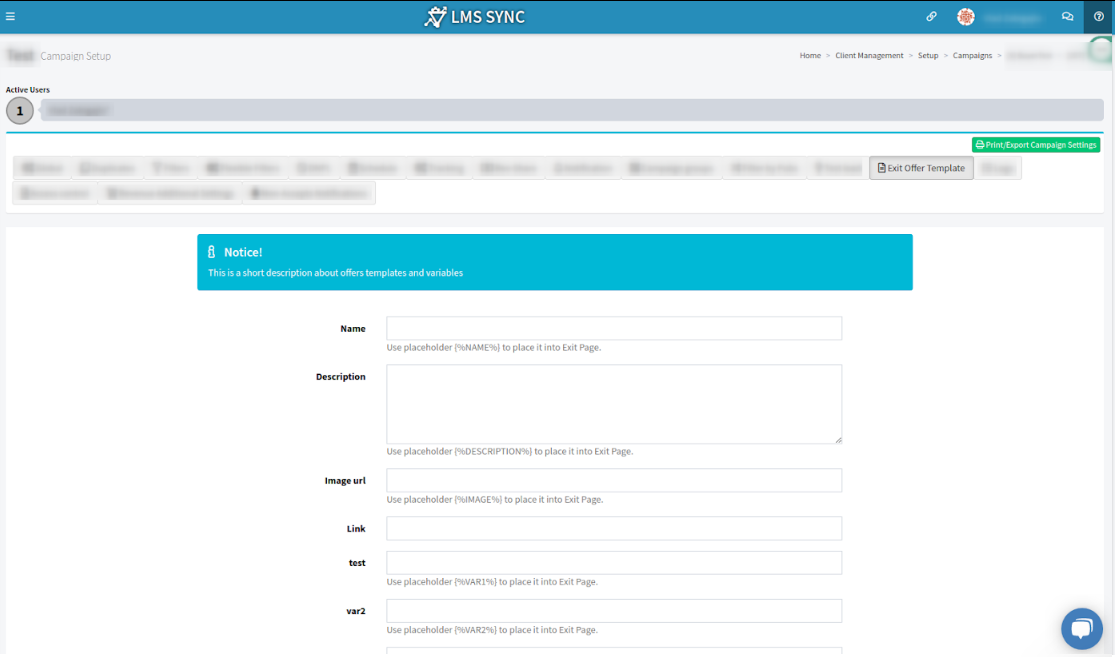
Fill out the “Global”, “Schedule”, and “Exit Page Template” tabs to complete the exit campaign setup.
-
Use the “Global” tab to validate the campaign settings and select the campaign type, status, and other information.
-
In the “Schedule” tab, you can set up the timeframes when the exit campaign is running.
Exit Offer Ping Tree
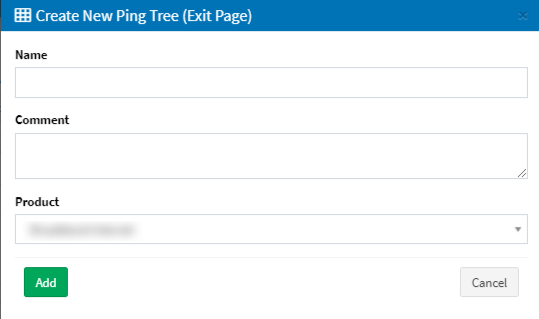
To create a new Exit Offer Ping Tree, go to Client Management > Setup > Ping Tree Settings, then click on the Exit Offer List tab.
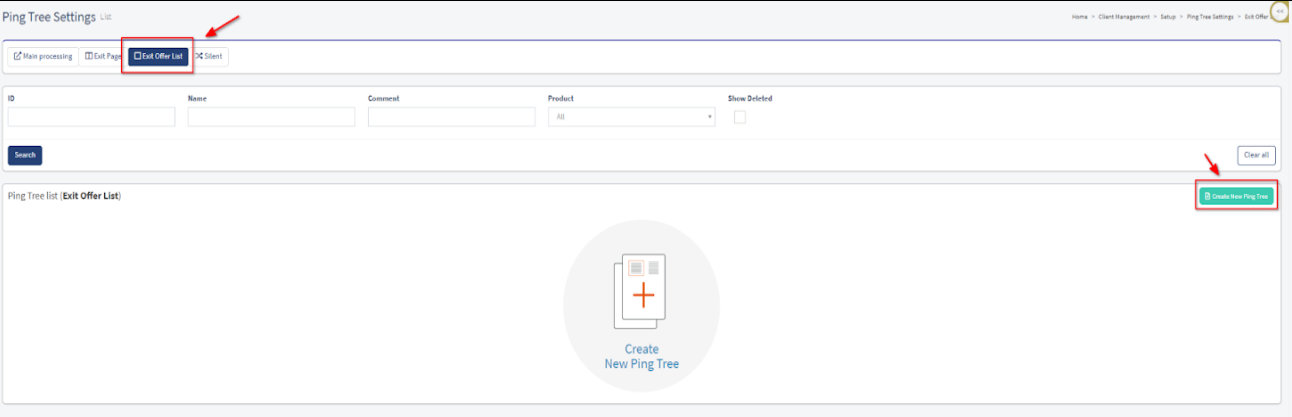
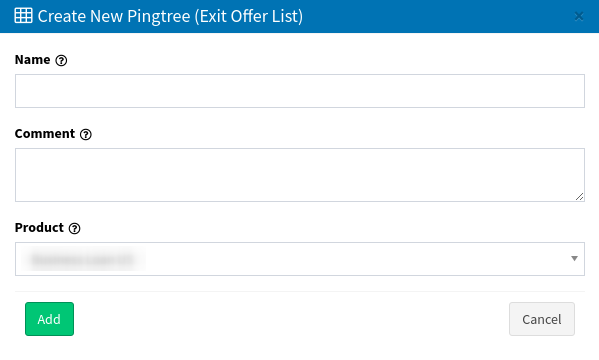
Click the green “Create New Ping Tree” button, and fill in the required fields.
Click the “Add” button to finish.
Note: Ensure to pick the same Product in the Ping Tree as in the Exit Page Campaign.
To assign the Exit Page to the Exit Offer Ping Tree, go to the Client Management > Setup > Campaigns > Exit and Comparison Campaigns section. Choose the Exit Page Campaign and click the “Configure” button. Click the “Exit Page Template” tab.
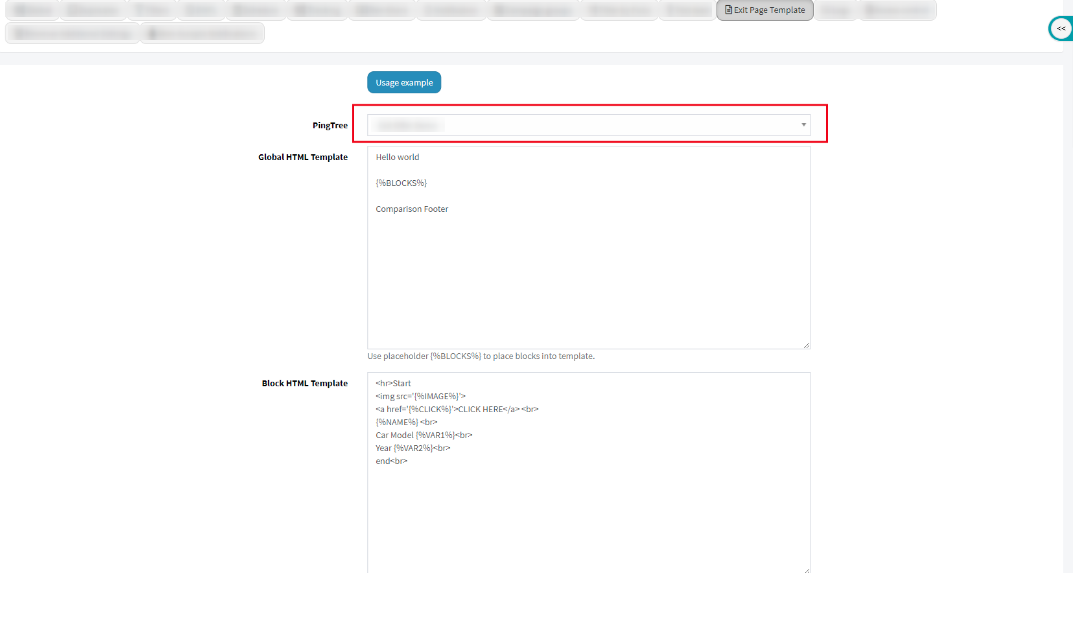
Set up the name of blocks to display in your template in the “Global HTML Template.”
Note: Ensure to type the “Comparison Footer” as shown in the screenshot above.
Set up the variables and fillers for the blocks in the “Block HTML Template.”
Note: Ensure to type “Start” and “End” (shown in the screenshot above).
Exit Offer Variables
The Exit Offer Variables section contains a list of existing variables per product. This section shows the identification of the variables under names that are easily understood and handled by the customers.
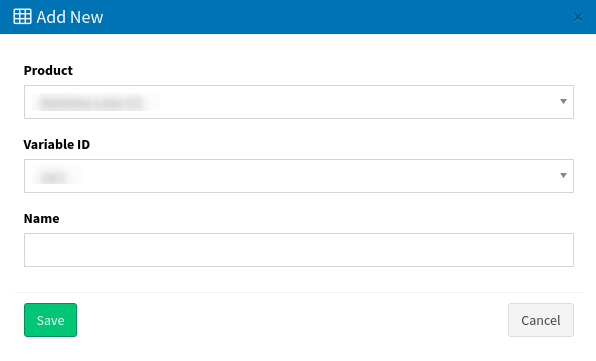
To add the new variable, go to Client Management > Additional settings > Exit Offer Variables, click the “Add New Record” button and fill in the required fields. Click the “Save” button to finish.
Once you add some variables, you can get back to the “Block HTML Template” and add these variables in the Exit Page Template settings.
-
Go to the Client Management > Setup > Campaigns section. Go to the Exit and Comparison Campaigns tab. Click the “Edit” button next to the appropriate campaign and go to the “Exit Page Template” tab. Click the “Usage Example” button and copy the JavaScript to the clipboard.
-
Go to the System Management > General > Pages section. Click the “Edit” button and paste the JavaScript from the clipboard in the Content field. Click the “Add” button to proceed.
Note: Make sure to set up the correct Main Domain, Product ID, and User ID (Publisher ID) in JavaScript. Don’t forget to type “Site footer” at the bottom of the block.
Exit Offer Campaign
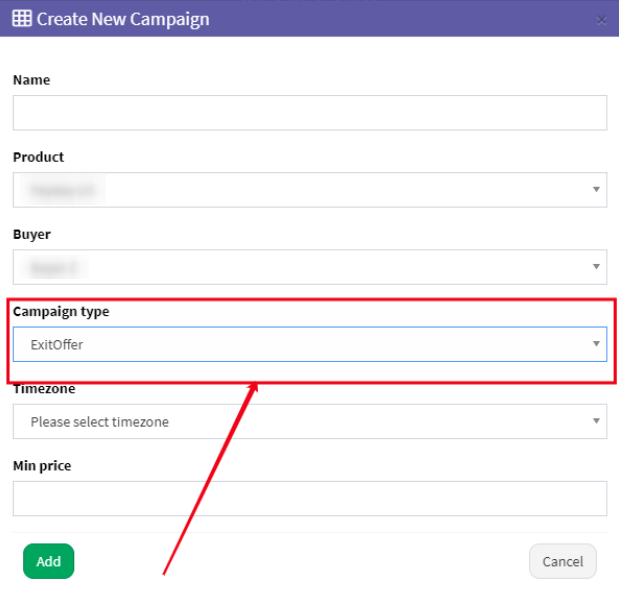
To create an Exit Offer Campaign, go to the Client Management > Setup > Campaigns, click the Exit & Comparison Campaigns tab, then the “Create New Campaign” button. Fill in the required fields and select the Exit Offer in the Campaign Type field.
Click the “Add” button to finish.
To set up the Exit Offer Campaign, go to the Client Management > Setup > Campaigns and click the Exit & Comparison Campaigns tab. Click the “Configure” button, and the system will forward you to the appropriate page.
In the “Global” tab, you can set the price-per-click and other general settings. Choose the “Exit Offer Template” tab and fill in the required fields.
Click the “Save” button to save changes.
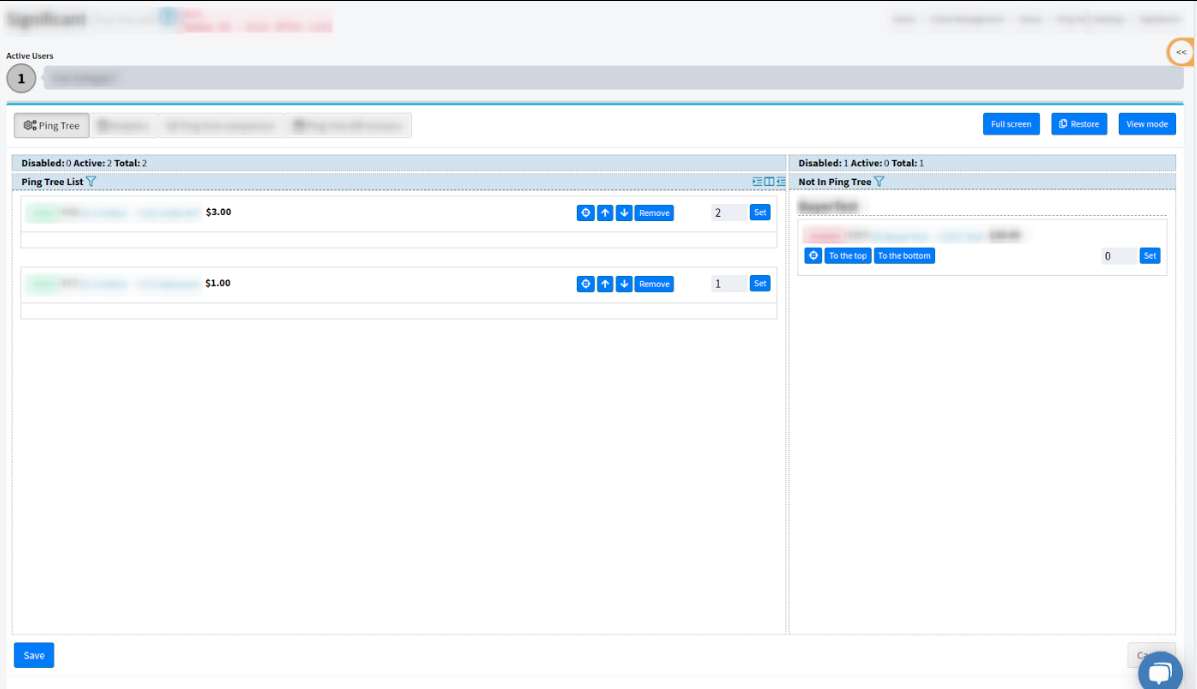
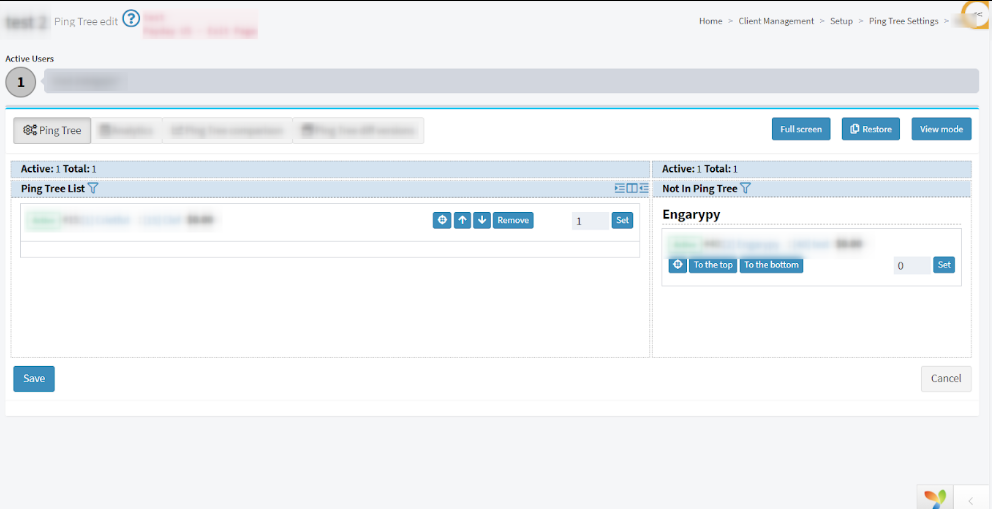
To add the Exit Offer Campaign to the Exit Offer Ping Tree, go to the Client Management > Setup > Ping Tree Settings > Exit Offer List section. Click the “Edit” button and drag and drop the exit offers to the Ping Tree List. Click the “Save” button to save changes.
Exit Page Ping Tree
To create a new Exit Page Ping Tree, go to Client Management > Setup > Ping Tree Settings, click the Exit Page tab, then the green “Create New Ping Tree” button. Fill in the required fields in the pop-up window, then click the “Add” button to finish.
To add the Exit Page to the Exit Page Ping Tree, go to the Client Management > Setup > Ping Tree Settings, click the Exit Page tab and click the “Edit” button. Drag and drop the exit pages to the Ping Tree List and click the “Save” button to apply changes.
Return to the Client Management > Setup > Ping Tree Settings, then click the Exit Page tab. Click the “Config” button. Set the percentage for Product per each Ping Tree and click the “Apply” button to proceed.
