To view the Export Tasks list, go to the All Reports > Extras > Export Tasks section.
The Export to Cloud PBX Tasks tab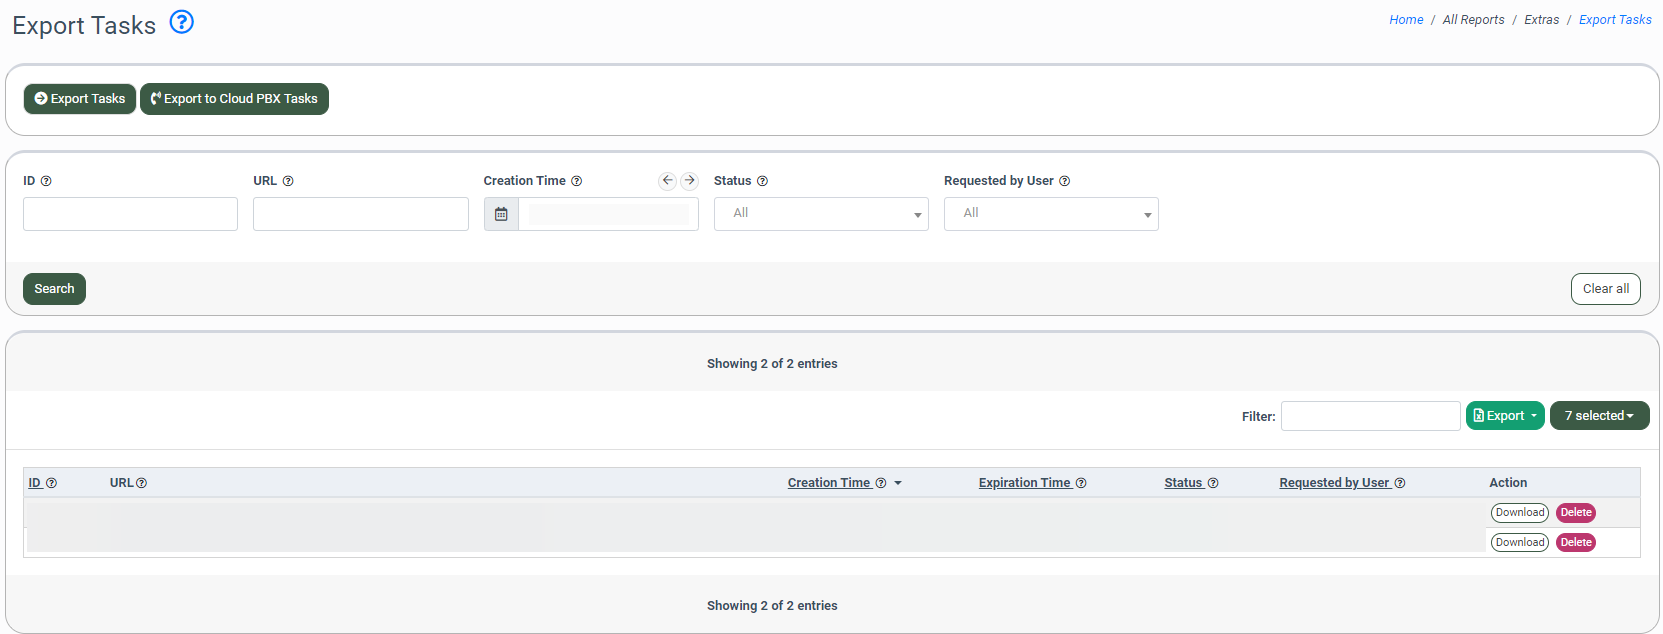
Export Tasks
The “Export Tasks” tab allows you to view the list of exports initiated in the LMS and Call Logic components. You can download the reports table and delete export tasks.
Note: Only exports implemented through the "All Pages to CSV" feature are displayed in the Export Tasks list. If you export only the current page, such export is not displayed in the list.
You can narrow down the search results by using the following filters:
- ID: Enter the unique identification number of the report.
- URL: Enter the link to the report`s export request.
- Creation Time: Select the date range when the report`s export was performed.
- Status: Select the report`s export status (Aborted, Deleted, Error, Pending, Processing, Success).
- Requested by user: Select the user that made the report`s export request.
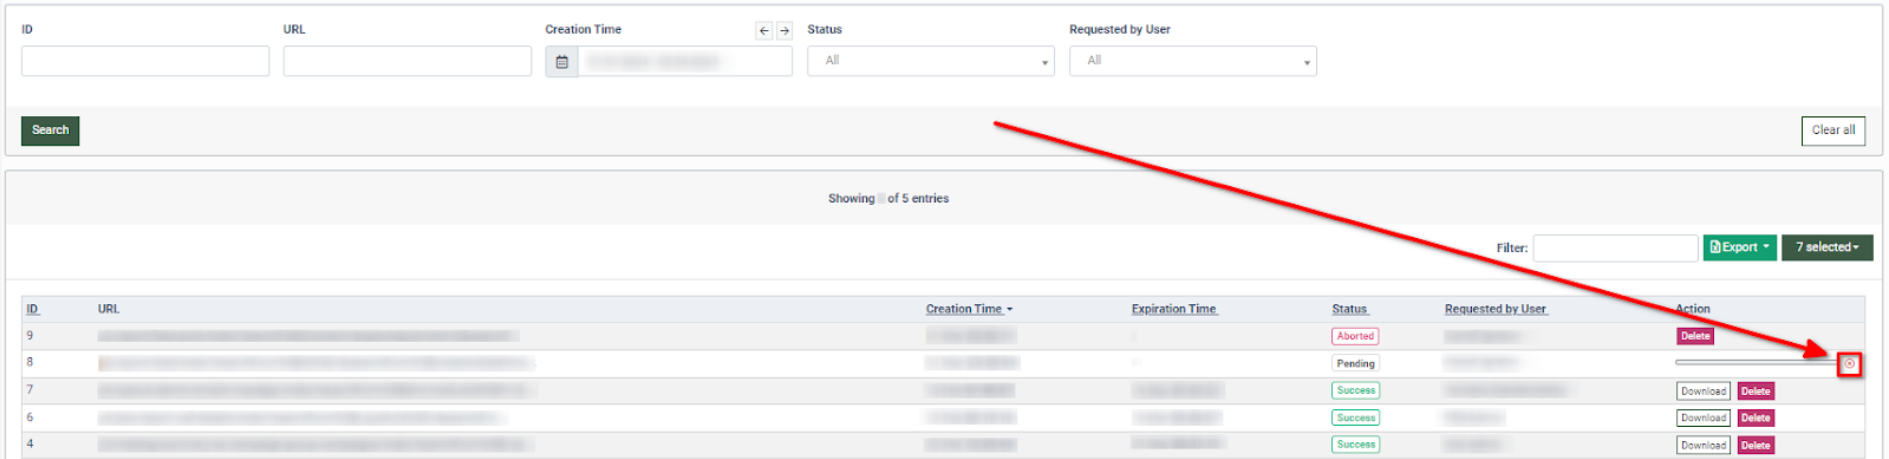
The Export Tasks list contains the following information:
- ID: The unique identification number of the report.
- URL: The link to the report`s export request.
- Creation Time: The date and time when the report`s export was performed.
- Expiration Time: The report`s expiration date and time.
- Status: The status of the report`s export progress.
- Requested by User: The user`s name who requested the report`s export.
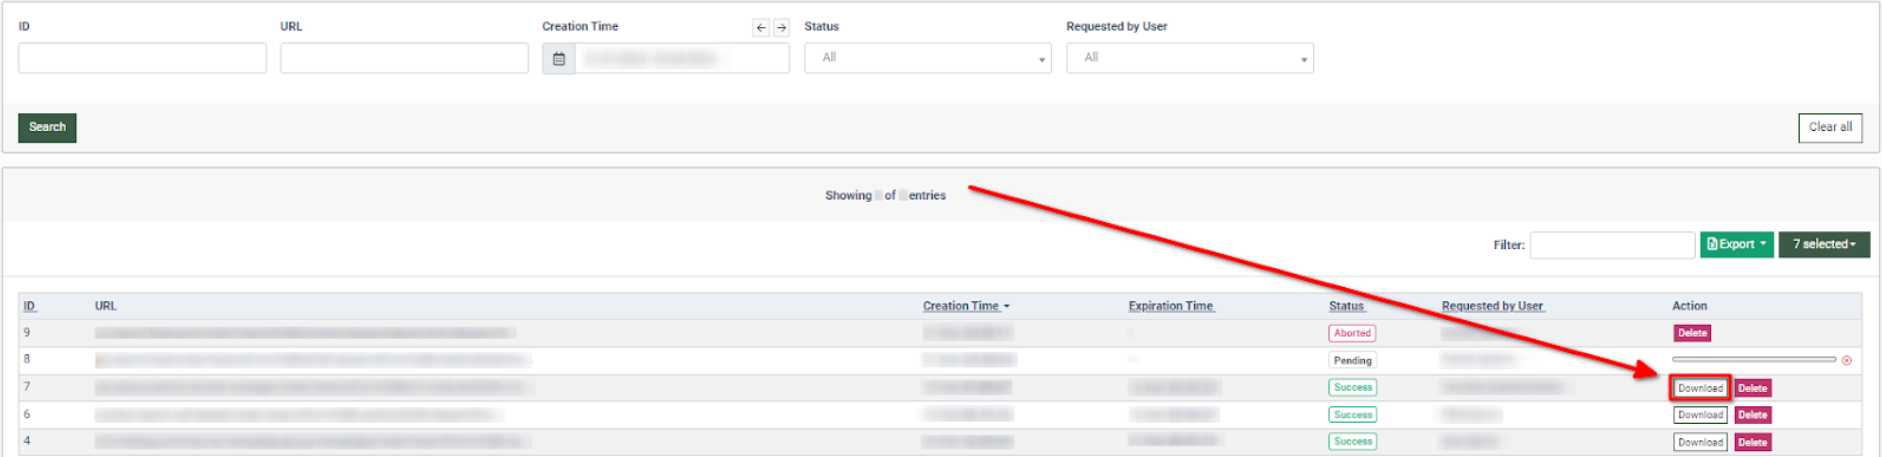
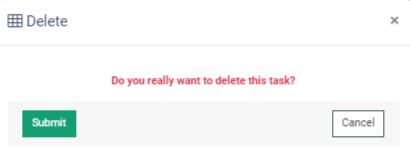
To delete the report, click the “Delete” button in the “Action” column.
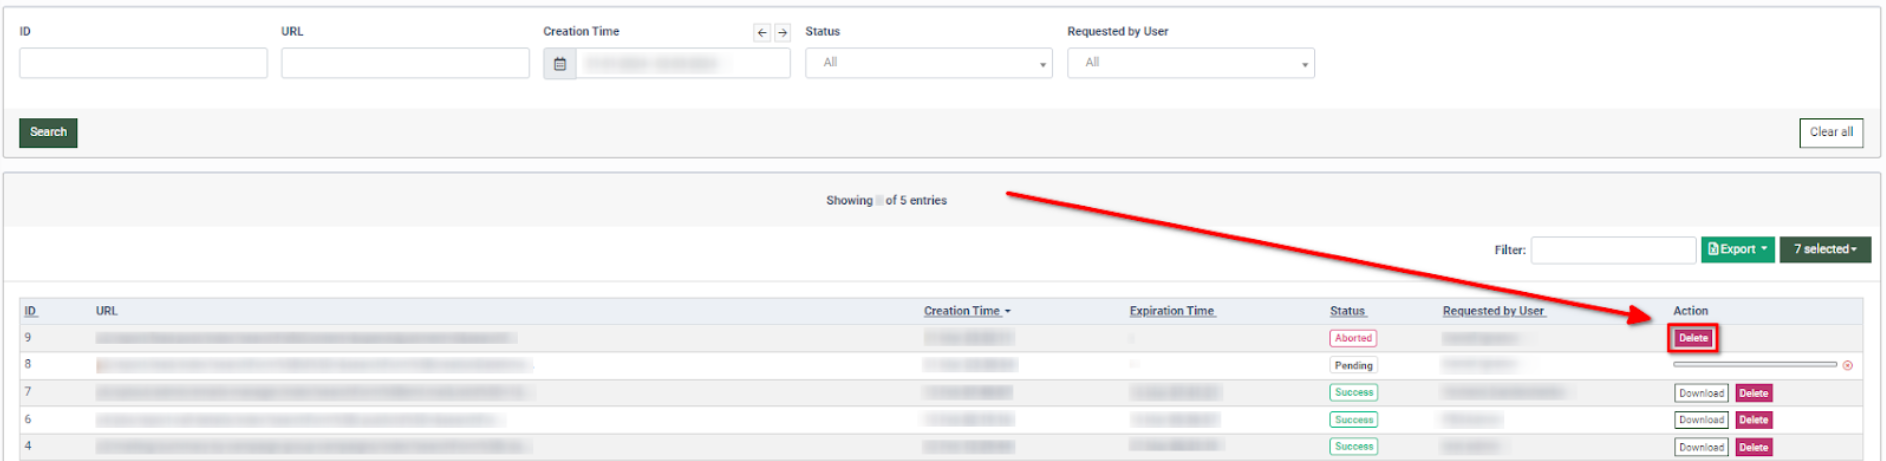
In the “Delete” pop-up window, click the “Submit” button or click the “Cancel” button to close the window.
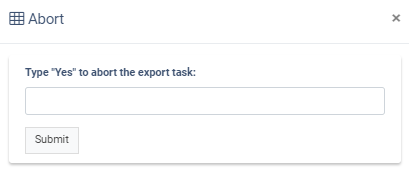
To abort the export task, hover to the right from the loading bar in the “Action” column and click the “Abort” button.
In the “Abort” pop-up window, enter “Yes” into the “Type “Yes” to abort the export task” field, and click the “Submit” button to complete the action.
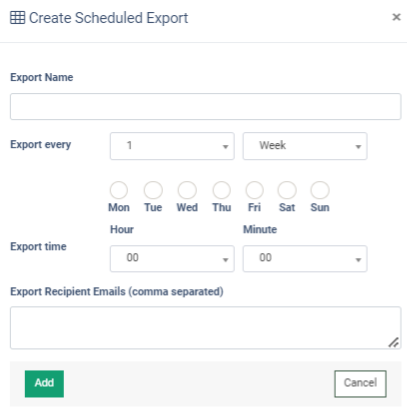
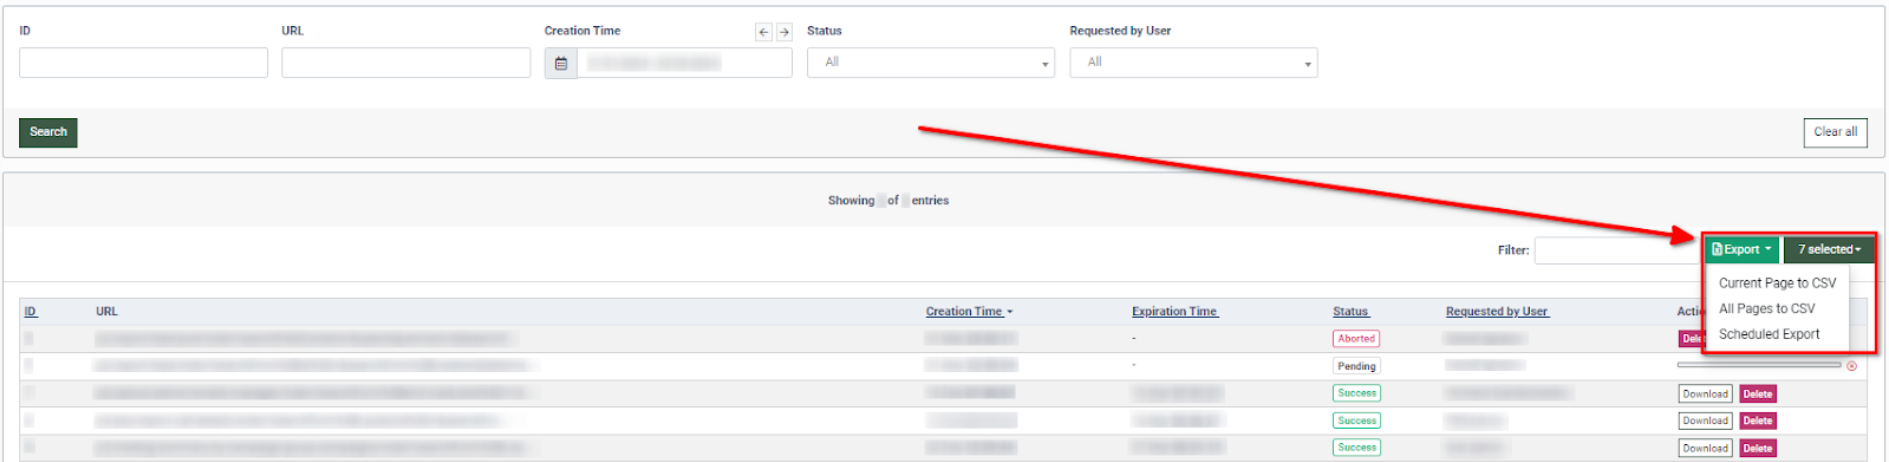
To export the section`s data, click the “Export” button and select the “Current Page” or “All Pages” type from the drop-down list. To create a scheduled export request, click the “Export” button and the “Scheduled Export” option.
Fill in the following fields in the “Create Scheduled Export” pop-up window:
- Export name: Enter the name for the export.
- Export every: Select the preferable frequency for the report export.
- Export time: Select the preferable time to start the report export.
- Export Recipient Emails (comma separated): Enter recipient emails separated by a comma.
Click the “Add” button to complete the action or click the “Cancel” button to close the window.

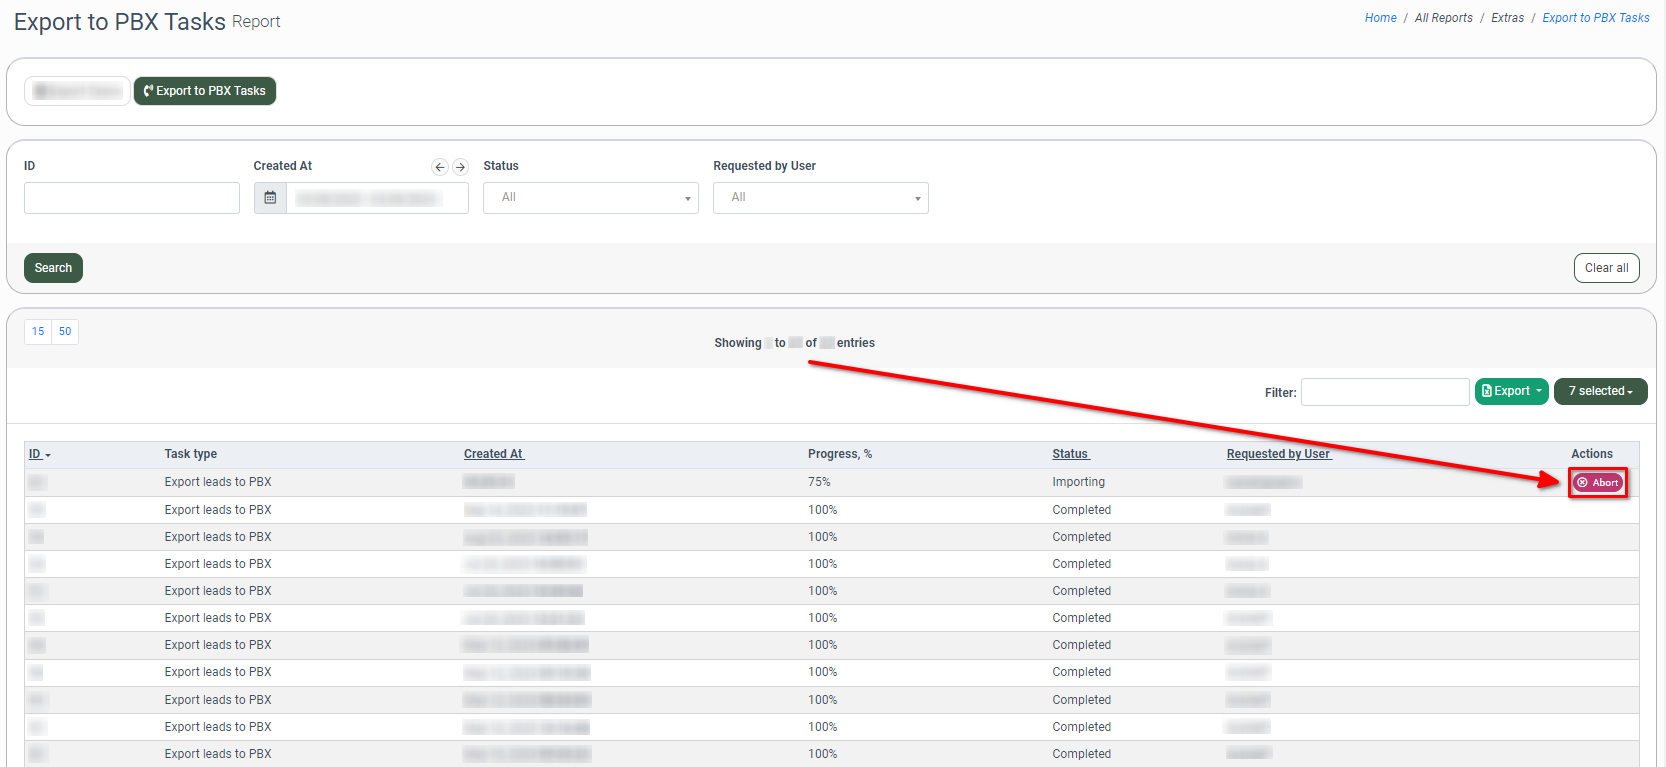
Export to Cloud PBX Tasks
The “Export to Cloud PBX Tasks” tab allows you to view the list of initiated leads exports from the LMS and Call Logic components to the Cloud PBX Dialing List. You can track the execution stage and the status of the leads export and abort the leads export tasks.
Note: The Export to Cloud PBX Tasks list displays exports initiated in the Publisher Lead Details report. Find more information about it in this Knowledge Base article.

You can narrow down the search results by using the following filters:
- ID: Enter the unique identification number of the leads' export task.
- Created At: Select the date range when the leads' export was performed.
- Status: Select the leads export status (Ignored, Pending, Exporting, Preparing, Importing, Completed, Error).
- Requested by user: Select the user that made the leads' export request.
The Export to PBX Tasks list contains the following information:
- ID: The unique identification number of the leads' export task.
- Task Type: The type of task (Export leads to Cloud PBX).
- Created At: The date and time the leads' export was performed.
- Progress, %: The execution stage in percentage (%).
- Status: The status of the leads' export progress.
- Requested by User: The user`s name who requested the leads' export.
To abort the leads' export task, click the “Abort” button in the “Actions” column.
To export the section`s data, click the “Export” button and select the “Current Page” or “All Pages” type from the drop-down list. To create a scheduled export request, click the “Export” button and the “Scheduled Export” option.
Fill in the following fields in the “Create Scheduled Export” pop-up window:
- Export name: Enter the name for the export.
- Export every: Select the preferable frequency for the export.
- Export time: Select the preferable time to start the export.
- Export Recipient Emails (comma separated): Enter recipient emails separated by a comma.
Click the “Add” button to complete the action or click the “Cancel” button to close the window.