How to create Publisher for LMS Platform
How to create Publisher for Call Logic Platform
There are 4 ways to create the Publisher in the system:
Self Registration
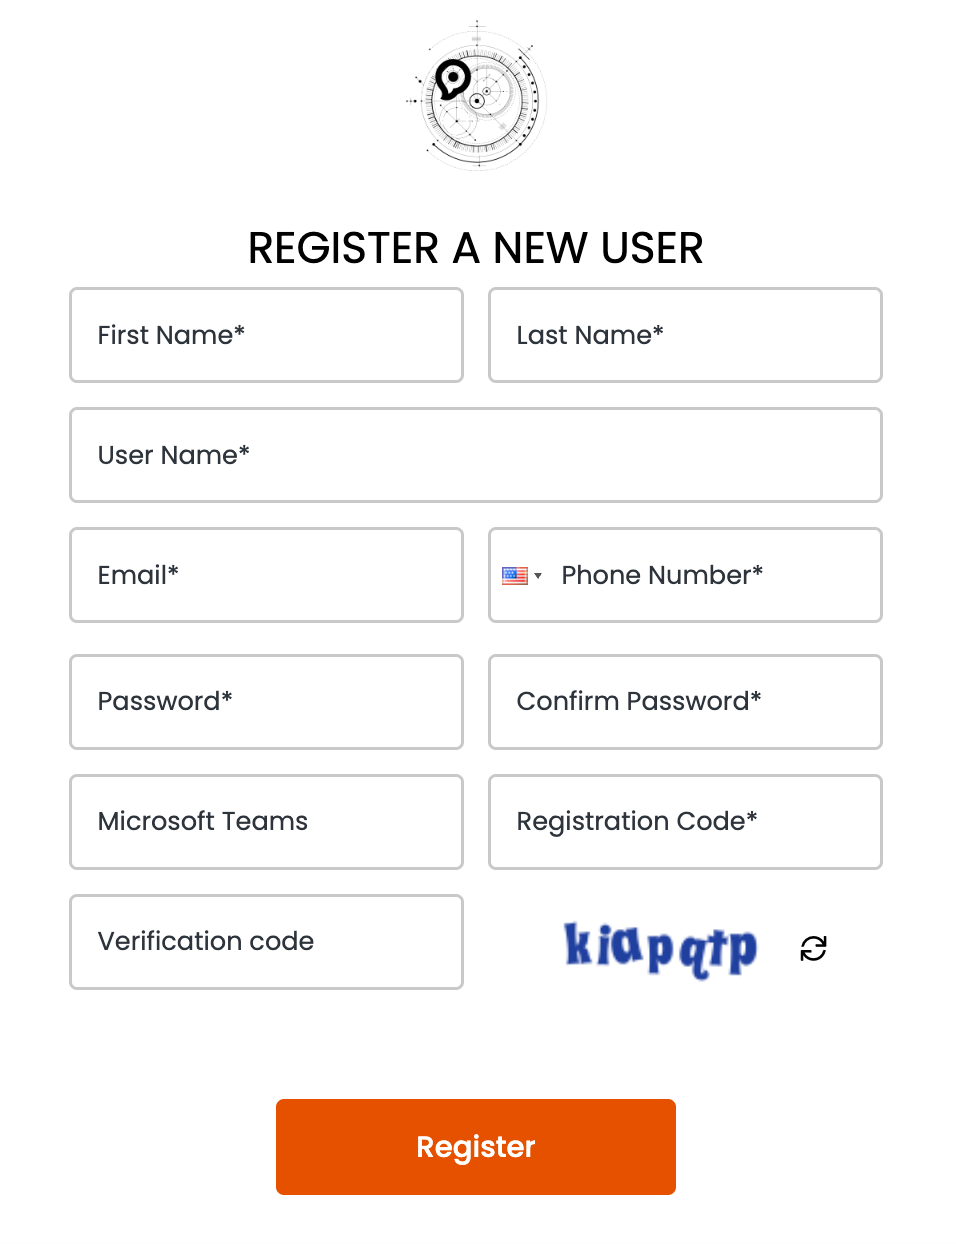
1. A client, who wants to register himself on the instance as a publisher needs to fill in the form via the link: /auth/registration. Fill in the “Register a new user” form fields:
-
First Name: Enter the Publisher first name.
-
Last Name: Enter the Publisher last name.
-
User Name: Enter the nickname of the publisher. It will be shown in all reports along with the Publisher ID.
-
Email: Enter the email address of the Publisher.
-
Company Name: Enter the Company name (optional).
-
Password: Enter the password. Note: Your password must be at least 8 characters long, have a mixture of uppercase and lowercase letters (a-Z), contain at least one number (0-9), and include at least one special character (!@#$%^&*~).
-
Confirm Password: Enter the password again.
-
Phone Number: Enter the phone number starting with the country code, e.g., +1 for the USA
-
Microsoft Teams: Enter the Microsoft Teams name (optional).
-
Account Representative: Select your Account Representative (Publisher’s Agent) from the drop-down list.
Click the “Register” button to complete.
2. After this, a new user will be created and the corresponding record will be displayed in the “Pre-Registered” tab (Publisher Management > Publishers section). The client will receive an email with a confirmation link. He needs to follow this link to continue registration.
3. When a new client login to the instance, he will be redirected to the “Complete Activation” section. Here the client can see a list of necessary actions in order to complete the registration as a Publisher for himself. Successfully passed steps will be marked with a green thumbs-up symbol, missing steps will be marked with a red thumbs-down symbol. Those steps are the following:
-
Verify your email
-
Add your address: Add your address by clicking the “Add” button.
-
Verify your phone number: Verify your phone number by clicking the “Add” button.
-
Complete the questionnaire form: Complete the questionnaire form by clicking the “Complete” button.
-
Contact your manager: You can view the personal account manager’s contact information.
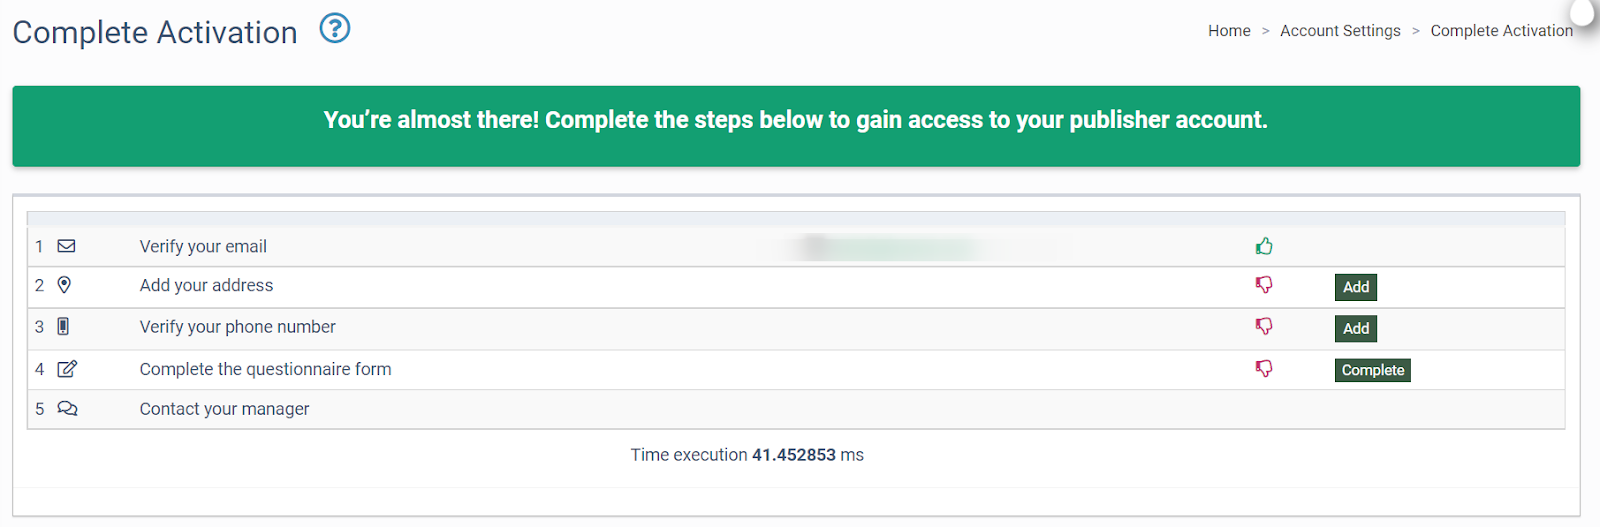
Note: All steps from the list are mandatory to do, in order to have access to full Publisher’s functionality.
4. When all steps are done, a Publisher Agent will receive a letter, that a new Publisher has been registered. Publisher Agent needs to go to the Publisher Management > Publishers section, click the button in the “Status” column. In the “Change Status” form select the “Active” option in the “Status” field, then click the “Save” button to complete.
Registration after Publisher Agent approval
-
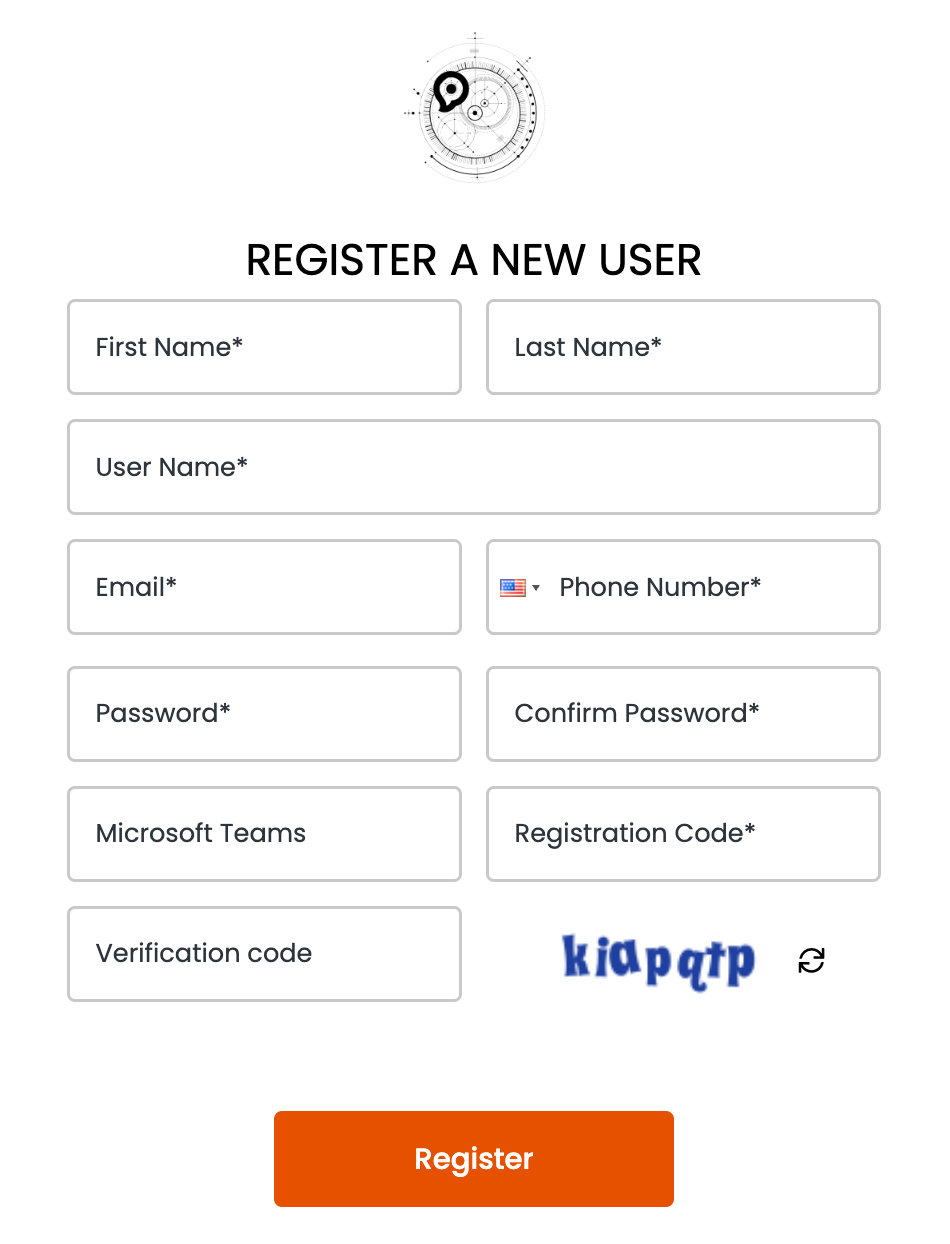
The client, who wants to register himself on the instance as a publisher needs to fill in the form via the link: /auth/registration. Fill in the “Register a new user” form fields:
-
First Name: Enter the Publisher first name.
-
Last Name: Enter the Publisher last name.
-
User Name: Enter the nickname of the publisher. It will be shown in all reports along with the Publisher ID.
-
Email: Enter the email address of the Publisher.
-
Company Name: Enter the Company name (optional).
-
Password: Enter the password. Note: Your password must be at least 8 characters long, have a mixture of uppercase and lowercase letters (a-Z), contain at least one number (0-9), and include at least one special character (!@#$%^&*~).
-
Confirm Password: Enter the password again.
-
Phone Number: Enter the phone number starting with the country code, e.g., +1 for the USA
-
Microsoft Teams: Enter the Microsoft Teams name (optional).
-
Account Representative: Select your Account Representative (Publisher’s Agent) from the drop-down list.
Click the “Register” button to complete.
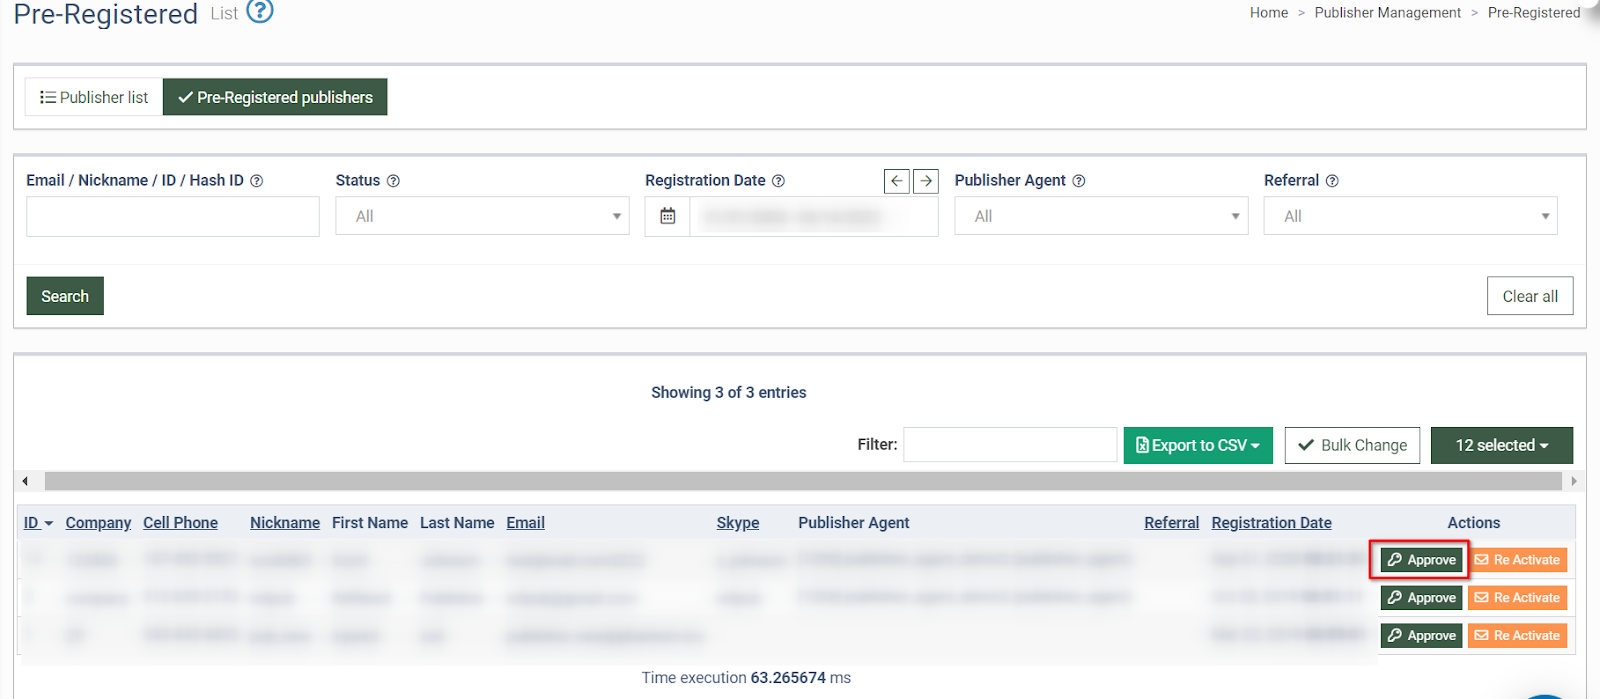
2. After this, a new user will be created and the corresponding record will be displayed in the “Pre-Registered” tab (Publisher Management > Publishers section).
3. A Publisher Agent should go to the Publisher Management > Publishers section. Then open the “Pre-Registered” tab and click the “Approve” button in the “Action” column. In the pop-up window, click the “Approve and Create User” button to complete the action.
4. The new Publisher should follow step 3 from the “Self Registration” method.
Registration through a new user creation
-
A Publisher Agent goes to the Publisher Management > Publishers section.
-
To add a new Publisher, click the “Create New User” button and fill in the form fields:
-
NickName: Enter the nickname for the user.
-
First Name: Enter the first name (optional).
-
Last Name: Enter the last name (optional).
-
Email: Enter the email address.
-
Password: Enter the password.
-
Phone number: Enter the phone number of the user (optional).
-
Account Representative: Select the account representative from the drop-down list.
Note: All fields with asterisks are mandatory.
Click the “Create” button to complete the action.
3. A new Publisher should follow step 3 from the “Self Registration” method.
Quick Registration
The Publisher Quick Registration feature allows you to instantly create new Publishers via an API request using a specialized, role-restricted API key. Once the request is sent, the system automatically creates the Publisher user and triggers automated emails for this user to securely set up their password and log in.
Note: The Publisher Quick Registration feature is available on demand only.
- To provide the user with access to the Publisher Quick Registration feature, you should create the API Key for this user in the System Management > General > Project Settings > LMS & Call Logic > API Access section. Note: You can create the API Key with the Publisher Quick Registration category only for users under the Publisher Agent and Publisher Agent Senior system roles. Read more about the API Access section in the Knowledge Base article.

- To view the API documentation for the Publisher Quick Registration, click the “Post Doc” button.
- Send the API request to the registration endpoint with the created API key and all mandatory fields. If you did that correctly, you’ll receive the success message.

- After this action, the new Publisher is already created in the system. You can check this in the Publisher Management > Publishers section. Read more about Publishers in the Knowledge Base article.
- The new Publisher should check their email inbox. They should receive a “Reset password” and the “New Quick Publisher” emails. Read more about Event Notifications in the Knowledge Base article.
- The new Publisher should go through the link in the “Reset password” email, enter the new password, and log in to the system.