The Create User Form is a method that allows you to create new users and their login credentials manually.
To add a new user to the system using this method, go to the left navigation bar and select System Users > Employees.
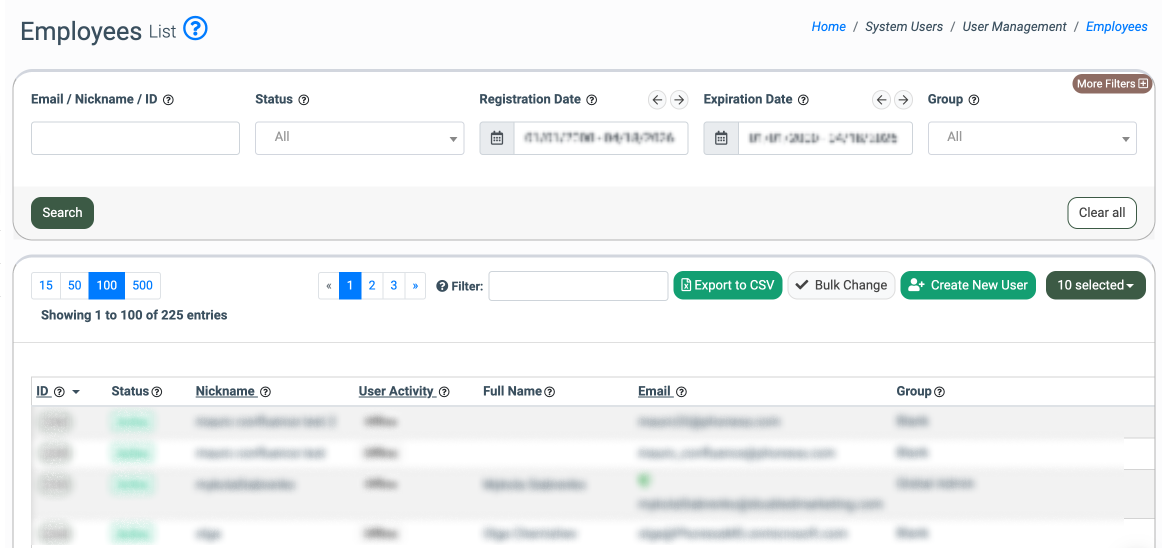
Click the “Create New User” button and fill in the “Create User” form fields:
- Email: Enter the email address of the new user. This will be the username for their login.
- Nick Name: Enter the nickname for the new user.
- Groups: Select one or more user groups to assign the new user to. Groups are the granted system permissions for the user. Note: This does not include Books360 access. You can find information about group permissions in this Knowledge Base article.
- Status: Select the status of the new user (Active, Disabled).
- New password: Enter the password for the new user. Be sure to write this down as you will need to provide it to your user.
- Repeat password: Re-enter the password for the new user.
- First name: Enter the first name of the new user.
- Last name: Enter the last name of the new user.
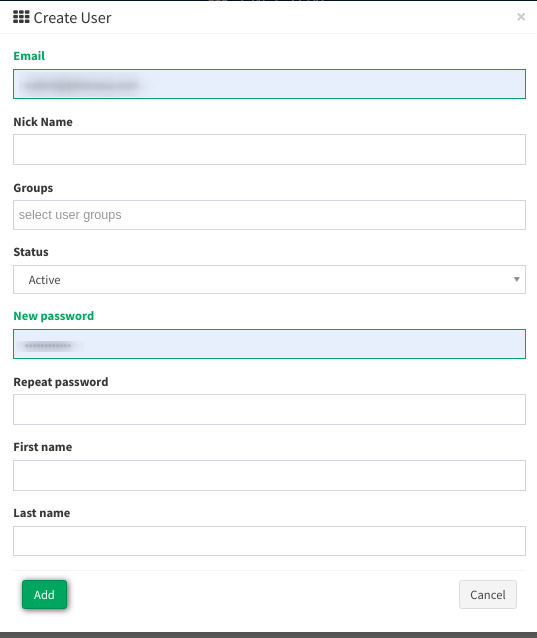
Сlick the “Add” button to save.
Add a new user through the Employee Registration Link
This method allows you to provide your employees with a registration link and code that invites them to create their own user accounts. You will need to approve these accounts after your employees register.
To add a new user to the system using this method, go to the left navigation bar and select System Management > Project Settings.
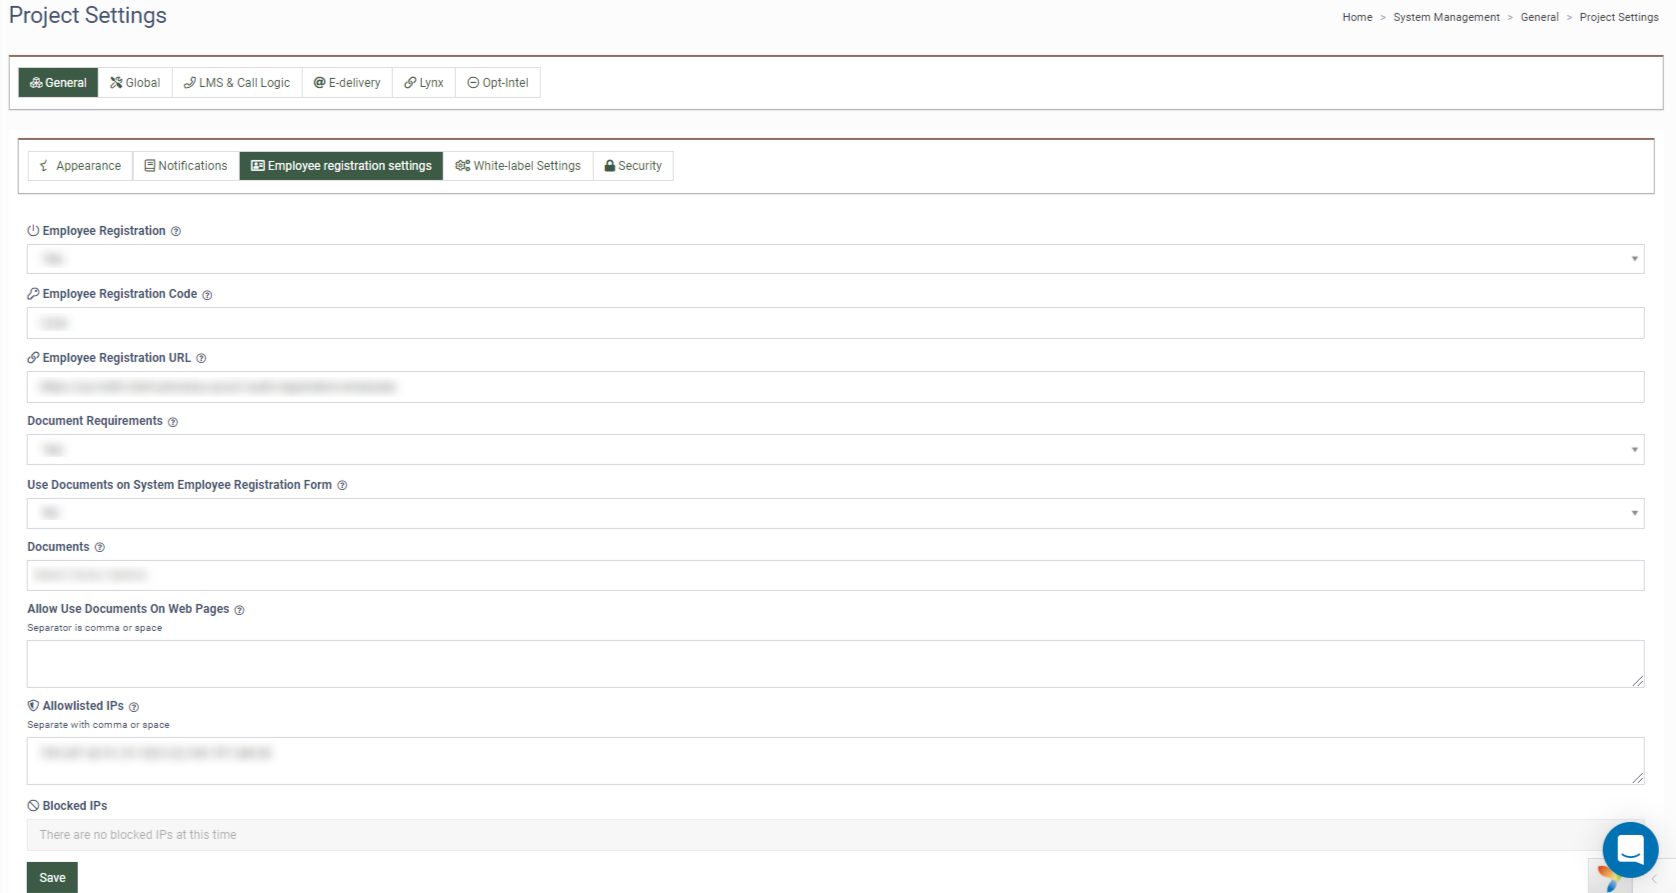
Click the “Employee Registration Settings” button and fill in the required fields:
- Employee Registration: Set to ‘Yes’ if you want to allow employees to register in the system using the registration URL provided.
- Employee Registration code: Create at least a 4-digit code required for your employees to register. You will need to provide this to your employees along with the registration link.
- Employee Registration URL: Enter the registration link URL.
- Document Requirements: Select the "Yes" or "No" value to enable or disable employee document submission during the registration process.
- Use Documents on System Employee Registration Form: Select the Yes or No value to enable or disable the document access on the System Employee Registration Form.
- Documents: (this option will only appear if you selected “Yes” for Document Requirements) Select the list of document signatures required for employee registration.
- Allow Use Documents On Web Pages: Enter the API for integrating a list of the documents for registration on the client’s website.
- Allowlisted IPs: Enter one or more IP addresses for new employee registrations. This will allow registrations from those IP addresses only.
- Blocked IPs: Enter one or more IP addresses you would like the system to block for employee registration.
Click the “Save” button to apply changes.
Note: Provide your employee(s) with the Employee Registration URL and Employee Registration Code.
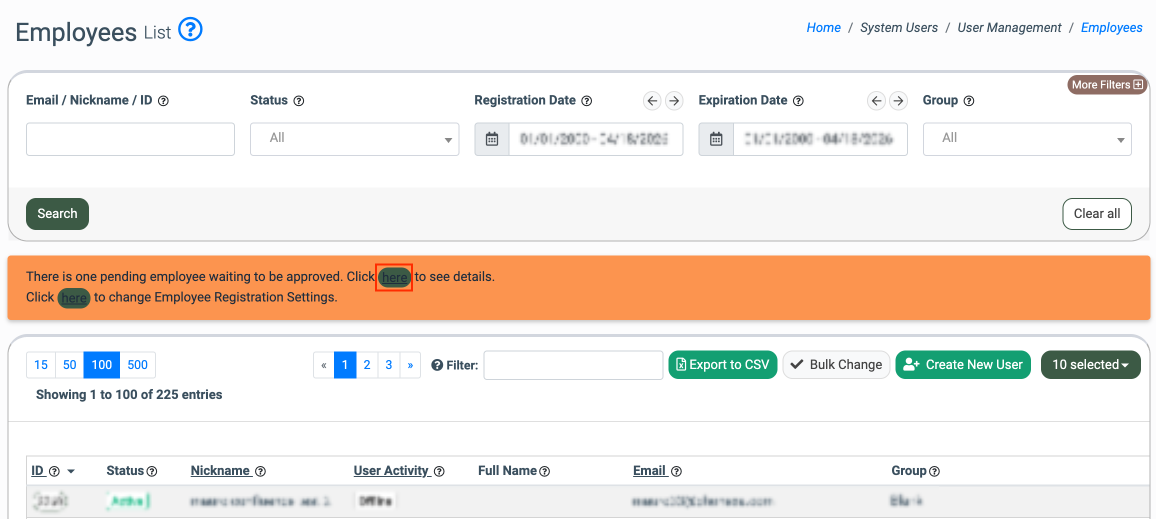
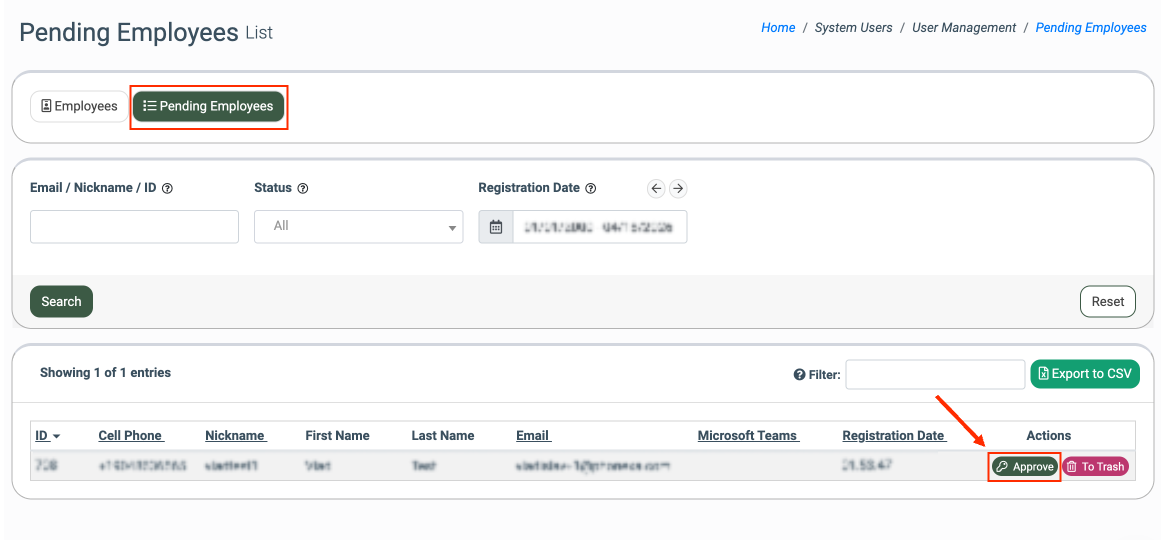
Once they finish the registration process, go to the System Users > Employees section. Here, you will find a yellow notification box in the center of the screen informing you of pending registration approvals.
Click the top “here” link, and the system will redirect you to the Pending Employees Page.
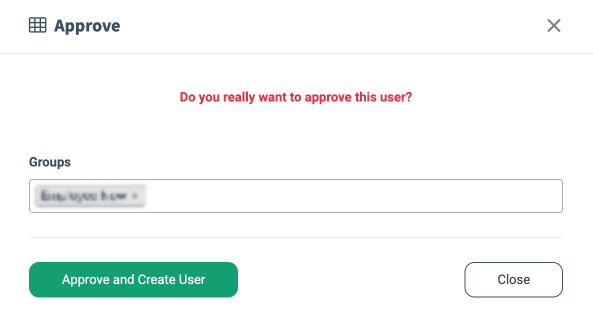
Click the “Approve” button and assign the user to one or more Groups. Groups are the granted system permissions for the user. You can find information about group permissions in this Knowledge Base article.
Click the “Approve and Create User” to complete.
Your user is now ready to sign in.