How To Post Leads From Zapier To Phonexa
Looking for detailed instructions on how to post leads from Zapier to Phonexa? Check our guide for more information.
In this article, you can find instructions on how to post leads from Zapier to Phonexa.
Step 1
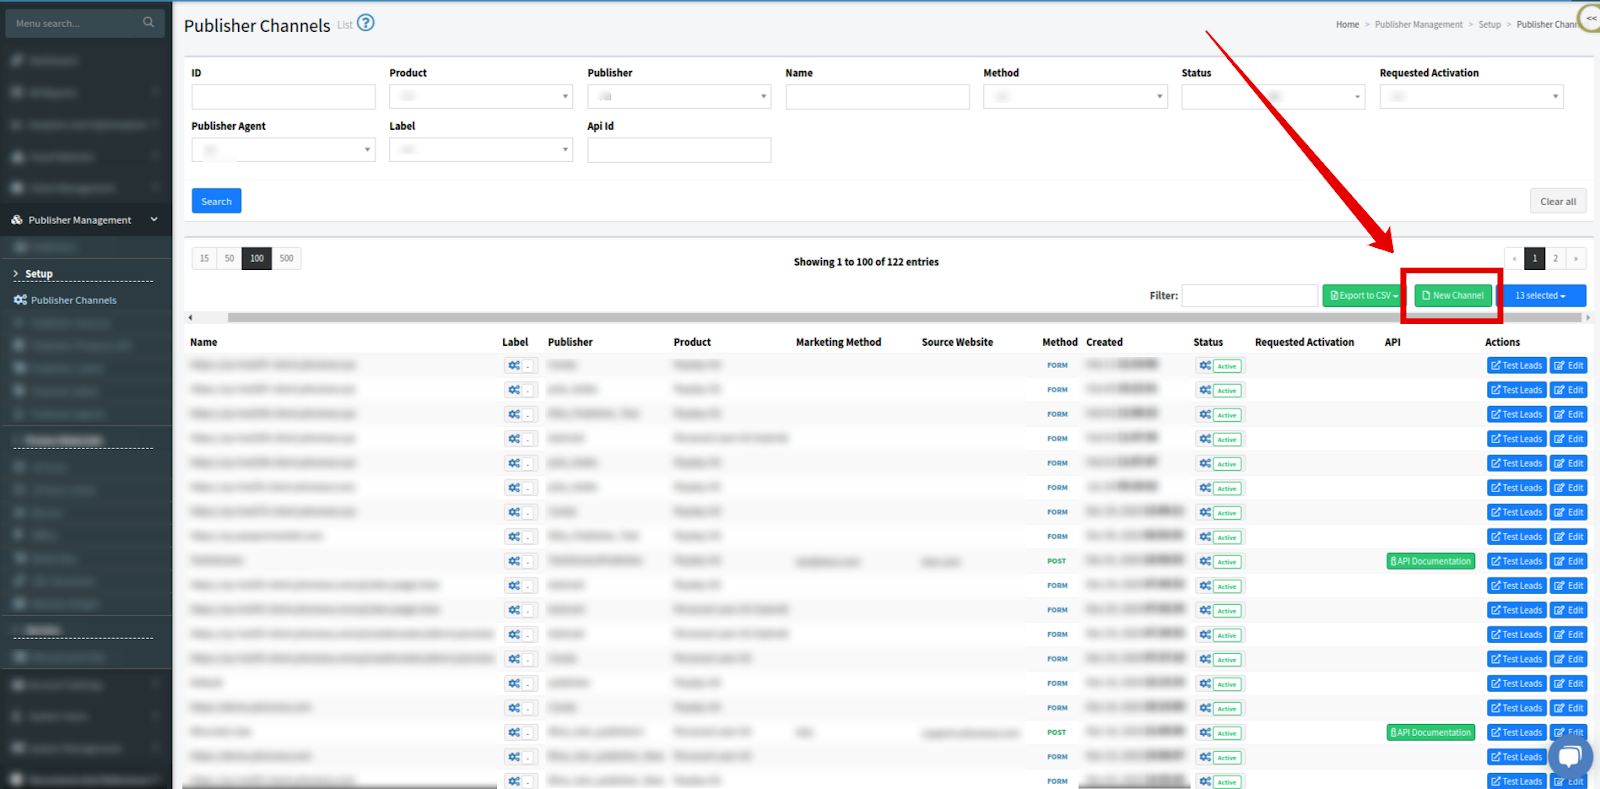
Within the Phonexa platform, configure the delivery channel for the Publisher. To do so, go to Publisher Management > Setup > Publisher Channels.
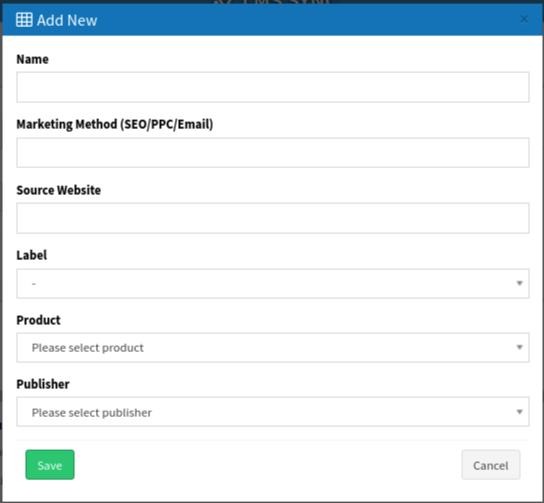
Click the “New Channel” button and fill in the following fields in the “Add New” pop-up window:
-
Name: Enter the name of the channel.
-
Marketing Method (SEO/PPC/Email): Enter the preferable Marketing Method.
-
Source Website: Enter the Source Website for the delivery channel.
-
Label: Select the Label.
-
Product: Select the Product for the delivery channel.
-
Publisher: Select the related Publisher.
Click the “Save” button to create the new Channel.
Step 2
Log in to your Zapier account.
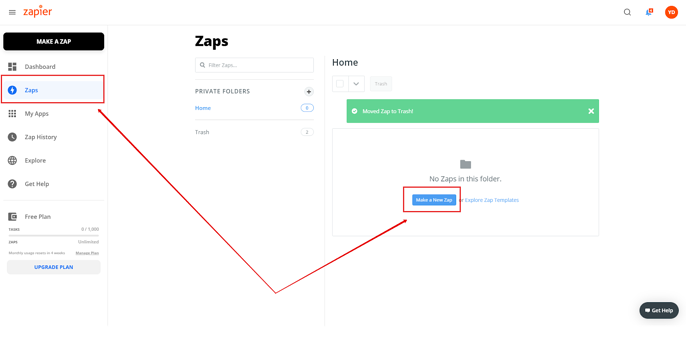
Go to the “Zaps” tab and click the “Make a new Zap” button.
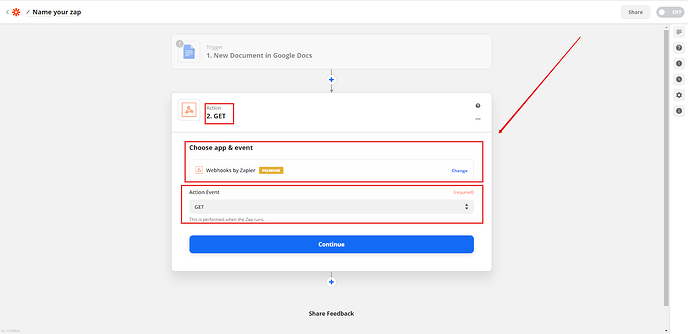
Set up the “Trigger” section.
Go to the “Action” section, in the Choose app & Event field select the “Webhooks by Zapier” option, and in the Action Event field select the “Get” option and click the “Continue” button.
Step 3
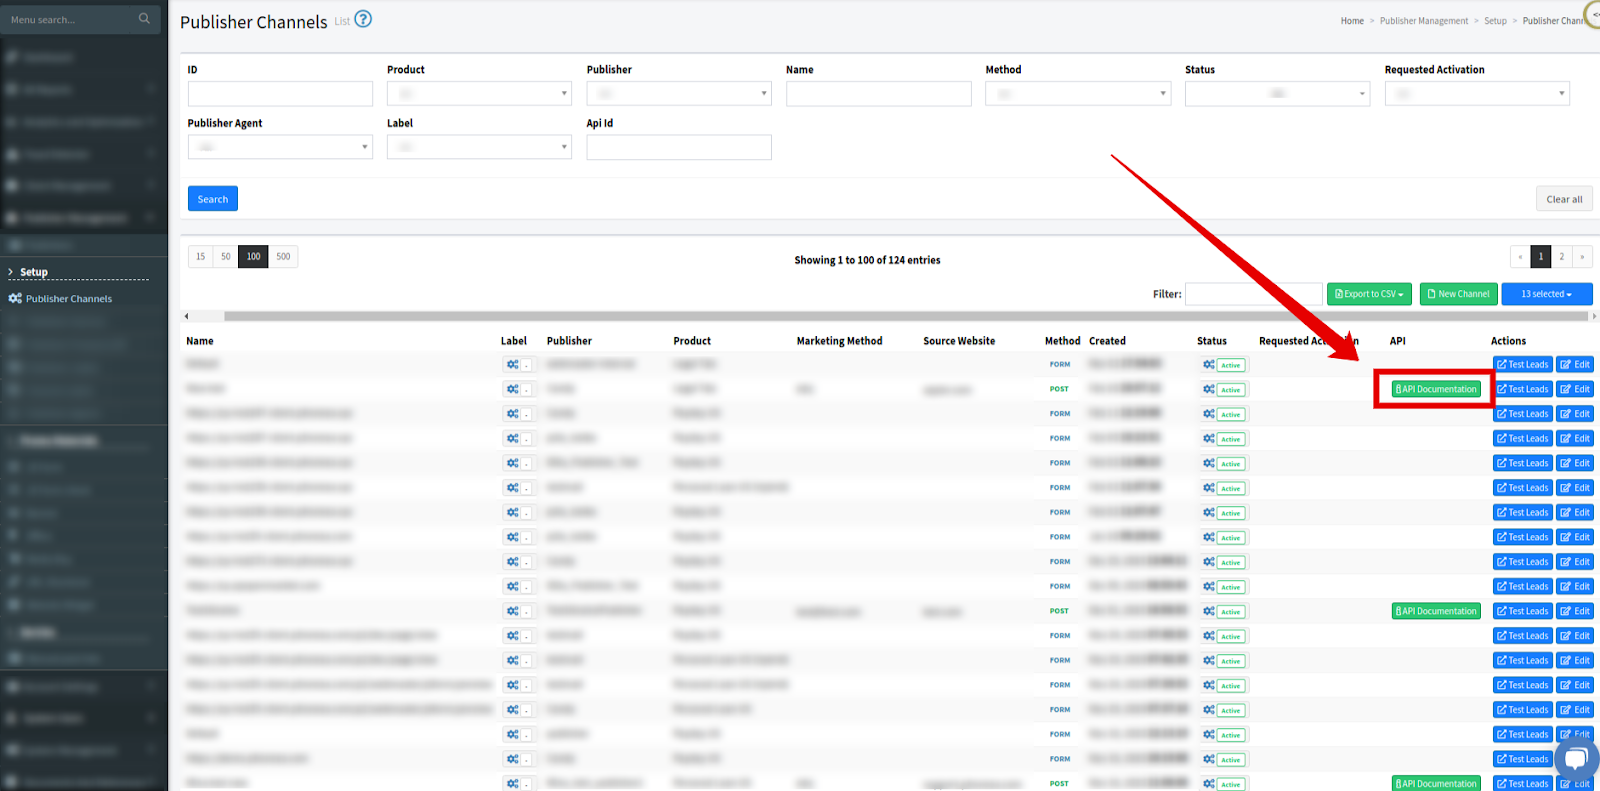
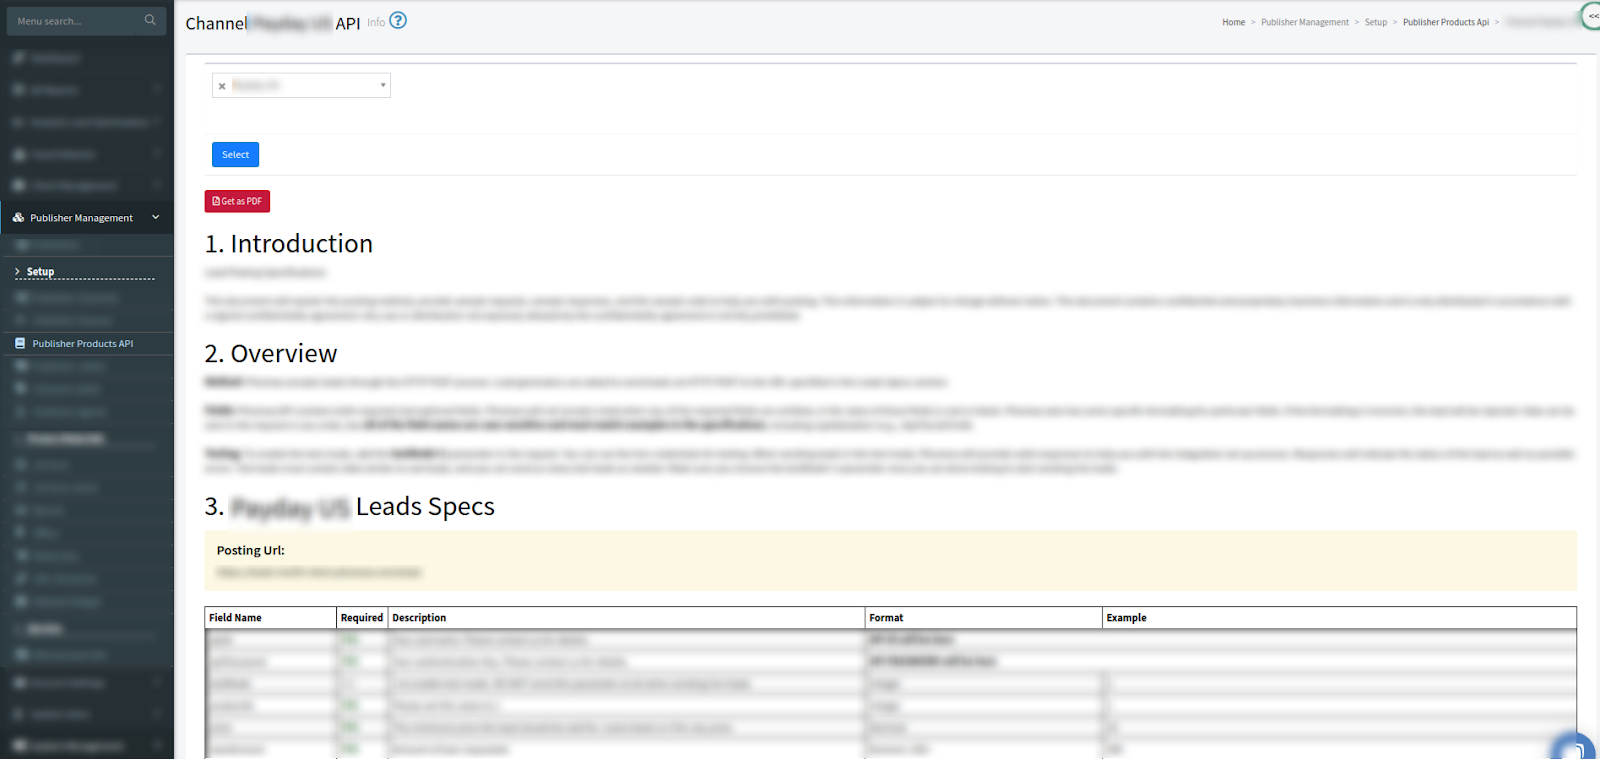
In your Phonexa instance, go to Publisher Management > Setup > Publisher Channels, and for the channel created during Step 1, download the API documentation by clicking on the “API Documentation” button.
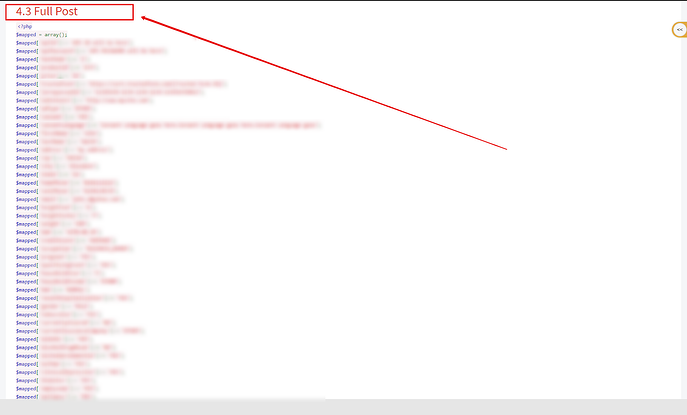
If you use a Ping Post Product, scroll down to the 4.3 Full Post section.
Step 4
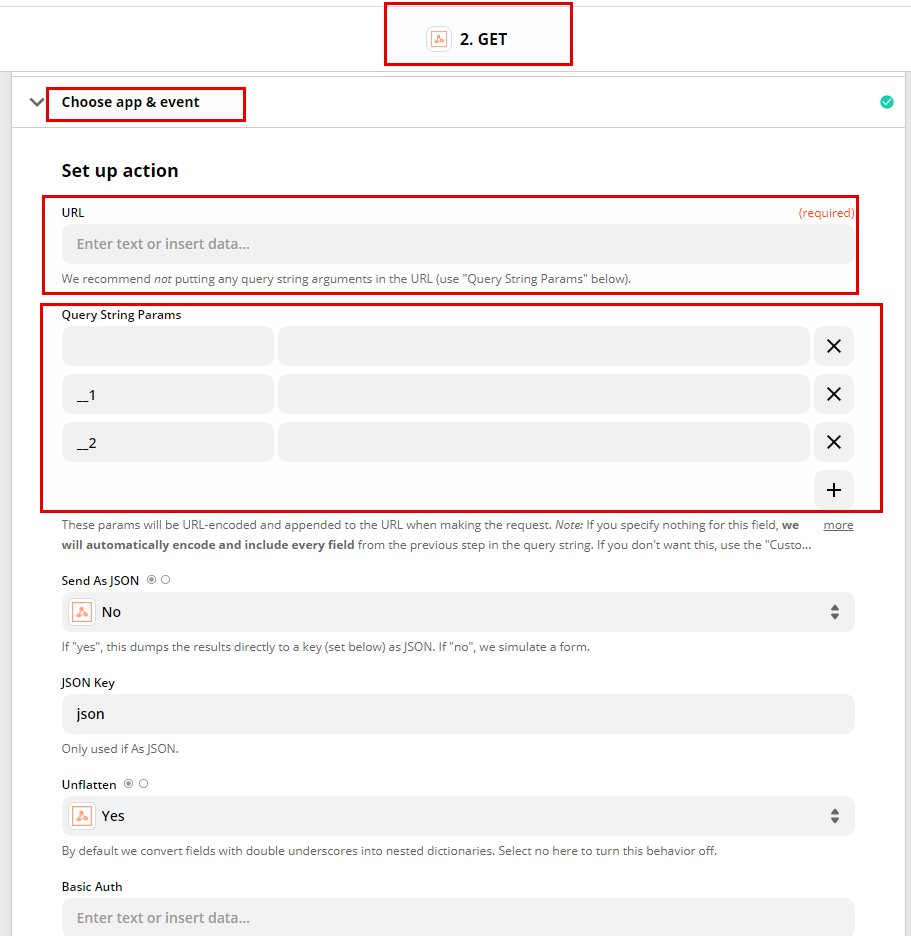
Find and copy the Phonexa posting URL in the section called “3 Lead Specs” for a Direct Post Product or in the 4.3 Full Post section for a Ping Post Product. In Zapier, go to the “GET” section and enter it into the URL field.
Add all fields marked as “Yes” in the Phonexa API documentation to Zapier Query String Params.
Fields such as Firstname, Lastname, Phone number, etc., can be pulled from Zapier via “Trigger”.
Step 5
Click the “Continue” button to go to the “Test action” section.
Click the “Test & Review” button to test the action and review it, or click “Test & Continue” to test the action, skip the test review, and continue.
The test is considered successful if a “Sold” or “Reject” response is received from Phonexa and can see the lead in your Phonexa system.
Example of the Test Response with an error:
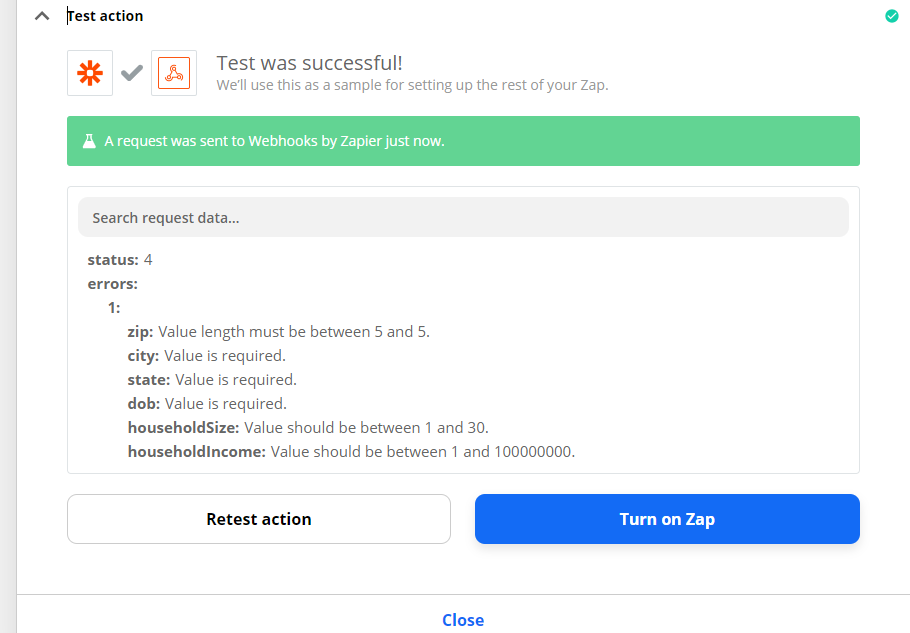
Once you have successfully tested the Zap, you can turn it on by clicking the “Turn on Zap” button.