Note: You should use a separate Authorize.Net account and keys for each Campaign.
Follow this setup guide:
- Log in to your Authorize.Net account and make sure your account is active.
- Go to the Account > API Credentials & Keys section to get the API Login ID, Transaction Key, and Signature Key.
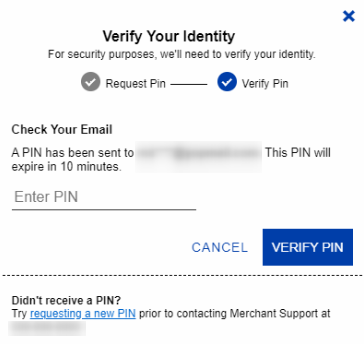
You can generate a new Transaction Key and Signature Key and get them in your email by checking the “New Transaction Key” and “New Signature Key” boxes and clicking the “Submit” button. To complete the action, verify your email.

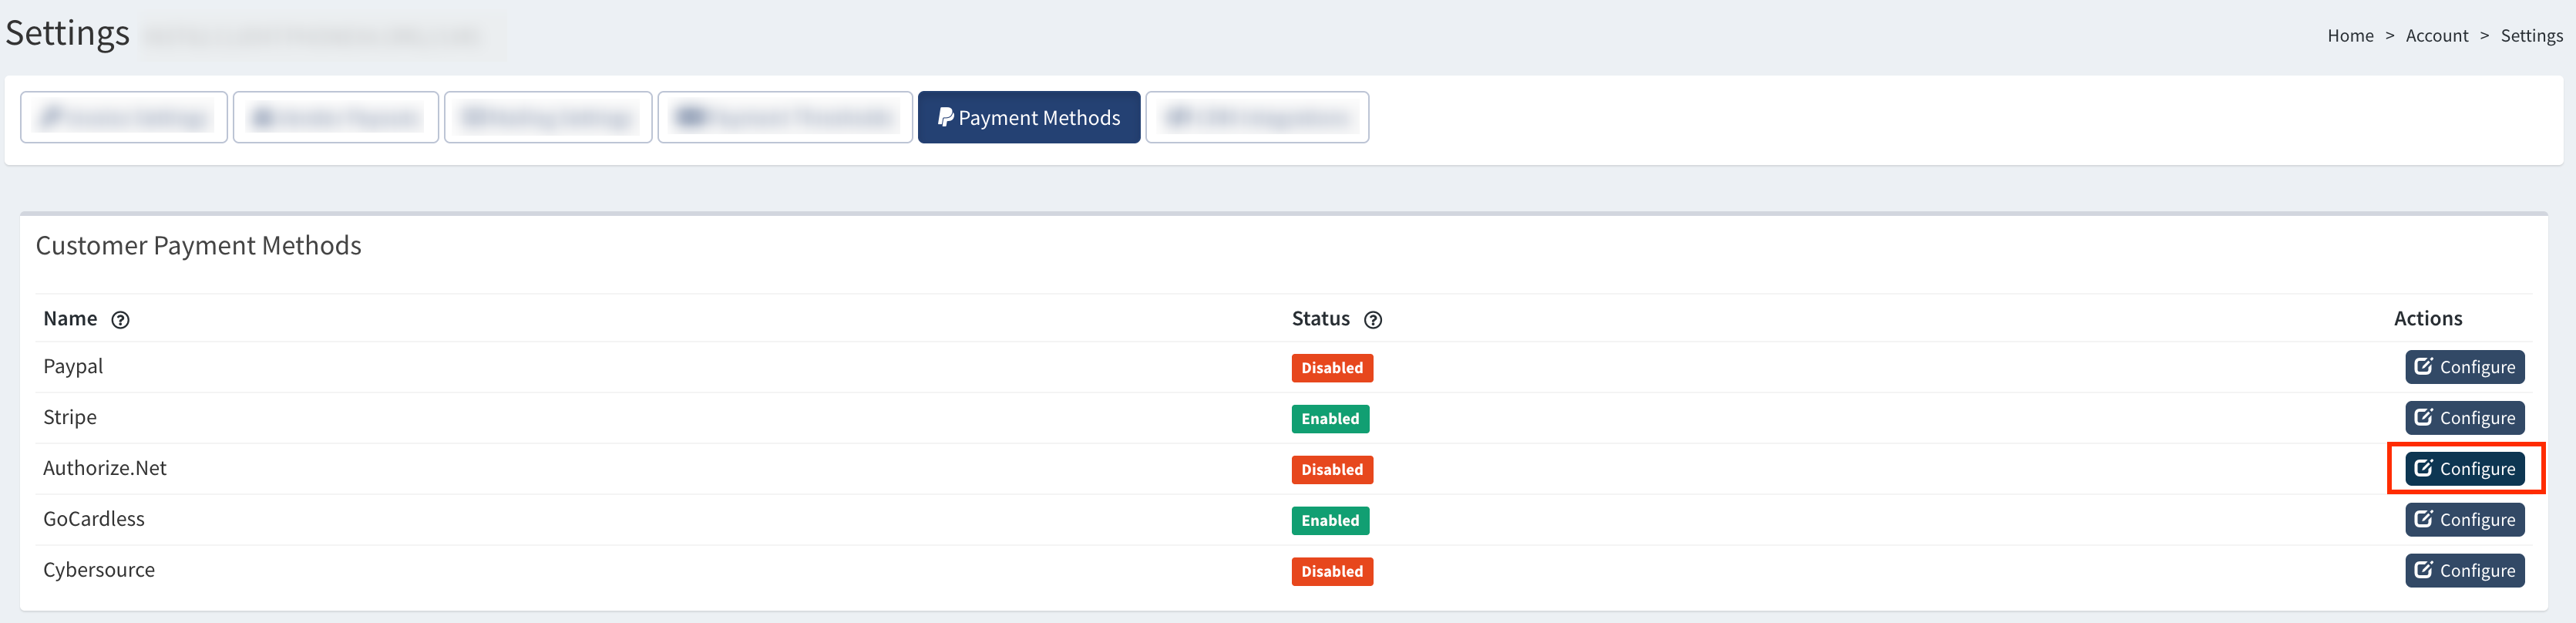
- Open Books360 and go to the Account > Settings > Payment Methods tab.

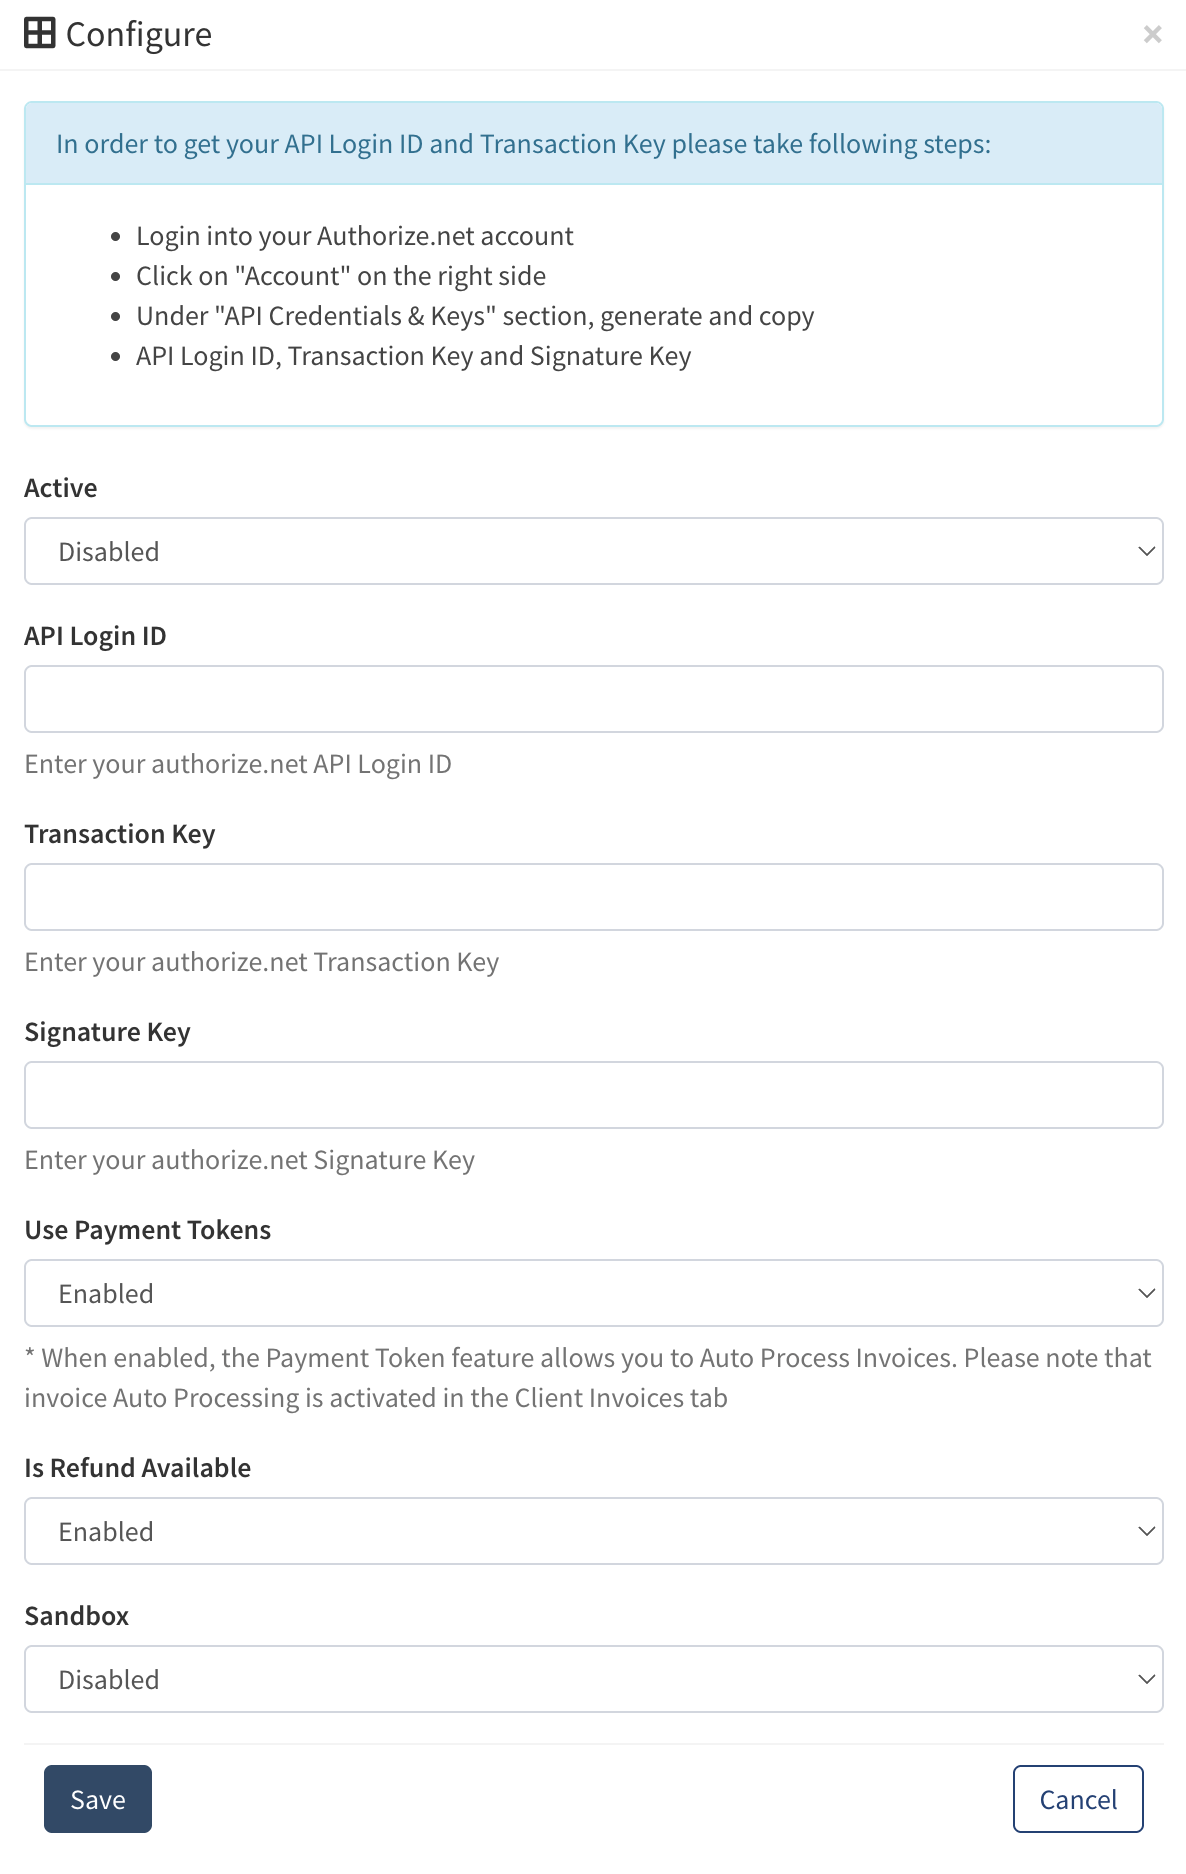
- Click the “Configure” button for the Authorize.Net and fill in the following fields in the “Configure” pop-up window:
- Active: Select the “Enabled” option from the list.
- API Login ID: Enter the API Login ID from your Authorize.Net account.
- Transaction Key: Enter the Transaction key from your Authorize.Net account.
- Signature Key: Enter the Signature Key from your Authorize.Net account.
- Use Payment Tokens: Select the “Enabled” option from the list to activate Invoices Auto Processing.
- Is Refund Available: Select the “Enabled” option to allow refunds for this payment method.
- Sandbox: Leave the default “Enabled” option.
Click the “Save” button to complete the configuration.
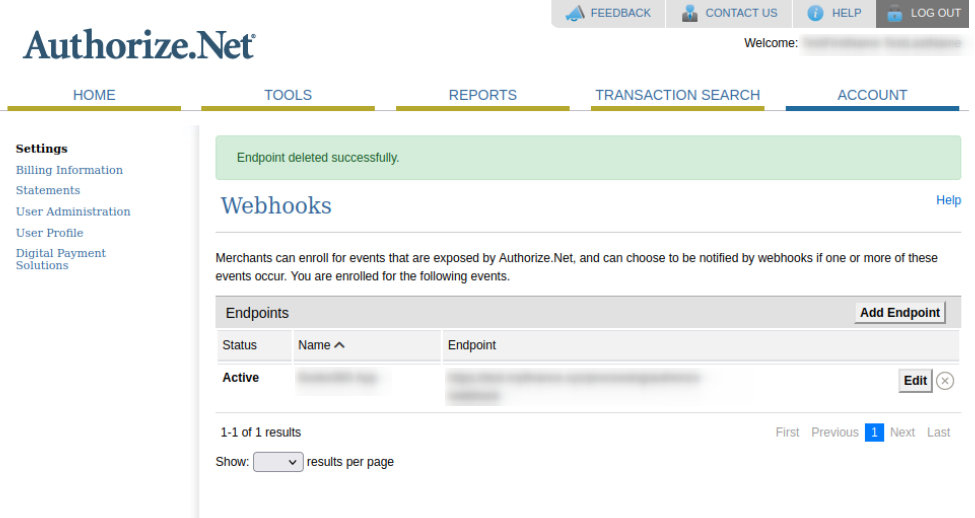
5. Go to your Authorize.Net account and go to the Account > Webhooks section to make sure that the new Endpoint has appeared.