
TBO Bank is a banking provider that enables ACH payments for vendor payouts and customer invoice payments. To use this integration, you must have an active TBO Bank merchant account and the required API credentials.
This integration supports ACH bank transfers, which are an alternative to credit card payments. ACH payments are commonly used for business transactions because they typically offer lower processing fees, are well-suited for recurring and high-value payments, and transfer funds directly between bank accounts.
Once your TBO Bank account is configured in Books360, you can use it to process vendor payouts, collect customer invoice payments, and monitor all ACH transactions through dedicated reports.
Vendor Payouts
Setup
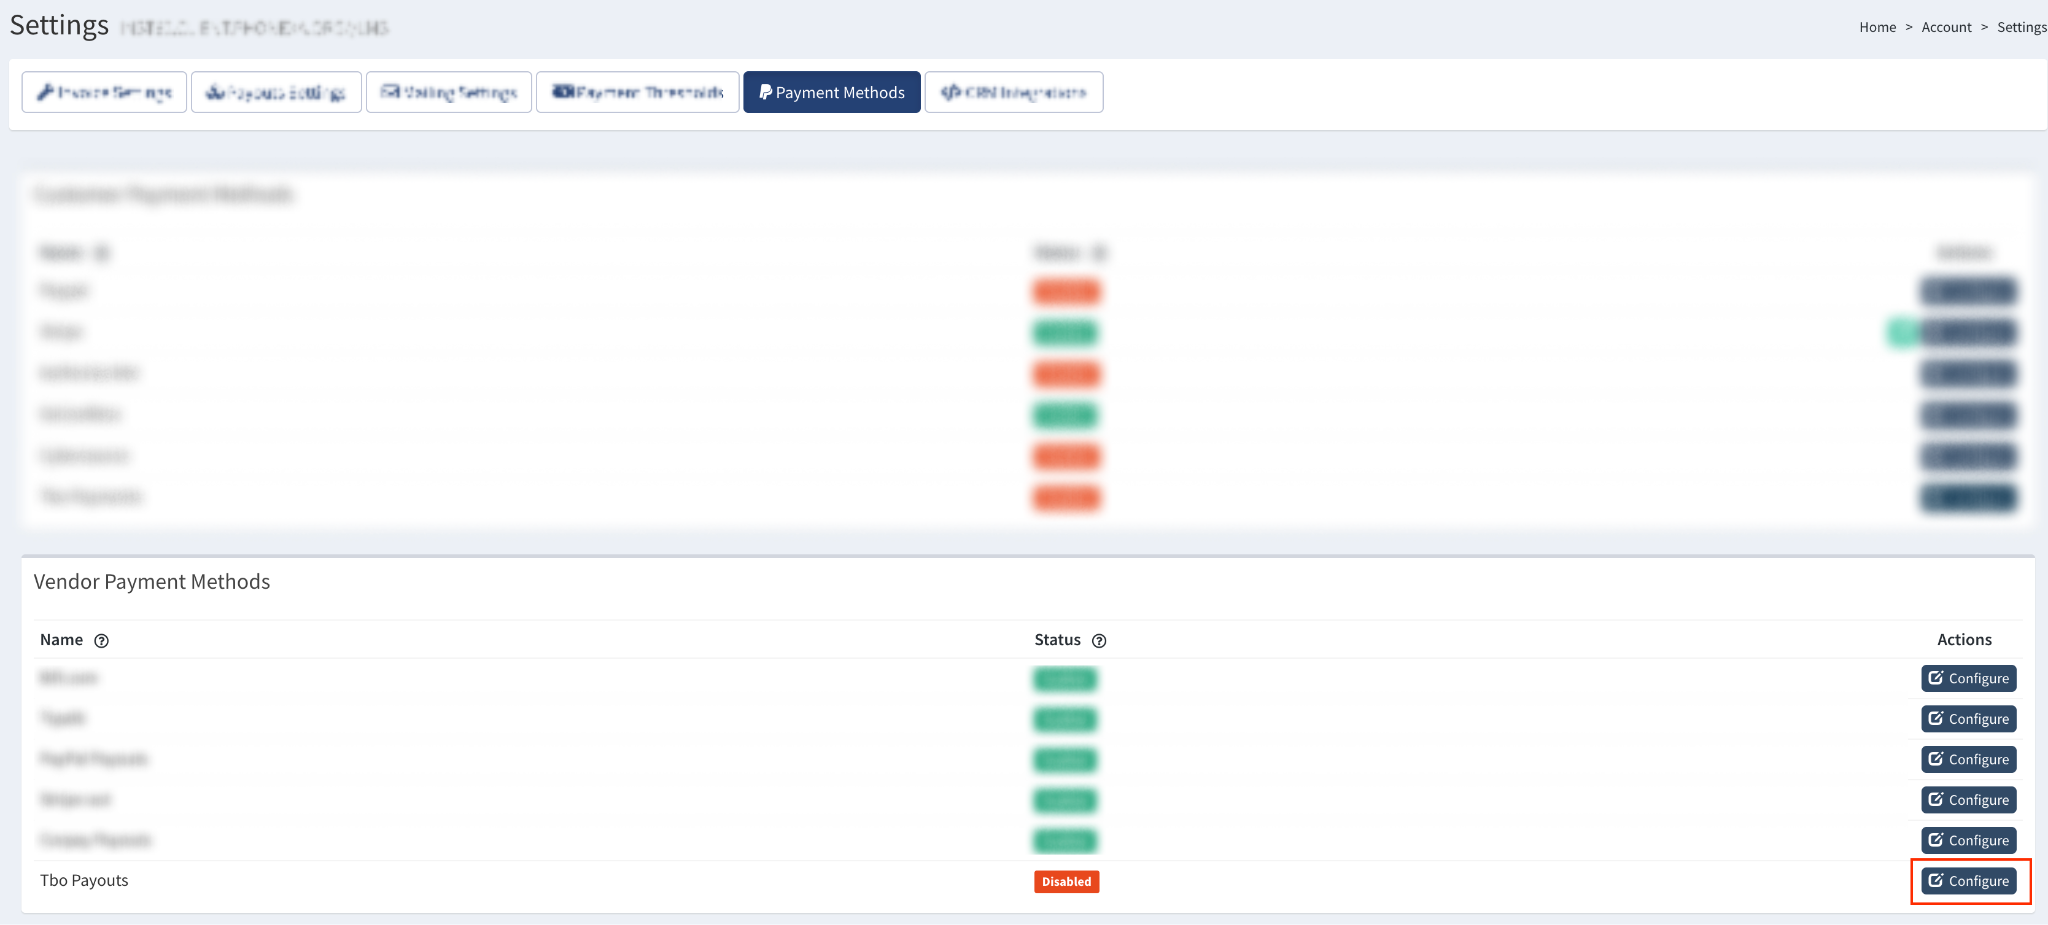
To set up TBO Bank as a Payment Method for vendor payouts, go to the Account > Settings section and select the “Payment Methods” tab. In the “Vendor Payment Methods” block, click the “Configure” button in the “Actions” column for the “Tbo Payouts” option.
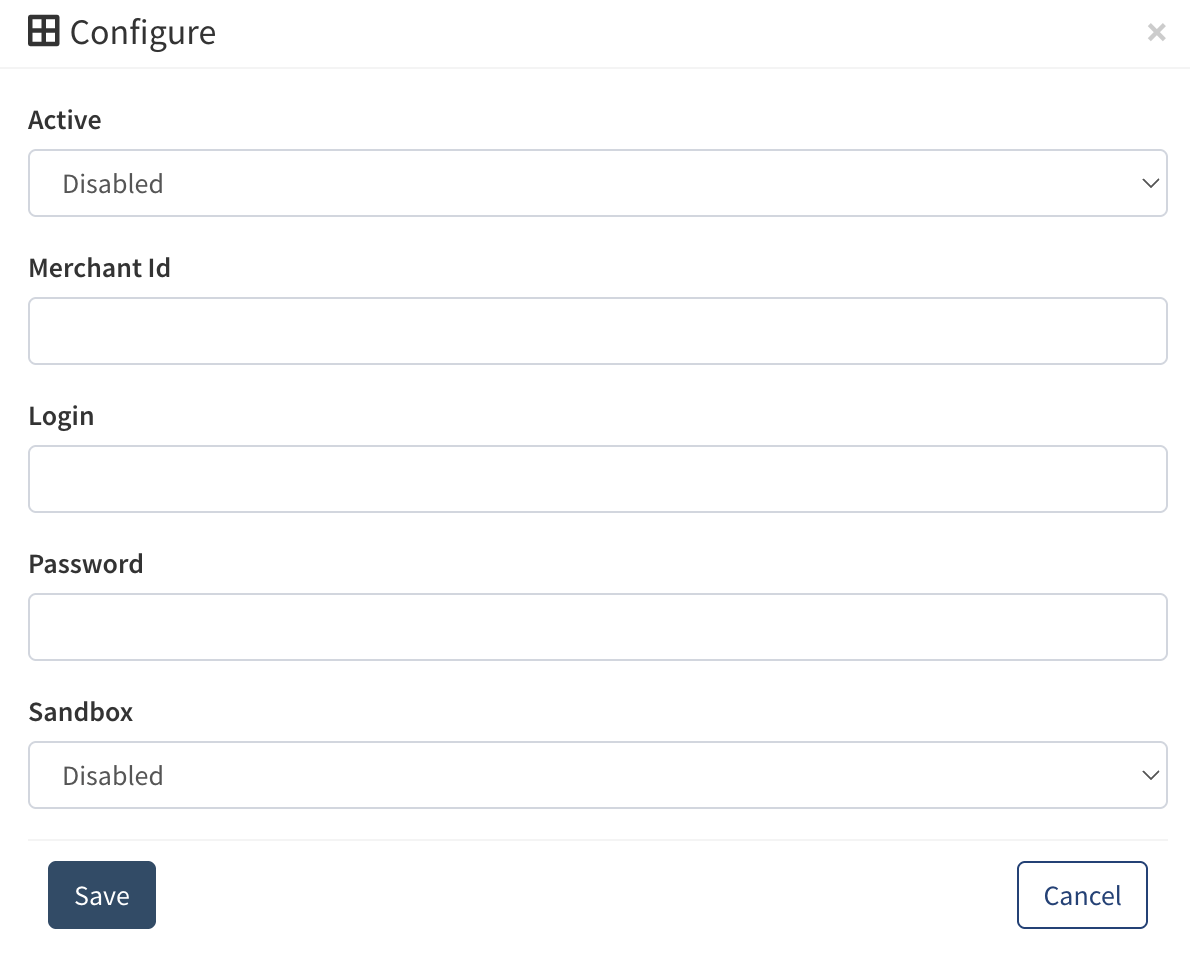
Fill in the following fields:
- Active: Select the “Enabled” option to set up this payment method.
- Merchant Id: Enter the TBO Bank merchant account ID.
- Login: Enter your API username.
- Password: Enter your API password.
Note: If you don't have API credentials yet, please contact TBO Bank to set up your merchant account and obtain your API access credentials. - Notification Emails: Enter the email(s) to receive approval requests for the payouts.
- Sandbox: Select the status of the test mode. Please make sure that this option is disabled once the testing is done.
Click the “Save” button to confirm.
Once the TBO Bank payment method is established, you have the option to process payouts either individually or in batches.
Read more about the payment methods setup in this Knowledge Base article.
Single Payouts
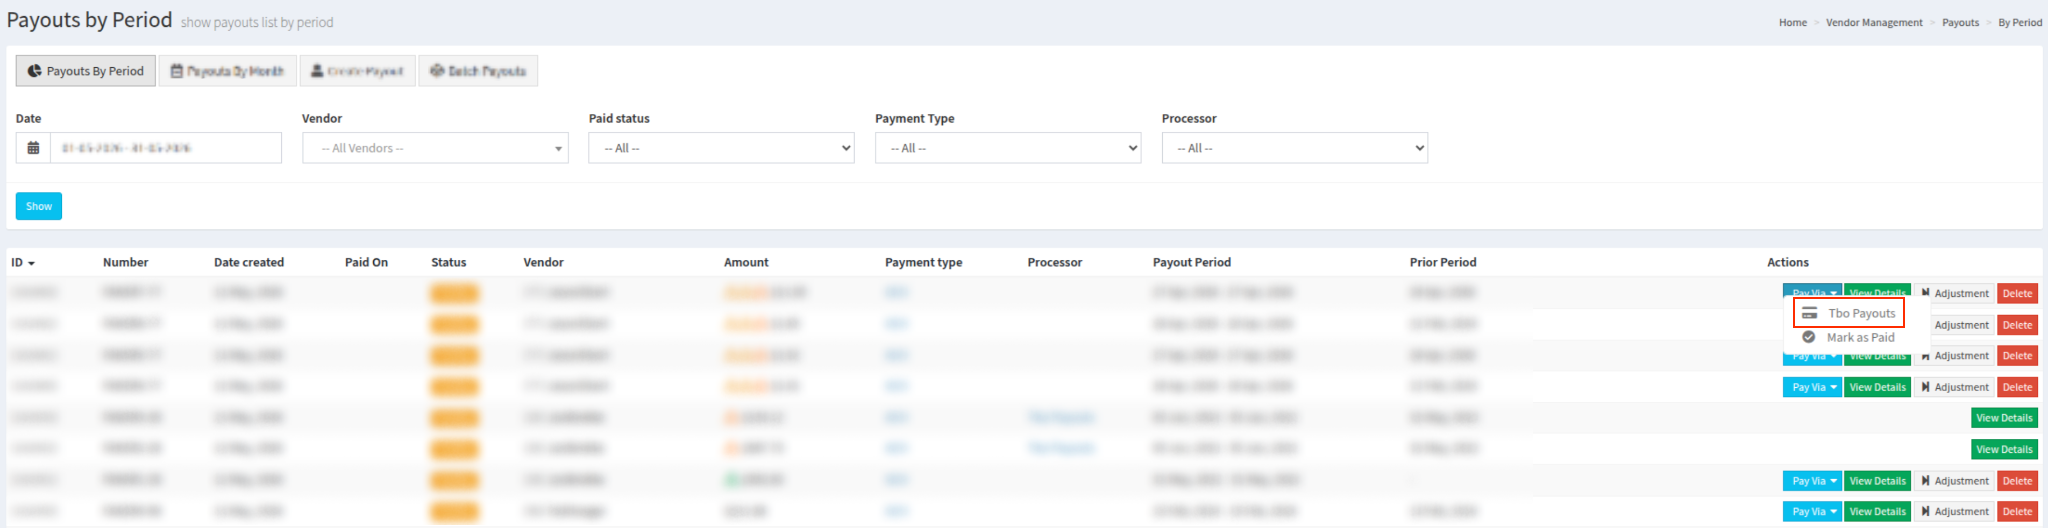
To process the payout individually, go to the Vendor > Payouts section. Select the payout from the list via the “Payouts by Period” tab and click the “Pay Via” > “Tbo Payouts” button.
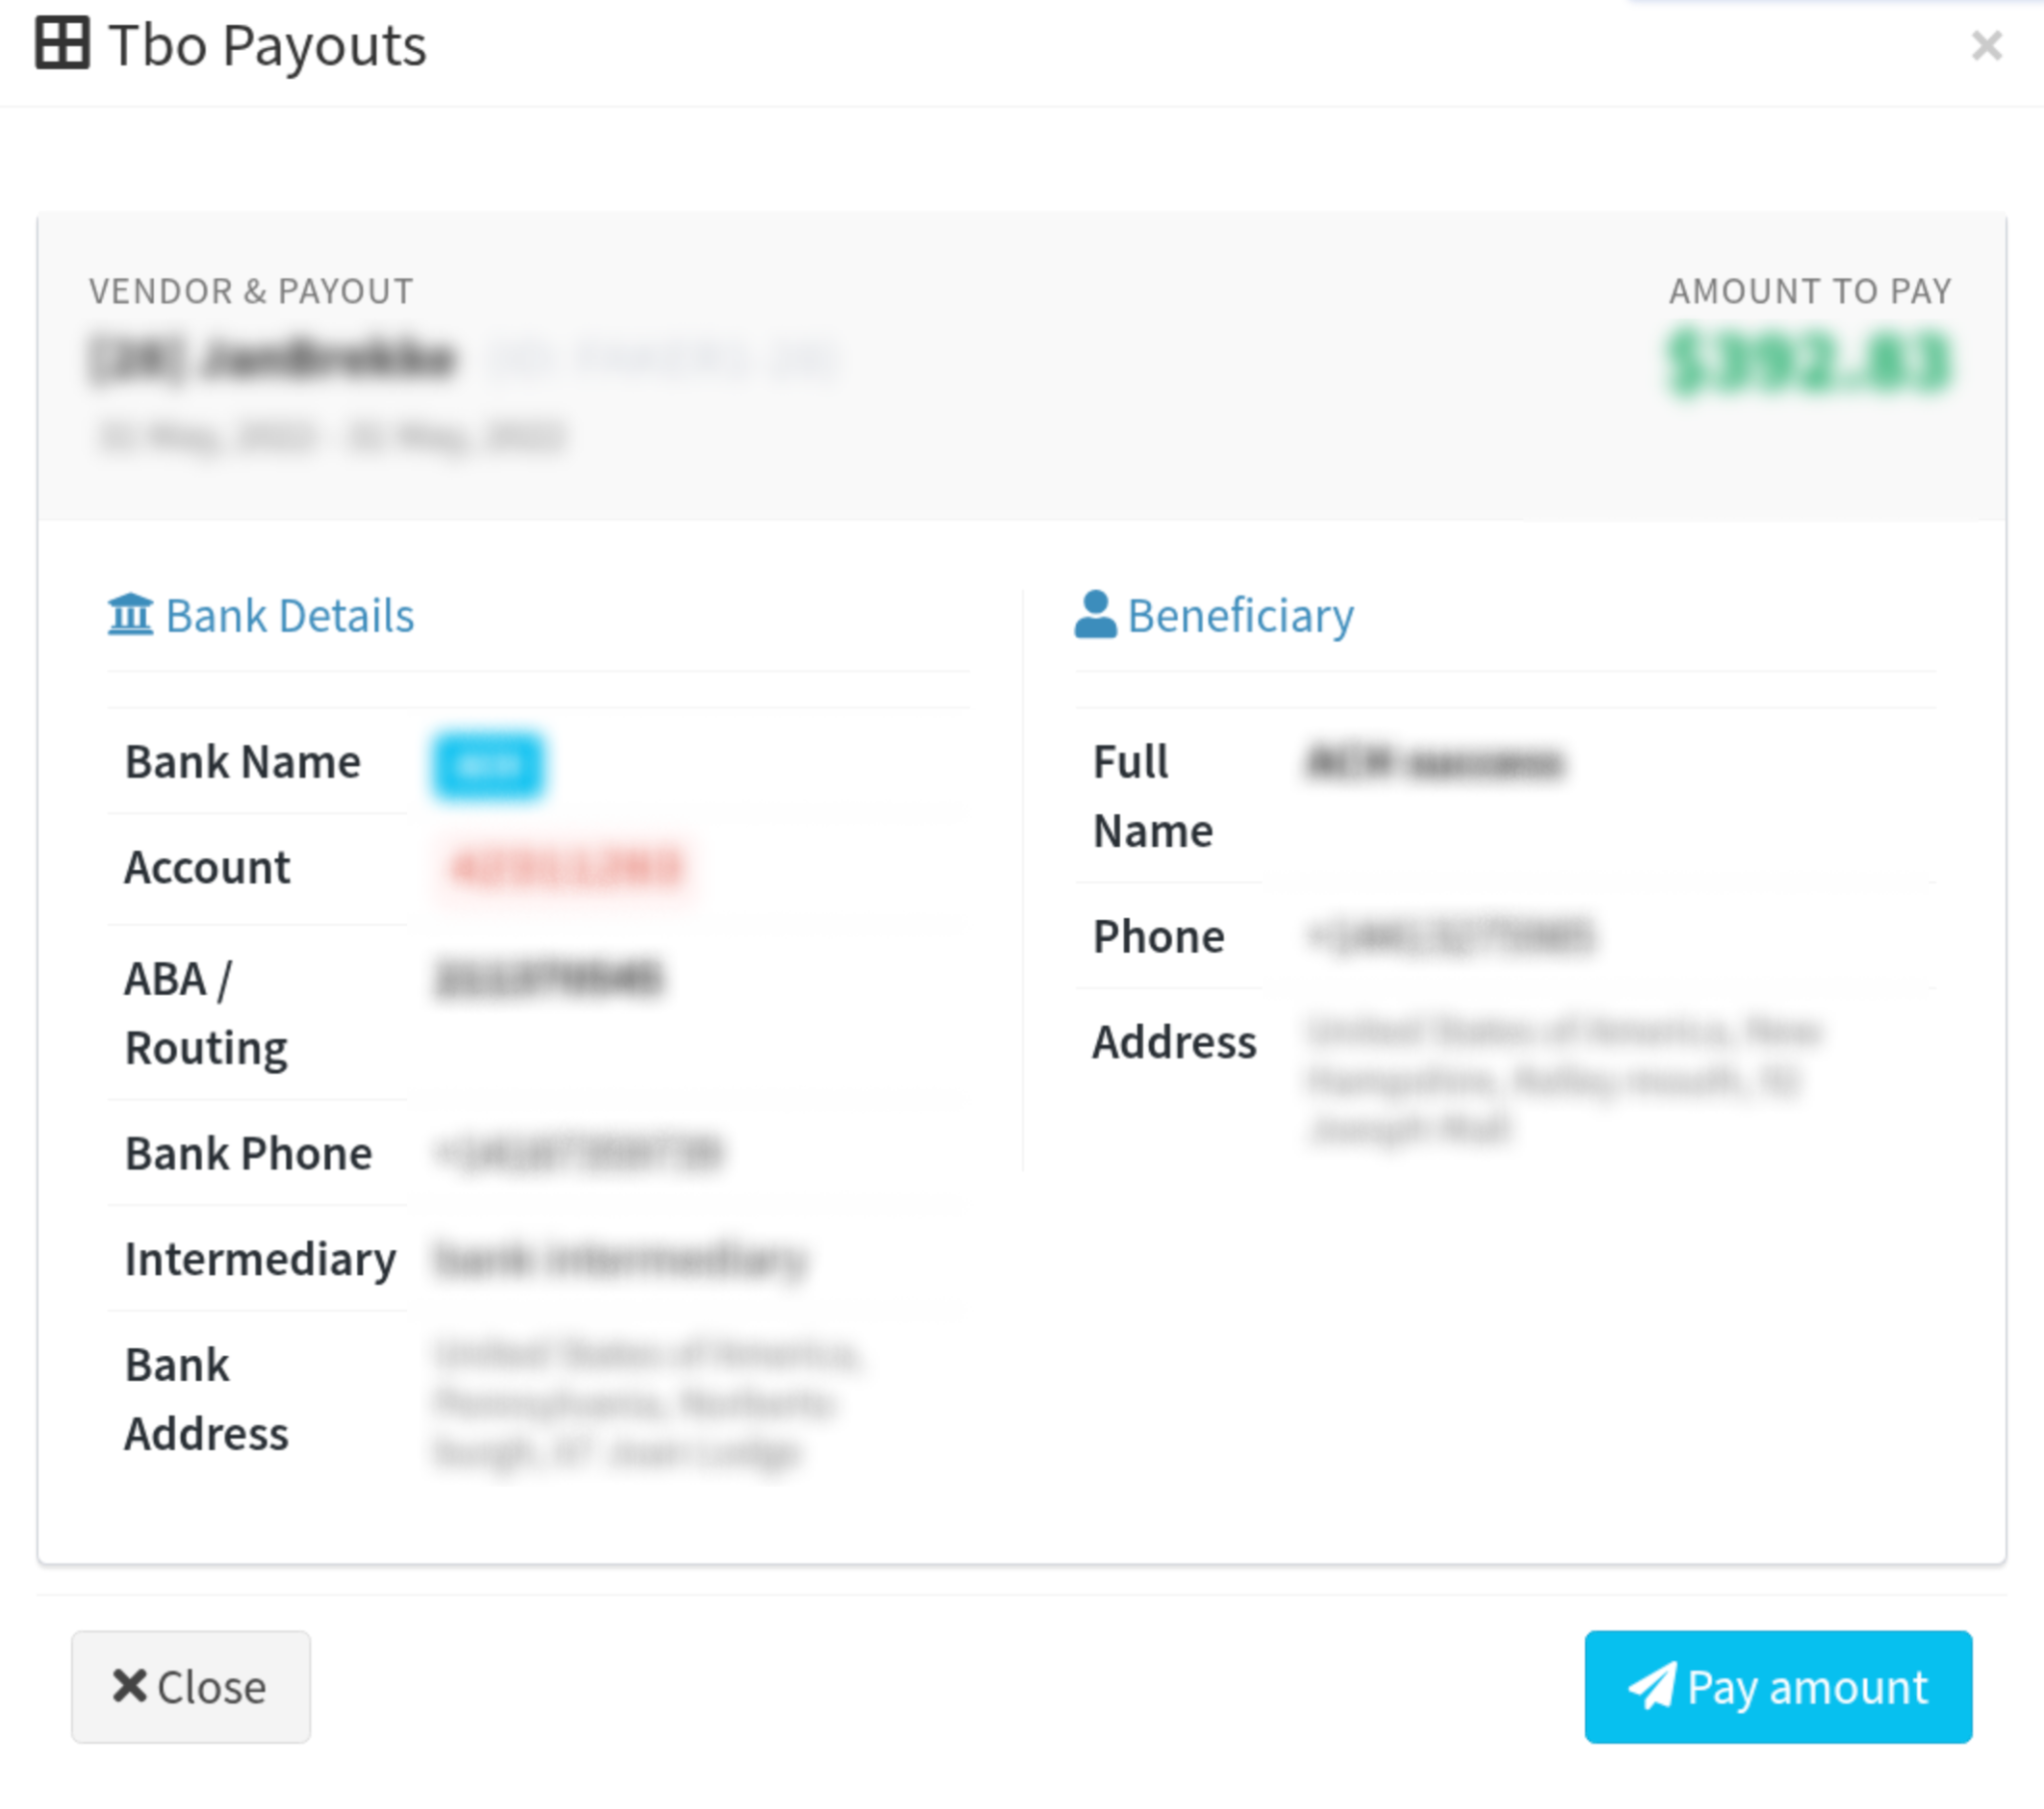
Confirm the details in the pop-up window and click the “Pay amount” button.
Read more about the vendor payouts in this Knowledge Base article.
Mass Payouts
To process the payouts in batches, go to the Vendor Management > Mass Payouts section. Select the payout from the list via the “Payouts by Vendor” tab and click the “Pay Via” > “Tbo Payouts” button.
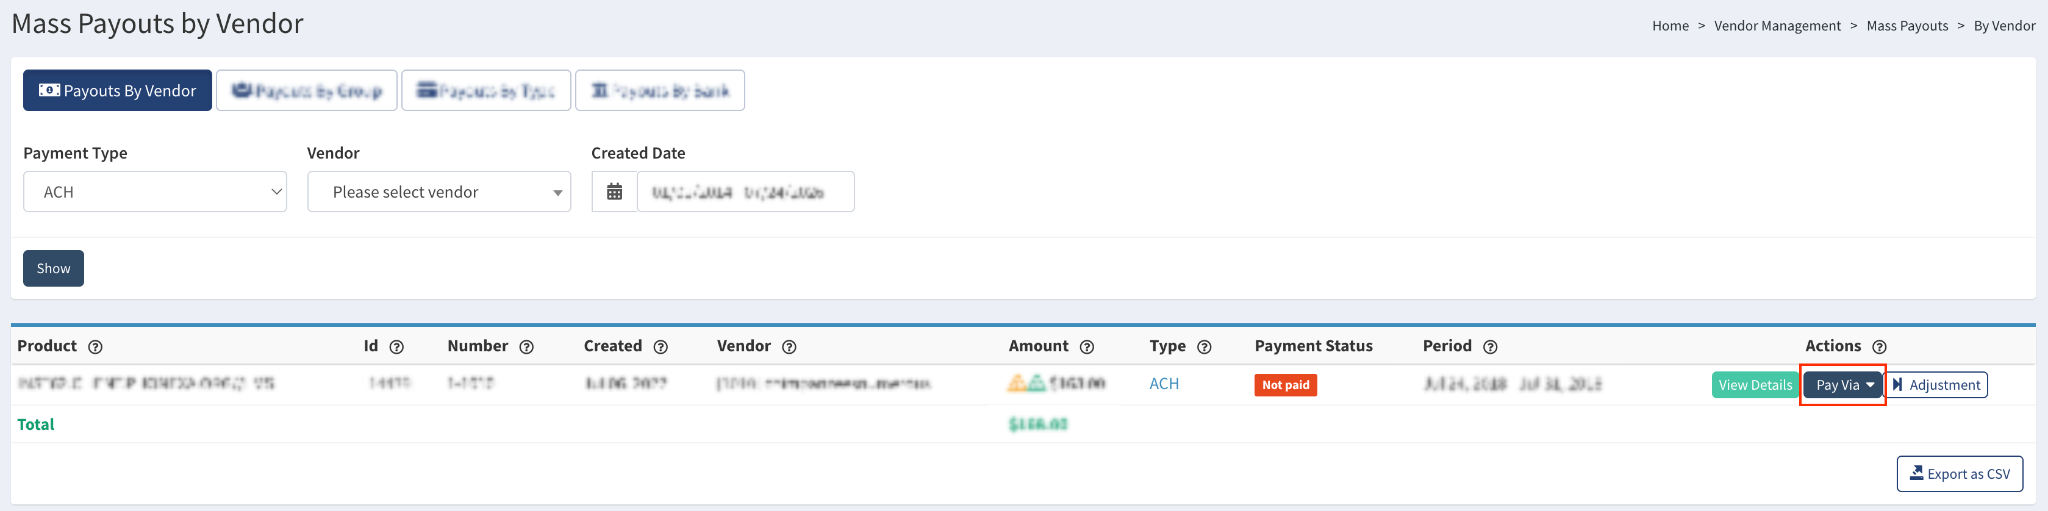
Confirm the details in the pop-up window and click the “Pay Amount” button.
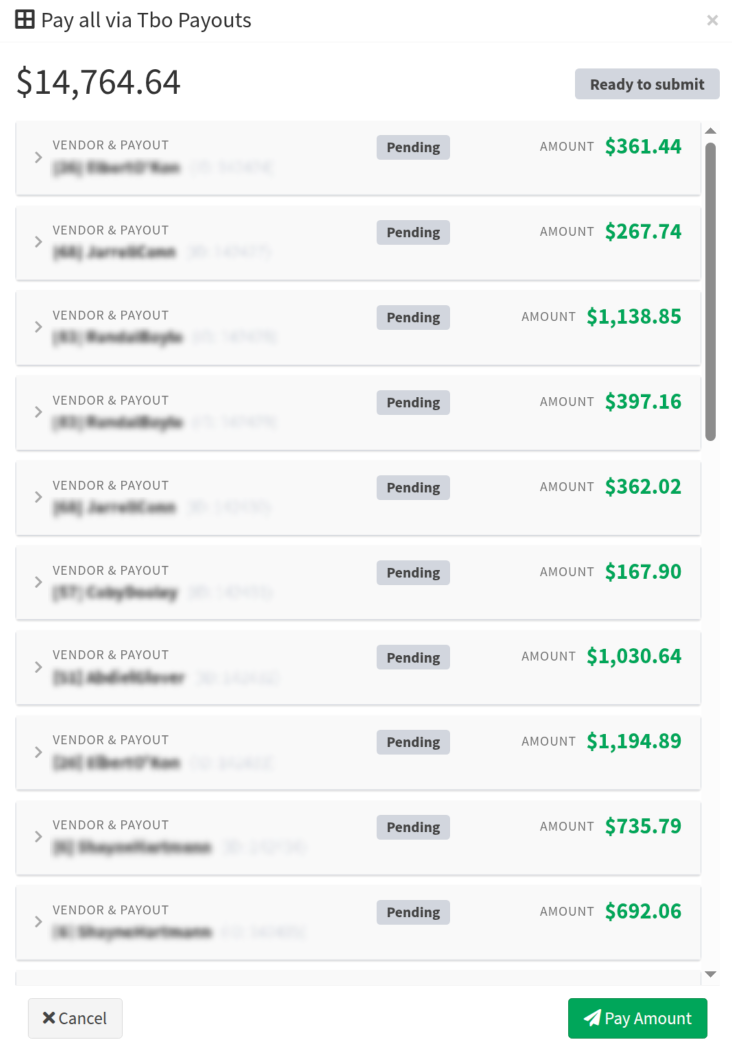
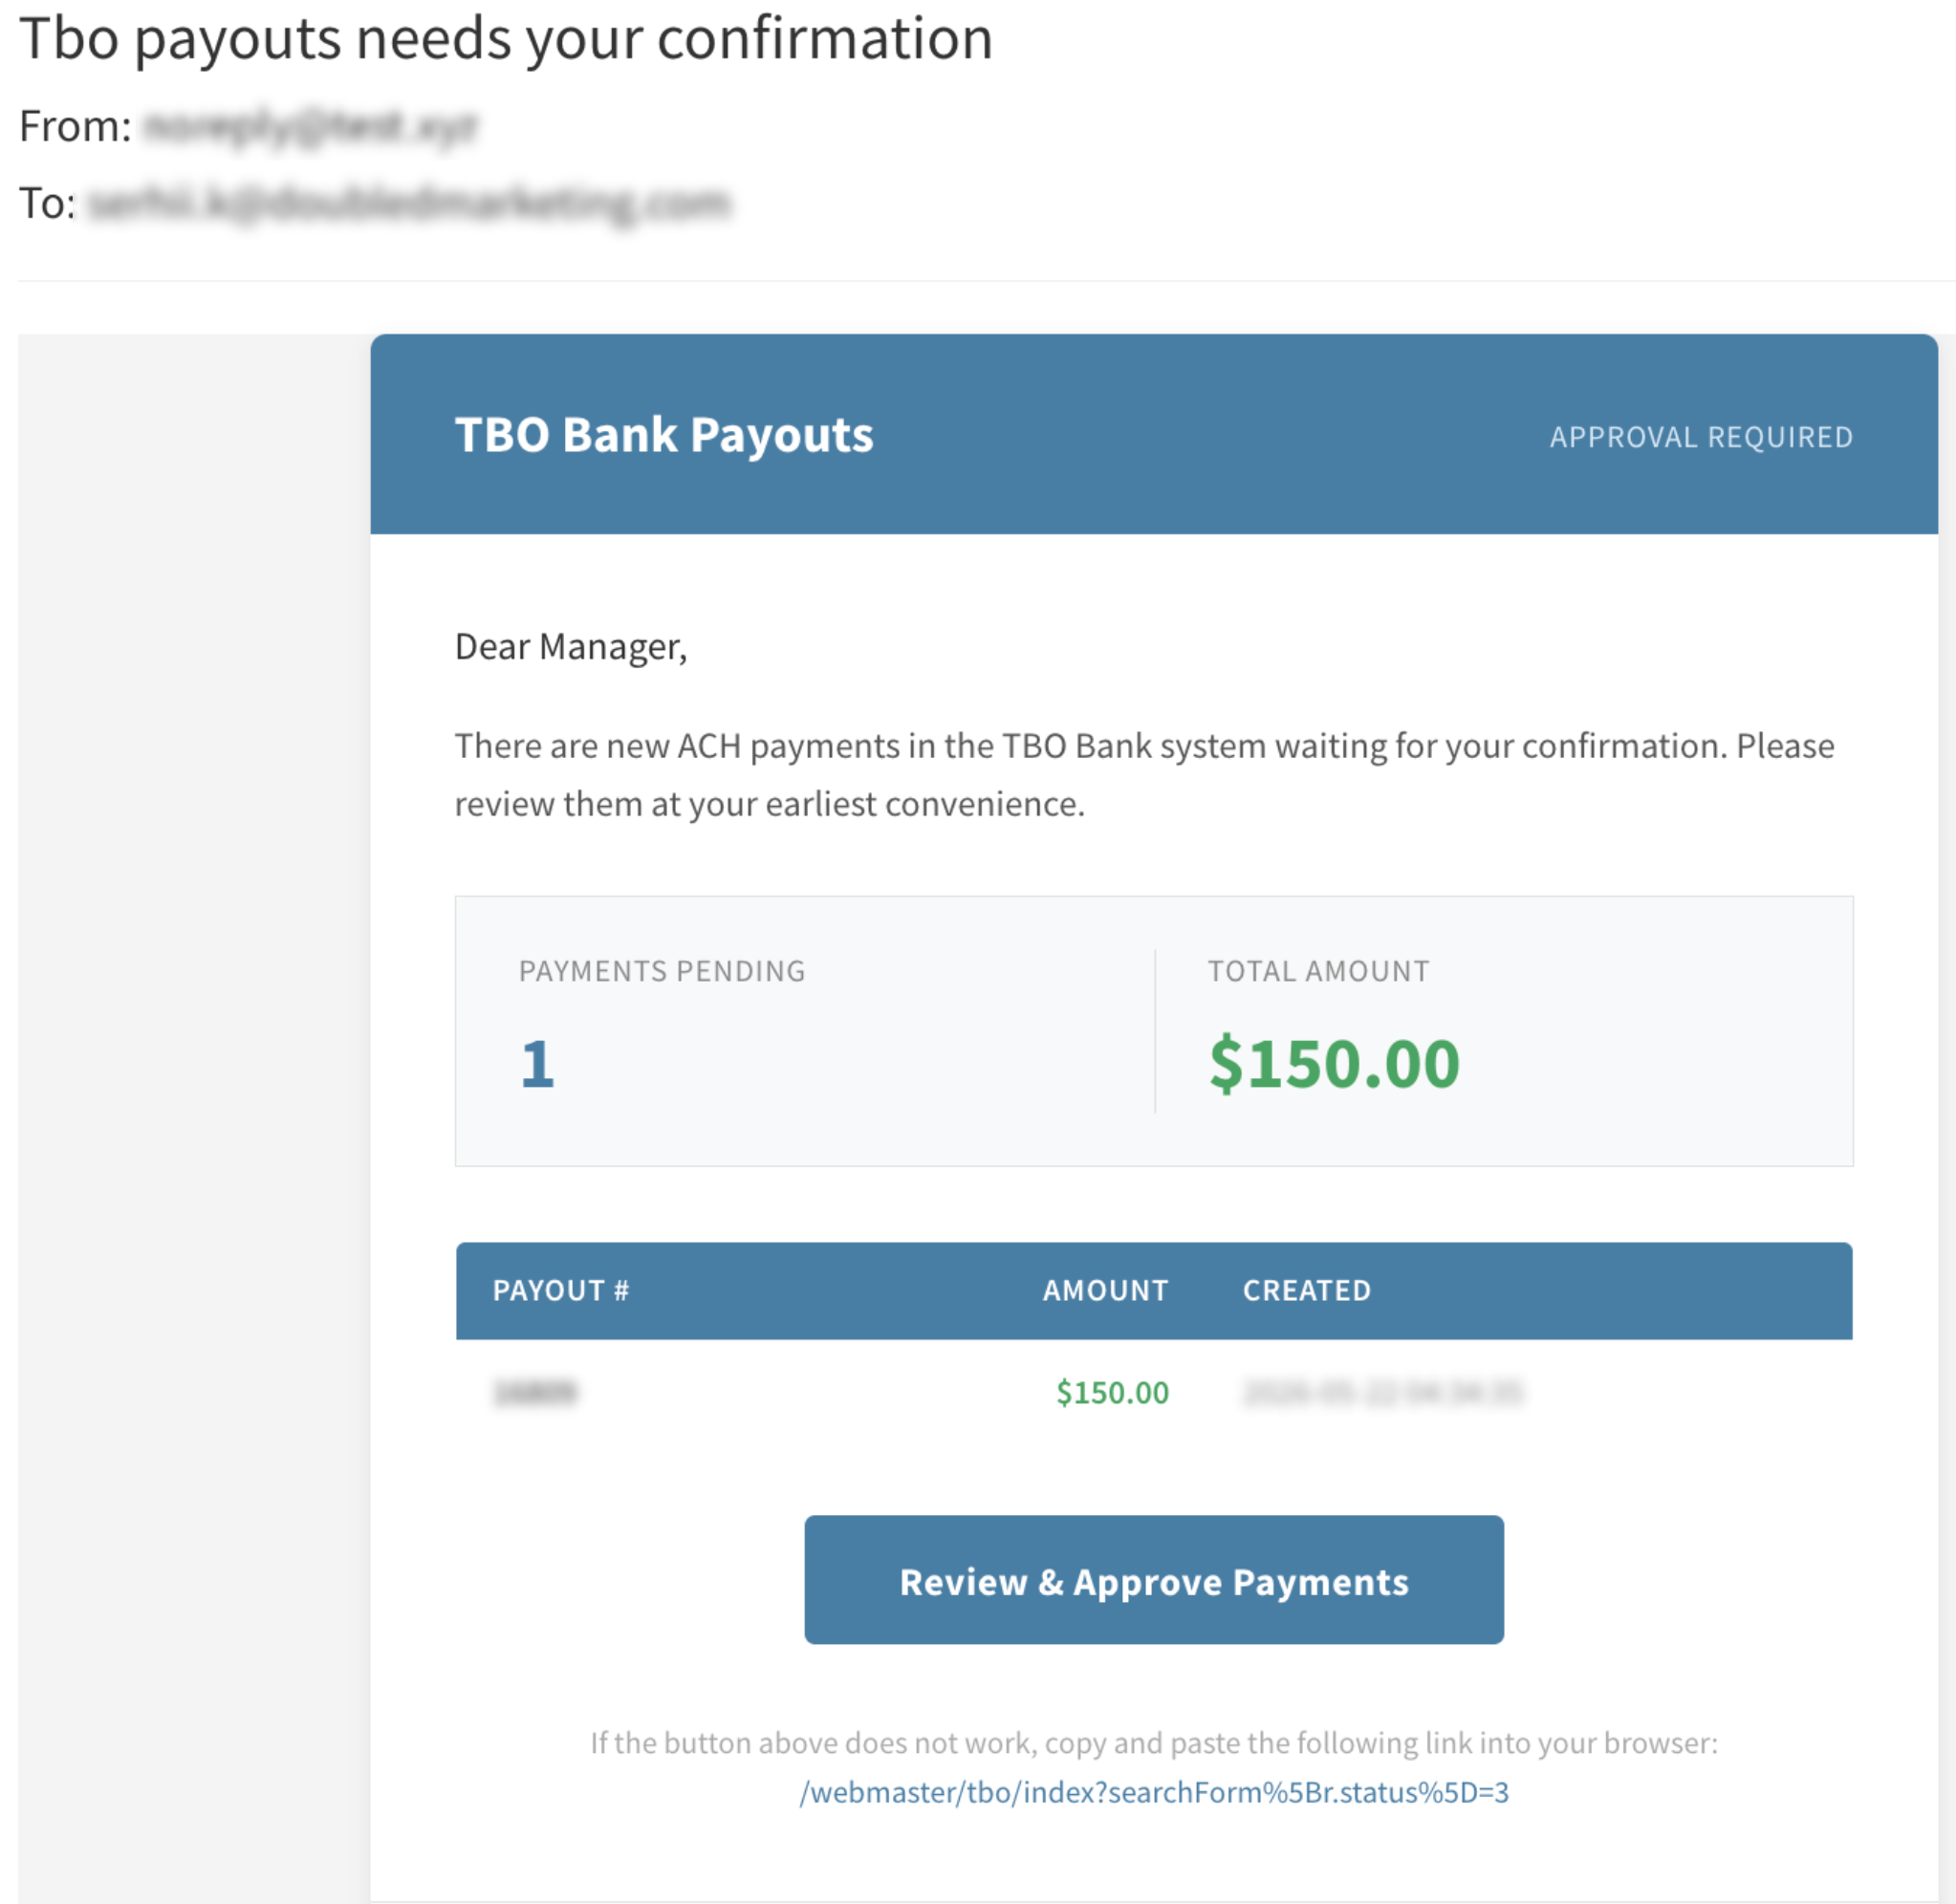
Whether it's an individual or a mass payment, once you initiate the payout, it will initially show a pending status. The email addresses you provided when setting up the TBO Bank payment method will receive a message asking for payout approval from the instance owner. The payout will be fully processed once the instance owner approves it.
Read more about the vendor mass payouts in this Knowledge Base article.
TBO Payouts
To view detailed information about all the payouts processed specifically via TBO Bank, go to the Vendor Management > TBO Payouts section.
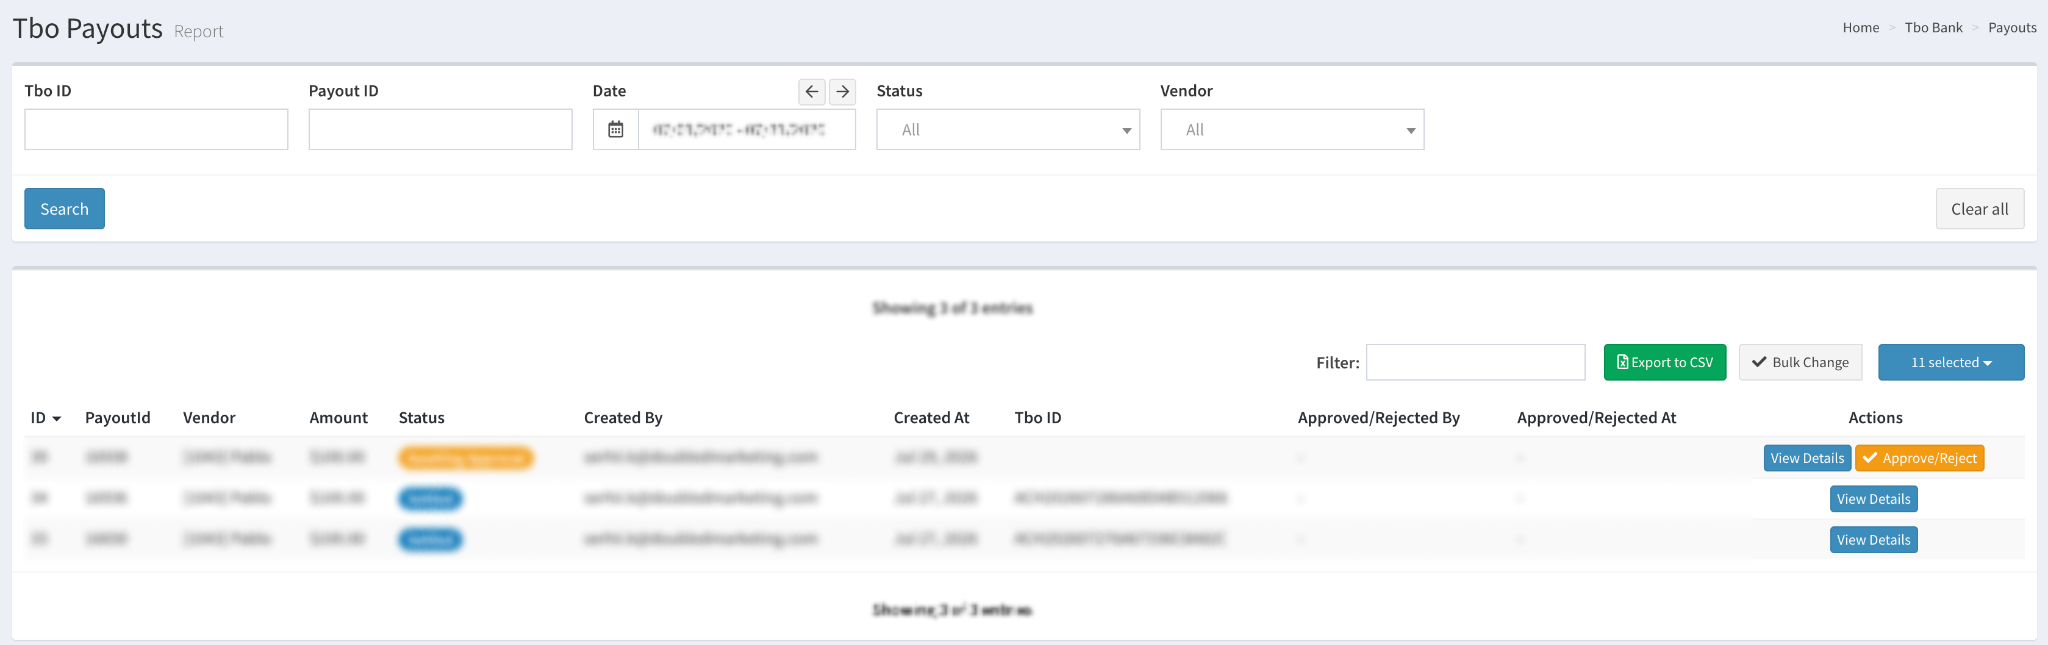
You can narrow down the search results by using the following filters:
- TBO ID: Enter the TBO Bank ID number.
- Payout ID: Enter the payout number in Books 360.
- Date: Select the date range for the report.
- Status: Select the payout status.
- Vendor: Select the vendor.
The payments list contains the following information:
- ID: The payment ID number in the report.
- PayoutId: The payout number in the system.
- Amount: The payout amount.
- Status: The payout status.
- Created By: The user who created the payout.
- Created At: The date and time when the payout was created.
- Approved/Rejected By: The user who approved/rejected the payout.
- Approved/Rejected At: The date and time when the payout was approved/rejected.
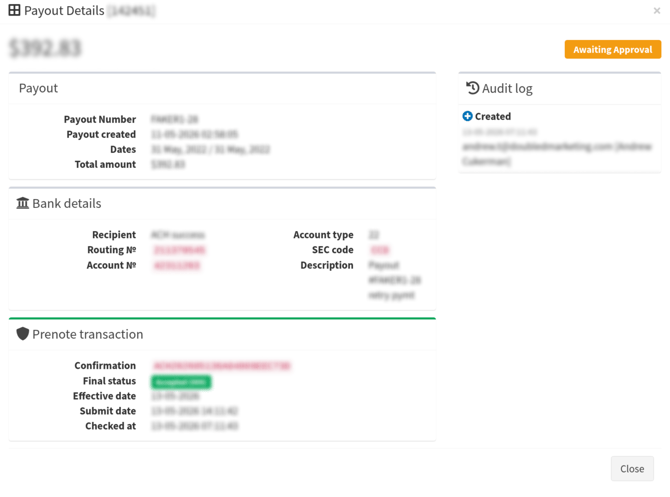
Select the specific payout from the list and click the “View Details” button in the “Actions” column to view more detailed information.
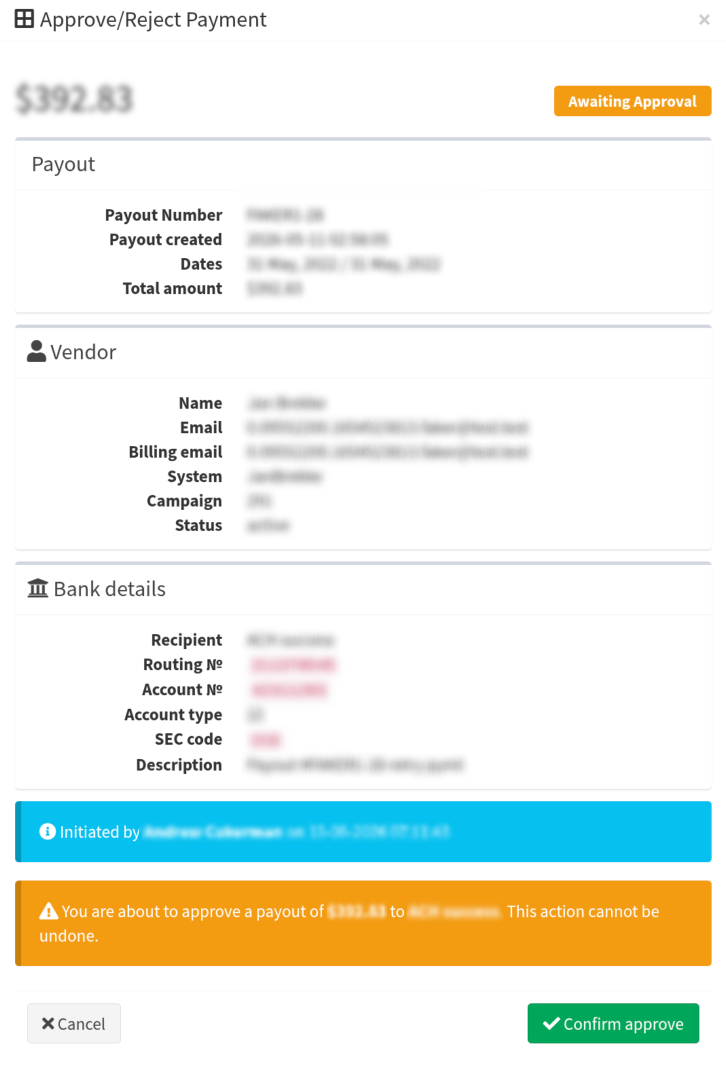
To approve or reject the payout, click the "Approve/Reject" button in the "Actions" column.
Note: The payout can be approved by the instance owner only. After selecting an action, review the details and confirm your choice in the pop-up window.
Customer Invoices
Setup
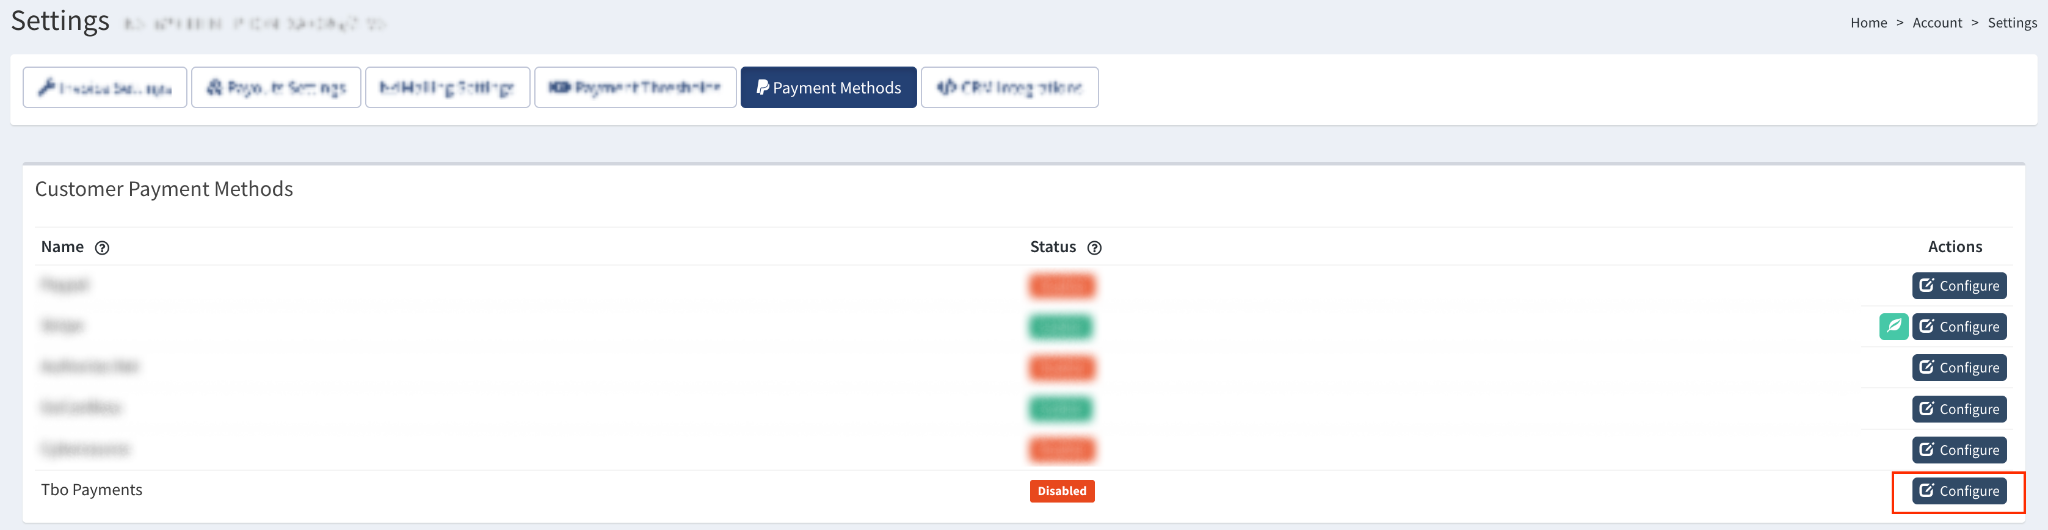
To set up TBO Bank as a Payment Method for customer invoice payments, go to the Account > Settings section and select the “Payment Methods” tab. In the “Customer Payment Methods” block, click the “Configure” button in the “Actions” column for the “Tbo Payments” option.
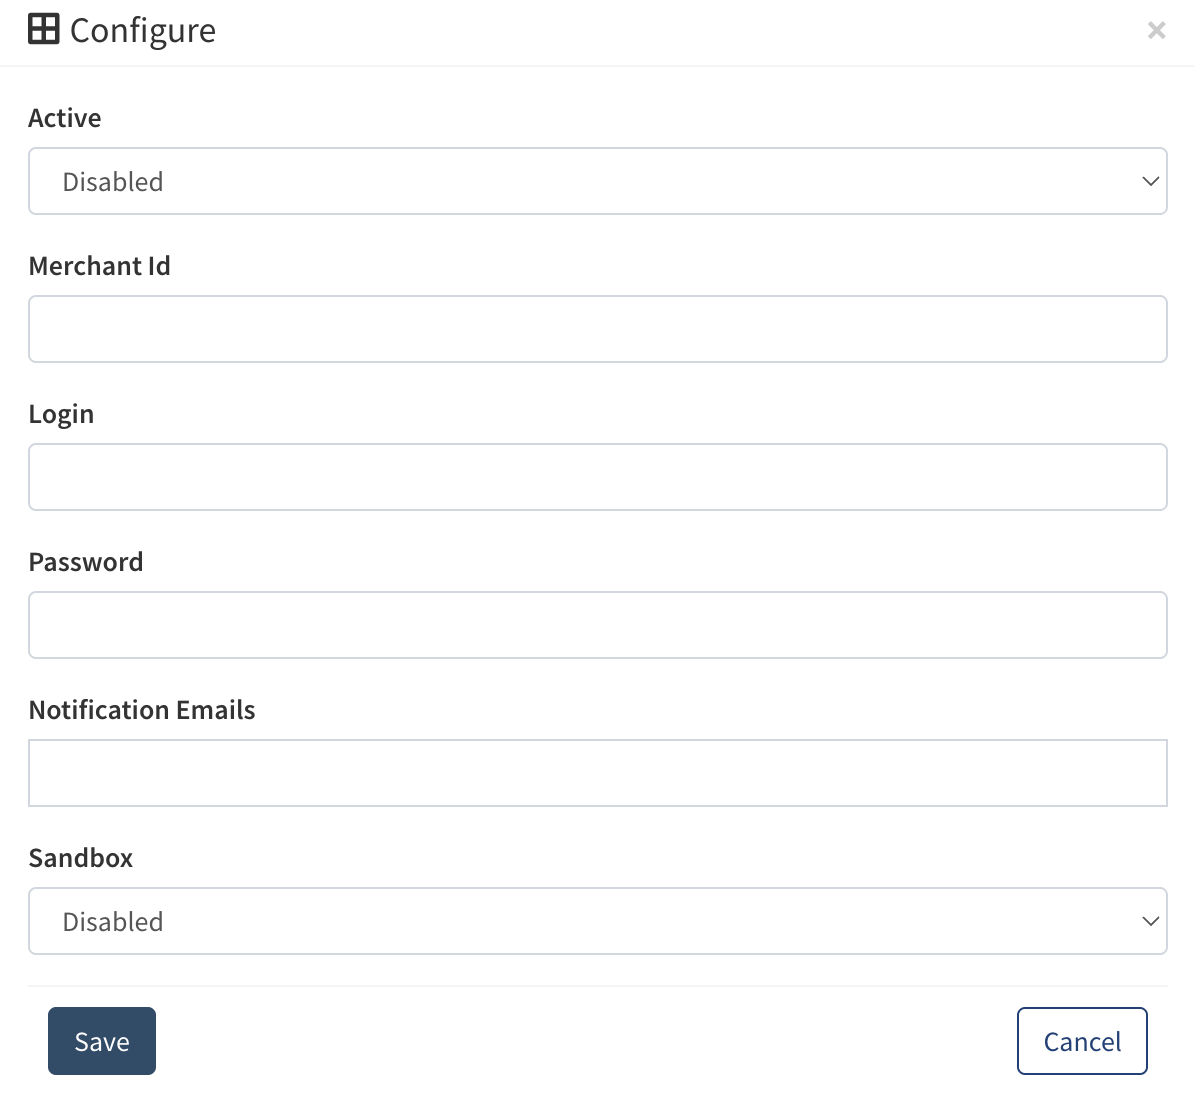
Fill in the following fields:
- Active: Select the “Enabled” option to set up this payment method.
- Merchant Id: Enter the TBO Bank merchant account ID.
- Login: Enter your API username.
- Password: Enter your API password.
- Sandbox: Select the status of the test mode. Please make sure that this option is disabled once the testing is done.
Click the “Save” button to confirm.
Read more about the payment methods setup in this Knowledge Base article.
TBO Payments
Once the TBO Bank payment method is established for the customers, the corresponding section will be added to the menu. To access, go to the Customer Management > Tbo Payments section.
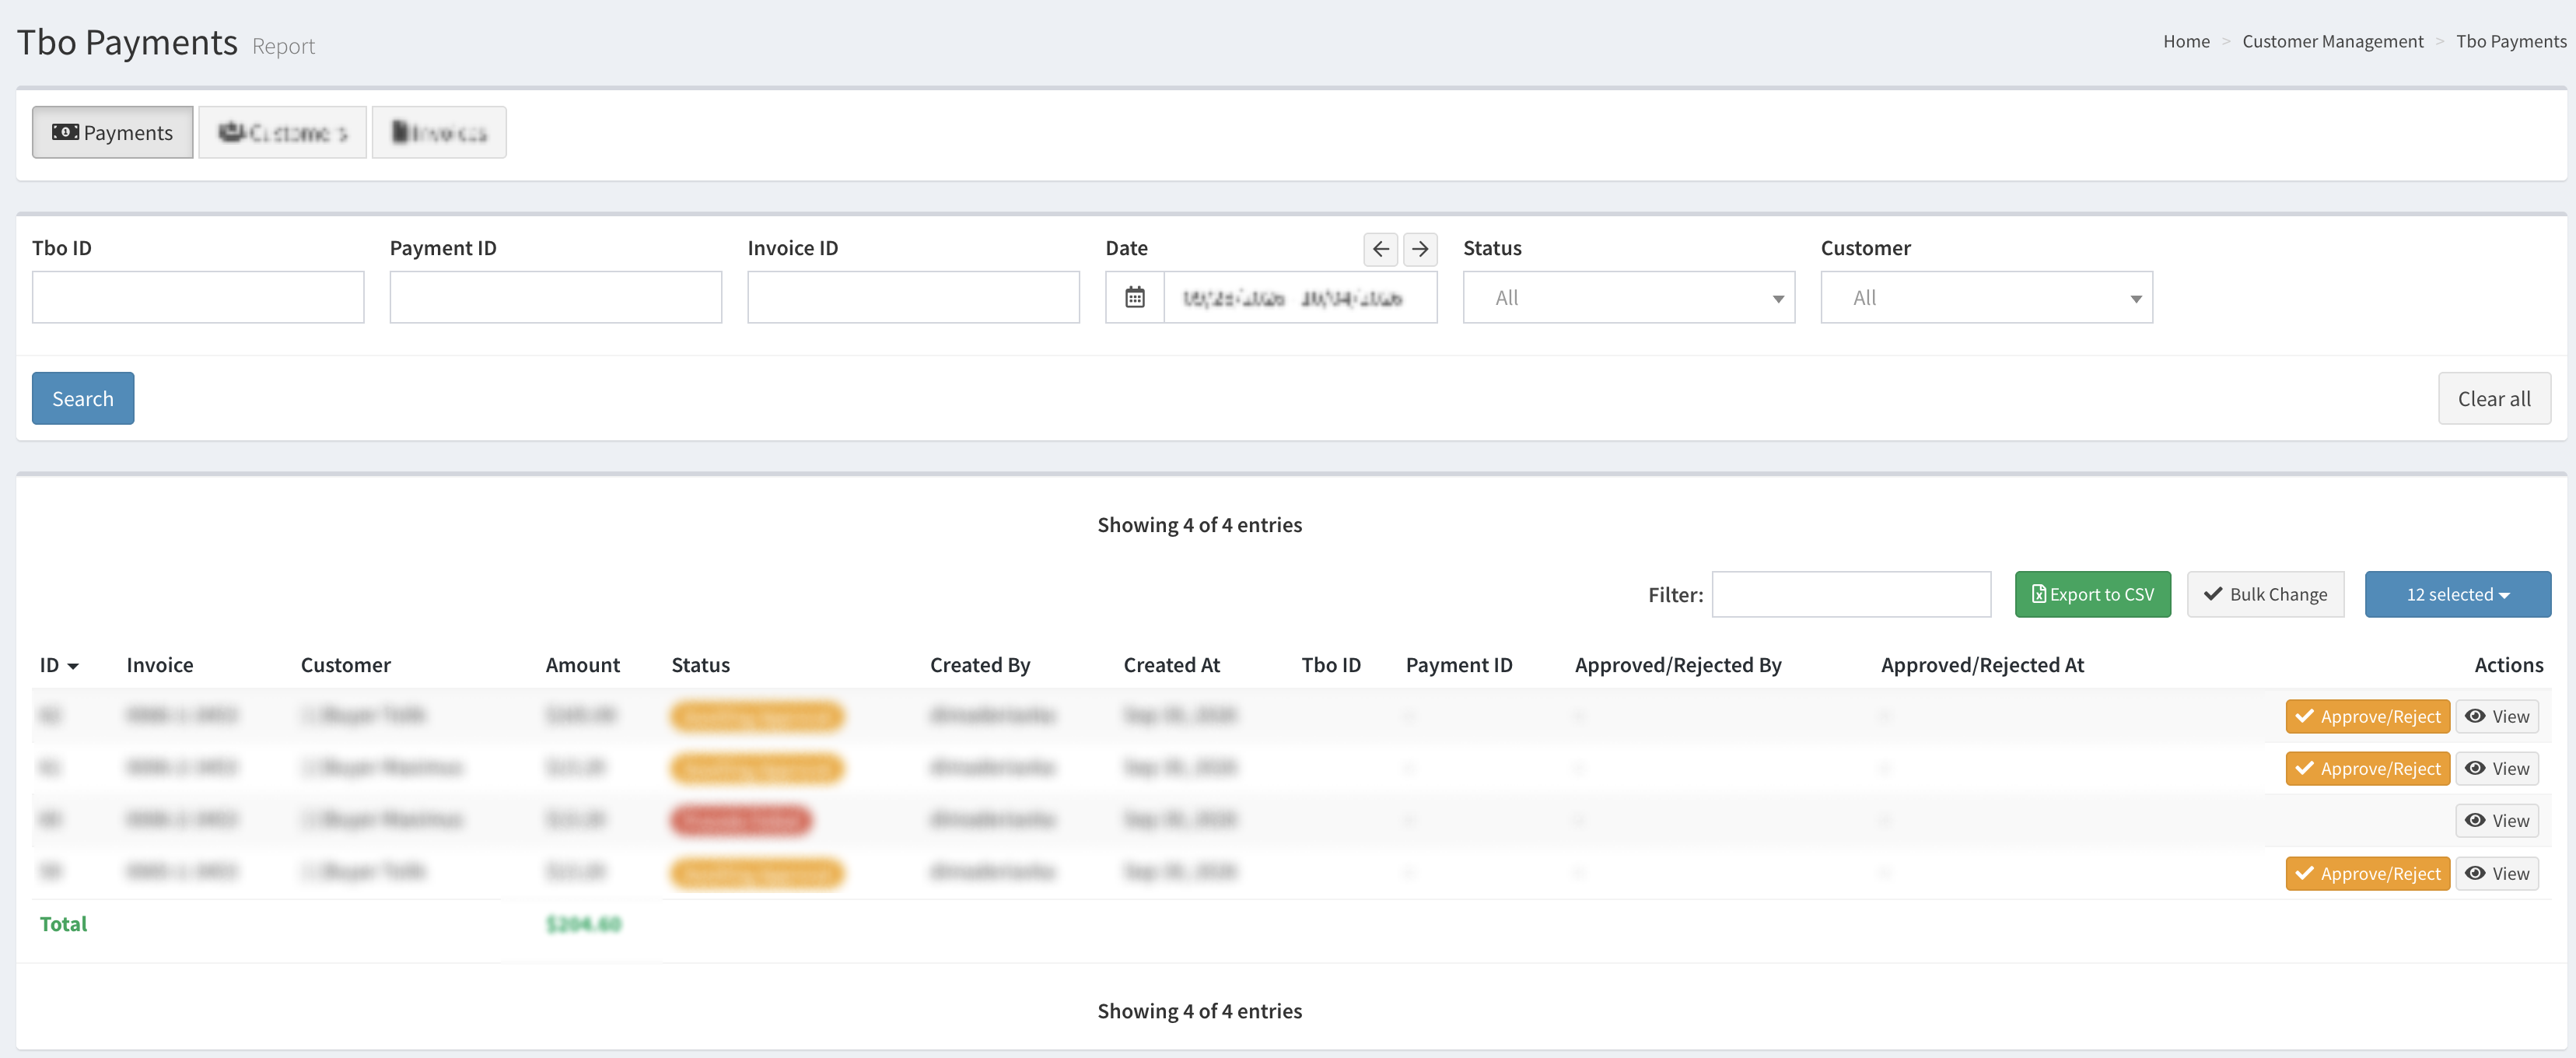
The “Payments” tab allows you to view detailed information about all customer charges processed via TBO Bank, enabling you to review each transaction individually. Additionally, this tab allows instance owners to approve or decline payment transactions initiated through the “Invoices” tab.
You can narrow down the search results by using the following filters:
- Tbo ID: Enter the TBO transaction ID.
- Payment ID: Enter the payment ID in Books360.
- Invoice ID: Enter the invoice number in the system.
- Date: Select the date range.
- Status: Select the payment status.
- Customer: Select the customer.
The list contains the following information:
- ID: The payment number in the report.
- Invoice: The invoice number in the system.
- Customer: The name of the customer in the system.
- Amount: The amount that was charged.
- Status: The payment status.
- Created By: The user who charged the account.
- Created At: The date and time when the customer was charged.
- Tbo ID: The TBO transaction ID.
- Payment ID: The payment ID in Books360.
- Approved/Rejected By: The name of the user who approved/rejected the transaction.
- Approved/Rejected At: The date and time when the transaction was approved/rejected.
To accept or decline the transaction initiated via the “Invoices” tab, click the “Approve/Reject” button in the “Actions” column. Note: Transaction approval is available to instance owners only. Check the transaction details and confirm the preferred action.
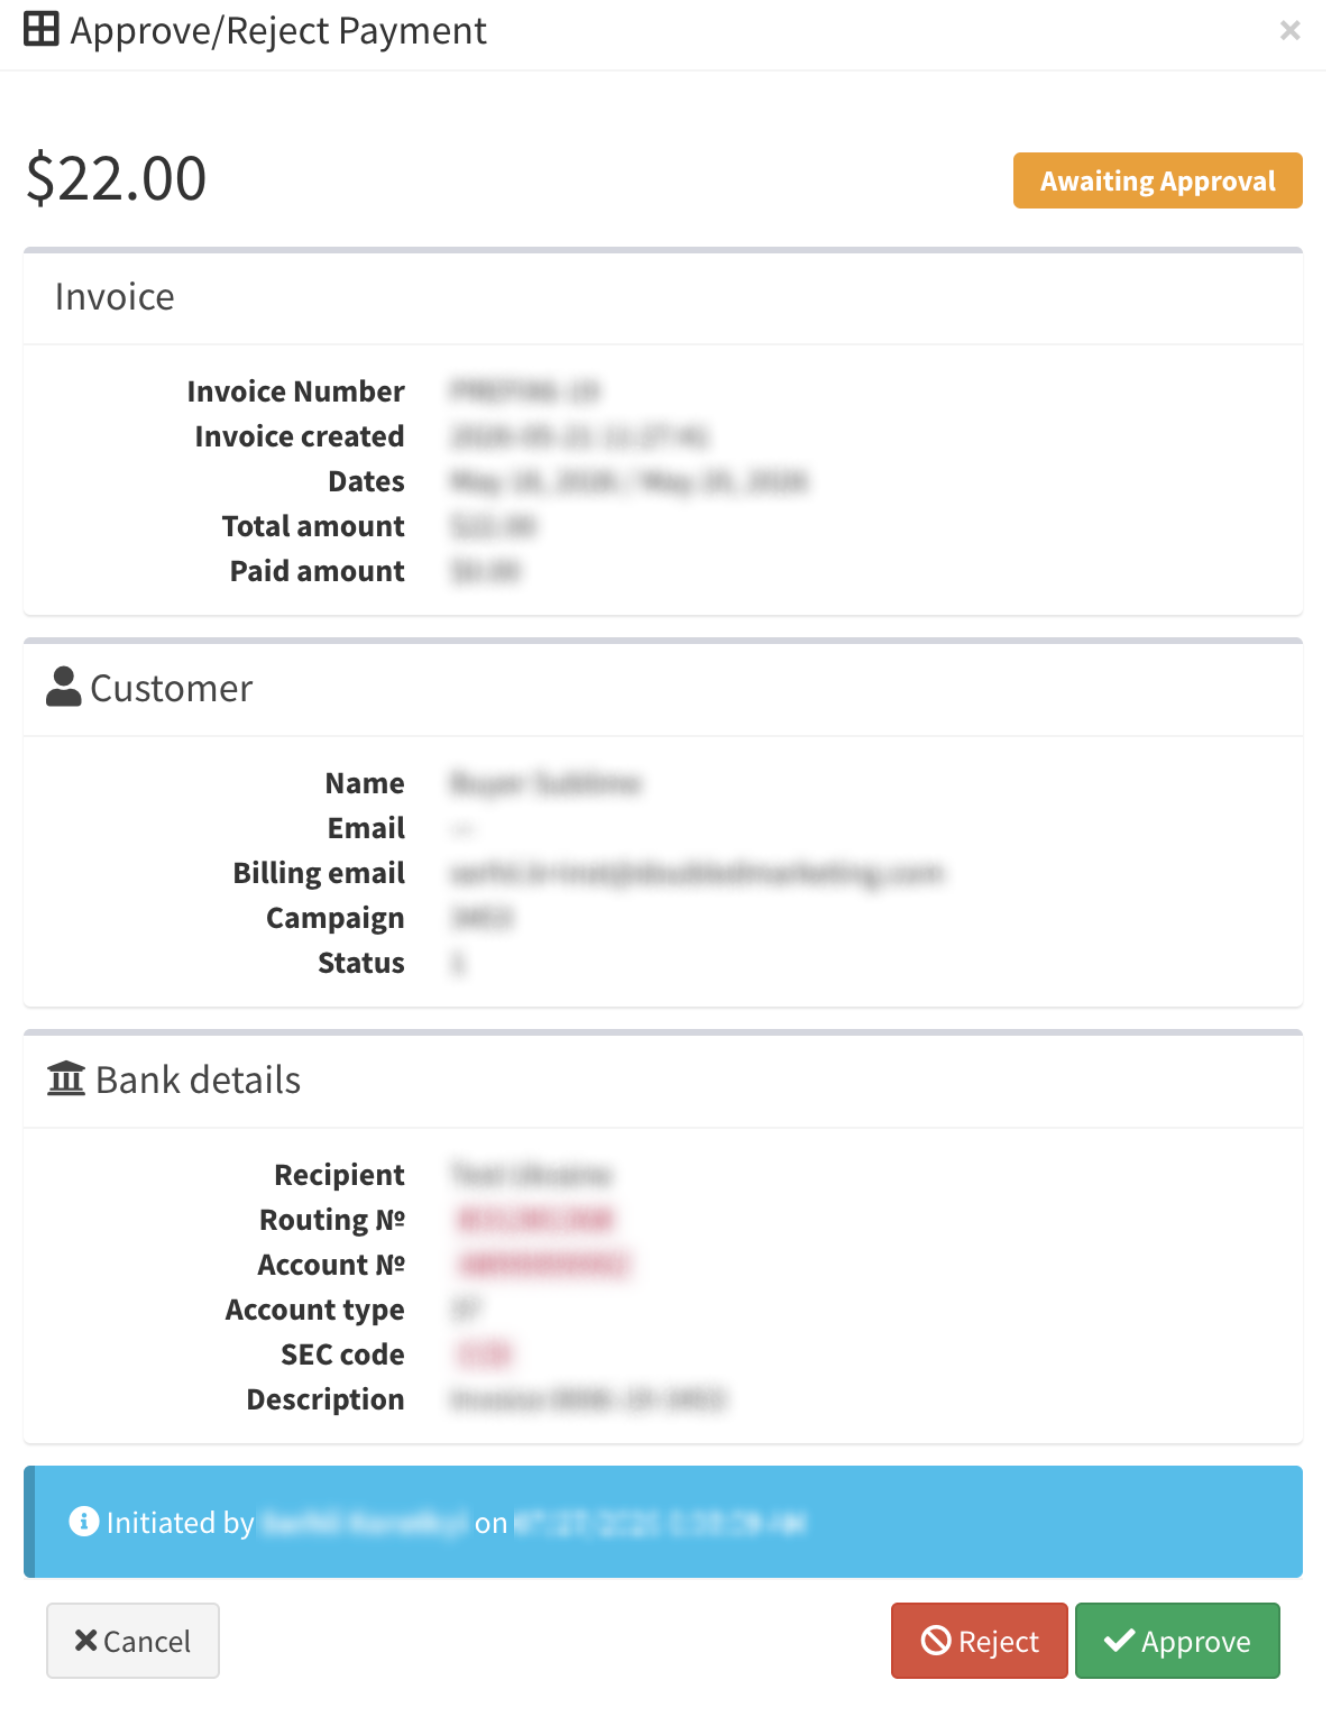
If approved, please verify the information and click the “Confirm approve” button.
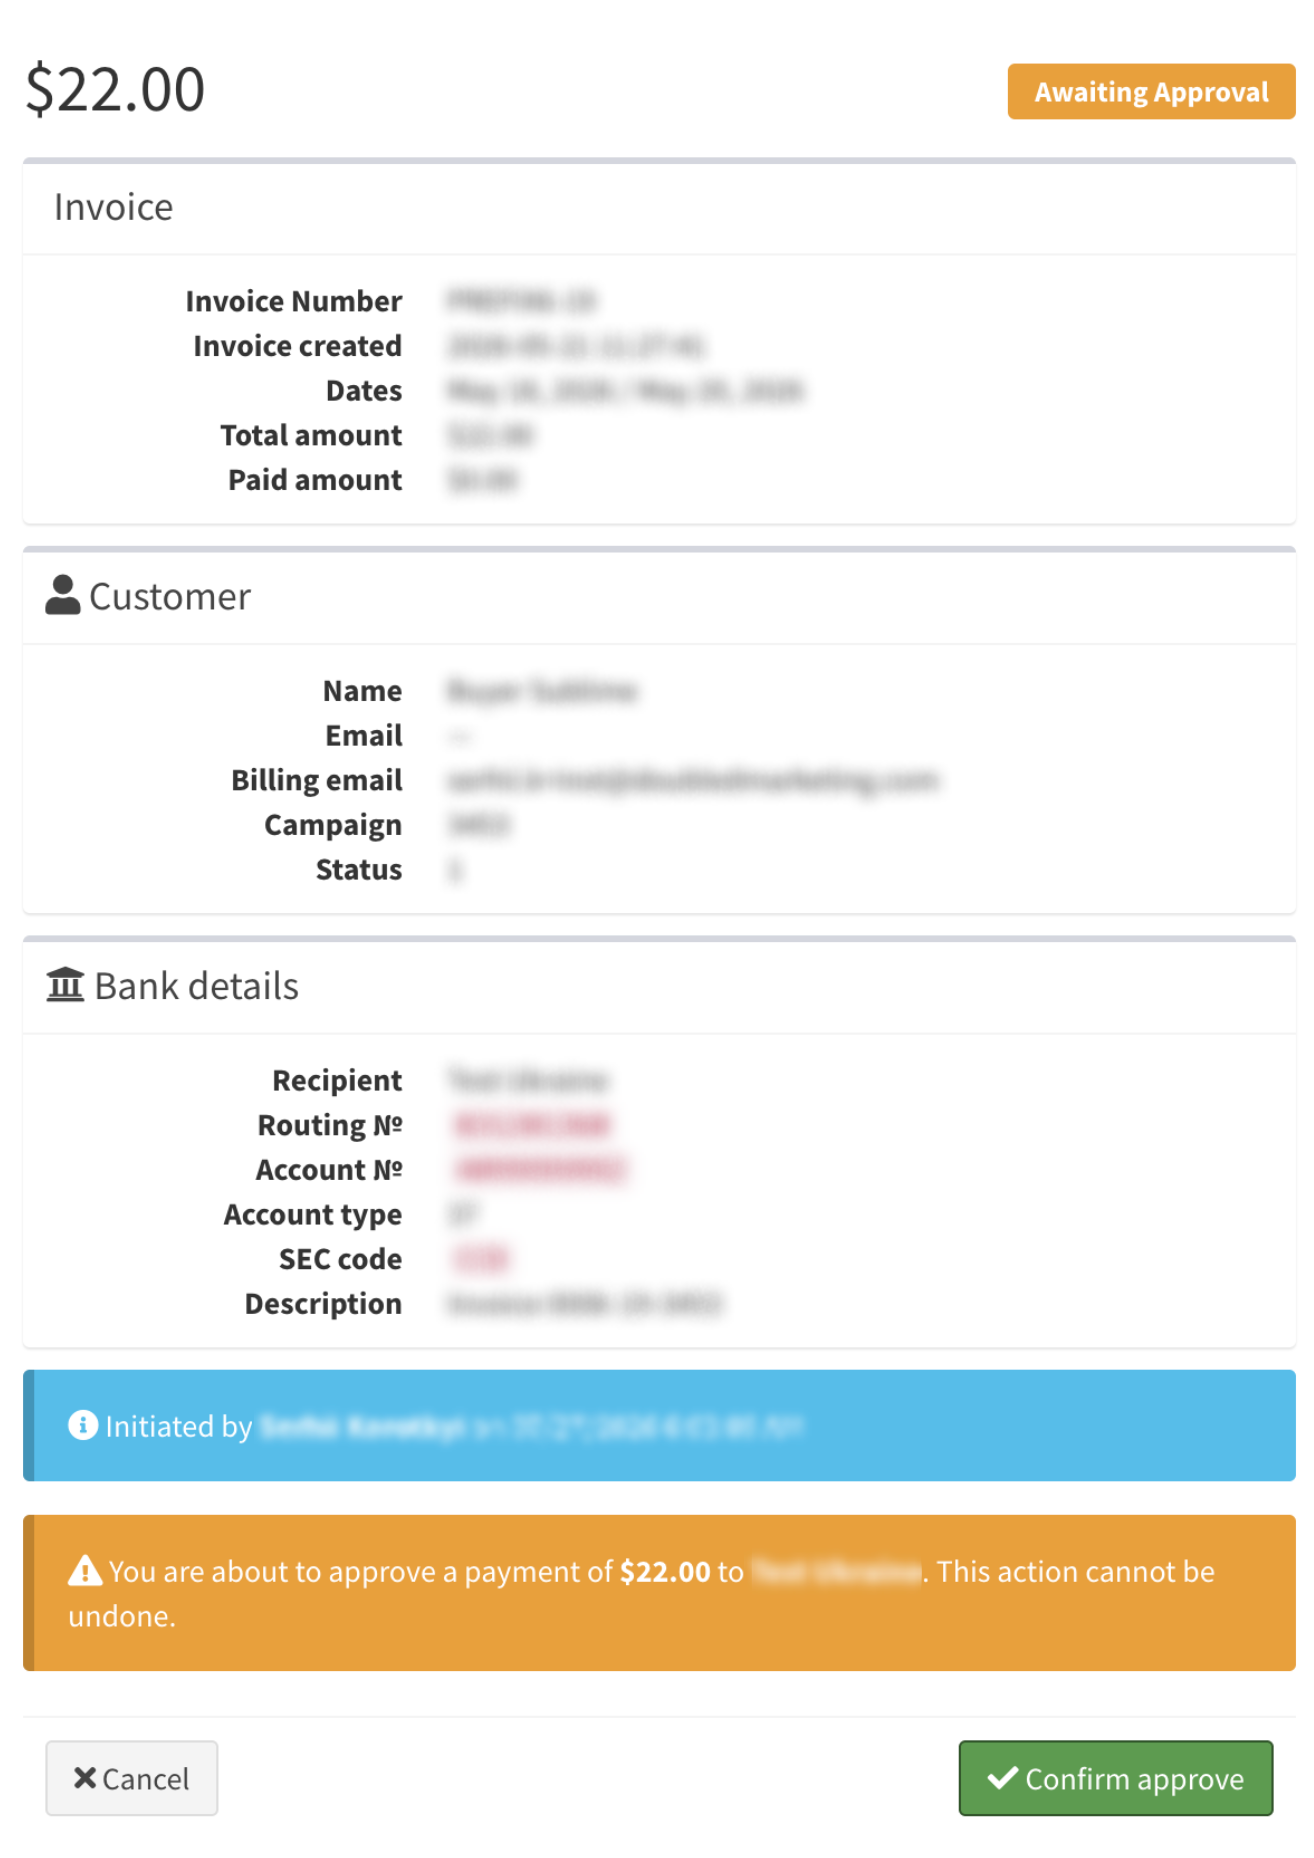
To view more detailed information about a specific transaction, click the “View” button in the “Actions” column.
The “Customers” tab allows you to view the complete list of campaign customers and manage their bank ACH credentials by adding or editing them.
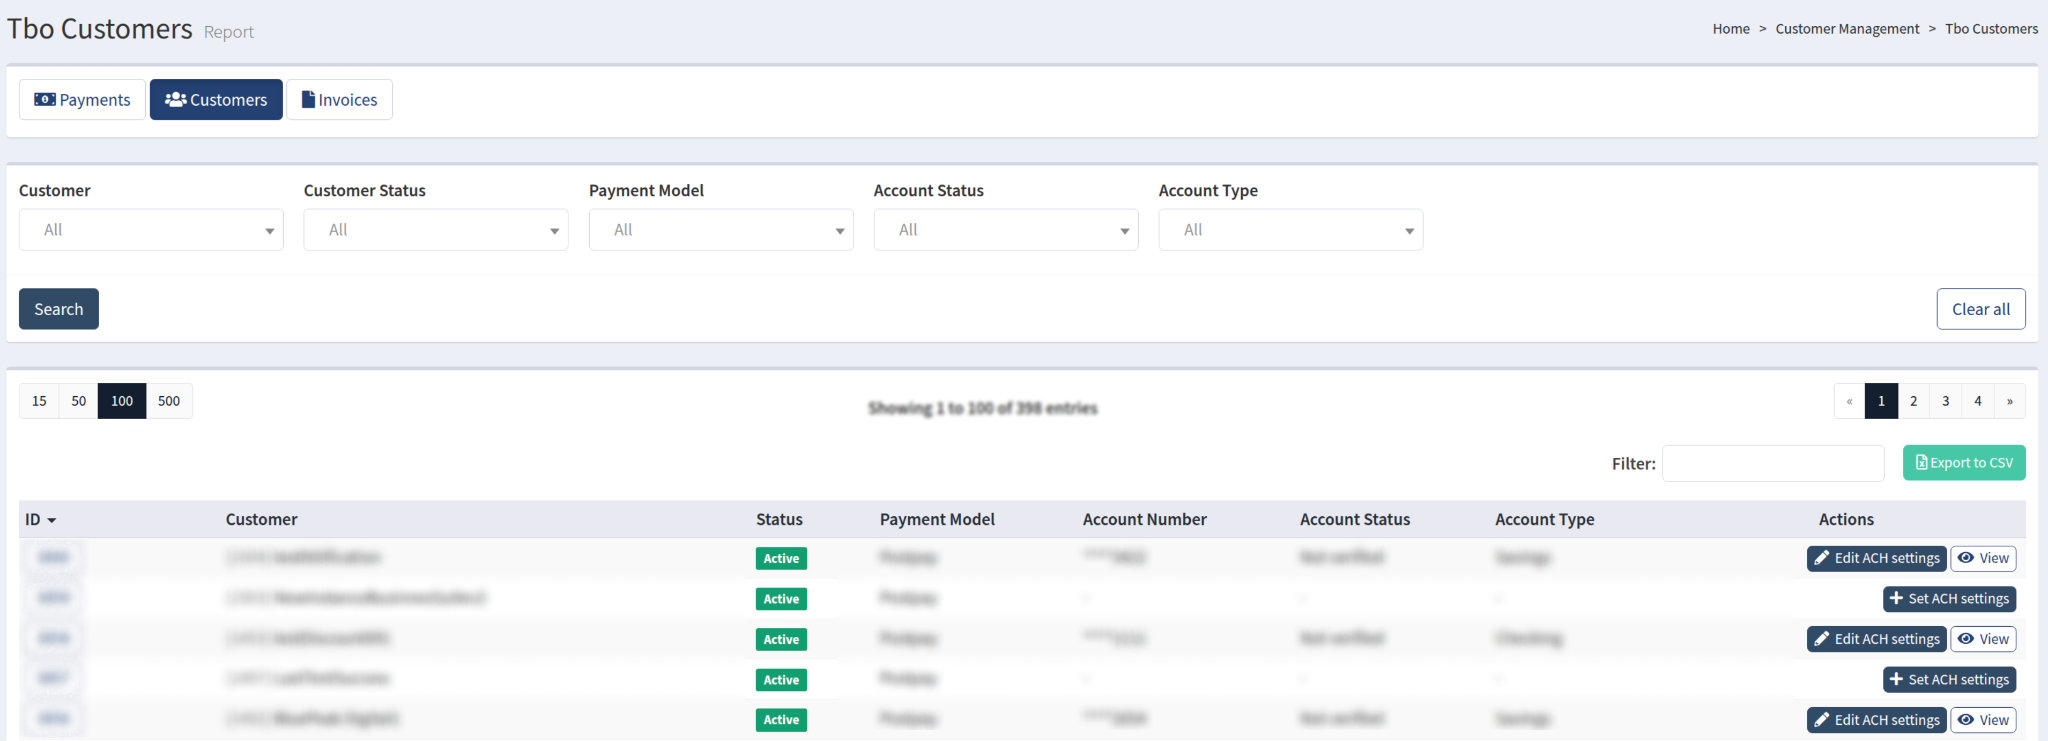
You can narrow down the search results by using the following filters:
- Customer: Select the customer.
- Customer Status: Select the customer status.
- Payment Model: Select the customer’s payment model (Postpay/Prepay).
- Account Status: Select the bank account status.
- Account Type: Select the bank account type.
The list contains the following information:
- ID: The customer’s number in the report.
- Customer: The name of the customer in the system.
- Status: The customer’s status.
- Payment Model: The customer’s payment model (Prepay/Postpay).
- Account Number: The customer’s bank account number.
- Account Status: The customer’s bank account status.
- Account Type: The customer’s bank account type.
Navigate to the “Actions” column and click either the “Set ACH Settings” or “Edit ACH Settings” button to manage or input bank account details for a specific customer. Once you have entered all the details, click the “Save Changes” button to confirm.
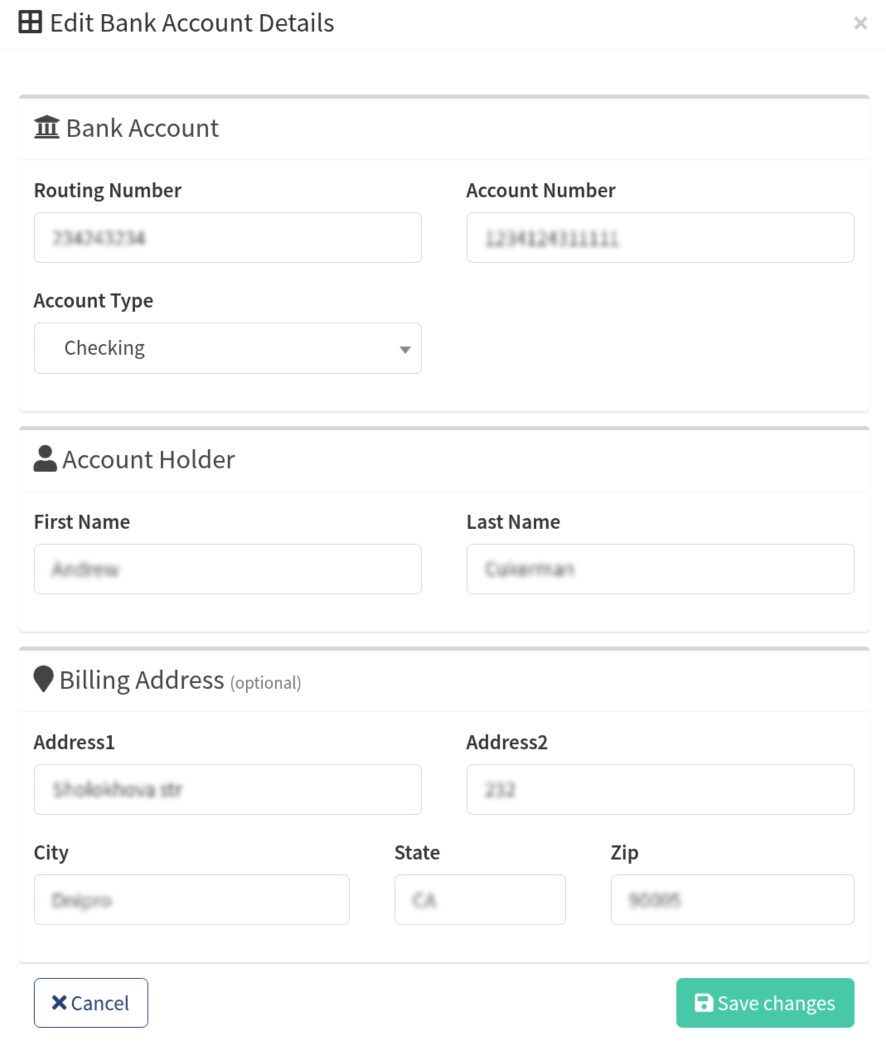
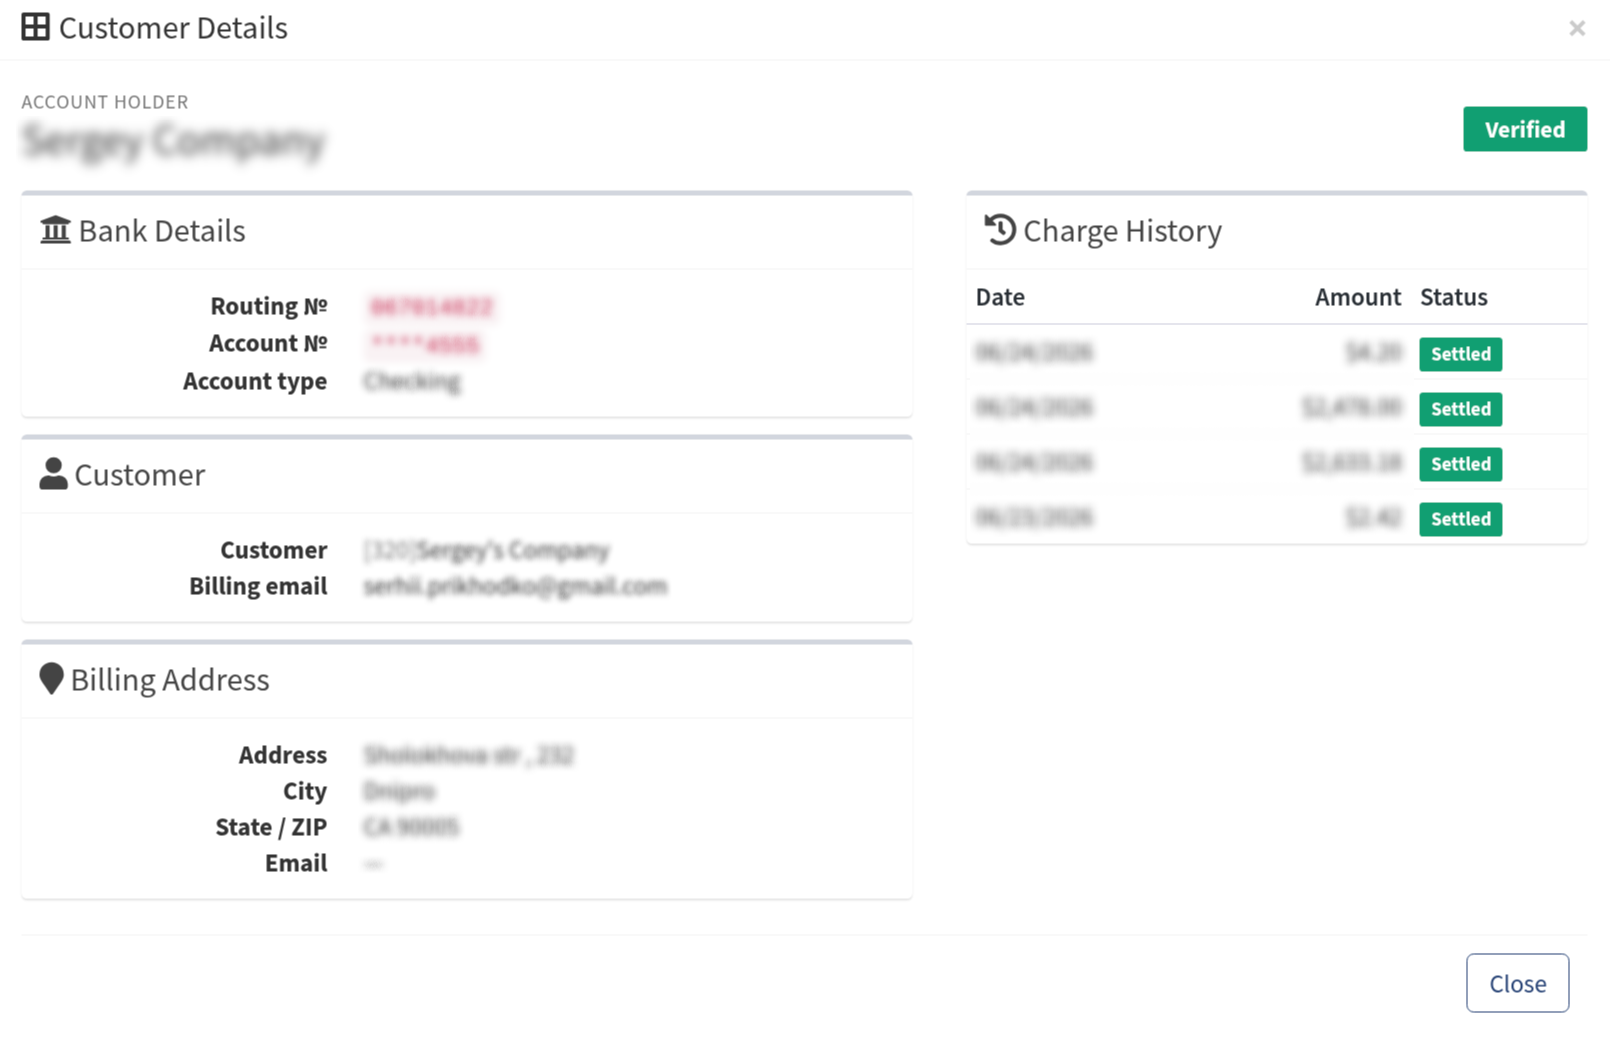
To view the bank account information, click the “View Details” button in the “Actions” column.
The “Invoices” tab allows you to charge customers for the unpaid invoices via the TBO Bank payment method.
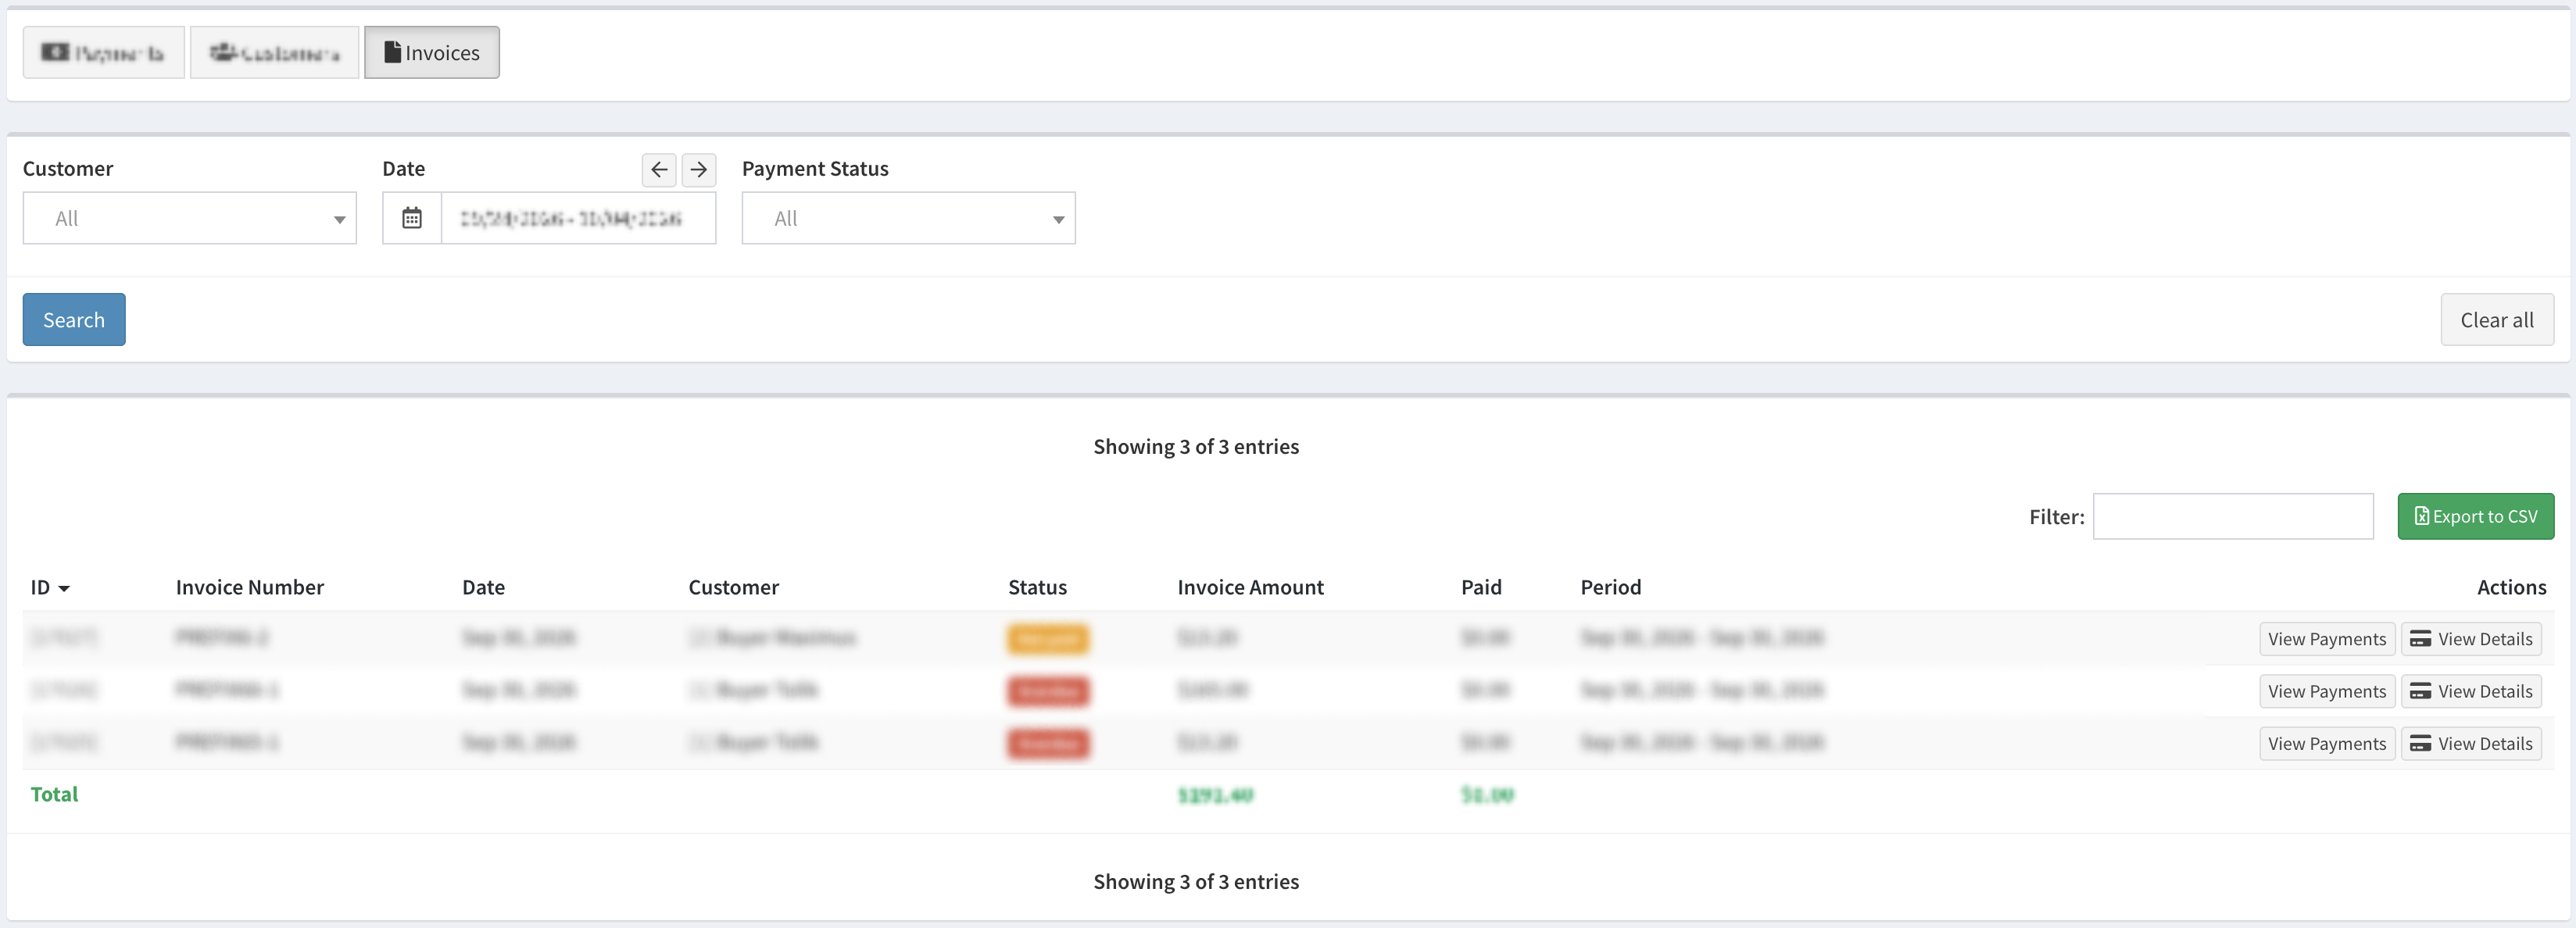
You can narrow down the search results by using the following filters:
- Customer: Select the customer.
- Date: Select the date range for the report.
- Payment Status: Select whether the invoice is paid or unpaid.
The list contains the following information:
- ID: The invoice number in the system.
- Invoice Number: The customer’s invoice number.
- Date: The date the invoice was created.
- Customer: The name of the customer.
- Status: The status of the invoice (Paid/Unpaid).
- Invoice Amount: The amount to be charged.
- Paid: The paid amount.
- Period: The period for which the customer is charged.
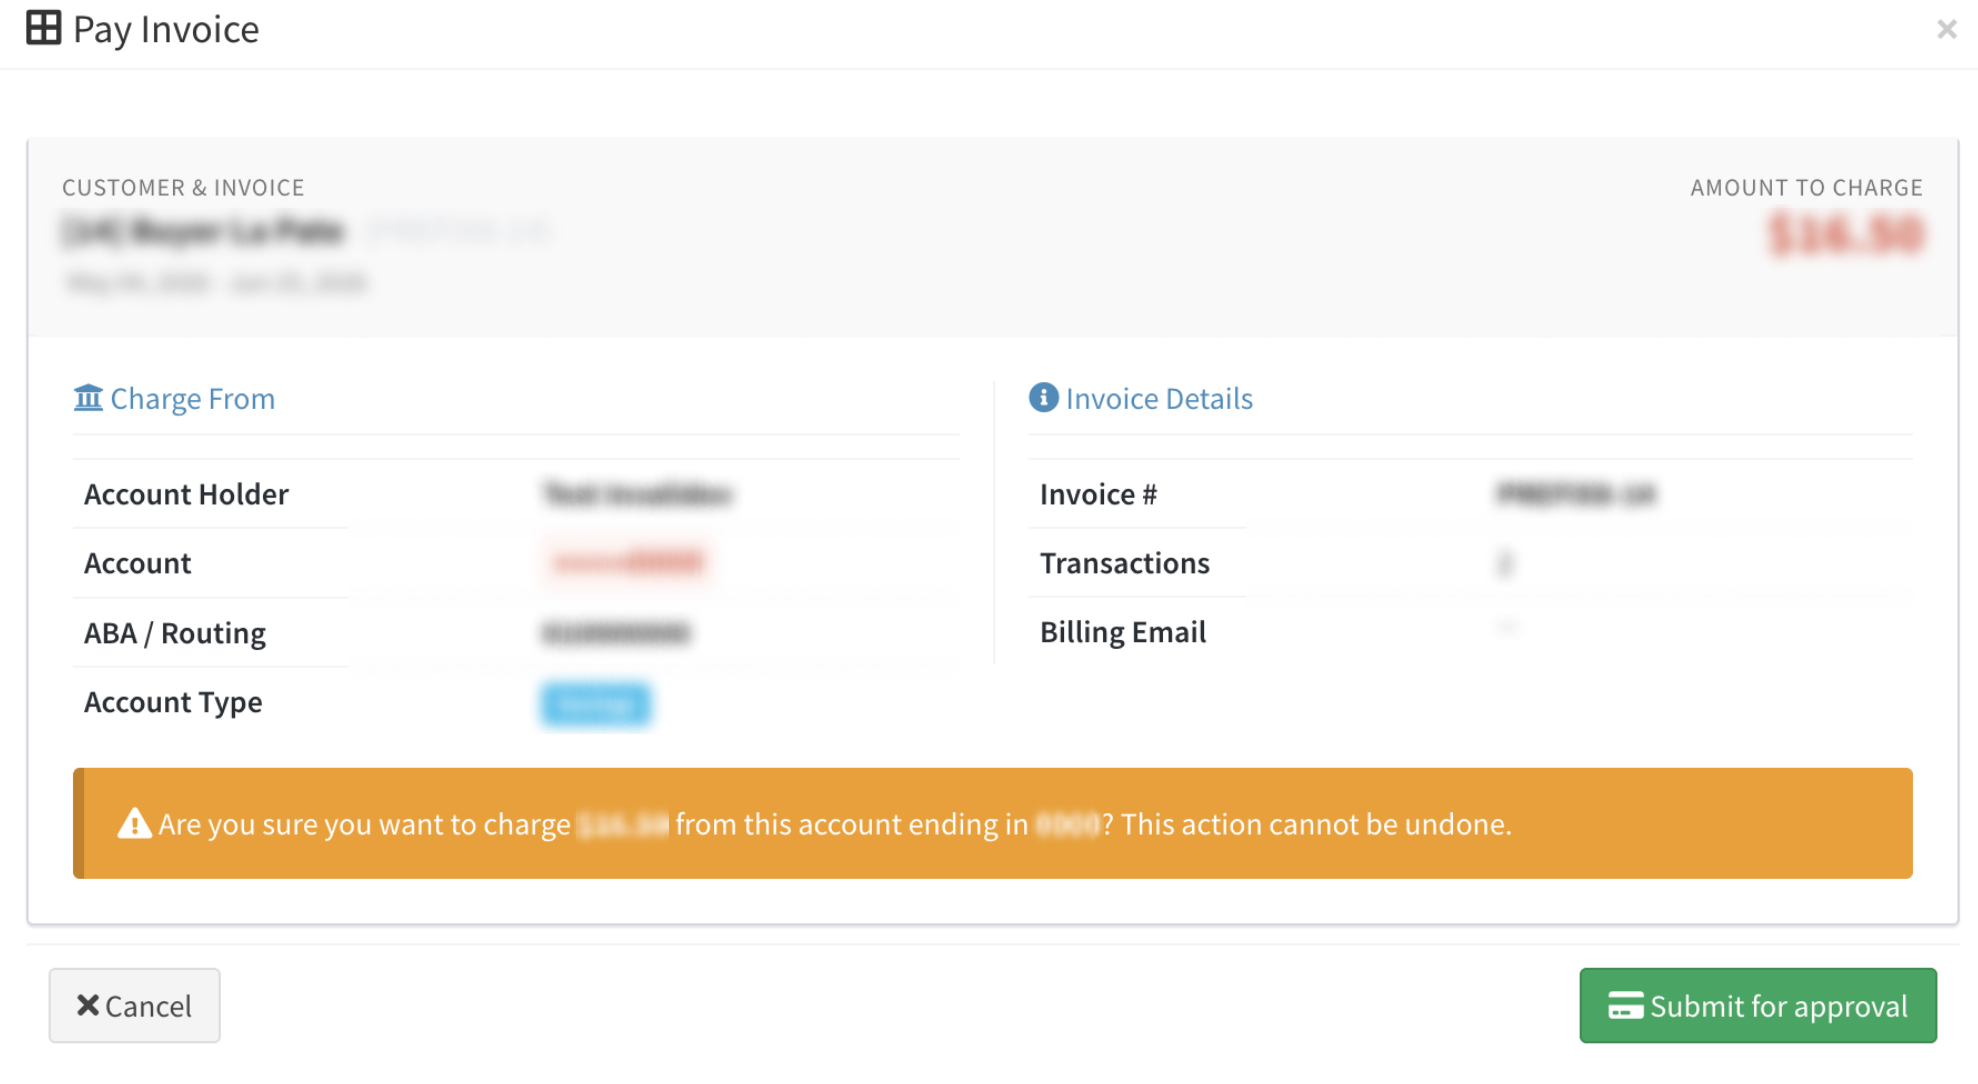
To charge the customer for the invoice amount using the TBO Bank payment method, click the "Pay" button in the "Actions" column. A pop-up window will appear where you can review the details. Once you have confirmed the information, click the "Submit for approval" button.
Note: This transaction is marked as "Awaiting Approval" and requires approval from the assigned manager through the "Payments" tab. The manager will receive a notification about the approval request at the provided email(s).
To view the payments related to the selected invoice, click the “View” button. You will be redirected to the “Payments” tab of this section.
To view the details of the transaction, click the “View Details” button in the “Actions” column.