To manage the imports, go to the List Management > Imports section.
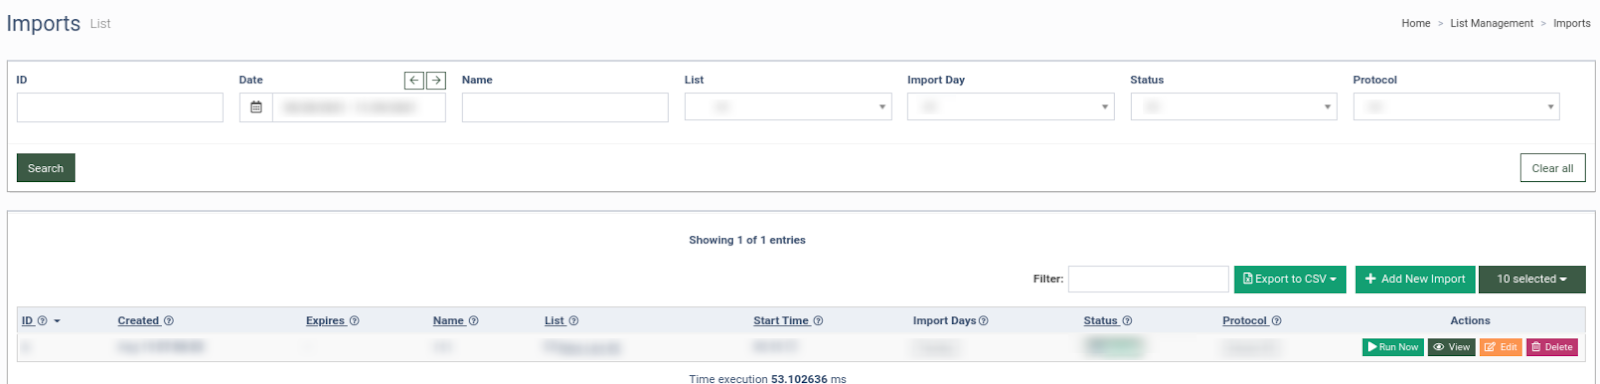
The “Import” section displays the following data:
-
ID: The unique identification number of the import list.
-
Created: The date of the import creation.
-
Expires: The date of the import expiration.
-
Name: The name of the import.
-
List: The list to import.
-
Start Time: The time when the import is scheduled to start.
-
Import Days: The day(s) when the import is processed.
-
Status: The import status (Active or Deleted).
-
Protocol: The protocol used for the import.
You can narrow down the search results by using the following filters:
-
ID: Enter the import list ID.
-
Date: Select the date range.
-
Name: Enter the import’s name.
-
List: Select the list.
-
Export Day: Select import day.
-
Status: Select the import status.
-
Protocol: Select the protocol used for the import.
To run the import manually, click the “Run Now” button in the “Actions” column.
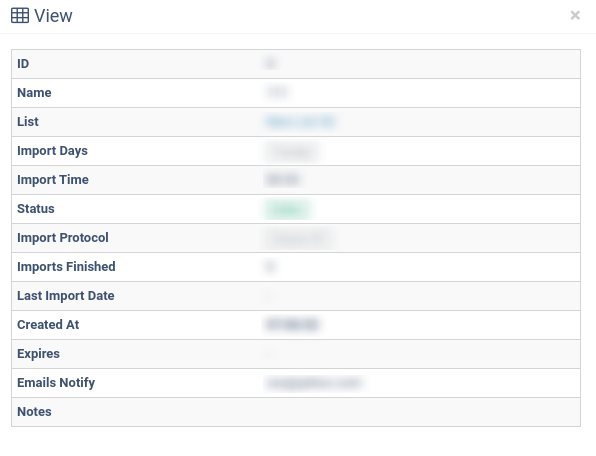
To view details, click the “View” button in the “Actions” column.
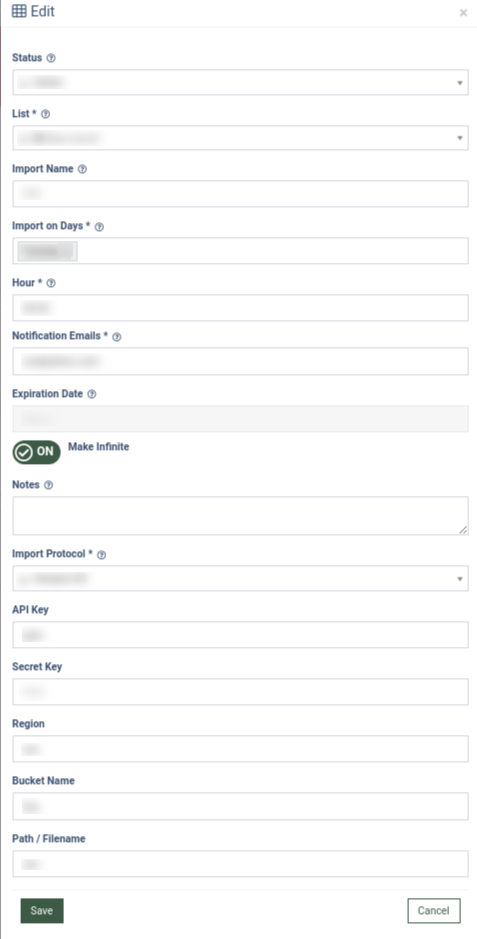
To create a new import, click the “+ Add New Import” button and fill out the following fields:
-
List: Select the email or phone number list from the drop-down menu.
-
Import Name: Enter the name of the import.
-
Import on Days: Select the days when the import should be done.
-
Hour: Set up the import time.
-
Notification Emails: Enter the email(s) to send the standard notification message. To view or edit the notification message, go to the System Management > System Notifications > Message Templates section.
-
Expiration Date: The date and time when the import is scheduled to expire.
-
Notes: Enter additional comments if needed. To view the comments, click the “View” or “Edit” button.
-
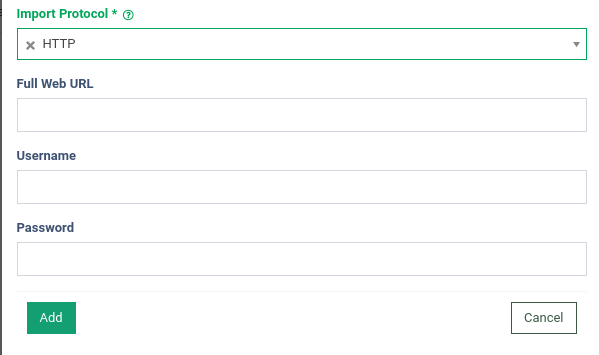
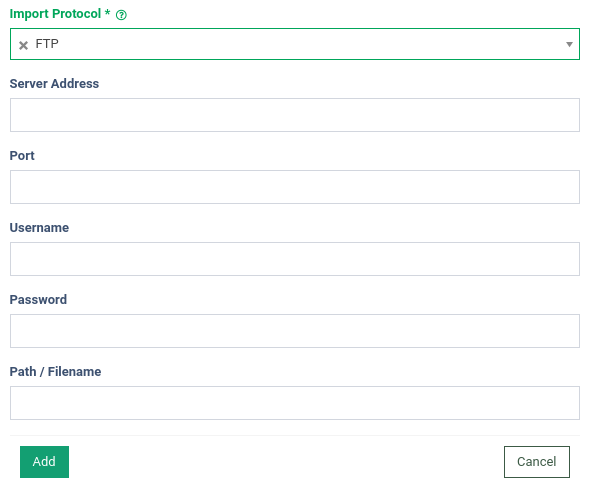
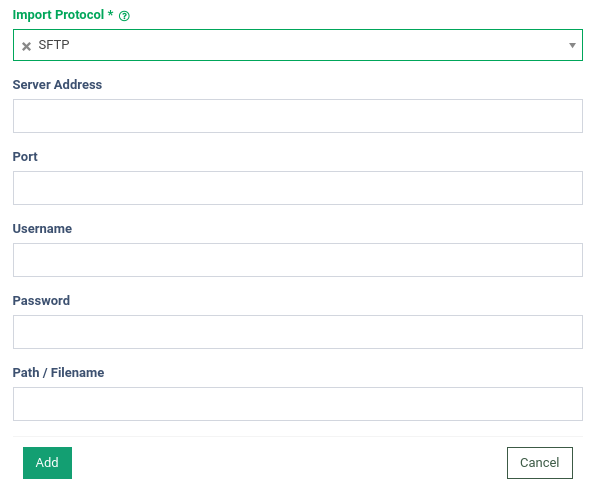
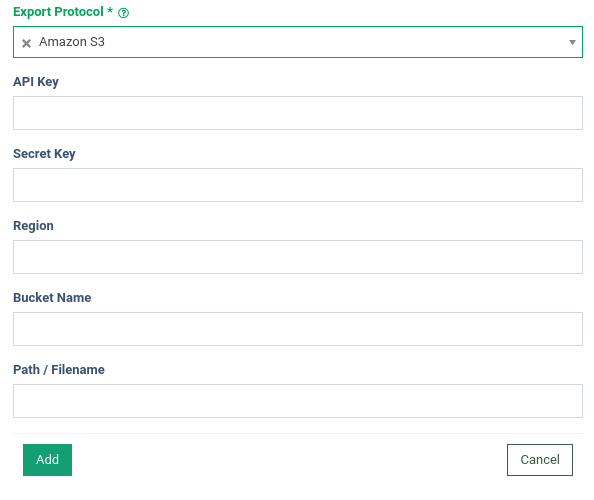
Import Protocol: Select the transfer protocol from the dropdown menu (HTTP, FTP, SFTP, Amazon S3, Google Storage).

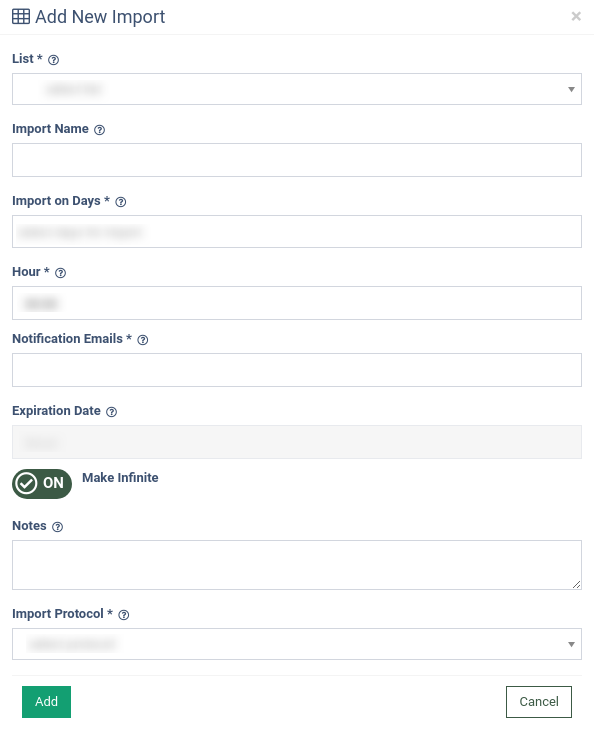
After choosing the protocol, additional fields related to the protocol access will appear.
Note: These settings become available after registration on the corresponding website or server.
To use the HTTP protocol, paste the URL to the “Full Web URL” field, enter the username in the “Username” field, and the password in the “Password” field. Click the “Add” button to save a new export record.
To use the FTP protocol, enter the server address, port, username, and password in the corresponding fields. Enter the path and filename using the forward slash (/) in the “Path/Filename” field (e.g., /Folder Name/File.csv), then click the “Add” button to save the settings.
To use the SFTP protocol, enter the server address, port, username, and password in the corresponding fields. Enter the path and filename using the forward slash (/) in the “Path/Filename” field (e.g., /Folder Name/File.csv), then click the “Add” button to save the settings.
To use the Amazon S3 protocol, enter the API key, Secret Key, Region, and Bucket Name in the corresponding fields. Enter the path and filename using the forward slash (/) in the “Path/Filename” field (e.g., /Folder Name/File.csv), then click the “Add” button to save the settings.
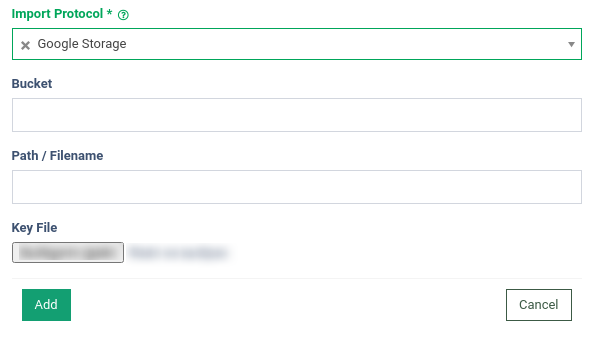
To use the Google Storage protocol, enter the bucket to the "Bucket" field, and enter the path and filename using the forward-slash (/) symbol in the “Path/Filename” field. Select the Key File and click the “Add” button to save settings.
To edit the import settings, click the “Edit” button in the “Action” column, change the required fields in the pop-up window depending on the transfer protocol settings, and click the “Save” button to confirm the changes.
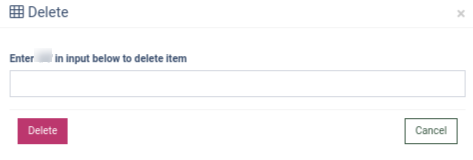
To delete the import, click the “Delete” button in the “Action” column and follow the instructions to proceed.