The “Inbound tracking” feature allows us to synchronize and connect leads, which can be transferred from LMS to the Call Logic system or vice versa and converted to the phone or LMS leads.
Now in our system new “Inbound tracking” feature is available, which allows us to synchronize and connect leads, which can be transferred from LMS to the Call Logic system or vice versa and converted to the phone or LMS leads.
Inbound Tracking for Call Logic > LMS Campaign
To set up a tracking tool for Call Logic > LMS campaigns:
-
Open the LMS system. Go to Client Management > Setup > Campaigns section.
-
Click the “Configure” button in the “Action” column and open the Campaign Setup Module.
-
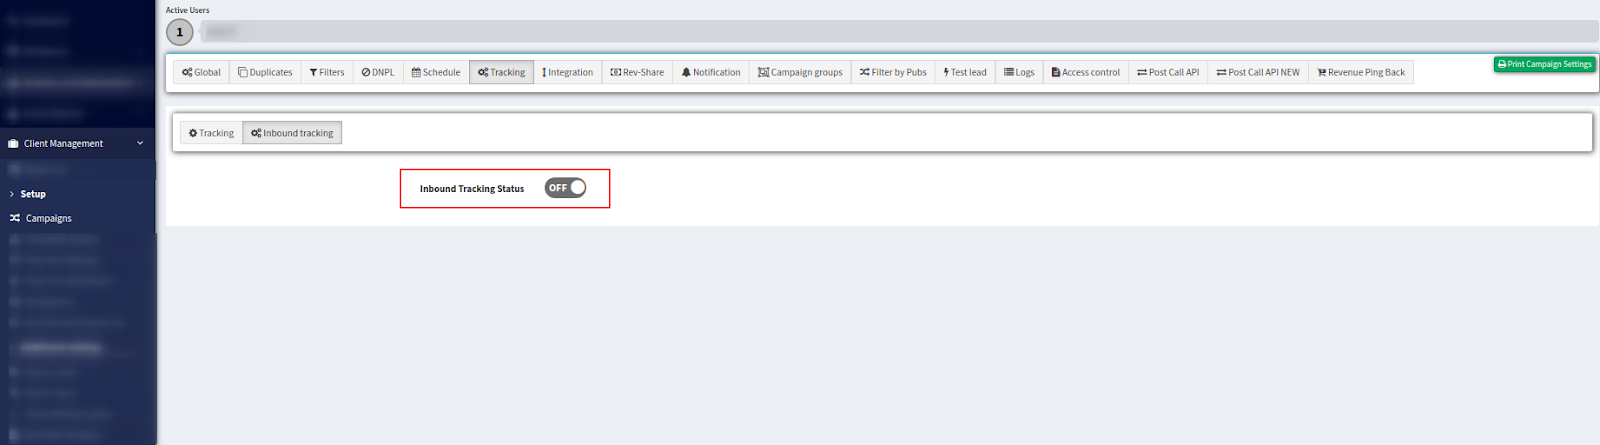
Here click the “Tracking” tab and open the “Inbound tracking” tab in the main block.
-
To enable this feature chose “On” value in the “Inbound Tracking Status” field.
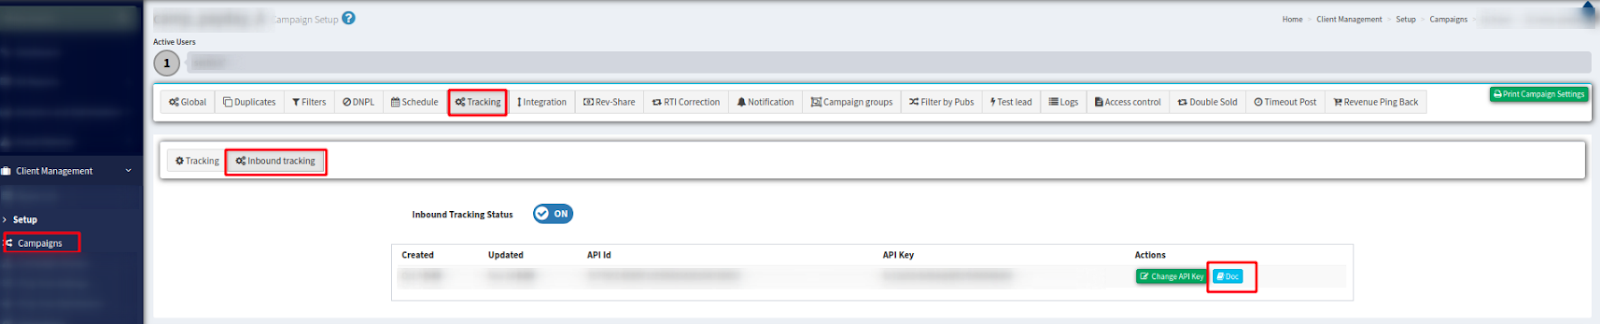
5. Click the “Doc” button in the “Action” column and copy the URL from the API Doc section and copy the link from the “2.3 Use Link” section.

6. Then open the Campaign Settings module for the Call Logic campaign and open the “Tracking” tab. This option can be added to any Call Logic campaign. In the main block, you need to add the link from step 5 for the following Actions and Methods. Click the “Add a Tracking URL” button and fill in the fields. Available the following options:
-
“Fire Action” field - “Campaign Accepted” value. “Method” field - “PHONE” value.
-
“Fire Action” - “Lead Sold” value, “Method” field - “PHONE” value
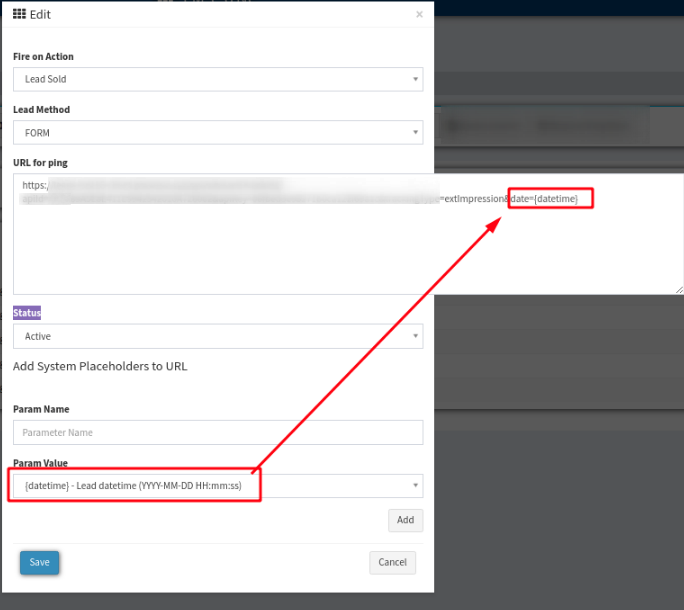
In the “Add System Placeholders to URL” fill-in the custom name of the parameter in the “Param Name” field and chose the parameter value from the list in the “Param Value” field, then click the “Add” button below to proceed. After this, in the “URL for ping” field this parameter will be added automatically by the system. To enable the feature right away chose the “Active” option in the “Status” field.

The counter type should be managed manually and can be chosen from the List in the “API Doc” section (“Inbound tracking tab”, “Doc” button in the “Action” column).
Inbound Tracking for LMS > Call Logic Campaign
To set up a tracking tool for LMS > Call Logic campaigns:
-
Open the Call Logic system. Go to Client Management > Setup > Campaigns section.
-
Click the “Configure” button in the “Action” column and open the Campaign Setup Module.
-
Here click the “Tracking” tab and open the “Inbound tracking” tab in the main block.
-
To enable this feature chose “On” value in the “Inbound Tracking Status” field.

5. Click the “Doc” button in the “Action” column and copy the URL from the API Doc section and copy the link from the “2.3 Use Link” section.

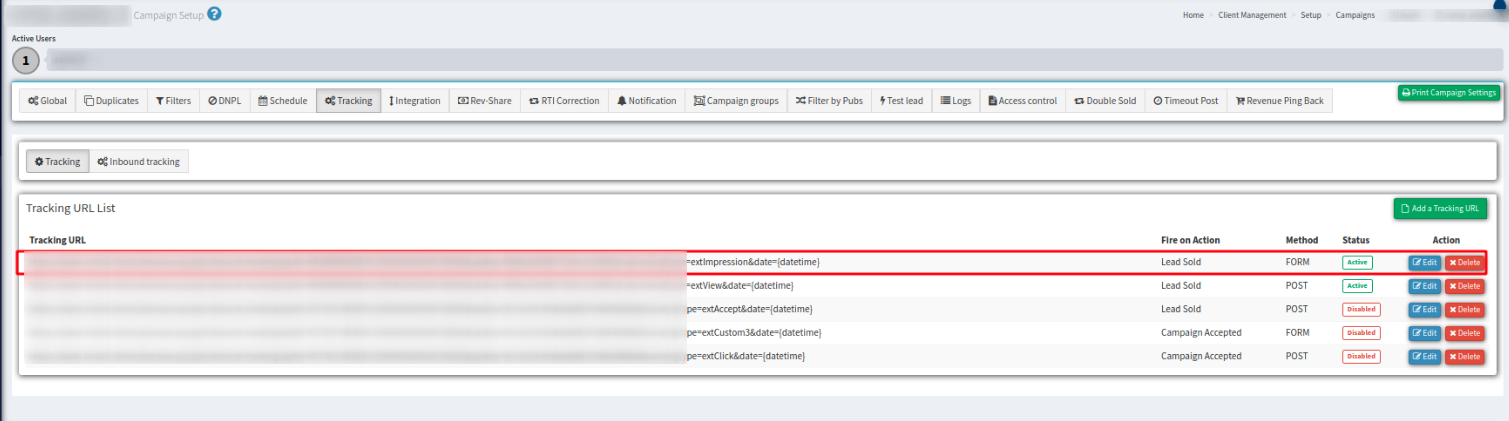
6. Then open the Campaign Settings module for the LMS campaign and open the “Tracking” tab. In the main block, you need to add the link from step 5 for the following Actions and Methods. Click the “Add a Tracking URL” button and fill in the fields. Available the following options:
-
“Fire Action” field - “Campaign Accepted” value, “Method” field - “POST” value.
-
“Fire Action” field - “Campaign Accepted” value, “Method” field - ”FORM” value.
-
“Fire Action” field - “Lead Sold” value, “Method” field - “POST” value.
-
“Fire Action” field - “Lead Sold” value, “Method” field - ”FORM” value.
In the “Add System Placeholders to URL” fill-in the custom name of the parameter in the “Param Name” field and chose the parameter value from the list in the “Param Value” field, then click the “Add” button below to proceed. After this, in the “URL for ping” field this parameter will be added automatically by the system. To enable the feature right away chose the “Active” option in the “Status” field.
The counter type should be managed manually and can be chosen from the List in the “API Doc” section (“Inbound tracking tab”, “Doc” button in the “Action” column).

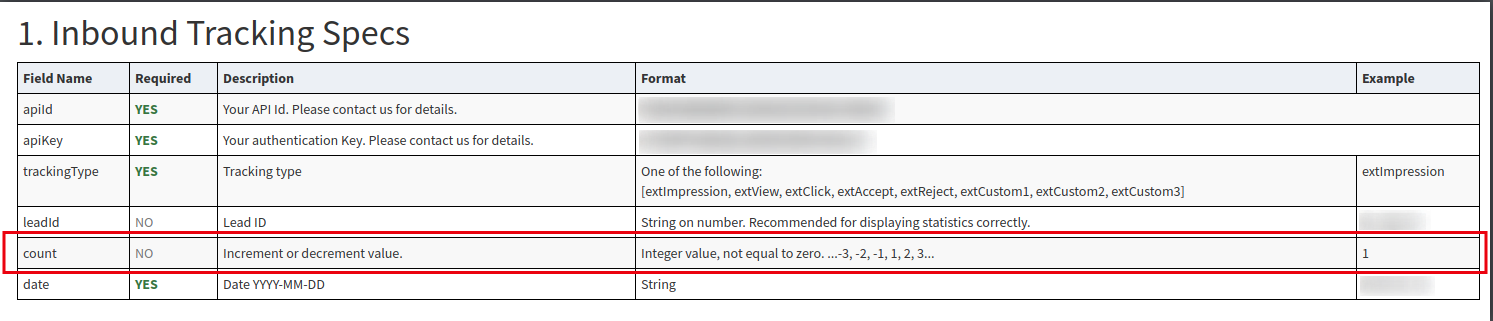
To set up counter value for pings use the “count” field. This parameter allows you to increment or decrement the counter value for setting the number of pings. By default the “count” = 1, it can be more or less than 0, but can not be equal to 0. Information about “count” is displayed in the API Doc section: