To view the “Integration Access Configuration” section, go to the Client Management > Additional Settings > Integration Access Configuration section.
The “Integration Access Configuration” section contains two subtabs:
Integration
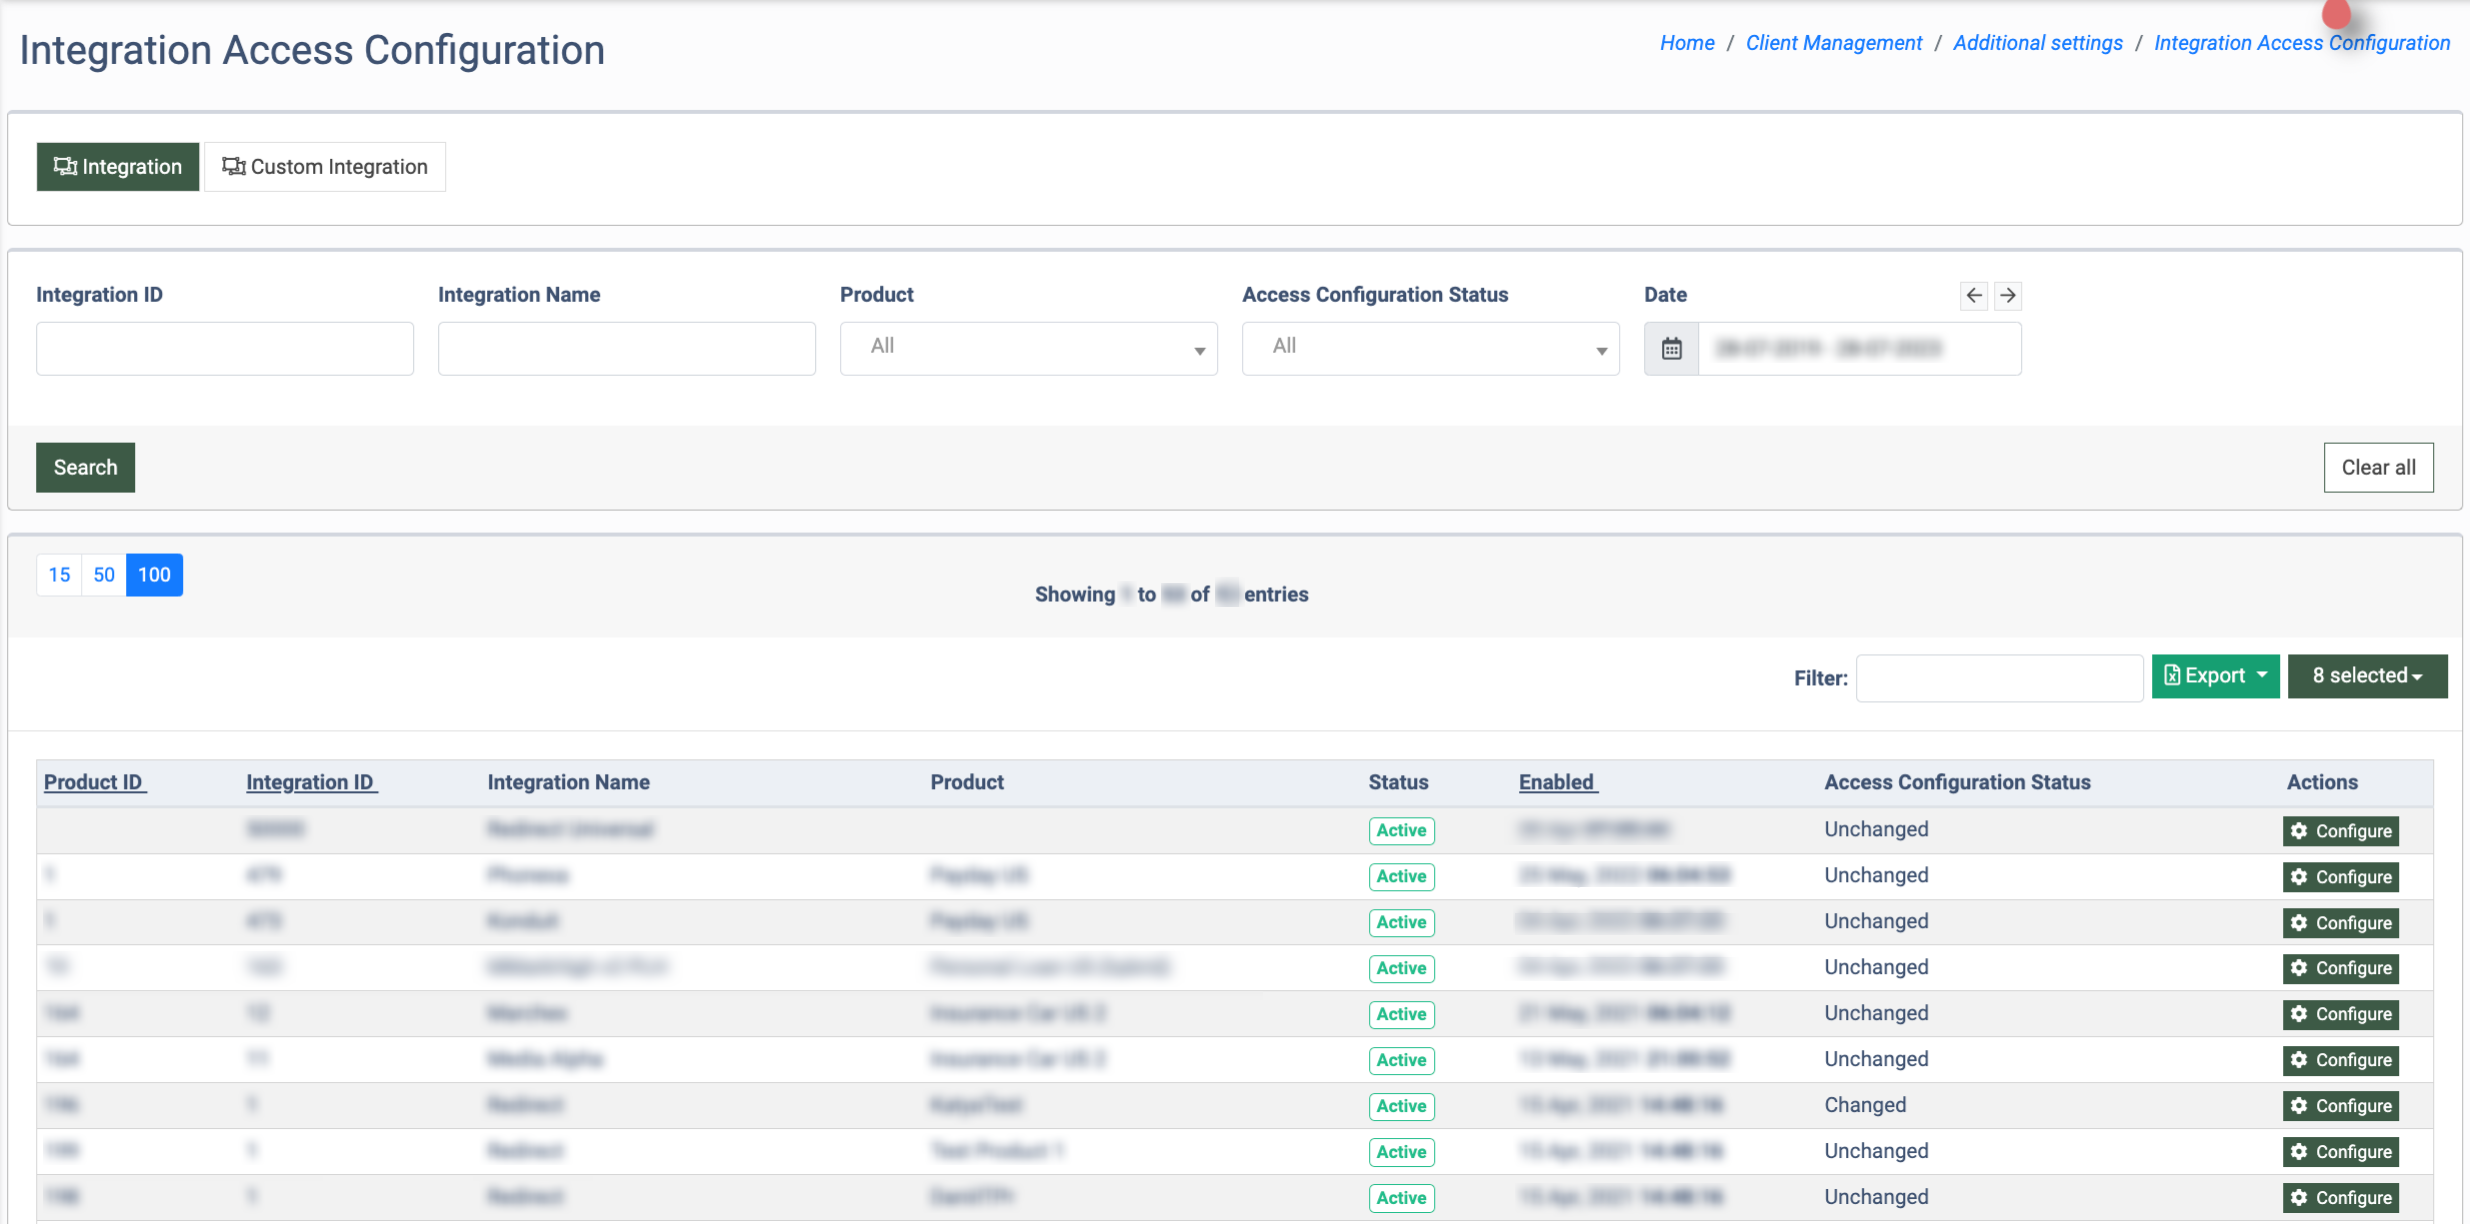
The “Integration” tab allows you to view the list of active integrations and manage access permissions for specific system roles to the integration settings on the Campaign Setup page.
You can narrow down the search results by using the following filters:
- Integration ID: Enter the unique identification number of the integration.
- Integration Name: Enter the name of the integration.
- Product: Select the product the integration was built for.
- Access Configuration Status: Select the status that indicates whether the integration’s access settings have been changed or remain unchanged (Changed, Unchanged).
- Date: Select the date range within which the integration was created.
The “Integrations” list contains the following information:
- Product ID: The unique identification number of the product.
- Integration ID: The unique identification number of the integration.
- Integration Name: The name of the integration.
- Product: The name of the product to which the integration is assigned.
- Status: The status of the integration (Active). Note: Only the active integrations are displayed in the following list.
- Enabled: The date and time when the integration was enabled.
- Access Configuration Status: The status shows whether the integration access settings have been changed or not (Changed/Unchanged). Note: If you revert the default access configuration after it’s been changed, the status will be Unchanged.
Click the “Export” button to export all data to the “CSV” file.
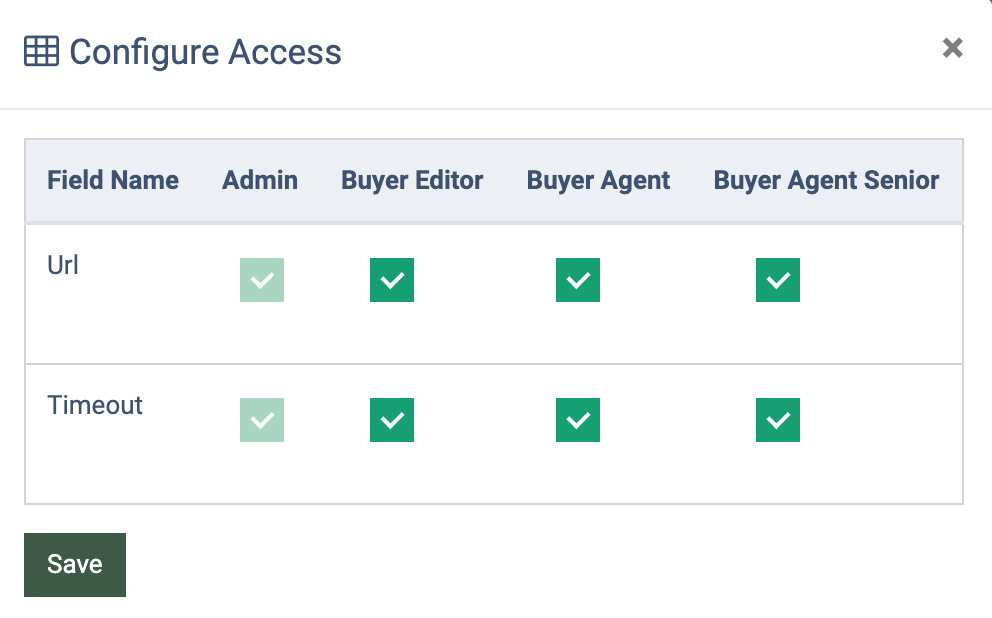
To edit the access permissions for the System Roles (Buyer Editor, Buyer Agent, Buyer Agent Senior) to the Campaign’s integration parameters, click the “Configure” button in the “Actions” column. In the “Configure Access” pop-up window, check/uncheck the boxes to manage access for the system role(s). To allow access, check the boxes for the corresponding integration fields. To limit access, uncheck the box. Click the “Save” button to save the changes. Note: The user with the Admin role has unrestricted access to the integration’s parameters, and this rule cannot be changed.
Custom Integration
The “Custom Integration” tab allows you to view the list of active custom integrations and manage access permissions for the system roles to the Campaign's integration parameters.
You can narrow down the search results by using the following filters:
- Integration ID: Enter the unique identification number of the custom integration.
- Integration Name: Enter the name of the custom integration.
- Product: Select the product to which the custom integration is assigned.
- Access Configuration Status: Select the status that indicates whether the integration’s access settings have been changed or remain unchanged (Changed, Unchanged).
- Date: Select the date range within which the integration was created.
The “Custom Integration” list contains the following information:
- Product ID: The unique identification number of the product.
- Integration ID: The unique identification number of the custom integration.
- Integration Name: The name of the custom integration.
- Product: The name of the product the custom integration is assigned to.
- Status: The status of the custom integration (Active). Note: Only the active integrations are displayed in the following list.
- Enabled: The date and time when the custom integration was enabled.
- Access Configuration Status: The status shows whether the custom integration’s access settings have been changed or not (Changed/Unchanged). Note: if you revert the default access configuration after it’s been changed, the status will be Unchanged.
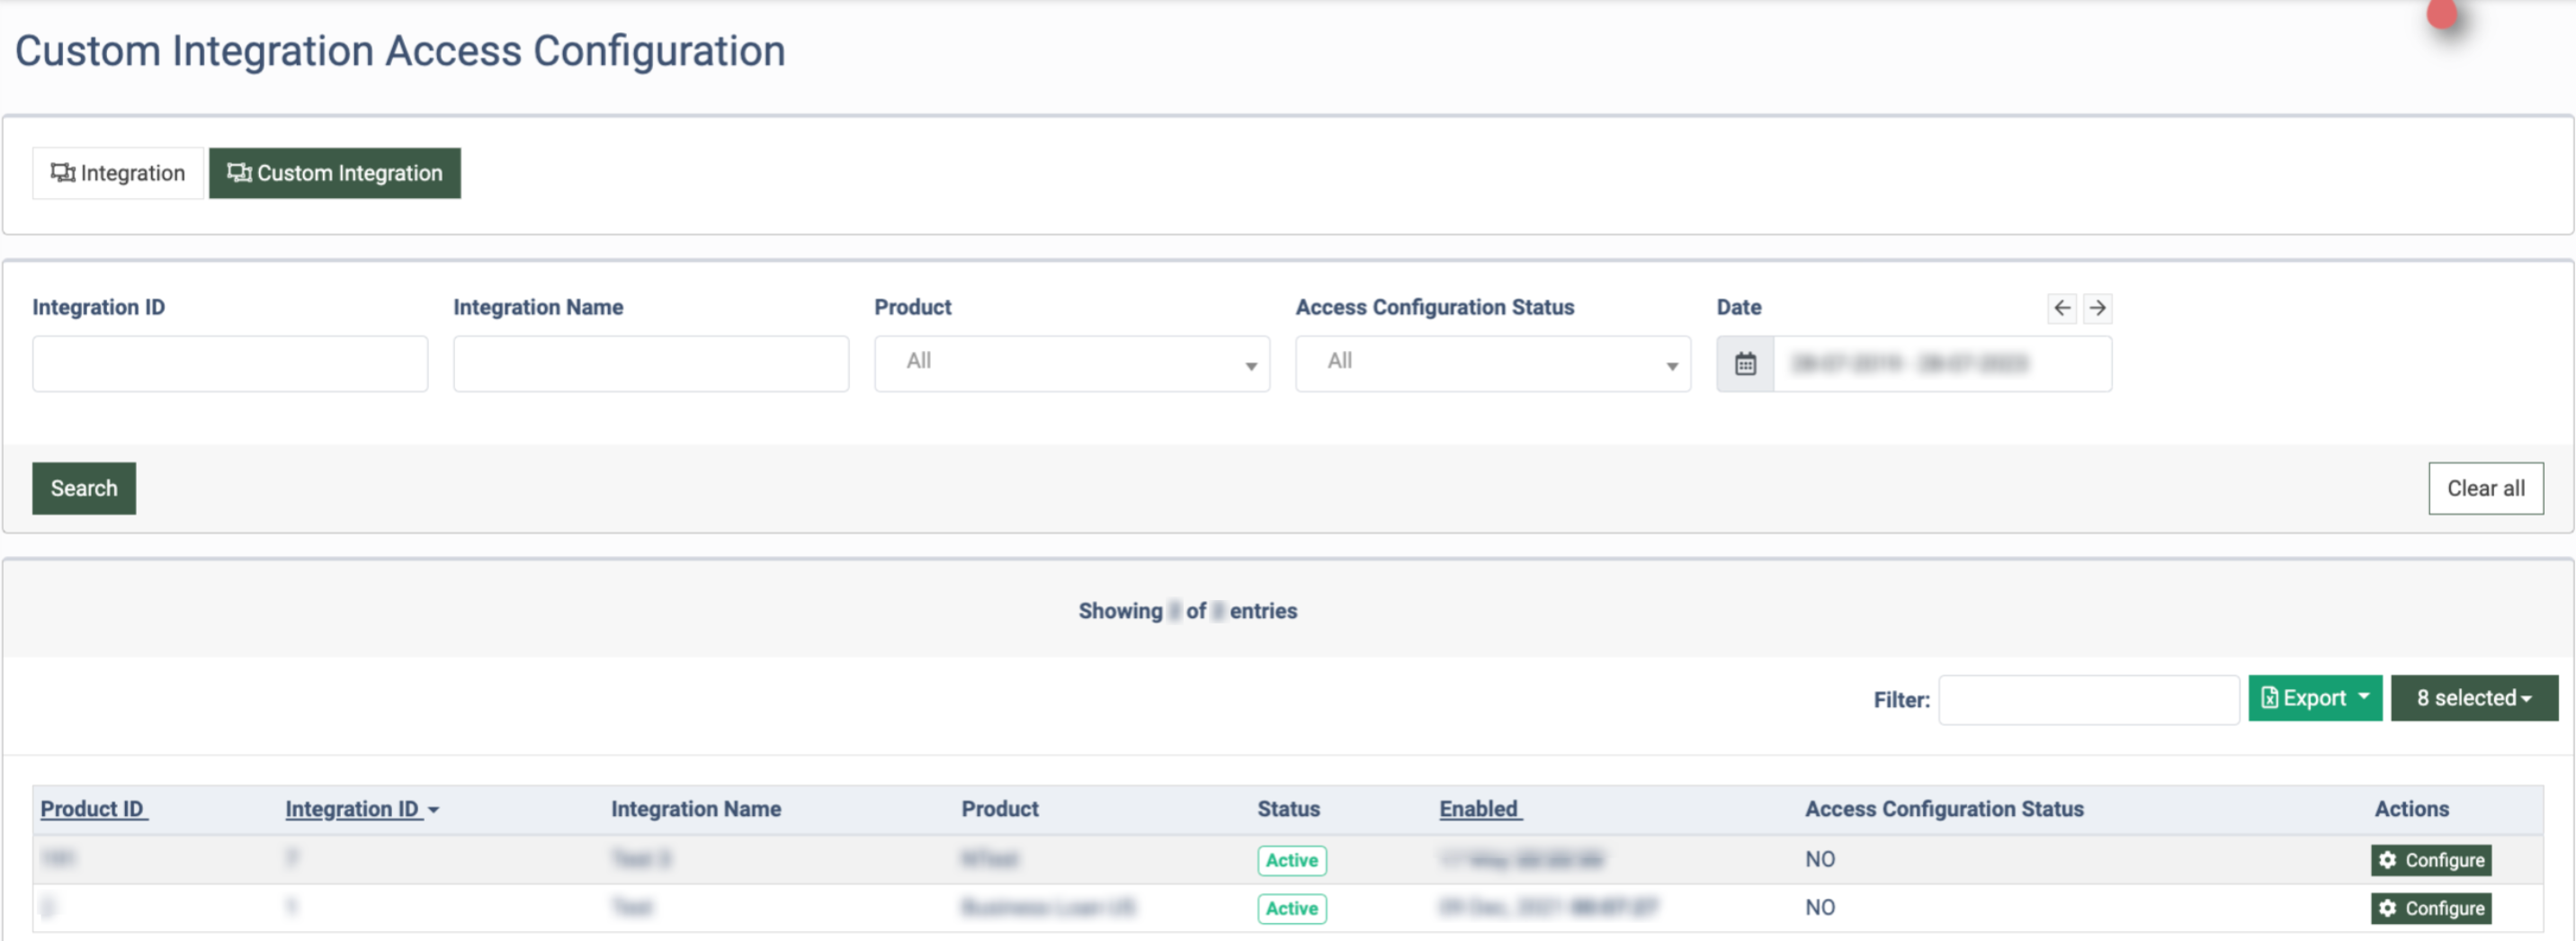
Click the “Export” button to export all data to the “CSV” file.
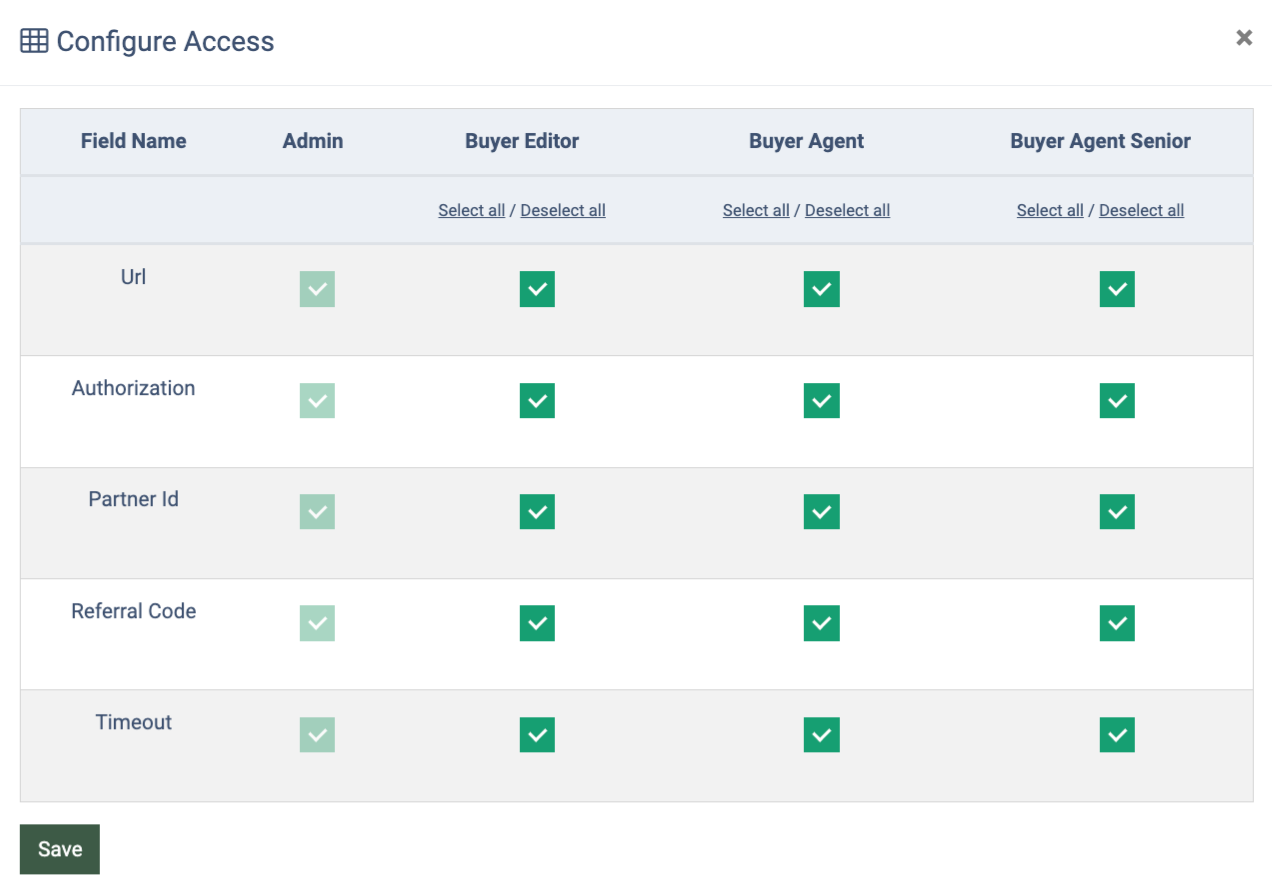
To edit the access level for the System Roles (Buyer Editor, Buyer Agent, Buyer Agent Senior) to the custom integration’s parameters, click the “Configure” button in the “Actions” column. In the “Configure Access” pop-up window, check/uncheck the boxes to limit access for the user(s) to the custom integrations. To allow access, check the boxes for the corresponding integration fields. To limit access, uncheck the box. Click the “Save” button to save the changes. Note: The user with the Admin role has unrestricted access to the integration’s parameters, and this rule cannot be changed.