The “Leads Test” feature allows you to run a lead through the system for testing purposes. A test lead will be processed as any other lead entering the system according to the current Ping Tree setup and will appear in the reports.
To send a test lead, go to the Support > Test > Leads Test section.
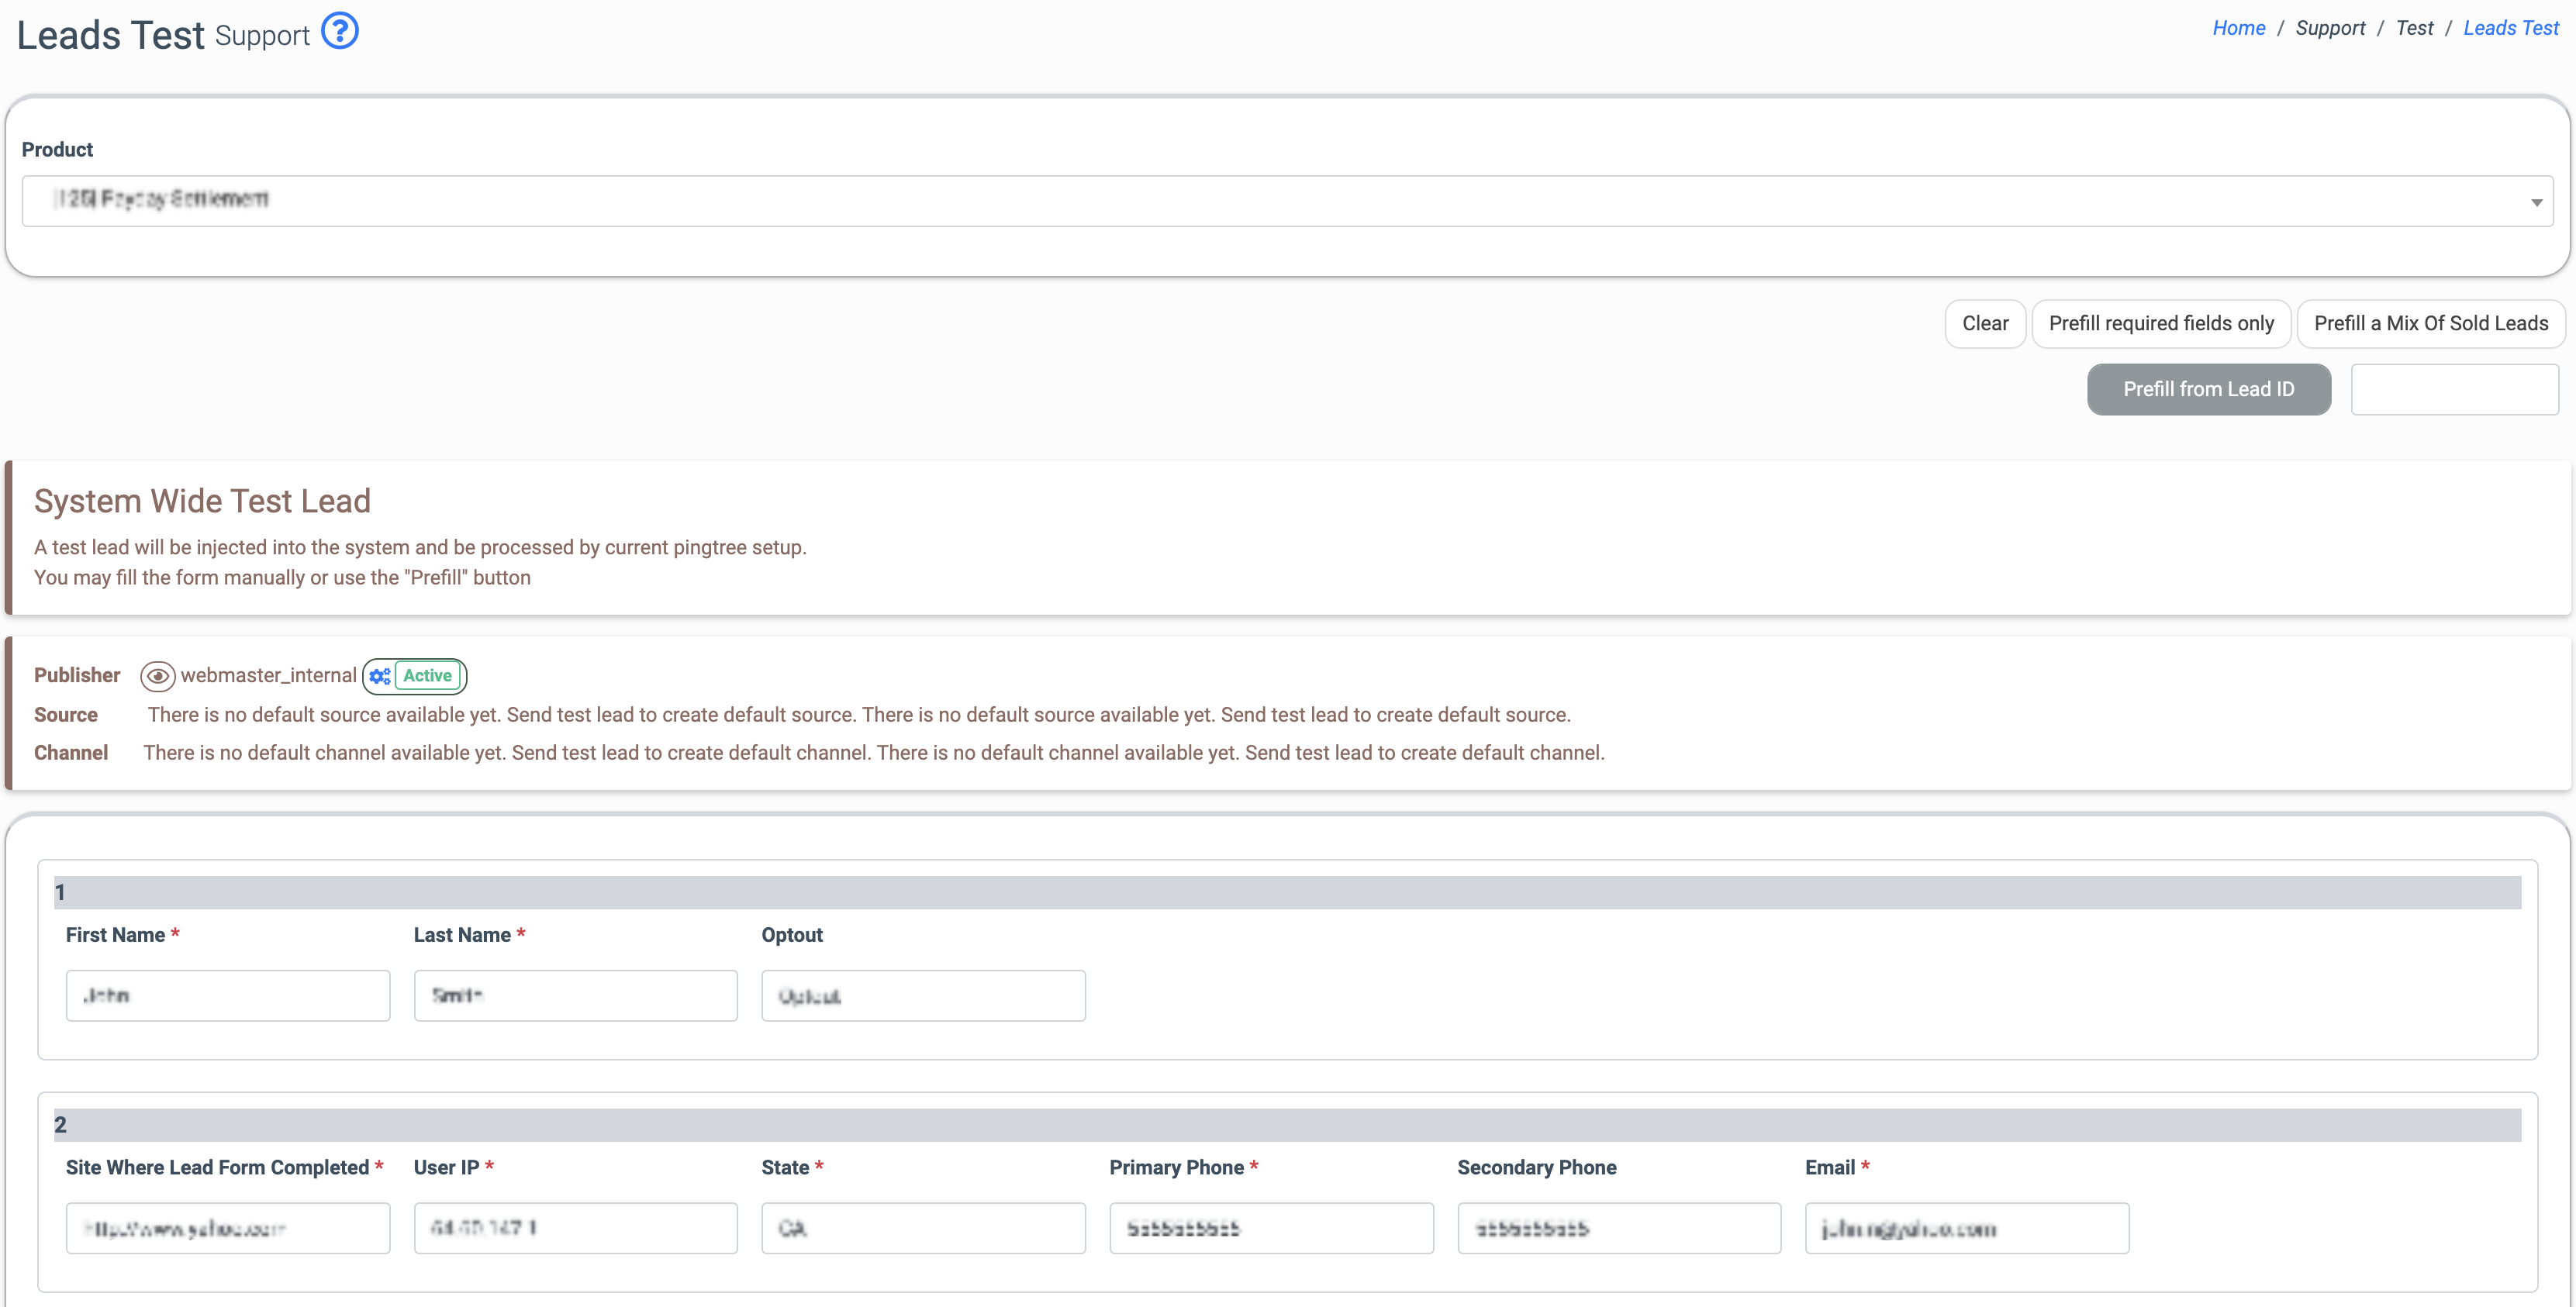

Select a Product from the “Product” drop-down list. To send a test lead for the Ping Post product, select the method in the “Ping Post Type” field:
-
Ping Post: Select this method to send a ping and a post.
-
Fullpost: Select this method to send a lead using the full post method.
The test lead is sent on behalf of the Publisher that is set as a default, its default source, and default channel.
To view the Publisher Configuration page, click the “Eye” icon before the name of the Publisher.

To go to the Default Publisher settings, click the “Active” button next to the name of the Publisher and then click the “Gear” icon in the “Change Status” pop-up window.
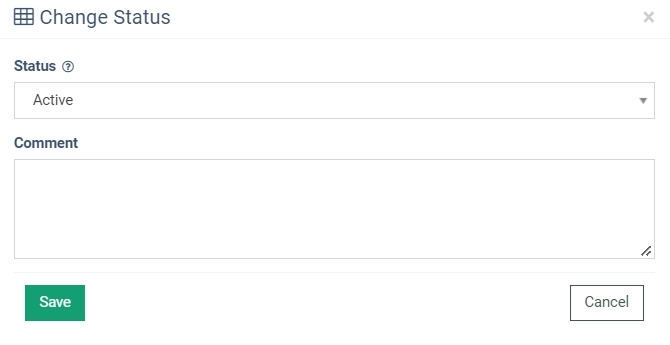
To change the status of the default Channel, click the “Active” button, select the status from the drop-down list, enter additional information to the “Comment” field, and click the “Save” button in the “Change Status” pop-up window
Update the form fields below if needed. You can also click the "Prefill a Mix of Sold Leads" button to fill in the form fields with random data or “Prefill required fields only” to fill in only the required form fields.
To remove data from the fields, click the “Clear” button.
To fill in the forms with data of a particular lead, enter the Lead Id in the text field and click the “Prefill from Lead ID” button. Note: You should enter the Lead Id that belongs to the Product, you select. Sensitive data will not be prefilled in the form (SSN, Drivers License Number, Bank Account Number, etc.).
To test additional fields that are not displayed by default, click the “Add Custom Field” button and fill in the name of the field and its value. Note: This doesn’t apply to the Campaign test lead form.
To send the lead, click the “Send lead” button. The system will redirect you to the response page. Click the “Back to form” button to go back to the form and submit additional leads. To cancel all the changes made in the form, click the “Reset to default” button.
Note: If you get the “Authorization failed” error, it’s most likely caused by the testing channel not being activated. To activate the channel, go to the Publisher Management > Publisher Channels section, select the “Default” channel for webmaster-internal publisher, and change the status to “Active”. Once you change the status, send a test lead again. Read more about Publisher Channels configuration in this Knowledge Base article.

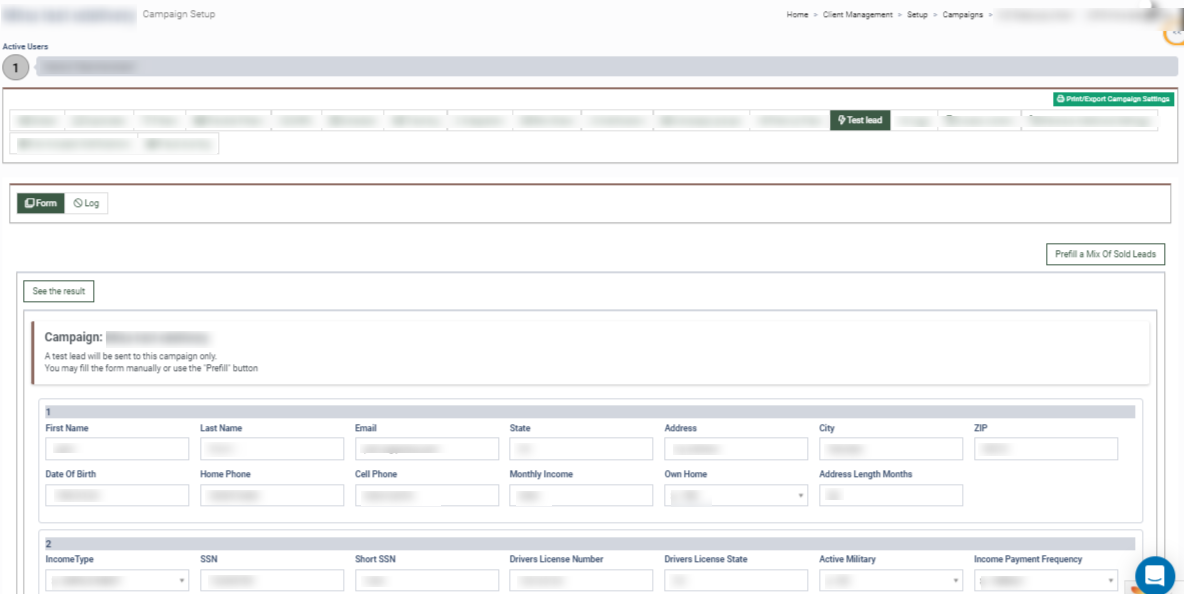
To test a specific Campaign and check the Campaign integration settings, go to the Client Management > Setup > Campaigns section, select the Campaign, and click the “Configure” button. Go to the “Test Lead” tab and fill in the form fields. Click the “Send lead” button to view the system response.
To view the log for the sent campaign test leads, go to the “Log” subtab.
Note: Test leads sent through this tab will not appear in the reports.
Read more about the Campaign configuration in this Knowledge Base article.
Note that all leads entering the system with any of the following parameters would be marked with the “Test” status by the system:
- The “firstName” and/or “lastName” fields contain the “test” value without any other symbols.
- The “email” field contains the domain “@test.com”.
- The “zip” field contains the “99999” value.
- The "phone", "phoneNumber", "primaryPhone", "homePhone", "workPhone", "cellPhone" fields contain the same 10-11 characters. For example, “1111111111“, “5555555555”, etc.