To manage the emails, go to the List Management > Manage Emails section. 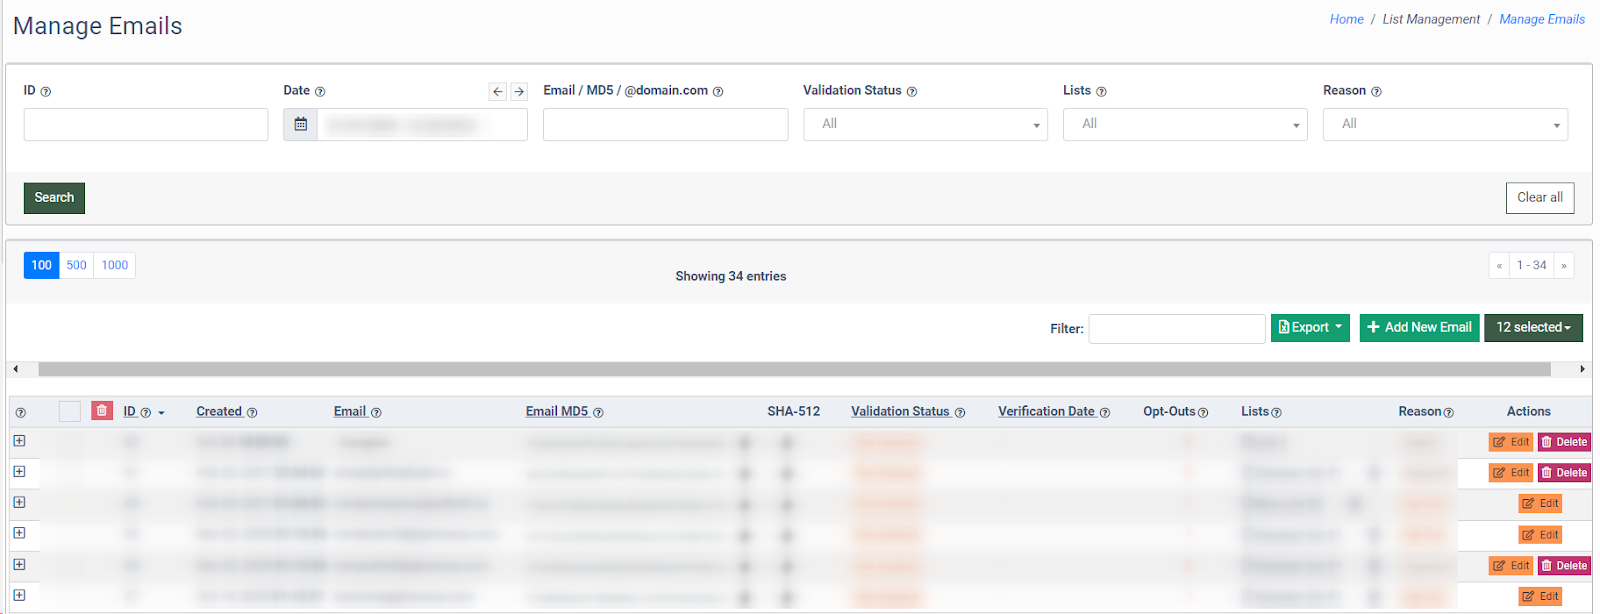
You can narrow down the search results by using the following filters:
- ID: Enter the email ID.
- Date: Select the date range.
- Email / MD5 / SHA-512 / @domain.com: Enter the email, MD5, SHA-512 or domain.
- Validation Status: Select the validation status (Not checked, Validated, Undeliverable, Catch All, Role or Distribution Group, Malformed, Spam Trap, Complainer, Bot, Seed Account, Unknown, Not Exist, Error 12, Disposable Email).
- Lists: Select the list.
- Reason: Select the reason the email is listed (Imported, Added, Deleted, Opt-Out, Opt-Out (Duplicate)).
The “Manage Emails” section contains the following information:
- ID: The unique identification number of the email.
- Created: The date the email was added to the list.
- Email: The email address.
- Email MD5: The encrypted email address in the MD5 format.
- SHA-512: The encrypted email address in the SHA-512 format.
- Validation Status: The status of the email after the email validation (Not checked, Validated, Undeliverable, Catch All, Role or Distribution Group, Malformed, Spam Trap, Complainer, Bot, Seed Account, Unknown, Not Exist, Error 12, Disposable Email).
Note: To enable the email addresses real-time validation service, you need to activate it in System Subscriptions first (System Management > System Subscription > Opt-Intel > Additional features > Email Validation and Hygiene).
- Verification Date: The date of the last verification.
- Opt-Outs: The total number of the Opt-Outs received via the unsubscribe link for the email, excluding opt-out duplicates. A value of 0 indicates the email was manually added to the list.
- Lists: The list(s) the email address is added to.
- Reason: The reason the email is listed (Imported, Added, Deleted, Opt-Out, Opt-Out (Duplicate)).
To view the history and detailed information about the specific email, click the “+” button in the leftmost column of the report.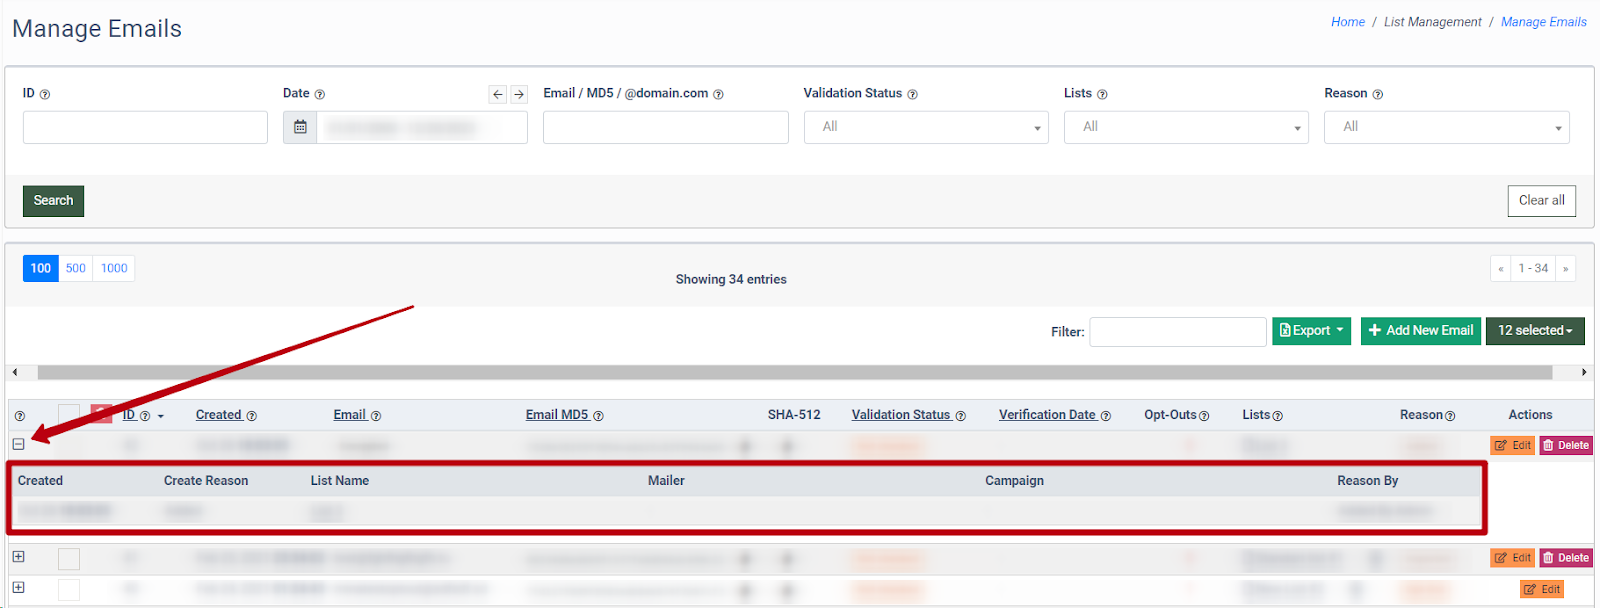
Once the action is completed, the History box for the selected email will be opened.
The History box contains the following information:
- Created: The date and time the record was created.
- List Name: The name of the list the email is added to.
- Mailer: The name of the Mailer the email is assigned to.
- Campaign: The name of the campaign the email is added to.
- Reason: The reason the record was created (Imported, Added, Opt-Out, Deleted, Opt-Out (Duplicate)). Note: Duplicate records for the same email won't affect the Opt-Outs (opt outs via unsubscribe link) counter. For the same email, it will count as 1 and not 2 or more, even if there are duplicate opt-outs.
- Reason By: The entity name that caused the event.
To add a new email address, click the “Add New Email” button.
In the “New Email” pop-up window, enter the email address in the “Email” field, select the list in the “Lists” field, and click the “Save” button to complete the action, or click the “Cancel” button to close the window. Note: To add the email to all existing lists, select the “All” option in the “Lists” field. 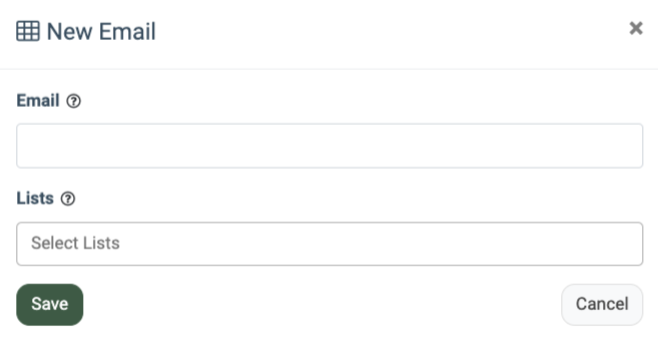
To edit the email address, click the “Edit” button in the “Actions” column.
In the “Edit” pop-up window, you can change the list(-s) the email is added to in the “Lists” drop-down menu. Click the “Save” button to complete. Note: To add the email to all existing lists, select the “All” option in the “Lists” field. 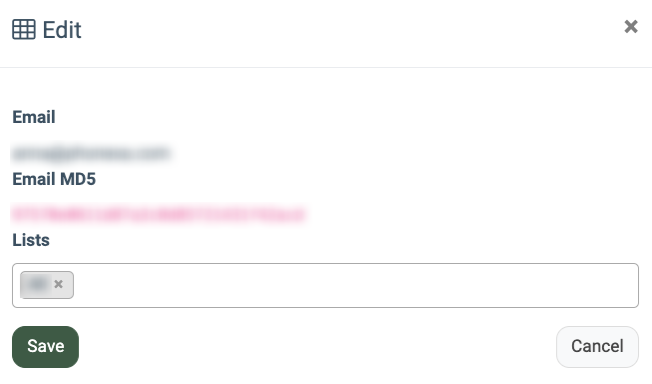
To delete the email address, click the “Delete” button in the “Actions” column.
In the “Delete” pop-up window, follow the instructions and click the “Delete” button to confirm the action, or click the “Cancel” button to close the window.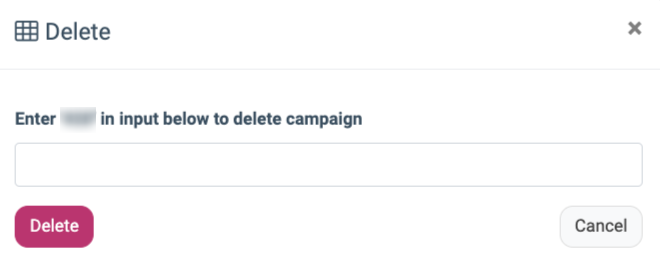
To export data to the CSV file, click the “Export” button.