To view the Manage Offer Walls section, go to the Offers > Offer Walls section.
- Manage Offer Walls
- How To Create a New Offer Wall
- How To Get API
- Offer Wall Edit
- Offers List
- Offer Variables
- Offer Wall Preset arguments
- Offer Wall Template
Manage Offer Walls
The Manage Offer Walls section allows you to view the list of the Offer Walls that contain offers for the API for an external site. The API response contains a list of offers with different parameters added to the Offer Wall.
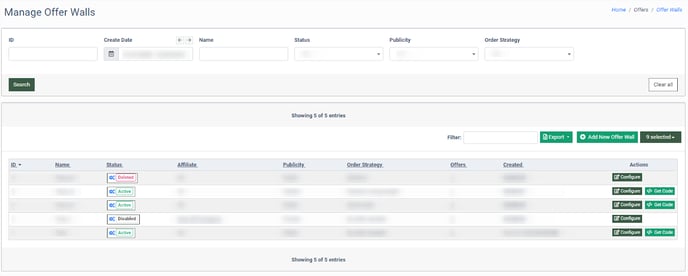
You can narrow down the search results by using the following filters:
- ID: Enter the unique identification number of the Offer Wall.
- Create Date: Select the creation date.
- Name: Enter the name of the Offer Wall.
- Status: Select the status of the Offer Wall (Active, Disabled, Deleted).
- Publicity: Select the publicity type of the Offer Wall (Public, Private, Hidden).
- Order Strategy: Select the order strategy of the Offer Wall (Strict order, Random, By Offer Variable, Random using weight)
The Offer Walls list contains the following information:
- ID: The unique identification number of the Offer Wall.
- Name: The name of the Offer Wall.
- Status: The status of the Offer Wall (Active, Disabled, Deleted). Note: To change the status of the Offer Wall, click the “Status” button and proceed with changes in the “Change Status” pop-up window.
- Affiliate: The name of the Affiliate that has access to the Offer Wall’s API and list of the Offers.
- Publicity: The publicity type of the Offer Wall (Public, Private, Hidden).
- Order Strategy: The order strategy of the Offer Wall:
- Strict order: This strategy sorts the offers strictly in order from less to more.
- Random: This strategy sorts the offers randomly.
- By Offer Variable: This strategy sorts the offers strictly by custom field.
- Random using weight: This strategy weighs the offers and the probability of each offer to be selected is determined by its relative weight.
- Offers: The number of offers that the Offer Wall contains. Note: Click the number of offers, to view the Offers List tab.
- Created: The creation date of the Offer Wall.
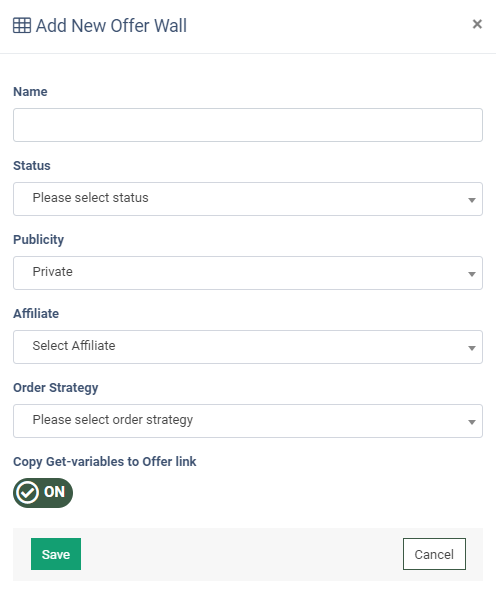
How To Create a New Offer Wall
To create a new Offer Wall, click the “Add New Offer Wall” button and fill in the following fields in the “Add New Offer Wall” pop-up window:
- Name: Enter the name of the Offer Wall.
- Status: Select the status of the Offer Wall (Active, Disabled, Deleted).
- Publicity: Select the publicity type of the Offer Wall (Public, Private, Hidden). Note: The Private type of publicity can be set only during Offer Wall creation and cannot be selected again after changes.
- Affiliate: Select the Affiliate for the Offer Wall. Note: This field is available only for the Private type of Publicity. Non-changeable.
- Order Strategy: The rules of sorting offers in the Offer Wall:
- Strict order: This strategy sorts the offers strictly in order from less to more.
- Random: This strategy sorts the offers randomly.
- By Offer Variable: This strategy sorts the offers strictly by custom field.
- Random using weight: This strategy weighs the offers and the probability of each offer to be selected is determined by its relative weight.
- Copy Get-variables to Offer link: Check the box to copy the Get-variables to the offer link.
 Note: The possibility of adding offers and variables to the Offer Wall, editing the template, and Offer Wall's data occurs after its creation.
How To Get Offer Wall API
The Offer Wall API is the API that returns the Offer Wall data, its offers, variables, and others in various formats: HTML, JS, JSON, applying the rules of sorting the offer that are specified when creating/editing the Offer Wall.
The API itself accepts the input of the ID of the Offer Wall in encrypted form, the response type (HTML, JS, JSON), and the unencrypted ID of the Affiliate. The error will occur if the response type or the Offer Wall ID is missing.
To get the Offer Wall API, click the “Get Code” button. The “Get Code” button is available only for the Offer Walls with Active status and at least one offer.
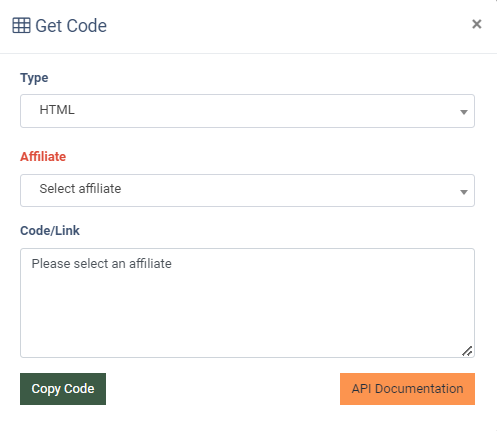
Fill in the following fields in the “Get Code” pop-up window:
- Type: Select the type of the API response (HTML, JS, JSON)
- Affiliate: Select the Affiliate.
- Code/Link: The code or the link for the selected Affiliate in the corresponding API response type.
Click the “Copy Code” button to copy the code to the clipboard.
Click the “API Documentation” button to open the Offer Walls API Documentation.
Offer Wall Edit
To manage the Offer Wall, click the “Configure” button in the “Actions” column. The Offer Wall Edit tab allows you to edit general Offer Wall data.
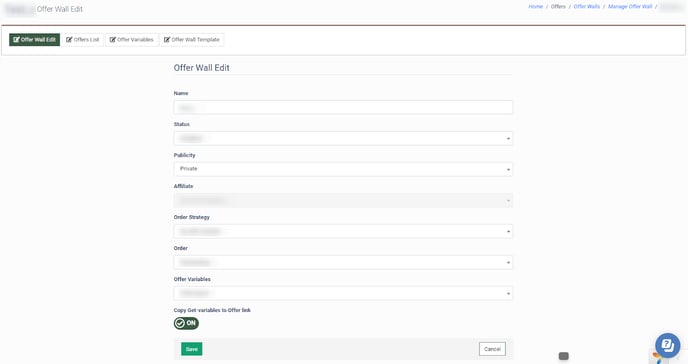
Fill in the following fields:
- Name: Enter the name of the Offer Wall.
- Status: Select the status of the Offer Wall (Active, Disabled, Deleted)
- Publicity: Select the publicity type of the Offer Wall (Public, Private, Hidden). Note: If you change the publicity from Private to any other, you won't be able to undo this action and select Private again.
- Affiliate: The name of the Affiliate. Note: Could be selected during Offer Wall creation for the Private type of Publicity only. Non-changeable.
- Order Strategy: The rules of sorting offers in the Offer Wall (Strict order, Random, By Offer Variable, Random using weight). For the “By Offer Variable” order strategy, the following fields are available:
- Order: Select the type of order (Ascending, Descending).
- Offer Variables: Select the Offer Variables from the drop-down list.
Click the “Save” button to proceed with the changes.
Offers List
The Offers List tab allows you to add or delete offers for the Offer Wall, set filters, variables, and sorting values for offers.
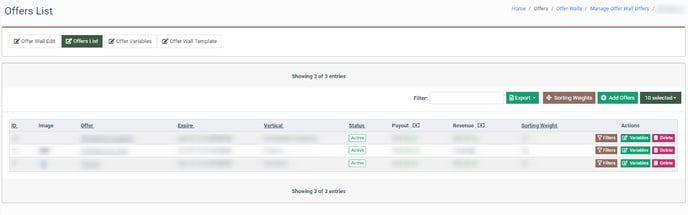
The Offer List tab contains the following information:
- ID: The unique identification number of the offer.
- Image: The image of the offer.
- Offer: The name of the offer.
- Expire: The expiration date of the offer.
- Vertical: The type of the market segment.
- Status: The status of the offer.
- Payout: The amount you pay to affiliates.
- Revenue: The amount you get from the advertiser of the offer.
- Sorting Weight: The value for the sorting weight of the offer (For Random by weight Publicity type only).
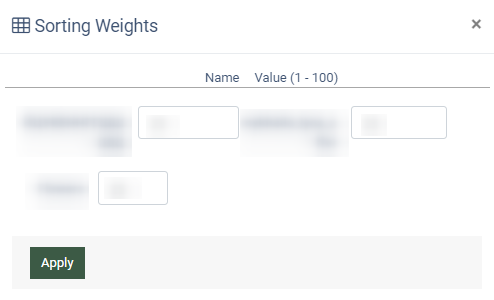
To change the sorting weight for the offer, click the “Sorting Weight” button. In the “Sorting Weight” pop-up window, enter the value from 1 to 100 for each offer. Note: The higher the number you put, the higher the possibility that this offer will be chosen. Available for Random by weight Publicity type only.
To add the offer to the Offer Wall, click the “Add Offer” button and select the offer from the drop-down list in the “Add Offer to Offerwall” pop-up window.
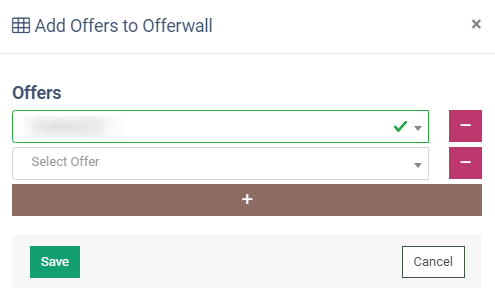 To add more than one offer simultaneously, click the “plus” sign and select the offer from the drop-down list in the additional field.
To remove the offer from the adding field, click the “minus” sign.
Click the “Save” button to add offers to the Offer Wall.
To enable/disable the variables separately for the offer, click the “Filter” button in the “Actions” column.
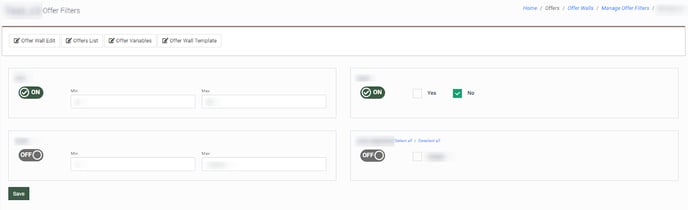
The Offer Filters page displays the variables that are used as a filter in API requests. Check the box for the variable and fill in the required fields depending on the variable type.
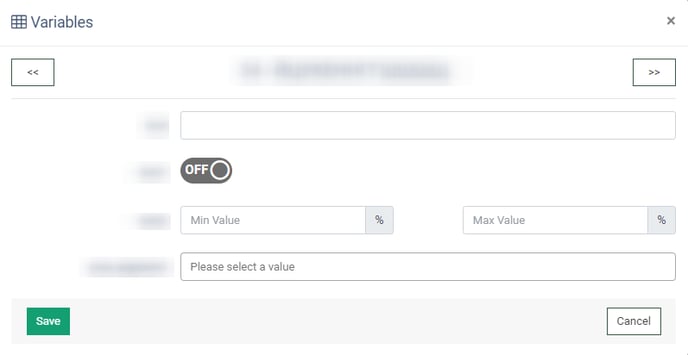
To set all of the variables for the offer, click the “Variables” button and fill in the following fields for the variables in the “Variables” pop-up window.
Note: Available fields depend on the variable type you have.
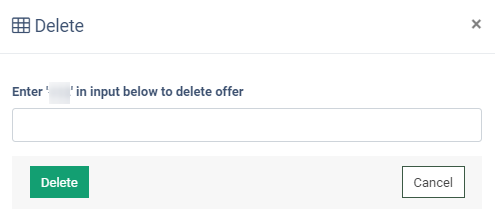
 To remove the offer from the Offer Wall, click the “Delete” button and follow the instructions in the “Delete” pop-up window.
Offer Variables
The Offer Variables tab allows you to add, delete, and manage the variables that are added to the Offer Wall. All of the variables in the Offer Variables list are placed according to the order.
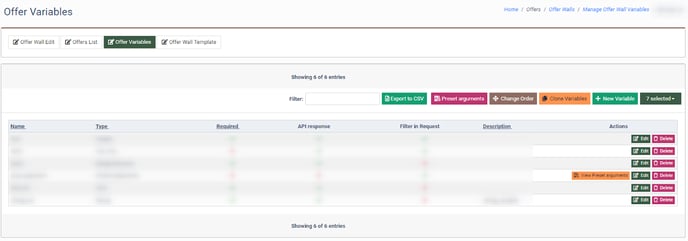
The Offer Variables tab contains the following information:
- Name: The name of the variable.
- Type: The type of the variable.
- Required: Displays if the field is required.
- API response: Displays if the field value is in the API response.
- Filter in Request: Displays if the variable is used as a filter in the API request.
- Description: The description of the variable.
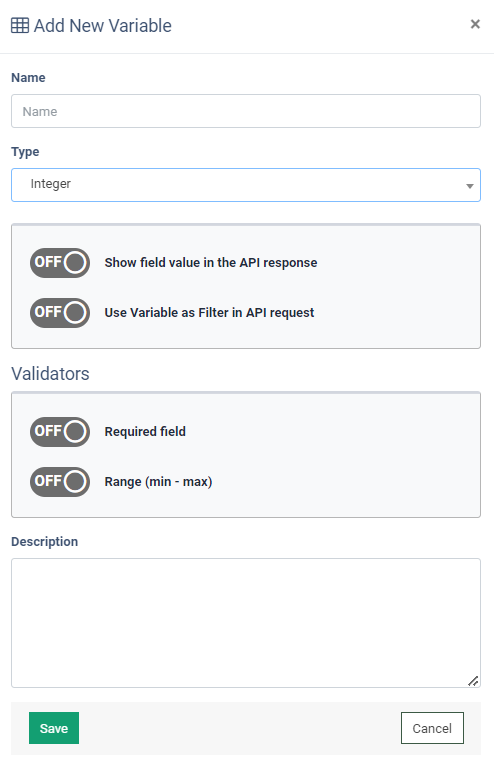
To create a new variable, click the “New Variable” button and fill in the required fields in the “New Variable” pop-up window:
- Name: Enter the name of the variable.
- Type: Select the type of variable (Integer, Float number, Yes/No, String, Text, Date, Date & Time, Preset Arguments, Money, Percent, Range Integer, Range Floats, Range Dates, Range Percents, Range Manew, Country Status, US States).
- Preset arguments: Select the Preset Arguments for the variable from the drop-down list. Note: Available for the “Preset Arguments” type of variable only.
- Show field value in the API response: Switch the toggle to the “ON” position to show the field value in the API response.
- Use Variable as Filter in API request: Switch the toggle to the “ON” position to use the variable as a filter in the API request.
- Description: Enter the description text of the variable.
Depending on the variable type the following validators for API response are available:
- Required field: Switch the toggle to the “ON” position to make the field required.
- Range (min - max): Switch the toggle to the “ON” position to set the minimum and maximum values.
- String length: Switch the toggle to the “ON” position to set the minimum and maximum string length.
- Email: Switch the toggle to the “ON” position to add the email address.
- Url: Switch the toggle to the “ON” position to add the URL.
- Site domain: Switch the toggle to the “ON” position to add the site domain.
- IP address: Switch the toggle to the “ON” position to add the IP address.
- Regular expression: Switch the toggle to the “ON” position to add the regular expression.
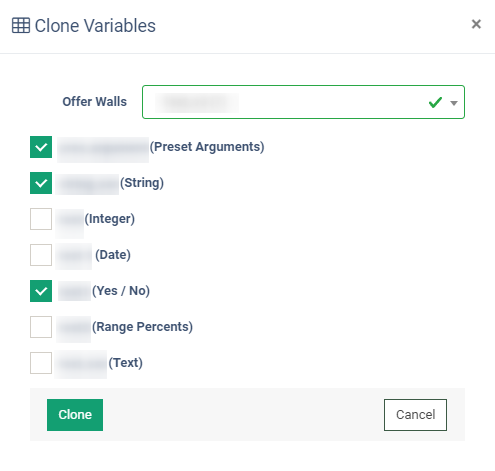
To add the variable from the different Offer Wall, click the “Clone Variables” button. In the “Clone Variables” pop-up window select the Offer Wall from which you want to get the variable, and check the box for the variables. Click the “Save” button to add.
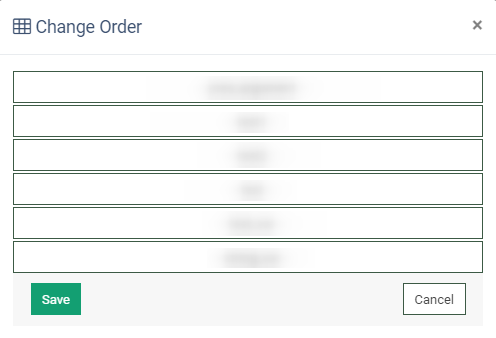
Click the “Change Order” button to change the order of the variables, and in the “Change Order” pop-up window, click and drag the variable through the list. Click the “Save” button to apply the changes.
Offer Wall Preset arguments
The Offer Wall Preset arguments tab allows you to create and manage all of the Preset Arguments for the Variables with the “Preset Arguments” type. To open the Offer Wall Preset arguments tab, click the “Preset arguments” button from the Offer Variables tab.
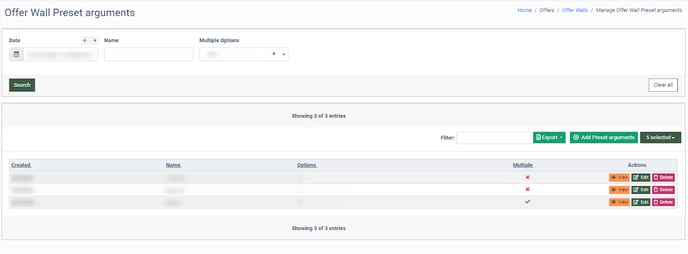
You can narrow down the search results by using the following filters:
- Date: Select the creation date.
- Name: Enter the name of the Offer Wall Preset Arguments.
- Multiple Options: Select if the Offer Wall Preset Arguments has multiplied options (Yes, No).
The Offer Wall Preset arguments tab contains the following information:
- Created: The date and time of creation.
- Name: The name of the Preset Argument.
- Options: The amount of the options in the Preset Arguments.
- Multiple: Shows if the Preset Argument is multiple.
To create new Preset Arguments, click the “Add Preset arguments” button.
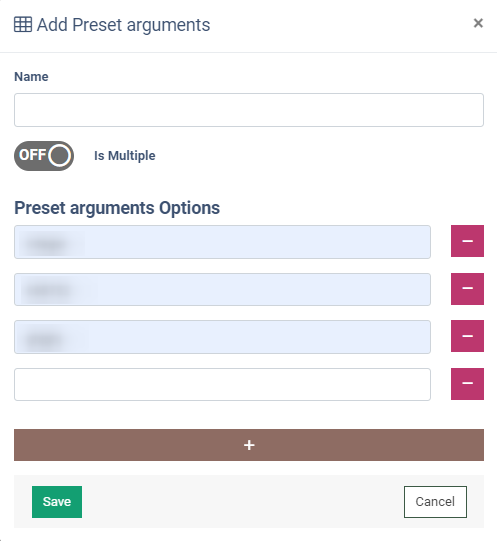
Fill in the following fields in the “Add Preset arguments” pop-up window:
- Name: Enter the name of the Preset Argument.
- Is Multiple: Switch the toggle to the “ON” position to make the Preset Arguments multiple.
- Preset arguments Options: Enter the options for the Preset Arguments. Click the “plus” button to add one more field of the Preset arguments Options or the “minus” button to remove the field.
Click the “Save” button to create a new Preset Argument.
To view the options for the Preset Arguments, click the “View” button in the “Actions” column.
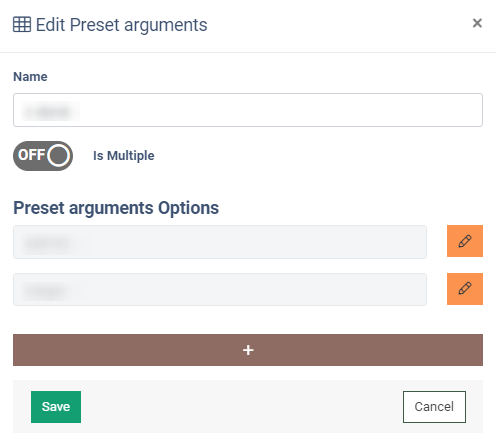
To edit the Preset Arguments, click the “Edit” button in the “Actions” column. Fill in the following fields in the “Edit Preset arguments” pop-up window:
- Name: Enter the name of the Preset Arguments/
- Is Multiple: Switch the toggle to the “ON” position to make the Preset Arguments multiple.
- Preset arguments Options: Enter the options for the Preset Arguments. To change the added option, click the “pencil” button and proceed with the changes or deletion. Click the “plus” button to add one more field of the Preset arguments Options.
To delete the Offer Wall Preset Arguments, click the “Delete” button in the “Actions” column.
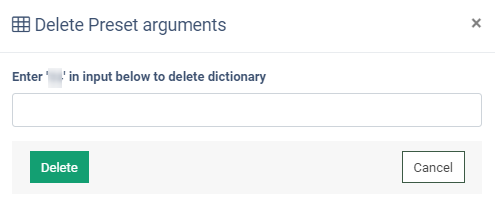
Note: There is no possibility to delete the Preset Arguments that are used for the variables.
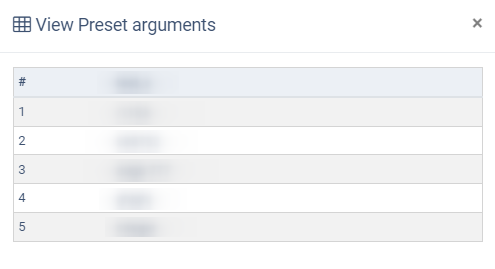
To view the Preset Arguments for the Variable, go to the Offer Variables tab and click the “View Preset Arguments” button in the “Actions” column.
The Preset arguments are available only for the variables with the “Preset Arguments” type.
Offer Wall Template
The Offer Wall Template tab allows you to set up the way the Offer Wall is displayed when requesting its data via API.
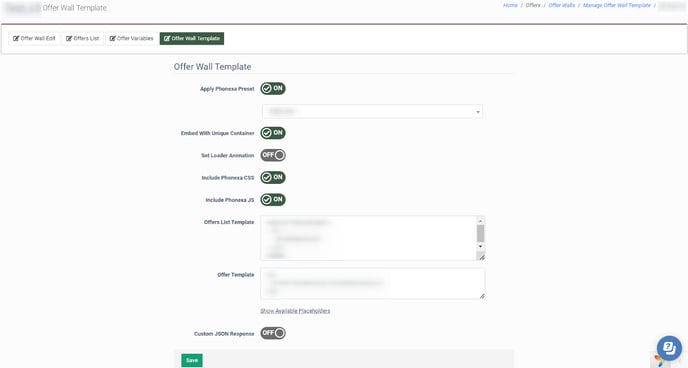
Fill in the following field to set up the Offer Wall Template:
- Apply Phonexa Preset: Switch the toggle to the “ON” position to apply the Phonexa Preset. Select the type of Phonexa preset from the drop-down list (Table View, Block View).
- Embed With Unique Container: Switch the toggle to the “ON” position to embed the Offer Wall with the unique container.
- Set Loader Animation: Switch the toggle to the “ON” position to set the loader animation. Select the loader animation from the drop-down list (Circle Spinning).
- Include Phonexa CSS: Switch the toggle to the “ON” position to include the Phonexa CSS in the Offer Wall.
- Include Phonexa JS: Switch the toggle to the “ON” position to include the Phonexa JS in the Offer Wall.
- Offers List Template: Enter the Placeholders of the Offer List Template.
- Offer Template: Enter the Placeholders of the Offer Template.
Note: Click the “Show Available Placeholders” button to view the possible placeholders for the Templates.
- Custom JSON Response: Switch the toggle to the “ON” position to create the custom JSON Response:
- Json Offers List Template: Enter the placeholders for the JSON Offers List template.
- JSON Offer Template: Enter the placeholders for the JSON Offer template.
Click the “Save” button to apply the settings.