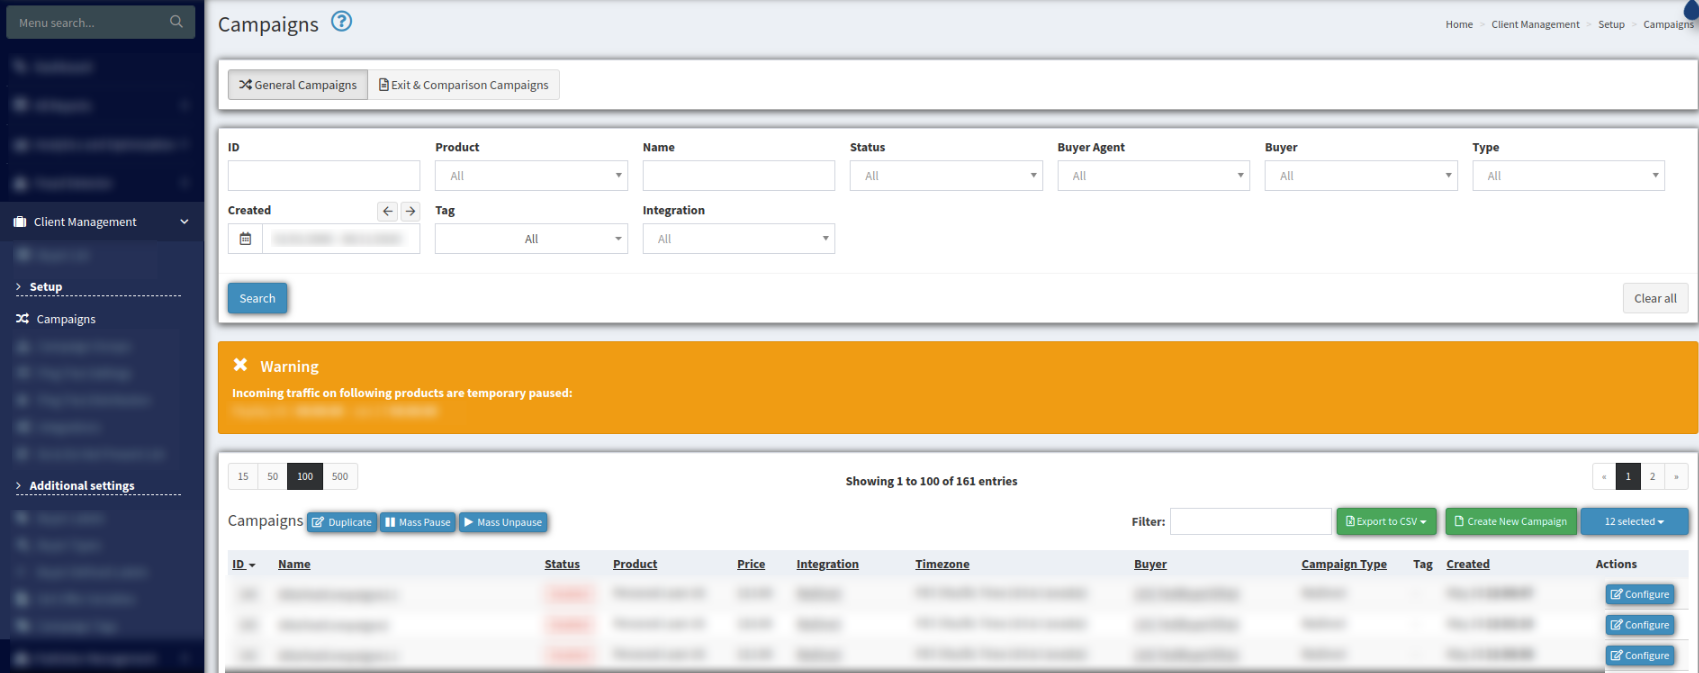
The “Mass Pause” button allows you to set on pause all the campaigns from the list. To use the option go to the Client Management > Setup > Campaigns section.
To set up the option, click the “Mass Pause” button and fill in the fields:
-
Product - select a product from the drop-down list. All active campaigns assigned to this product will be temporarily paused.
-
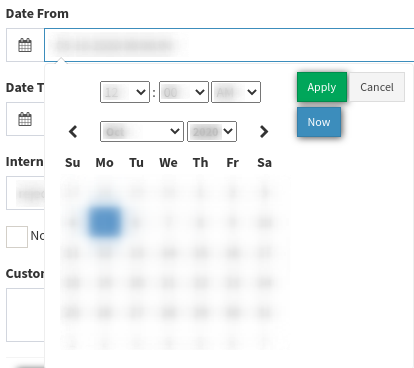
Date From - select the time and date to pause the campaigns. To set the current time, click the "Now" button and then the "Apply" button. Please note that the campaigns will not be paused if you choose a date that has passed.
-
Date To - select time and date to unpause campaigns.
-
Internal Comment - enter the internal comment that will show up in the system logs (e.g. the reason behind the pause or the name of the user initiated the pause).
-
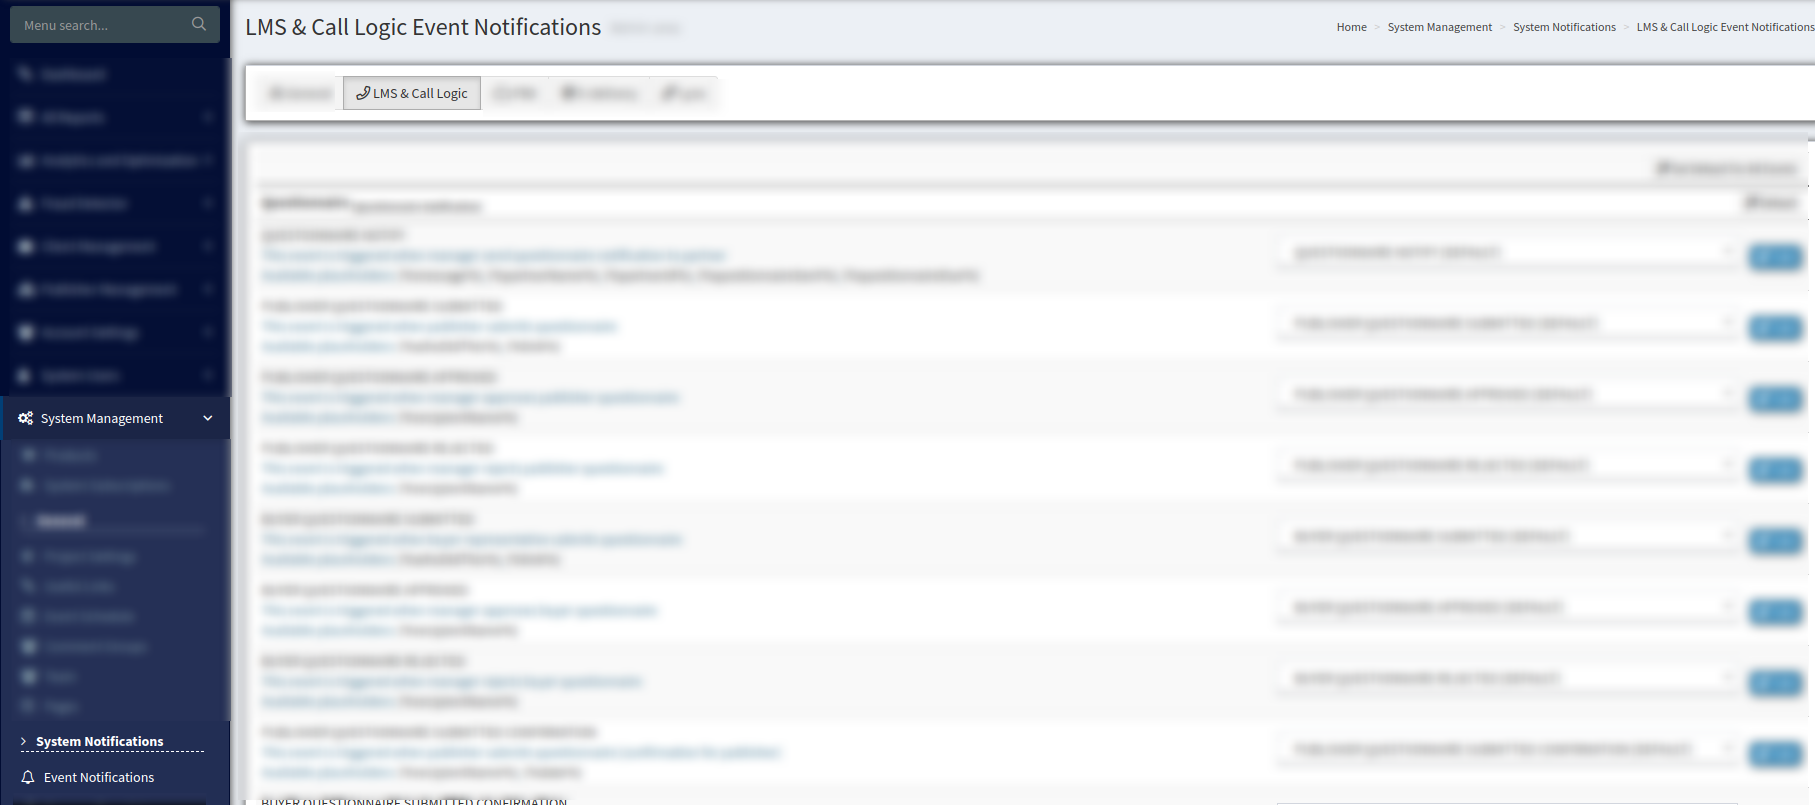
Notify Publishers - if the checkbox is selected, the system will send standard notifications to publishers. To view or edit the standard notification template go to the System Management > System Notifications > Event Notifications section, choose the LMS & Call Logic tab and click the “Edit” button in the “Publisher Notification” block for the “Product Pause” template.
-
Custom Notification Massage - you can add a custom message that will be added to the standard notification or you can leave this field blank.
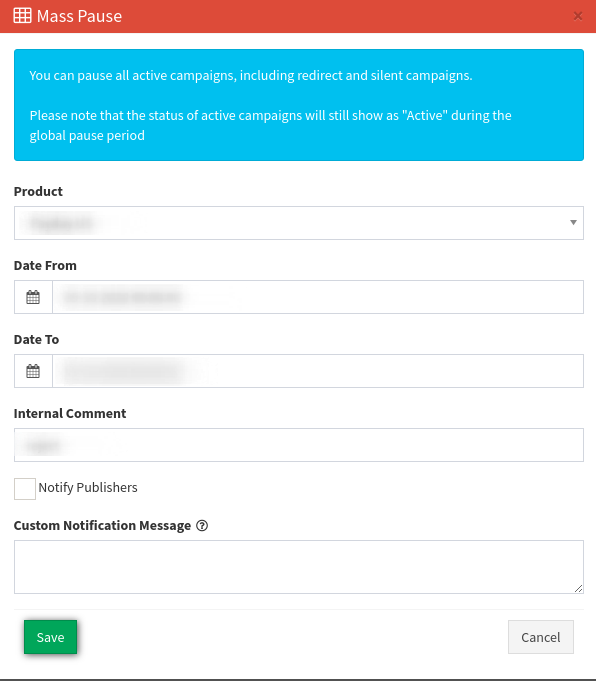
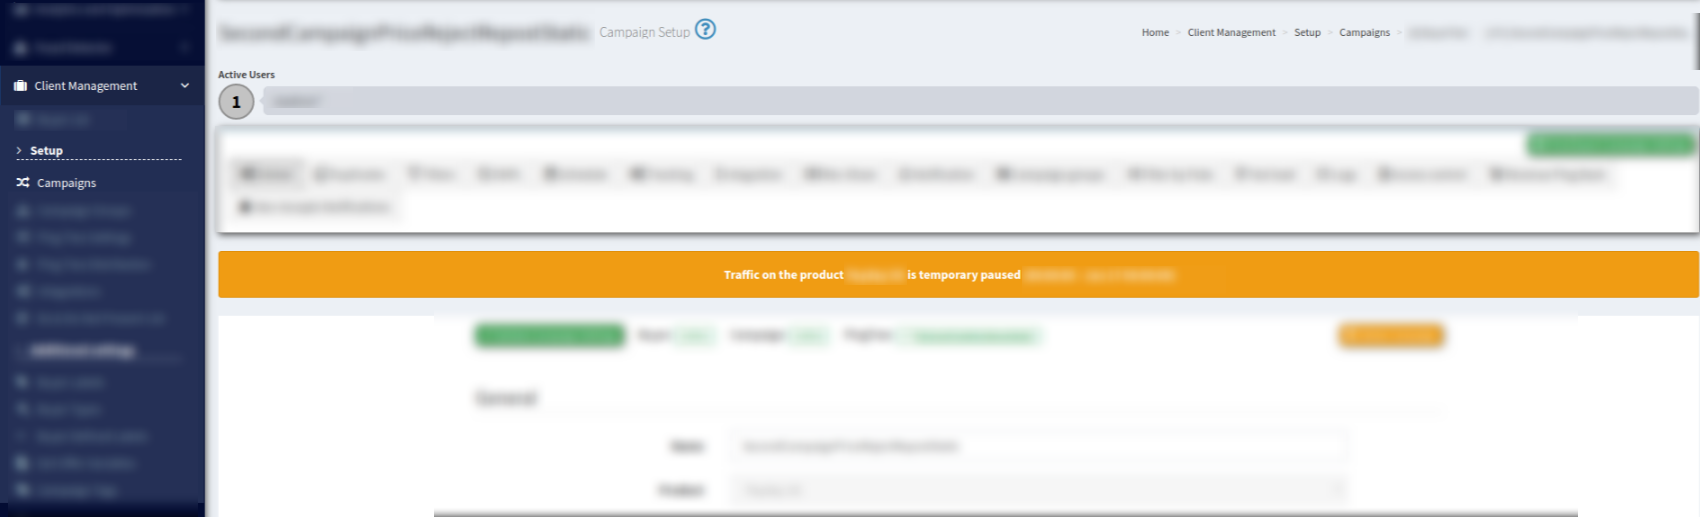
Please note that the status of the active campaigns will still show as "Active" during the global pause period.
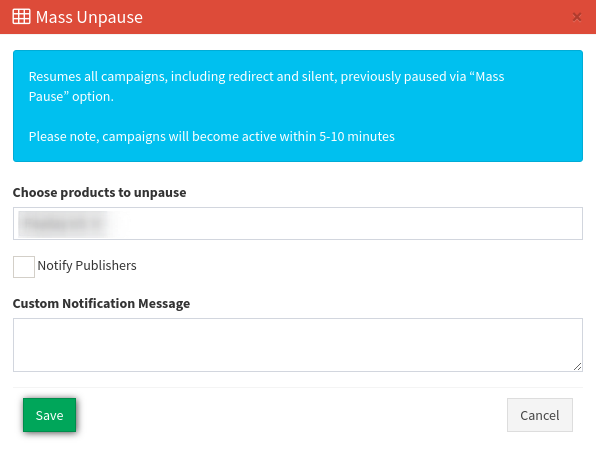
The “Mass Unpause” button allows you to unpause all the campaigns that were put on pause when the “Mass Pause” option was enabled. The “Mass Unpause” button becomes available only if the “Mass Pause” option is enabled. To unpause the campaigns click the “Mass Unpause” button and fill in the following fields:
-
Choose products to unpause - displays all paused products and allows you to select a specific product to unpause all the campaigns associated with it.
-
Notify Publishers - if the checkbox is selected the system will send standard notifications to publishers. To view or edit the standard notification template go to the System Management > System Notifications > Event Notifications section, choose the LMS & Call Logic tab and click the “Edit” button in the “Publisher Notification” block for the “Product Unpause” template.
-
Custom Notification Message - you can add a custom message that will be included in the standard notification or you can leave this field blank.
Please note, campaigns will become active within 5-10 minutes.
If the checkbox “Notify Publishers” was checked, standard notification emails will be sent to all publishers and publisher agents as soon as the product is paused or unpaused. The system sends 100 notifications per minute.
If the checkbox was not checked, no notifications will be sent.
In order to add a custom message that will be included in the standard notification, fill in the "Custom Notification Message" field. To view or edit the standard notification templates go to the System Management > System Notifications > Event Notifications section, choose the LMS & Call Logic tab and check the “Publisher Notification” block.

When the “Mass Pause” option is enabled, the notification “All campaigns for the product XYZ are temporarily paused ” is shown on the Campaign Setup page.
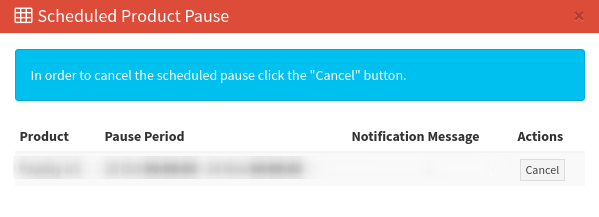
The “Scheduled Product Pause” button allows you to view a list of scheduled temporary product pauses and if necessary to cancel the scheduled pauses. The “Scheduled Product Pause” button becomes available only if the “Mass Pause” option is enabled for future dates.
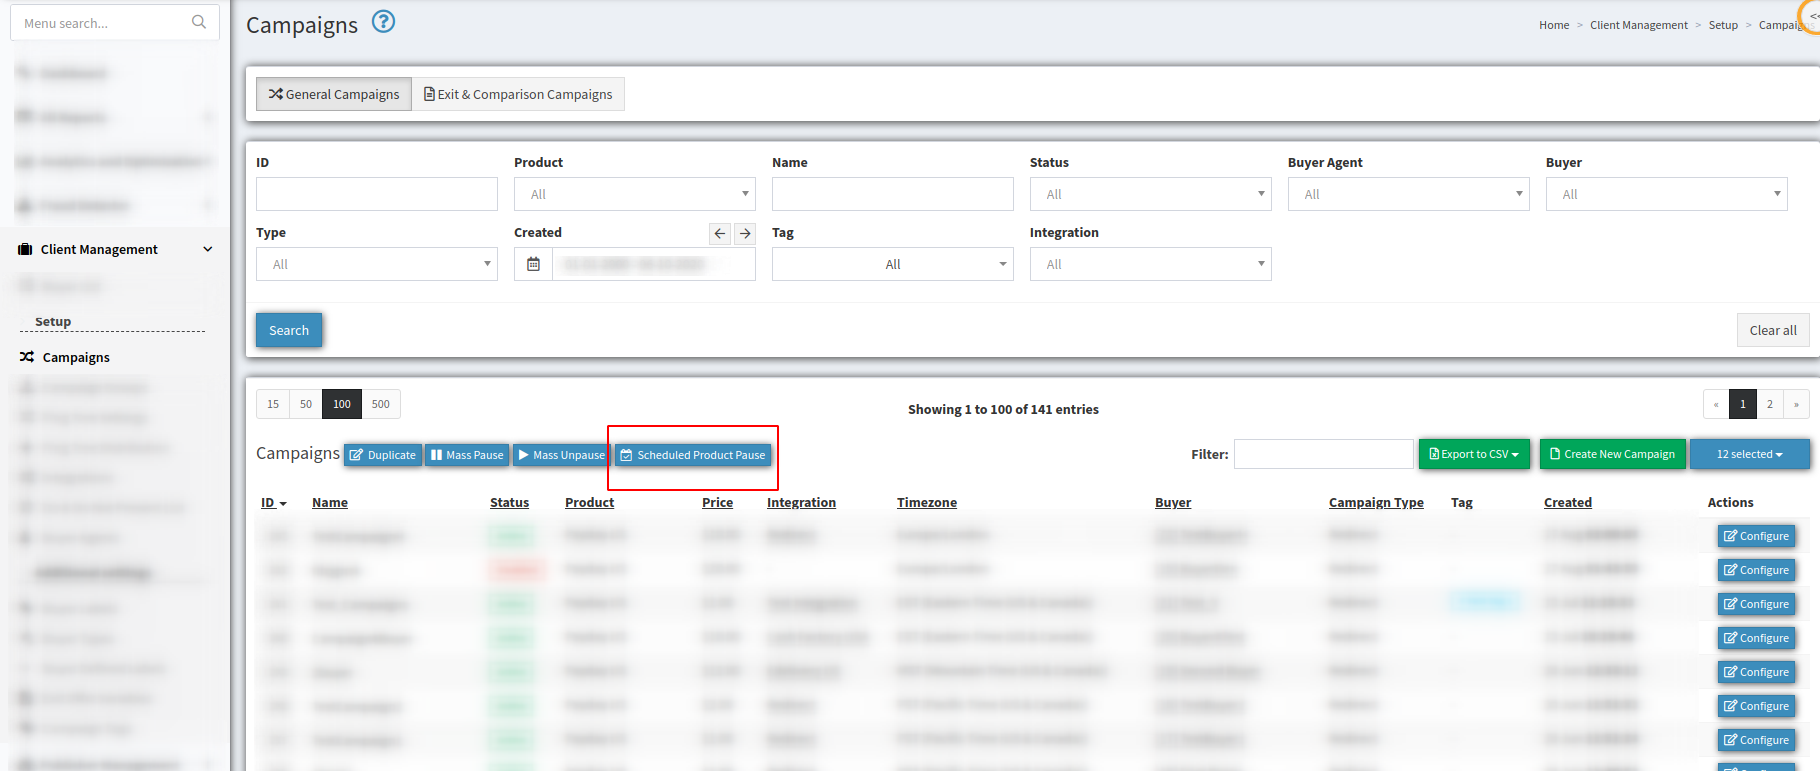
To view or cancel the scheduled pause click the “Scheduled Pause” button. The pop-up window appears with the following fields:
-
Product - the name of the product that will be paused.
-
Pause Period - the pause date range.
-
Notification Message.
To cancel the scheduled pause click the "Cancel" button in the “Actions” column and confirm the action afterward.