This guide walks you through integrating Phonexa with Microsoft Entra ID (Azure AD) for Single Sign-On (SSO) (SAML-based) and Automatic user provisioning and de-provisioning via SCIM 2.0.
Once configured, your users can sign in to Phonexa using Entra, and Entra can automatically create, update, or disable Phonexa users based on your assignments.
Microsoft Entra ID Configuration
Prerequisites before starting the configuration process:
- A Microsoft Entra tenant
- An account with permissions to manage Enterprise Applications (typically Application Administrator or Global Administrator)
- Your Phonexa environment/tenant (example format: cp-instXXXX-client.phonexa.com, or for the white-labeled format: cp.yourdomain.com).
- A SCIM Secret Token
Create the Phonexa Enterprise Application in Entra
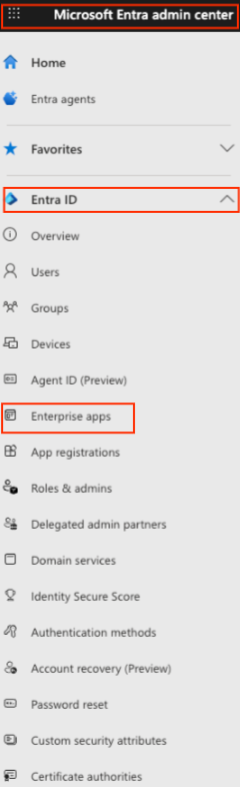
- Sign in to the Microsoft Entra admin center component, and go to the Entra ID > Enterprise apps menu section.
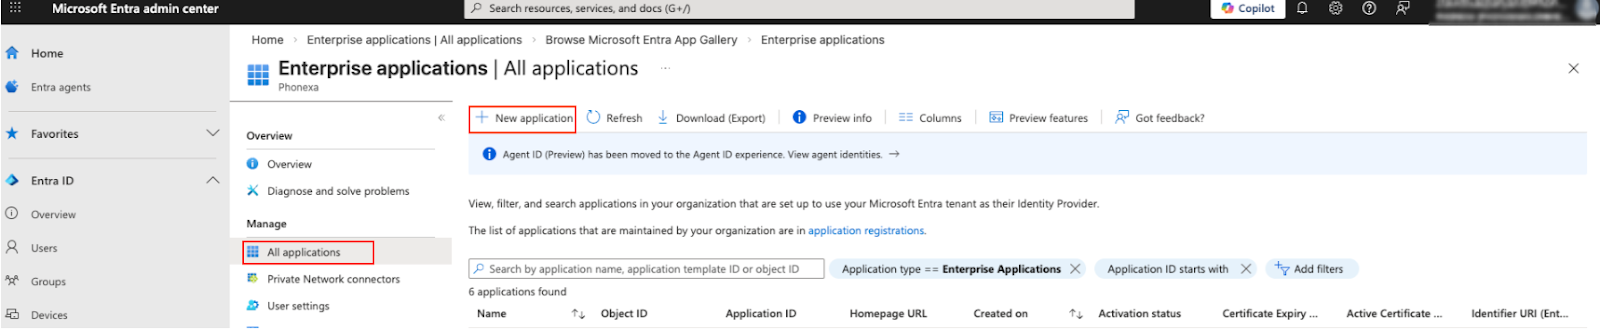
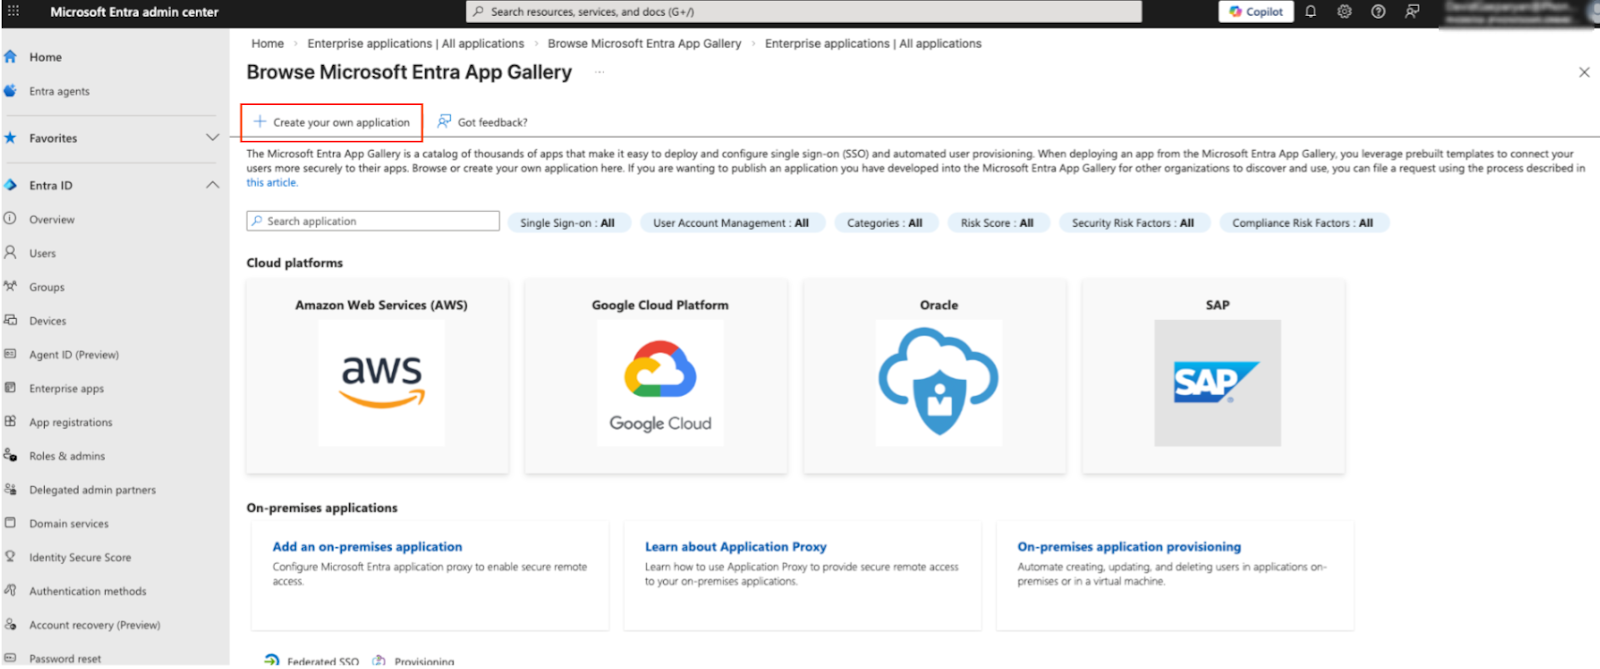
- Go to the Manage > All Applications subsection, click the “+ New application” option in the top menu of the section, and select the “Create your own application” option in the “Browse Microsoft Entra App Gallery” section.
- Enter the following information in the “Create your own application” right-side panel fields:
- What is the name of your app?: Enter the name of the application.
- What are you looking to do with your application?: Select “Integrate any other application you don’t find in the gallery (Non-gallery)” radio button.
Click the “Create” button to continue the configuration process.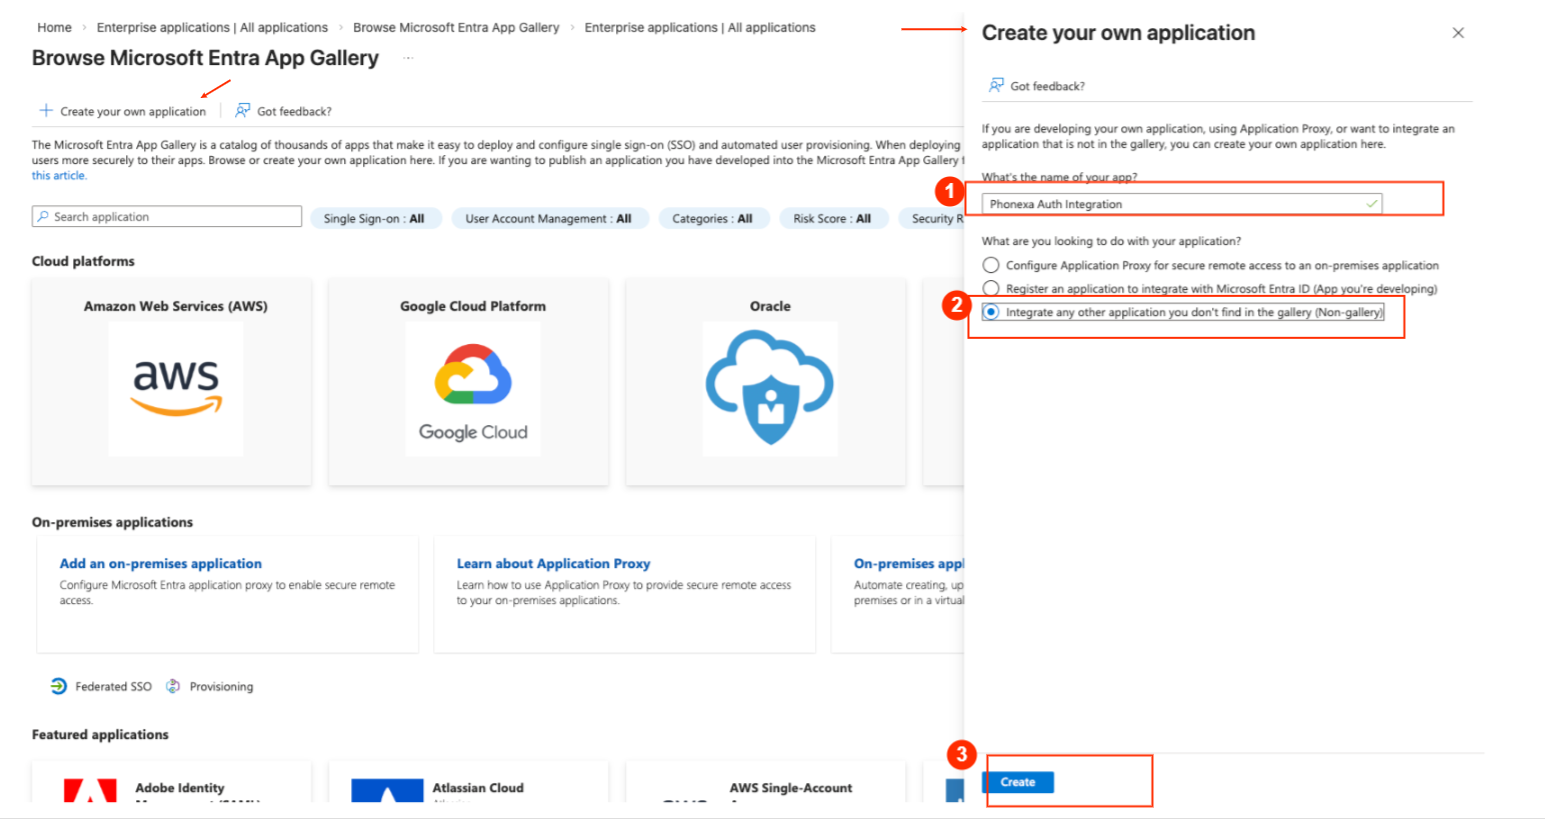
Configure SCIM Provisioning in Microsoft Entra
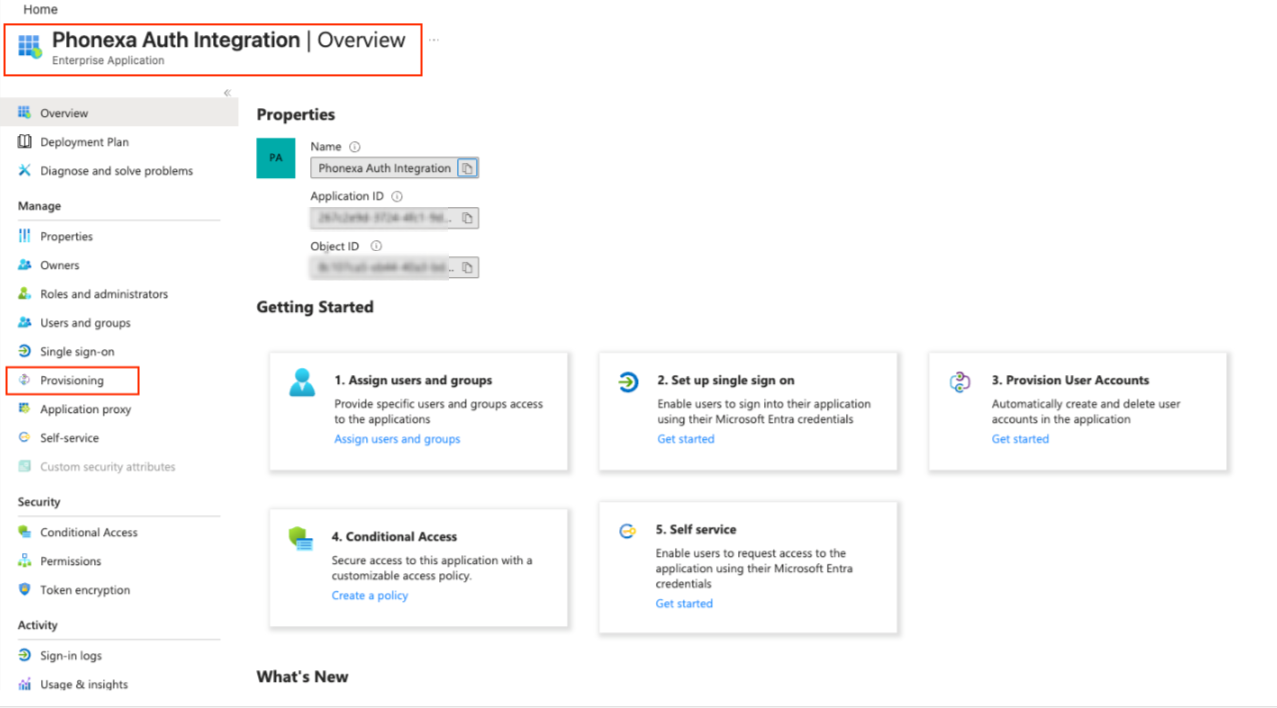
- Open your created Enterprise Application (e.g., Phonexa Auth Integration) and go to the Manage > Provisioning section.
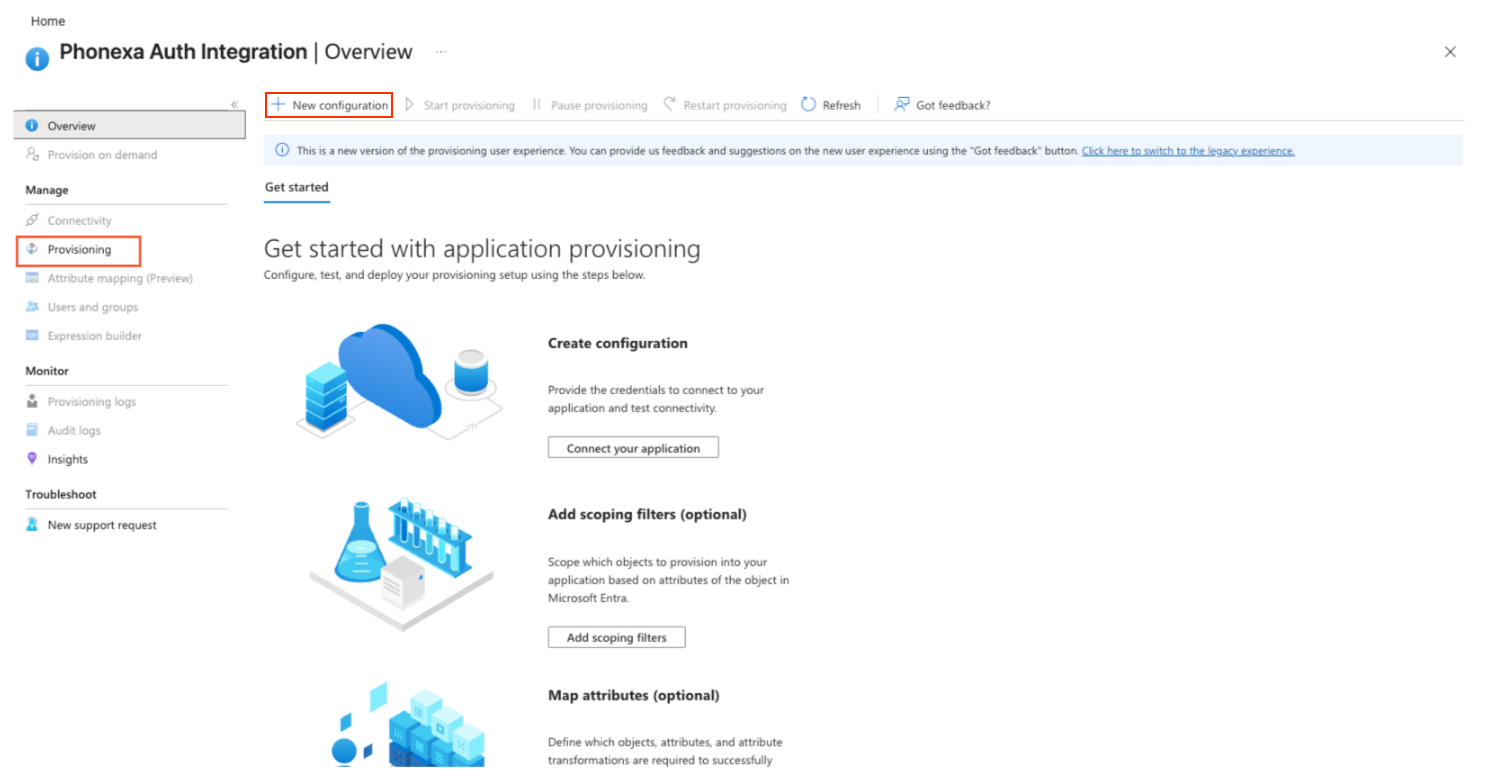
- Select the “New configuration” tab and click the “+ New configuration” button at the top menu. Fill in the following fields in the “New provisioning configuration” block:
- Authentication method: Bearer authentication (2FA is not required)
- Tenant URL: Use this exact format: https://cp-instXXXX-client.phonexa.com/scim/v2/ by replacing XXXX with your Phonexa instance number.
- Secret token: Generate a Secret Token with any token generator, save the Token on your side and save the changes, then send it to your Phonexa Account Manager. The Phonexa Account Manager will create an internal task and assign it to the respective project manager to initiate the synchronization process, which will then be completed by the development team.
- Once the setup is finished on Phonexa’s side and your Account Manager notifies you that it is complete, return to the same screen and click Test connection to confirm everything is configured correctly. Note: “Test connection” will only succeed after Phonexa applies the token and completes configuration on their end. Your Account Manager will confirm when it’s ready.
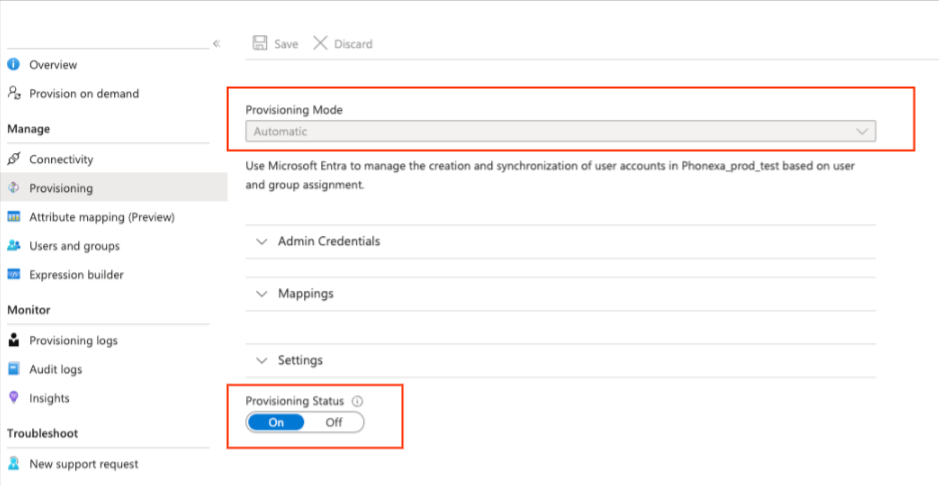
- After a successful Test connection, you’ll be redirected to the configuration details page. On the next screen, ensure it matches this state:
- For the “Provisioning Mode” field, the “Automatic” option is set.
- For the “Provisioning Status” toggle, the “ON” value is selected (enabled).
- Once the connection is tested and everything is ready, provisioning typically begins within 20 - 40 minutes; if it doesn’t start automatically, go to the “Provisioning” section and click the “Start provisioning” button.
Phonexa Settings: Enabling Microsoft SSO on Phonexa End
Prerequisites before starting the configuration process:
- Microsoft Entra integration is already configured (SSO and/or provisioning) on the Entra side.
- You have Admin access in Phonexa to configure the “Project Settings” section.
- You have a Microsoft test user account available for login testing.
Microsoft SSO in Phonexa
- Once the Microsoft Entra integration is completed, the Microsoft SSO section will automatically become available in Phonexa. To view the corresponding settings from the Phonexa end, go to the System Management > General > Project Settings section, select the “General” tab, and then the “Employee registration settings” subtab.

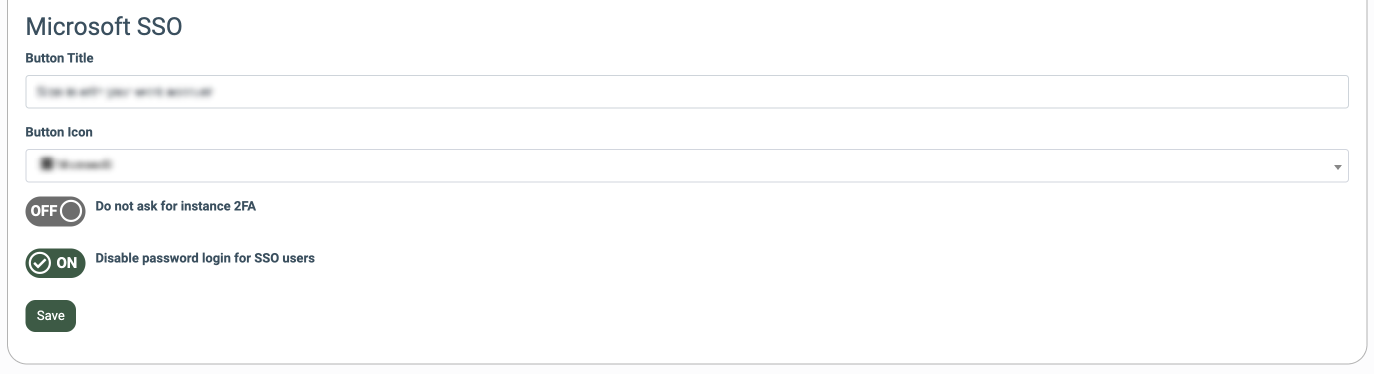
- Configure the following settings in the “Microsoft SSO” block:
- Button Title: Enter the text that will appear on the login button (e.g., Sign in with your work account).
- Button Icon: Select the icon that will appear on the login button (Microsoft, Windows, Sign In, No icon ).
- Do not ask for instance 2FA: Enable this only if you want to bypass Phonexa 2FA for Microsoft SSO users, allowing access to Phonexa without Phonexa 2FA. Note: We do not recommend enabling this, as it reduces account security.
- Disable password login for SSO users: Enable this setting to disable password authentication for users enrolled via SSO. If enabled, users will not be able to log in using a Phonexa password and must authenticate using Microsoft SSO only. We recommend enabling this because if a user is removed/disabled in Entra but deprovisioning doesn’t sync (e.g., a sync/communication issue), they may still be able to access Phonexa with their Phonexa password.
Click the “Save” button to apply the changes.
Recommendation: We recommend keeping the “Disable password authentication for users enrolled via SSO” and “Do not ask for instance 2FA settings” disabled to maintain centralized access control and security.
Verify the password on the login page
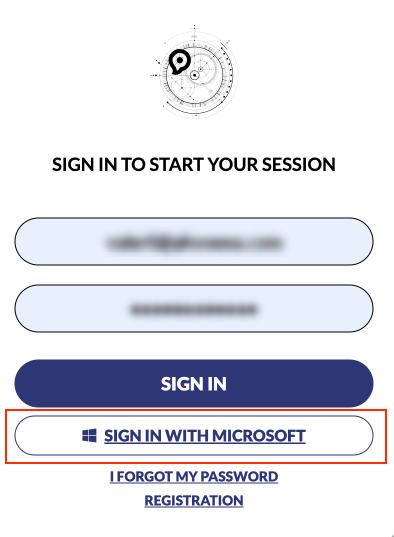
- Open the Phonexa login page and confirm the “Sign In With Microsoft” button appears with the title and icon you configured.
- On the first login via Microsoft SSO, Phonexa may prompt the user to set a password (this is expected only once, depending on your instance configuration). Note that this password is not for signing in. This password allows the user to manage the security settings of the account, such as 2FA and PIN code creation or management.
- After the first login, log out and sign in again via the “Sign In With Microsoft” option. The password setup screen should NOT appear again, and the user should go directly into Phonexa (e.g., welcome page).
Note: The name and the appearance of the login button depend on the settings set in the “Button Title” and “Button Icon” set in the “Microsoft SSO” block.
Configure roles for the users
- If you assign existing users/groups in Microsoft Entra, those users are automatically created in Phonexa during provisioning.
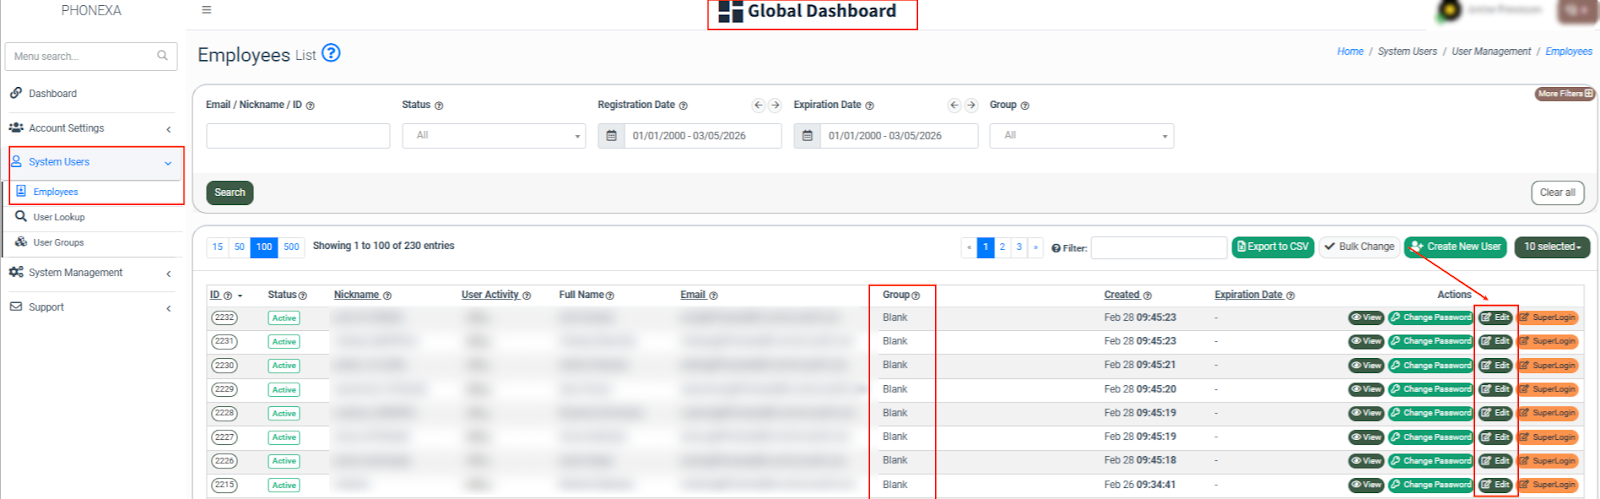
- All users created via Microsoft SSO/provisioning typically appear in Phonexa with the role “Blank” by default, which means they won’t have access to any areas until an admin assigns the appropriate system role in Phonexa. This requirement applies to users provisioned from Entra both during the initial setup and for any users created afterward.
- The user with the admin role must assign the appropriate Phonexa role/permissions to the user before they can access areas of the platform. To assign the system role for the created user, go to the Global Dashboard > System Users > Employees section, select the corresponding user from the list, and click the “Edit” button in the “Actions” column. Assign the system role in the “Groups” field on the “Edit” pop-up window.

- Phonexa users are matched during provisioning using the email address from Microsoft Entra. If the email exactly matches an existing Phonexa user, a duplicate will not be created, and the user will be able to log in with the existing Phonexa account. If a user already exists in Phonexa and the user’s login/username is the same, but the email differs even slightly (for example, an alias like +, a typo, a different domain, an extra character, etc.), Microsoft Extra Provisioning will treat it as a different user and will create a duplicate Phonexa user.
Best practices
- Start with one test user to validate SSO and provisioning end-to-end.
- Roll out by group assignment (recommended for enterprise environments).
- Keep the SCIM token secure. Treat it like a password or API credential.
Troubleshooting (common issues and fixes)
“Test Connection” fails
- Confirm the Tenant URL is correct and ends with /scim/v2/.
- Confirm the Secret Token is valid and synced on the Phonexa end.
- Confirm your Phonexa tenant domain is correct (cp-instXXXX-client.phonexa.com).
- Ensure any firewall/proxy rules allow Entra to reach the endpoint (if applicable).
Users are not being provisioned
- Make sure users/groups are assigned to the Enterprise App.
- Confirm Provisioning Status is On.
- Check Provisioning logs for attribute errors/mapping issues.
De-provisioning doesn’t disable users
- Confirm your organization’s desired behavior: “Unassign user” vs “disable in Entra” can produce different outcomes depending on settings/mappings.
- Check logs for “Disable user” events and confirm Phonexa SCIM supports deactivation for your configuration.