The "Do Not Call List" contains a list of undesirable lead phone numbers. You can add a new number, edit, delete, import, and export records from the existing list.
To view the Do Not Call List, go to the PBX Management > Do Not Call List.
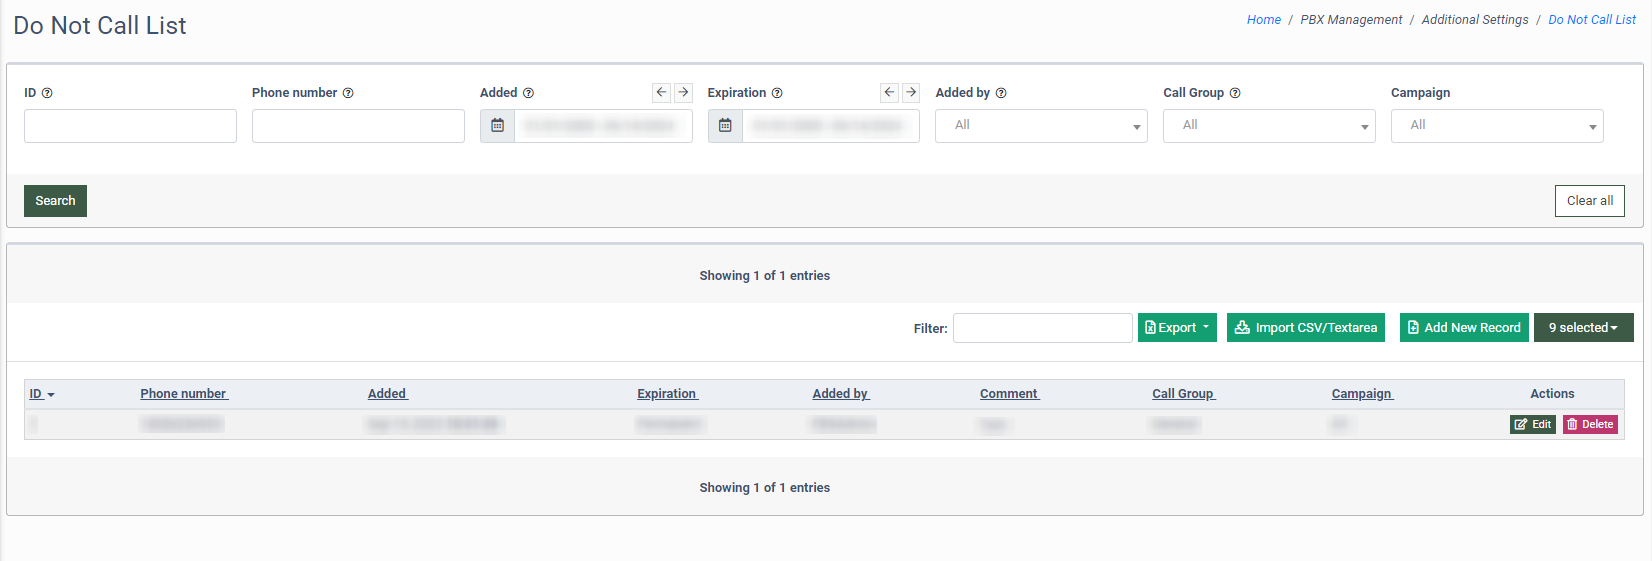
You can narrow down the search results by using the following filters:
- ID: Enter the unique identification number of the record.
- Phone number: Enter the phone number.
- Added: Select the date range for the record creation.
- Expiration: Select the date range for the record activity expiration.
- Added by: Select the name of the record creator.
- Call Group: Select the Call Category.
- Campaign: Select the Campaign.
The Do Not Call List contains the following information:
- ID: The unique identification number of the record.
- Phone number: The phone number is included in the Do Not Call List.
- Added: The date of the record creation.
- Expiration: The Expiration Time of the record (Permanent, Temporary).
- Added by: The name of the user who created the record.
- Comment: The comment left when the record was created.
- Call Group: The name of the Call Group.
- Campaign: The name of the Campaign.
To add a new phone number to the Do Not Call List, click the “Add New Record” button and fill in the following fields in the pop-up window:
- Phone Number: Enter the phone number that should be added to the list.
- Comment: Enter the comment.
- Call Group: Select the related Call Category.
- Campaign: Select the Сampaign.
- Type: Select the type of the record activity time (Permanent, Temporary)
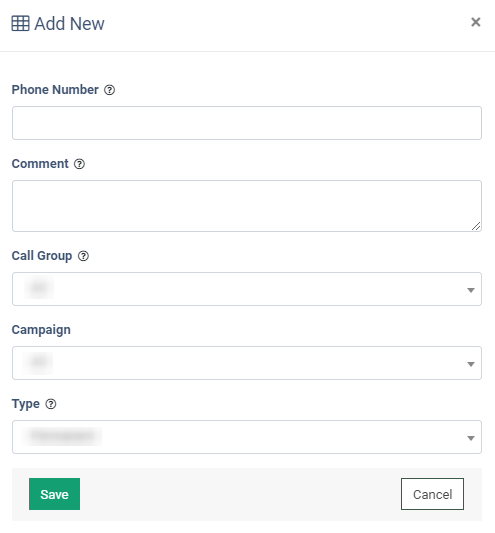
Click the “Save” button to complete. Click the “Cancel” button to discard the changes.
To edit the record, click the “Edit” button in the “Actions” column.
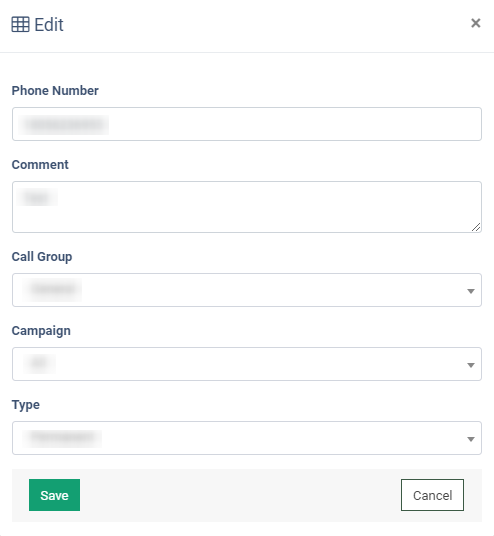
Click the “Save” button to complete. Click the “Cancel” button to discard the changes.
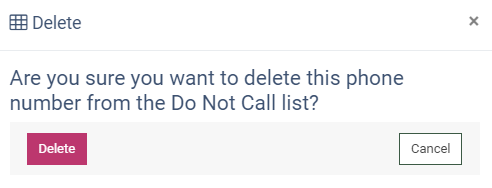
To delete a record, click the “Delete” button in the “Actions” column. In the pop-up window, click “Delete” to confirm your operation.
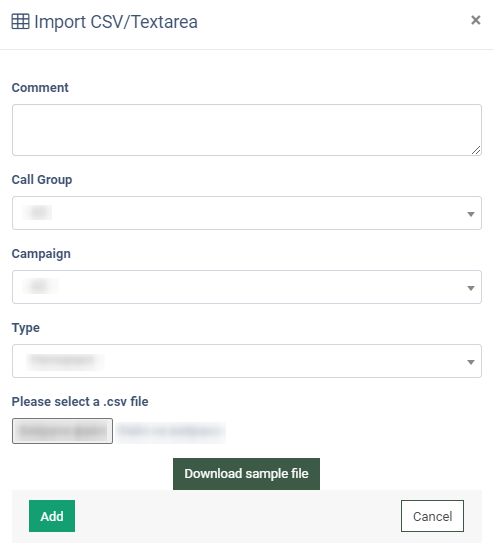
To import the data, click the “Import CSV/Textarea” button. In the pop-up window, select the future file size (smaller than 100,000 values or larger than 100,000 values). You can manually enter phone numbers if your file is smaller than 100,000 values. If the file has values larger than 100,000, you can import it from a CSV file.
To export data to the CSV file, click the “Export to CSV” button.