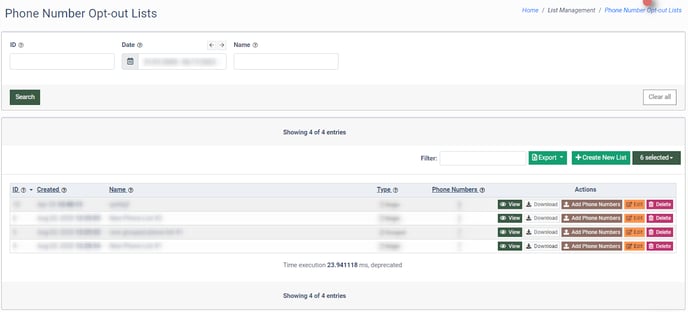
There are two types of lists available in the system: the “Single List” and the “Grouped List”. The “Single List” contains the phone numbers, and the “Grouped List” contains several Single Lists. To manage the phone number lists, go to the List Management > Phone Number Opt-out Lists section.
You can narrow down the search results by using the following filters:
- ID: Enter the list ID.
- Date: Select the date range.
- Name: Enter the name of the list.
The “Phone Number Lists” section contains the following information:
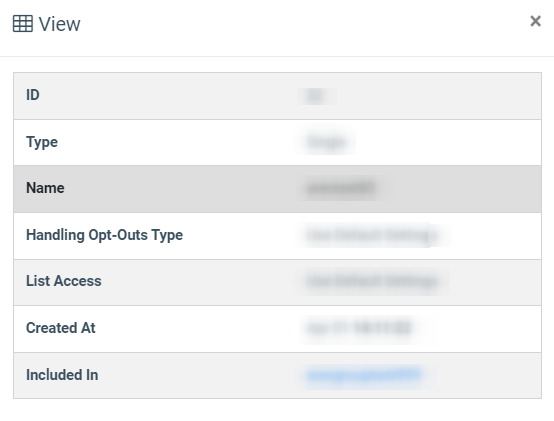
- ID: The unique identification number of the list.
- Created: The date when the list was created.
- Name: The name of the list.
- Type: The type of the list (Standart List/ Grouped List).
- Phone Numbers: The number of phone numbers in the list.
To add a new list, click the “+ Create New List” button. The system will forward you to the tab to fill in the required fields.
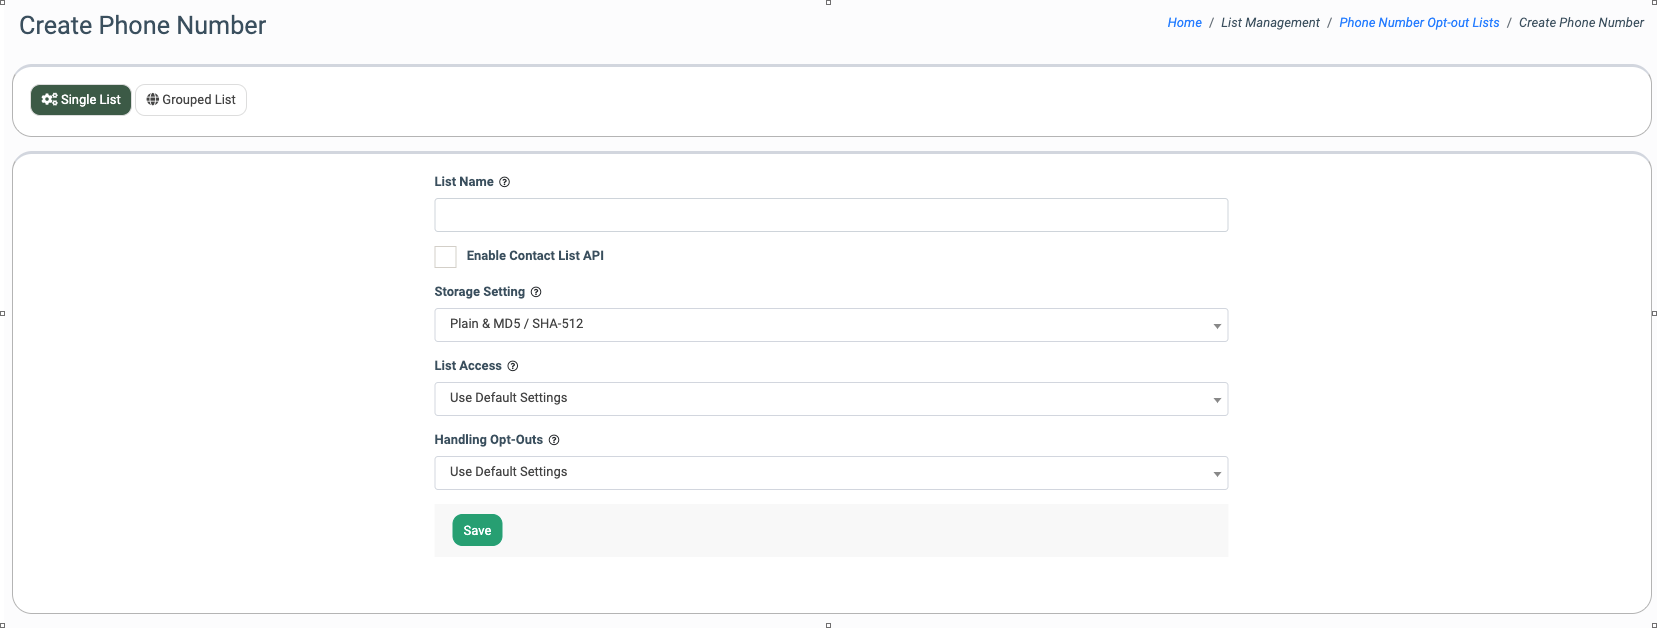
To create a Single List, select the “Single List” tab, and fill in the following fields:
- List Name: Enter the name of the list.
- Enable Contact List API: Check the box to create API documentation automatically.
- Storage Setting: Select the data storage method: Plain & MD5 / SHA-512 (both encrypted and plain text) or MD5 / SHA-512 Only (encrypted only).
- List Access: Select one of the options to define the format of the list downloaded by the mailer, the mailer's access to the list cleansing, and the download deltas options. (Use default settings/ Override default settings).
- Handling Opt-Outs: Select one of the options to define how the system is handling opt-outs:
- Use default settings
- Redirect users after Opt-Out
- Use Internal Opt-Out page
- Opt-Outs are handled by a third-party
To create the Grouped List, select the “Grouped List” tab, and fill in the following fields:
- List Name: Enter the name of the list.
- Enable Contact List API: Check the box to create API documentation automatically.
- Distribution Lists: Select the Single Lists to be combined into the Grouped List.
- Collection Lists: Select the Single List(s) you want the new opt-outs to be shared with.
- List Access: Select one of the options to define the format of the list downloaded by the mailer, the mailer's access to the list cleansing, and the download deltas options. (Use default settings/ Override default settings).
- Handling Opt-Outs: Select one of the options to define how the system is handling opt-outs:
- Use default settings
- Redirect users after Opt-Out
- Use Internal Opt-Out page
- Opt-Outs are handled by a third-party
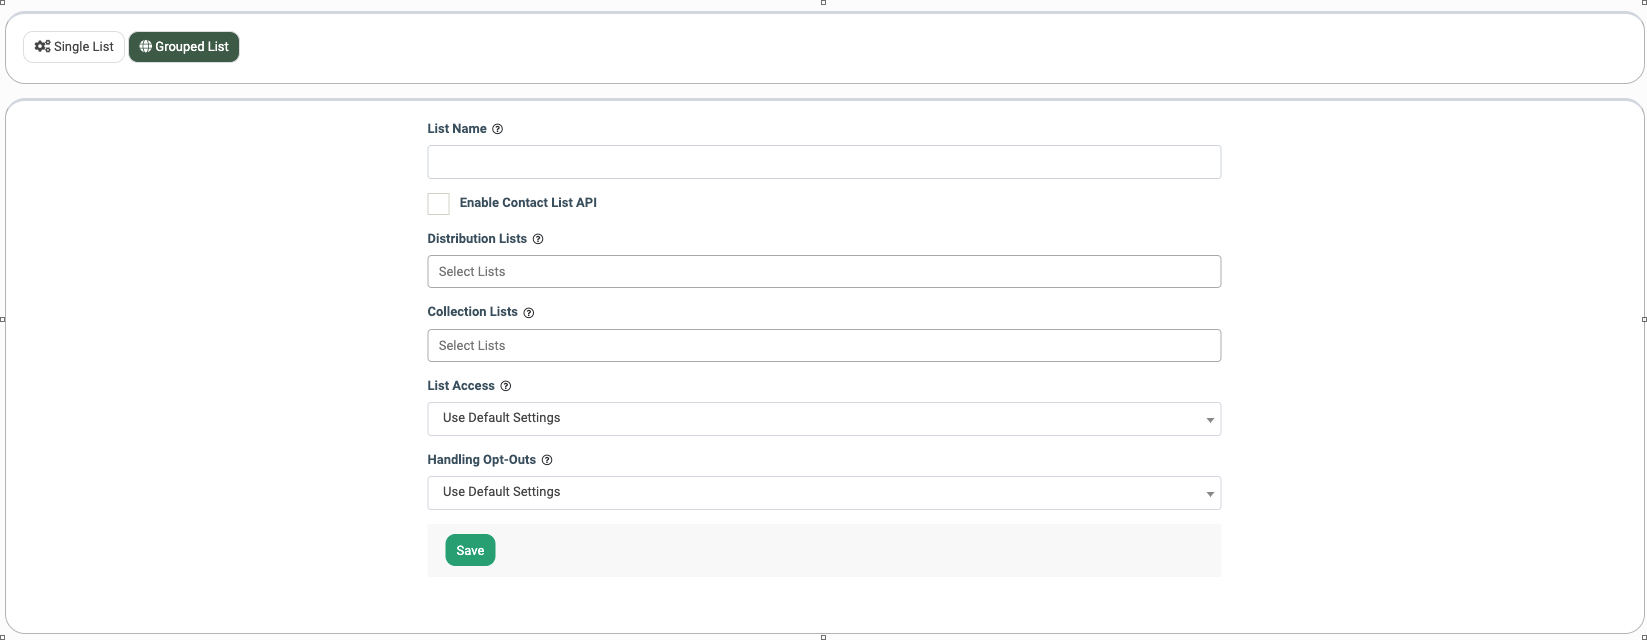
When an opt-out is collected by any Campaign that uses this Grouped List, it will be shared with the Single List(s) added to the Collections Lists.
To get detailed information about the list, click the “View” button in the “Actions” column.
To download the list, click the “Download” button in the “Actions” column.
You can set the format of the downloaded list by selecting the following filters:
- Encrypted MD5: Select the checkbox to download the phone numbers in the MD5 encrypted format.
- Encrypted SHA-512: Select the checkbox to download the phone numbers in the SHA-512 encrypted format.
- Plain Contact: Select the checkbox to download the phone numbers in plain text format. This option is only available if contacts are stored in Plain&MD5 / SHA-512 format.
- Import Datetime: Select the checkbox to add the contact creation date column to the list.
- Opt-Out IP: The Opt-Out IP address.
- Country: Select the checkbox to add the Country column to the list.
- Zip Opt-Out File: Select the checkbox to download the list in the .zip file format.
- Collection Type: Select the type of contacts to be included in the list (Both Collected & Imported, Collected via Opt-Out Pages Only, Imported Emails/MD5s only).
- Mailer: Select the mailer to download the opt-outs for the specific mailer or select All to download all contacts.
- Campaign: Select the Campaign related to the chosen mailer to download the opt-outs for the specific campaign only or select All to download all contacts related to the mailer(s).
- Field Separator: Select the field separator for the list. (semicolon, comma, tab, pipe).
- From/To (optional): Enter the start and end dates to include the contacts added to the list during a specified time frame.
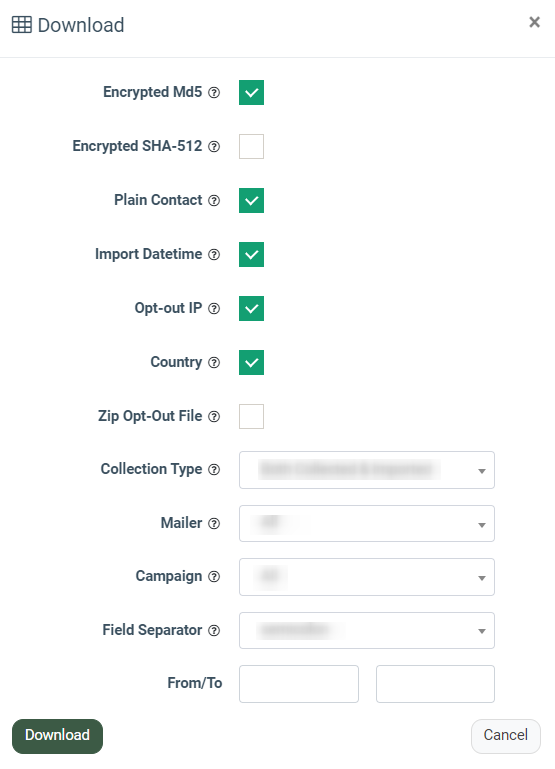
To download the list in the selected format, click the “Download” button.
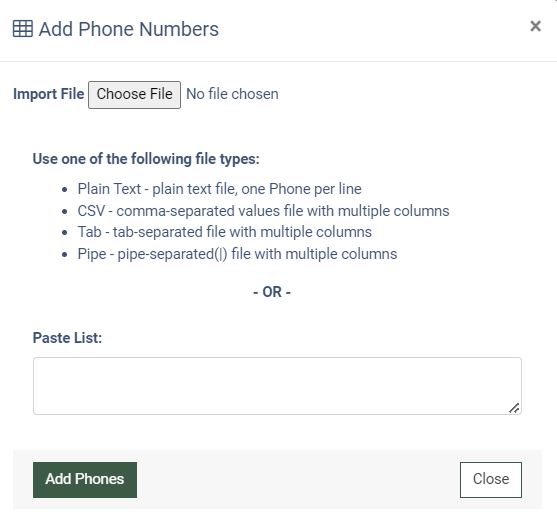
To add phone numbers to the list, click the “Add Phone Numbers” button in the “Actions” column. You can upload the file with the phone numbers list or enter it to the “Paste List” field and click the “Add Phones” button.
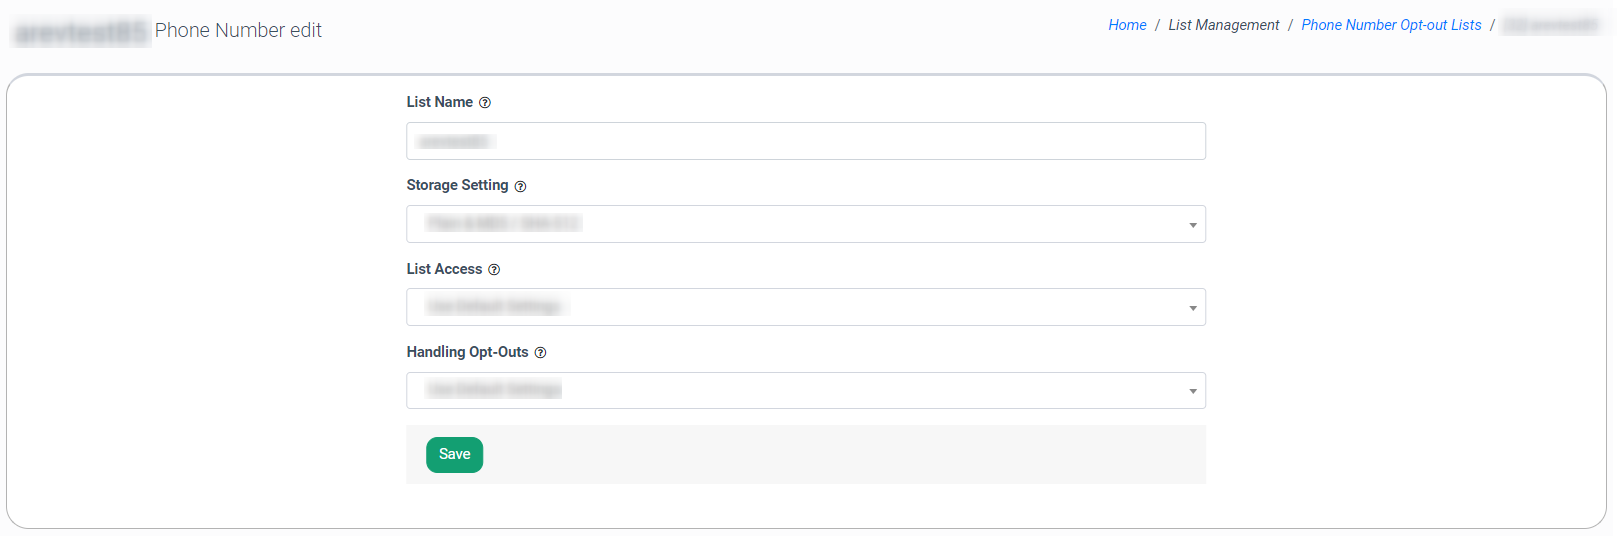
To edit the list, click the “Edit” button in the “Actions” column. Fill in the following fields in the “Edit” pop-up window:
- List Name: Enter the name of the list.
- Storage Settings: Select the storage settings (Plain & MD5 / SHA-512, MD5 / SHA-512 Only).
- List Access: Select one of the options: “Use default settings” or “Override default settings”.
- Handling Opt-Outs: Select one of the options to define how the system is handling opt-outs:
- Use default settings
- Redirect users after Opt-Out
- Use Internal Opt-Out page
- Opt-Outs are handled by a third-party
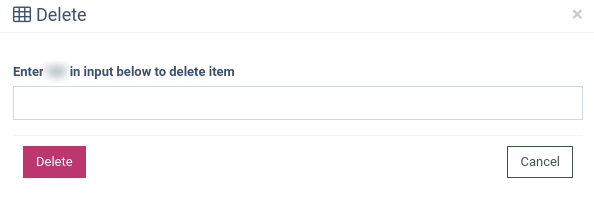
To delete a list, click the “Delete” button in the “Actions” column, follow the instructions, and click the “Delete” button to confirm your action.