To view the Opt-Intel Project settings go to the System Management > Project Settings section, and select the Opt-Intel tab.
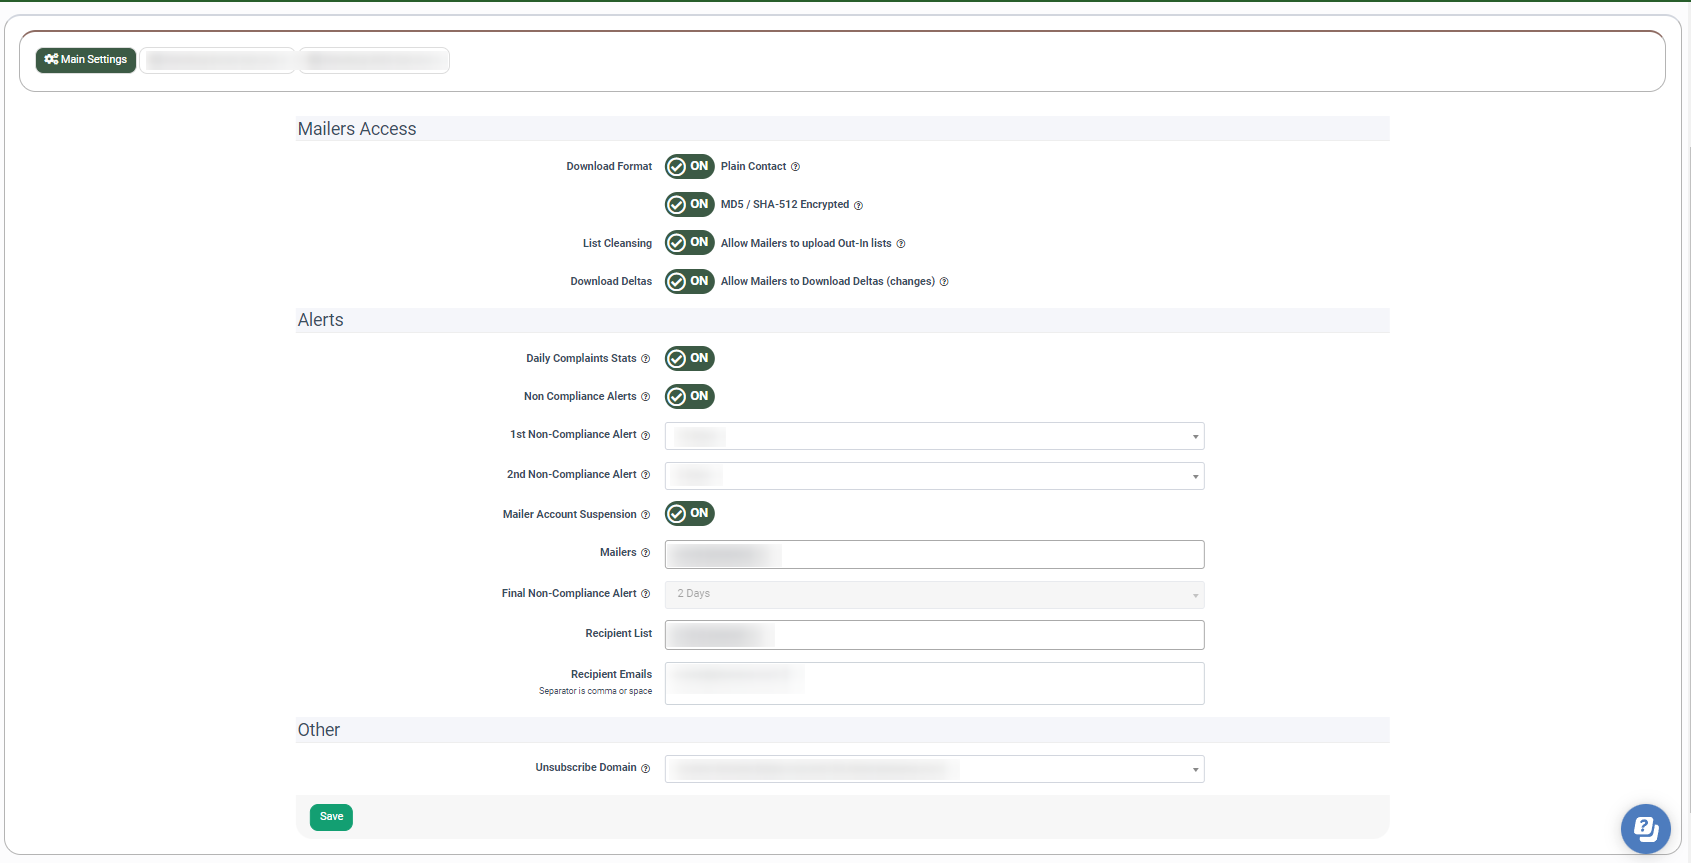
The “Main Settings” subtab contains the following settings:
- Mailers Access:
- Download Format: Enable the "Plain Contact" option to allow mailers to export data in plain text format. This option is accessible only when contacts are stored in Plain & MD5/SHA-512 format. Enable the "MD5/SHA-512 Encrypted" option to allow mailers to export data in encrypted MD5 and/or SHA-512 format. This option is accessible only when contacts are stored in MD5/SHA-512 Only format.
- List Cleansing: Enable List Cleansing to allow mailers to upload their email/phone number lists and perform list cleansing.
- Download Deltas: Enable Download Deltas to allow mailers to download only the latest changes (new or modified entries) since their last upload.
- Alerts:
- Daily Complaints Stats: Enable Daily Complaints Stats to receive statistics on daily complaints received from users who are receiving emails/SMSs five days after opting out.
- Non-Compliance Alerts: Enable Non-Compliance Alerts, which are generated when a mailer has not reviewed a campaign within a specified timeframe.
- 1st Non-Compliance Alert: Enter the number of days for the initial alert to be issued in response to mailer inactivity on a campaign. (Example: If the 1st Non-Compliance Alert is set to 10 days, the alert will be generated after 10 days of no activity from the mailer.)
- 2nd Non-Compliance Alert: Enter the number of days for the follow-up alert if the mailer remains inactive after the first warning. (Example: If the 1st Non-Compliance Alert is set to 10 days and the 2nd Non-Compliance Alert is set to 5 days, the 2nd Non-Compliance Alert will be generated after 15 days of no activity from the mailer.)
- Mailer Account Suspension: Enable Mailer Account Suspension to allow the deactivation of the mailer’s account due to continued non-compliance.
- Mailers: Enter the users responsible for sending and managing email and/or SMS Campaigns.
- Final Non-Compliance Alert: Enter the number of days for the final alert before escalating to stricter actions, such as account suspension. (Example: If the 1st Non-Compliance Alert is set to 10 days and the 2nd Non-Compliance Alert is set to 5 days, the Final Non-Compliance Alert will be generated after 17 days of no activity from the mailer.)
- Recipient List: Enter the list of system users (comma or space separated) who will receive notifications.
- Recipient Emails: Enter the list of email addresses (comma or space separated) that will receive notifications.
- Other:
- Unsubscribe Domain: Set up the system default unsubscribe domain by selecting it from the drop-down list.
The “Handling Email Opt-Outs” and the “Handling SMS Opt-Outs” subtab allows you to set up the Opt-Out’s page styling and handling types.
-1.png?hsLang=en)
The “Handling Opt-Outs” block allows you to manage the Handling Type and define how the system handles the opt-outs. Select one of the following options:
- Redirect Users After Opt-Out: The system will redirect users to another page after they have unsubscribed.
- Your Return Page: Enter the URL of the page to which the system will redirect users.
- Append the Opt-Out Email Address to the Return Page: Switch the toggle to the “On” position to add the entered email to the URL after unsubscribing for tracking purposes. (e.g., https://www.website.com/email=email@gmail.com).
.png?hsLang=en)
- Use Internal Opt-Out page: The system will use the internal opt-out page.
- Opt-Outs are handled by a third party: If the third party holds the opt-out page, enter the URL for the opt-out page in the “Third Party Opt-Out Link” field.
-1.png?hsLang=en)
The “Opt-Out Page Styling” block allows you to manage the Opt-Out’s page styling.
The “Landing Page” subtab allows you to configure the landing page settings:
- Landing Logo: Upload your logo by clicking the “Choose File” button. The logo should not exceed 300 px height and 700 px width.
- Current Logo: Displays the logo that is already uploaded.
- Page Title: Enter the Opt-Out page title.
- Page Content: Enter the text you want to be displayed on the opt-out page (e.g., “Please, enter your email”). You can also input the BBCode in this field to change the appearance of the page.
.png?hsLang=en)
The “Confirmation Page” subtab allows you to set up the confirmation page after successfully unsubscribing:
- Page Title: Enter the Confirmation page title.
- Page Content: Enter the text you want to be displayed on the Confirmation page (e.g., “You have successfully unsubscribed”). You can also input the BBCode in this field to change the appearance of the page.
.png?hsLang=en)
The “Settings” subtab allows you to send an unsubscribe confirmation to an email address that has unsubscribed.
- Send Opt-Out Copy: Enable the “Send Opt-Out Copy” toggle to send a copy of unsubscribe confirmation to an email address that has unsubscribed.
- URL: Enter the URL the system will use to post the email address that has unsubscribed, e.g. if you enter https://example.com/recieve-optout, after the opt-out the system will send the following response https://example.com/recieve-optout/?email=example@phonexa.com .
.png?hsLang=en)
The “Privacy” subtab allows you to specify the privacy policy in two different ways:
- Privacy Page, URL: Enter the URL of the Privacy Policy page.
Note: You can use the “Privacy Content” field instead. - Privacy Content: Enter the Privacy Policy text that will be displayed on the Unsubscribe page. You can also input the BBCode in this field to change the appearance of the page.
Note: You can use the “Privacy Page, URL” field instead.
.png?hsLang=en)
The “Styling” subtab allows you to customize the Unsubscribe page display using the CSS styles:
Note: CSS (Cascading Style Sheets) is a stylesheet language used to describe the presentation of a document written in HTML or XML. CSS describes how elements should be rendered on screen, on paper, in speech, or on other media.
- .header: Use the CSS styles to edit the header of the Unsubscribe page.
- .body: Use the CSS styles to edit the body of the Unsubscribe page.
- .footer: Use the CSS styles to edit the footer of the Unsubscribe page.
.png?hsLang=en)
Note: You can preview all changes you’ve made in the “Handling Email Opt-Outs” and the “Handling SMS Opt-Outs” subtab in the modal window below the settings.
.png?hsLang=en)
The “Tracking” subtab allows you to add, configure, and delete the tracking rules for the Opt-Intel component.
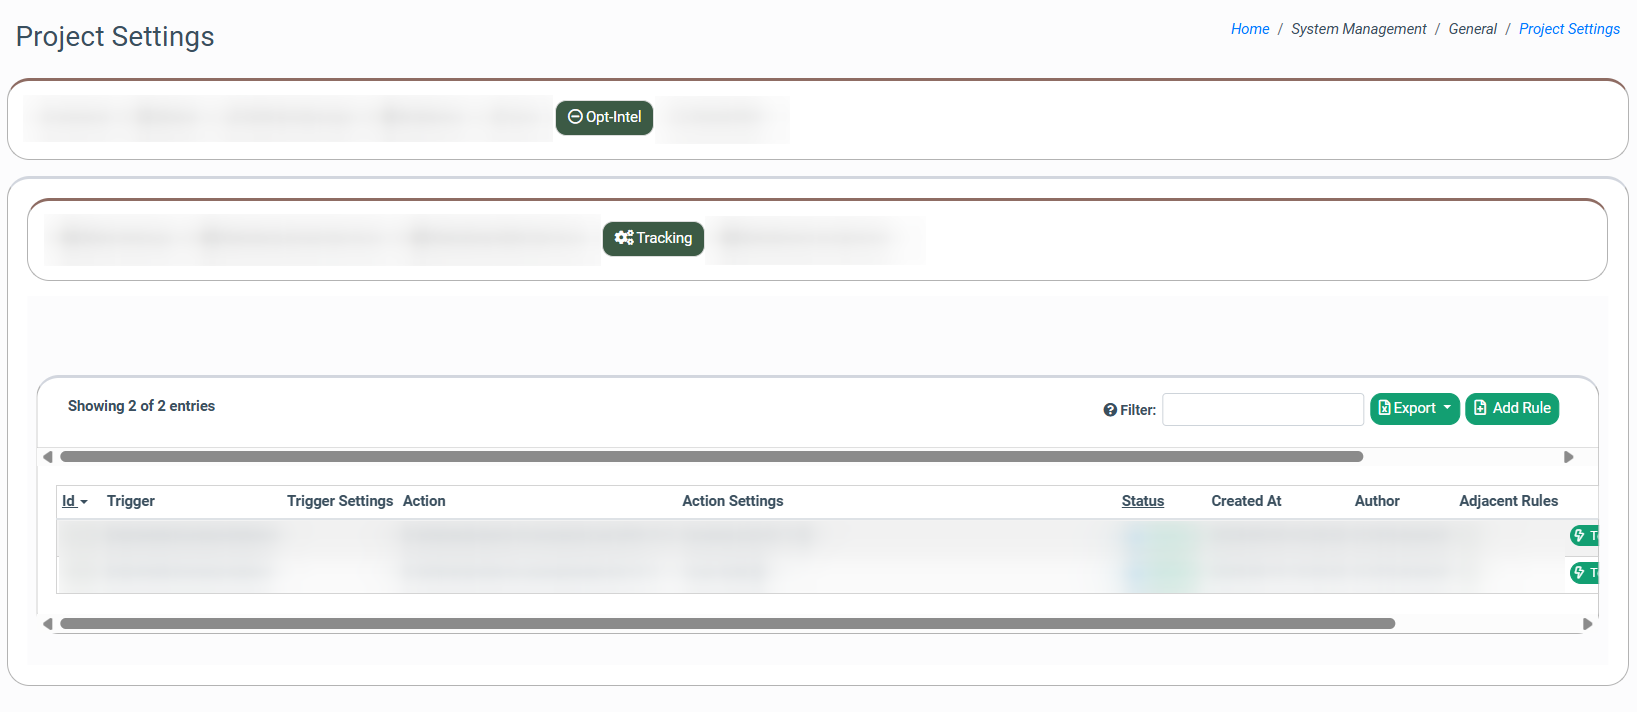
The “Tracking” tab contains the following information:
- Id: The identification number of the rule.
- Trigger: The event name that triggers the action.
- Action: The tracking rule action.
- Action Settings: The tracking rule’s action settings.
- Status: The tracking rule’s status (Active / Disabled).
- Created At: The date and time when the tracking rule was created.
- Author: The name and ID of the employee who created the tracking rule.
- Adjacent Rules: The adjacent rules assigned to the tracking rule.
To add a new Tracking Rule, click the “Add Rule” button, select the action you want to perform, the trigger for this action, and click the “Next” button.

You need to fill in the required fields in the pop-up window to define the trigger and action settings. Find detailed information about each Tracking Action on the Knowledge Base.
To test the existing tracking rule configuration, click the “Test Run” button in the “Actions” column. Click the “Confirm” button in a pop-up window to confirm your intention.

To edit the existing tracking rule, click the “Config” button in the “Actions” column.

Click the “Save Rule” button to proceed.
To delete the tracking rule from the system, click the “Delete” button in the “Actions” column.

Type the tracking rule ID in the corresponding field in the pop-up window, and click the “Delete” button to finish.
The “Enrollment to Opt-Intel” subtab allows all Lynx Affiliate Users to be automatically registered on the Opt-Intel platform. This setting will give both existing and new Lynx Affiliate Users access to the Opt-Intel module.
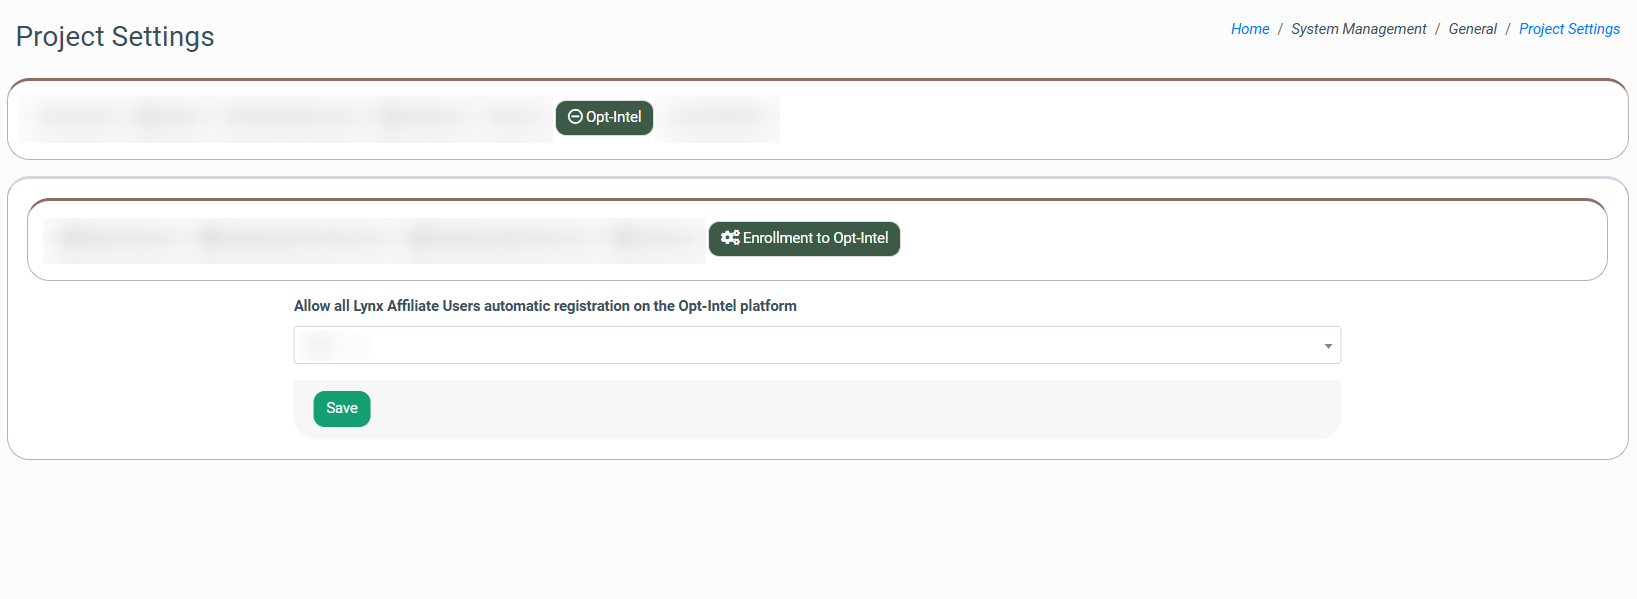
Allow all Lynx Affiliate Users automatic registration on the Opt-Intel platform: Select the Yes / No option to allow or deny all Lynx Affiliate Users automatic registration on the Opt-Intel platform.
Click the “Save” button to apply changes.