A Buyer Agent is a contact person on the instance owner’s side who manages and supports a buyer account and coordinates communication and operations. The Buyer Agent can browse through the LMS and Call Logic components sections that are related to the Buyer activity. He can view the Buyer Reports data and manage the Buyers’ and campaigns’ settings of the attached Buyers.
To view the Buyer Agent settings, go to the System Management > General > Project Settings section, select the “LMS and Call Logic” tab, and click the “Buyer Agent Settings” subtab.
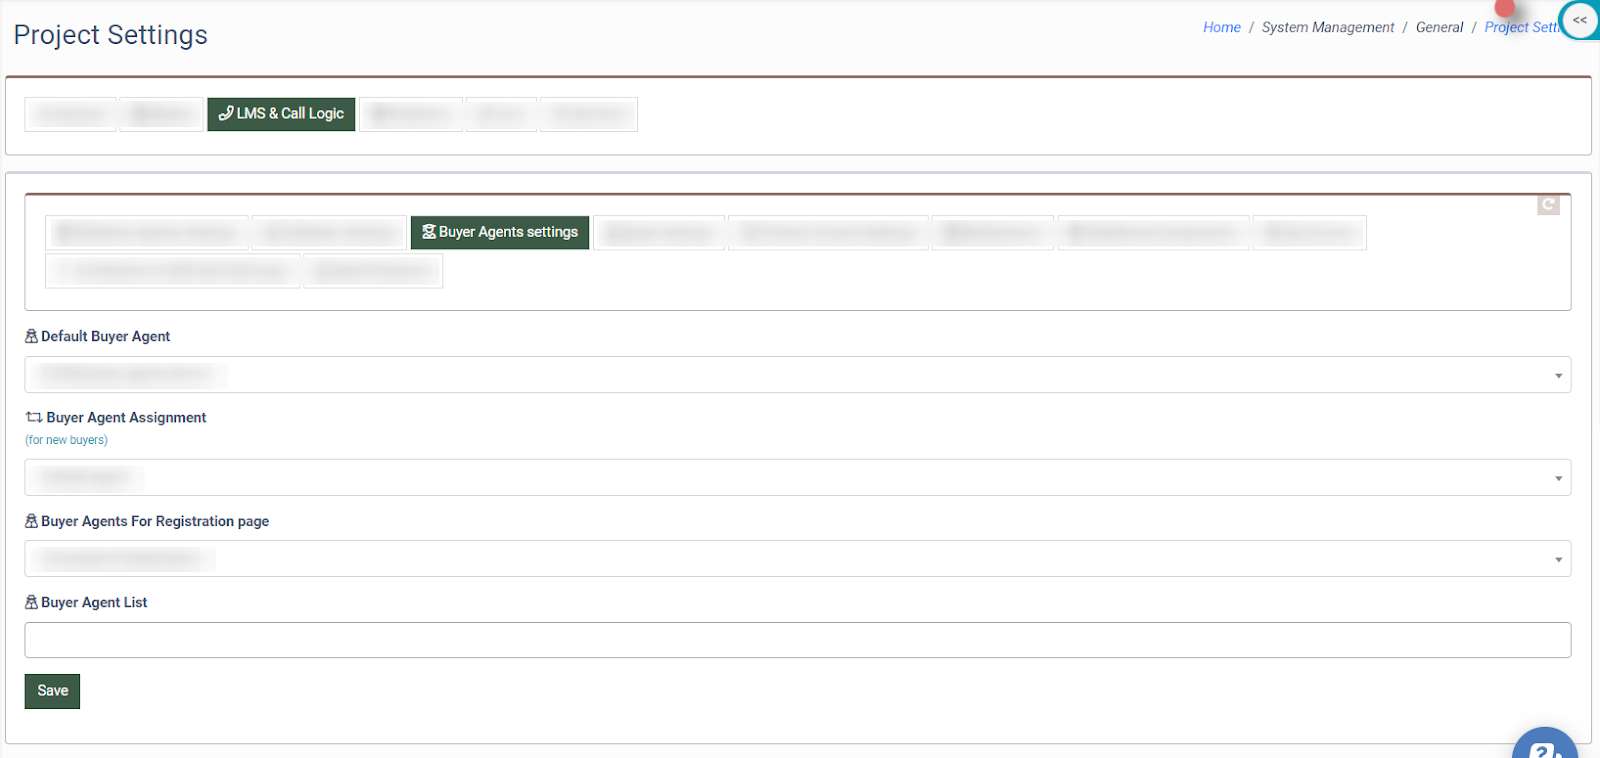
The following settings are available:
- Default Buyer Agent: Select the Buyer Agent that will be assigned to the Buyer in case the Buyer does not select an agent during registration. The “Default Agent” assignment strategy is selected in the “Buyer Agent Assignment”. Note: It is recommended to assign the Buyer Agent for the Buyer to avoid inconsistencies and ensure the accountability and representativeness of the reporting system data.
- Buyer Agent Assignment: Select the Buyer Agent that would be assigned to the Buyer automatically if the Buyer does not select the Buyer Agent during registration. There are three available options in the system:
- Default Agent: The default Buyer Agent is assigned automatically.
- Random: The Buyer Agent is assigned randomly.
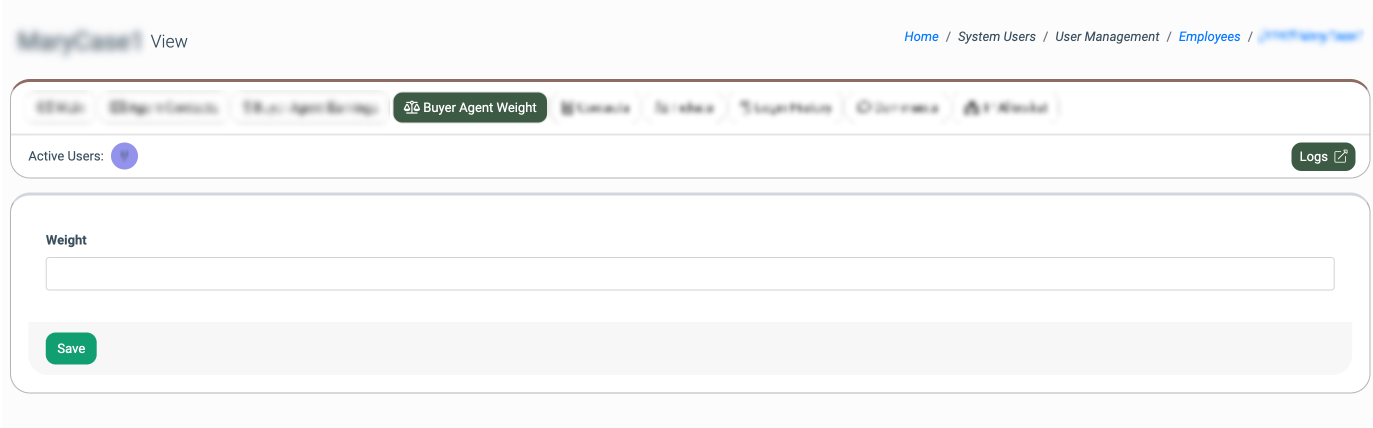
- Rotation With Weight: The Buyer Agent is assigned depending on the weight value. The weight value is considered a probabilistic value that represents the coefficient of the Buyer Agent selection for the assignment. The allowed values range is from 0 to 10. To check the Buyer Agent's weight, go to the System Users > User Management > Employees section, select the corresponding agent from the list, click the “View” button, and select the “Buyer Agent Weight” tab. The example of the assignment workflow: We have three agents with the following weight values: Agent 1: Weight = 1, Agent 2: Weight = 4, Agent 3: Weight = 7. The system sums up all active weight values to create a total probability pool (1 + 4 + 7 = 12). When an assignment is triggered, the system generates a random number from 1 to 12. The assignment is distributed proportionally based on the generated number: 1: Assigned to Agent 1, 2 to 5: Assigned to Agent 2, 6 to 12: Assigned to Agent 3. Note: If the Buyer Agent's weight is set to 0 while other agents have weights greater than 0, that agent is skipped and excluded from the assignment process. If all available Buyer Agents have their weight set to 0, the system automatically treats all weights as 1, ensuring an equal, randomized distribution among all agents.
- Buyer Agents For Registration Page: Select the availability option for the Buyer Agent to be displayed for the selection on the registration page (All except of listed below or Only listed below).
- Buyer Agent List: Select Buyer Agent(s) to be displayed or hidden on the registration page, based on the option selected above.
Click the “Save” button to complete the settings.