The Phone Numbers section allows you to review the list of phone numbers reserved for Publishers in the system, reserve phone numbers, assign and reassign phone numbers, and manage phone number pools.
To view and manage publisher phone numbers, go to the Publisher Management > Setup > Phone Numbers section.
This section includes four tabs:
Reserved Phone Numbers tab
The “Reserved Phone Numbers” tab displays the list of all the reserved phone numbers in the system. The list contains the following information:
-
ID: The unique identification number of the phone number.
-
Phone number: The reserved phone number.
-
Label: The phone number label.
-
Group: The name of the phone number group (Local / Toll-Free).
-
Product: The name of the product that the phone number is assigned to.
-
Routing: The phone number routing method. The following routing methods are available in the system:
-
Default: When the Default routing method is selected, calls will be transferred to an IVR according to the call distribution settings for the Product. Read more about the distribution settings in the Knowledge Base article.
-
Direct (Campaign): When the Direct (Campaign) routing method is selected, calls will be transferred to the campaign selected in the phone number settings.
-
Specific (IVR): When a Specific (IVR) routing method is selected, calls will be transferred to the specific IVR selected in the phone number settings.
-
Direct (Ping Tree): When the Direct (Ping Tree) routing method is selected, calls will be sent directly to the Ping Tree selected in the phone number settings for processing.
-
-
Status: The status of the phone number.
-
Tracking Code: Tracking code for the phone number that may be used to create an offer with the Phone Number.
-
Publisher: The Publisher that the phone number is assigned to. All of the calls received on this phone number are accounted to the corresponding publisher. Note: Newly reserved phone numbers are not assigned to any product or publisher. If an existing phone number gets unassigned from a publisher, all incoming calls will be declined.
-
Last Changes: The time and date of the last changes applied to the phone number.
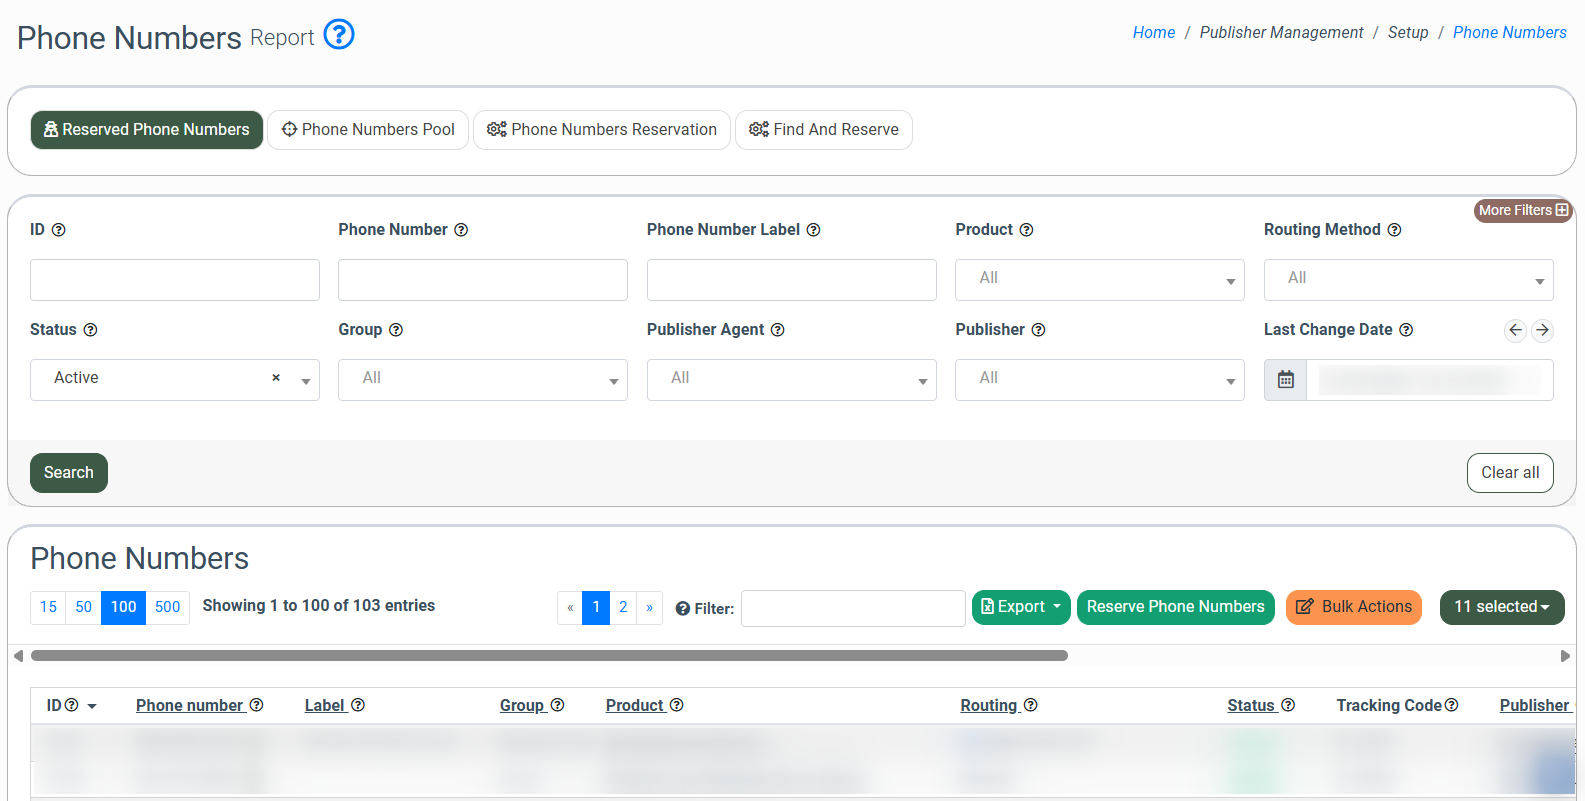
You can narrow down the search results using the following filters:
- ID: Enter the identification number of the Phone Number.
- Phone Number: Enter the reserved Phone Number.
- Phone Number Label: Enter the label of the Phone Number.
- Product: Select the Product name.
- Routing Method: Select the Routing Method (Default (IVR)/Direct (Campaign)/Specific IVR/Direct (Ping Tree)).
- Status: Select the Phone Number status (All/Active/Deleted).
- Group: Select the Phone Number Group.
- Publisher Agent: Select the Publisher Agent.
- Publisher: Select the Publisher Name.
- Last Change Date: Select the date of the phone number's last change.
To view the list of phone number groups with information about reserved phone numbers and their cost, click the "Reserve Phone Number" button. It will redirect you to the "Phone Numbers Reservation” tab. Read more about the "Phone Numbers Reservation” tab here.
To edit the reserved phone number settings, select the number from the list and click the “Edit” button in the “Actions” column. In the pop-up window, fill in the following fields:
-
Phone: Enter the reserved phone number.
-
Label: Enter the phone number label.
-
Product: Enter the product name that the phone number is assigned to.
-
Publisher: Enter the Publisher that the phone number is assigned to. All of the calls received on this phone number are assigned to the corresponding publisher.
-
Greeting Audio File: Select the audio for the call greeting audio file (for Direct (Campaign) and Direct (Ping Tree) routing methods). The audio file will be played as a greeting for all incoming calls for this phone number.
-
Farewell Audio File: Select the farewell audio file for Direct (Campaign) and Direct (Ping Tree) routing methods.
-
Routing: Select the phone number routing method. The following routing methods are available in the system:
-
Default: When the Default routing method is selected, calls will be transferred to the default IVR for the Product.
-
Direct (Campaign): When the Direct (Campaign) routing method is selected, calls will be transferred to the campaign selected in the phone number settings.
-
Specific (IVR): When the Specific (IVR) routing method is selected, calls will be transferred to the specific IVR selected in the phone number settings.
-
Direct (Ping Tree): When the Direct (Ping Tree) routing method is selected, calls will be sent directly to the Ping Tree selected in the phone number settings for processing. It’s recommended to set “Rejection Audio File” for the cases when the buyer is not found.
-
-
Campaign (For the Direct (Campaign) Routing Method): Select the campaign to which the calls will be transferred.
-
IVR (For the Specific (IVR) Routing Method): Select the IVR to which the calls will be transferred.
-
Rejection Audio File (For the Direct (Campaign) and Direct (Ping Tree) Routing Methods): Select the audio file to be played when a call gets rejected. Note that the file should be first uploaded in the Media > Audio Messages section to be available for selection.
-
Override IVR Ping Tree Settings (Direct Call): You can override the default IVR Ping Tree settings and set a specific Ping Tree for this phone number by selecting a Ping Tree from the drop-down list.
-
Phone Number Tags: Select the phone number tag(s) created in the Phone Numbers Tags section for additional labeling and sorting.
-
Fax Detector Action: Select the Fax Detector action for a phone number.
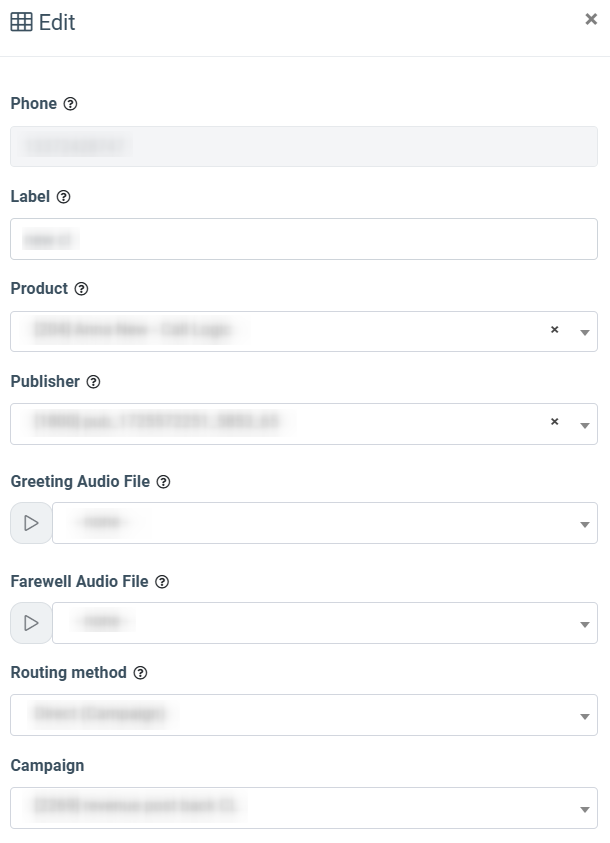
Click the “Save” button to complete.
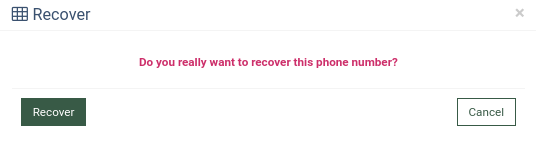
To restore the deleted Phone Number, click the “Recover” button in the “Actions” column.
Click the “Recover” button to confirm the changes.
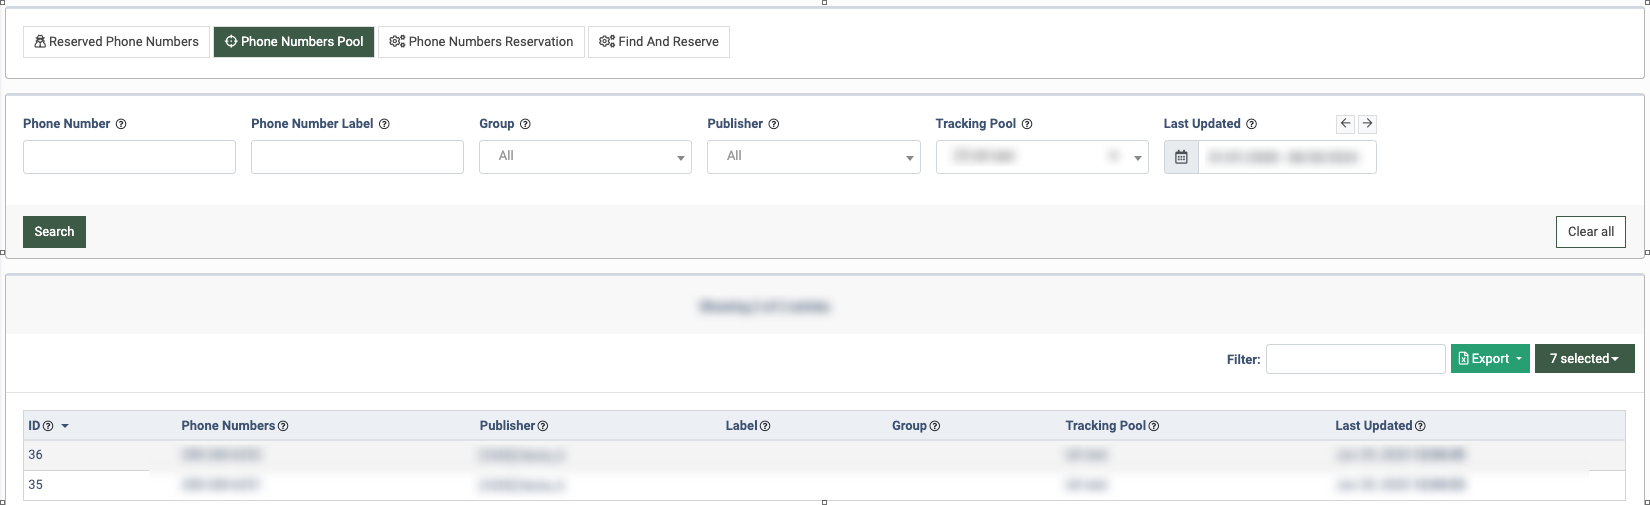
Phone Numbers Pool tab
The “Phone Numbers Pool” tab displays the list of all the phone numbers reserved and assigned to the specific tracking pools. The list of phone numbers contains the following data:
-
ID: The unique identification number of the record.
-
Phone Numbers: The phone number reserved for the specific tracking pool.
-
Publisher: The Publisher that the phone number is assigned to.
-
Label: The phone number label.
-
Group: The phone number group the phone numbers are assigned (Local/Toll-Free).
-
Tracking Pool: The name of the tracking pool that the phone number is reserved for. Read more about call tracking in this article.
-
Last Updated: The time and date of the last record update.
You can narrow down the search results using the following filters:
-
Phone Number: Enter the phone number reserved for the specific tracking pool.
-
Phone Number Label: Enter the Phone Number Label.
-
Group: Select the phone number group. (Local / Toll-Free).
-
Publisher: Select the Publisher.
-
Tracking Pool: Select the name of the tracking pool.
-
Last Updated: Select the time and date of the last update of the record.
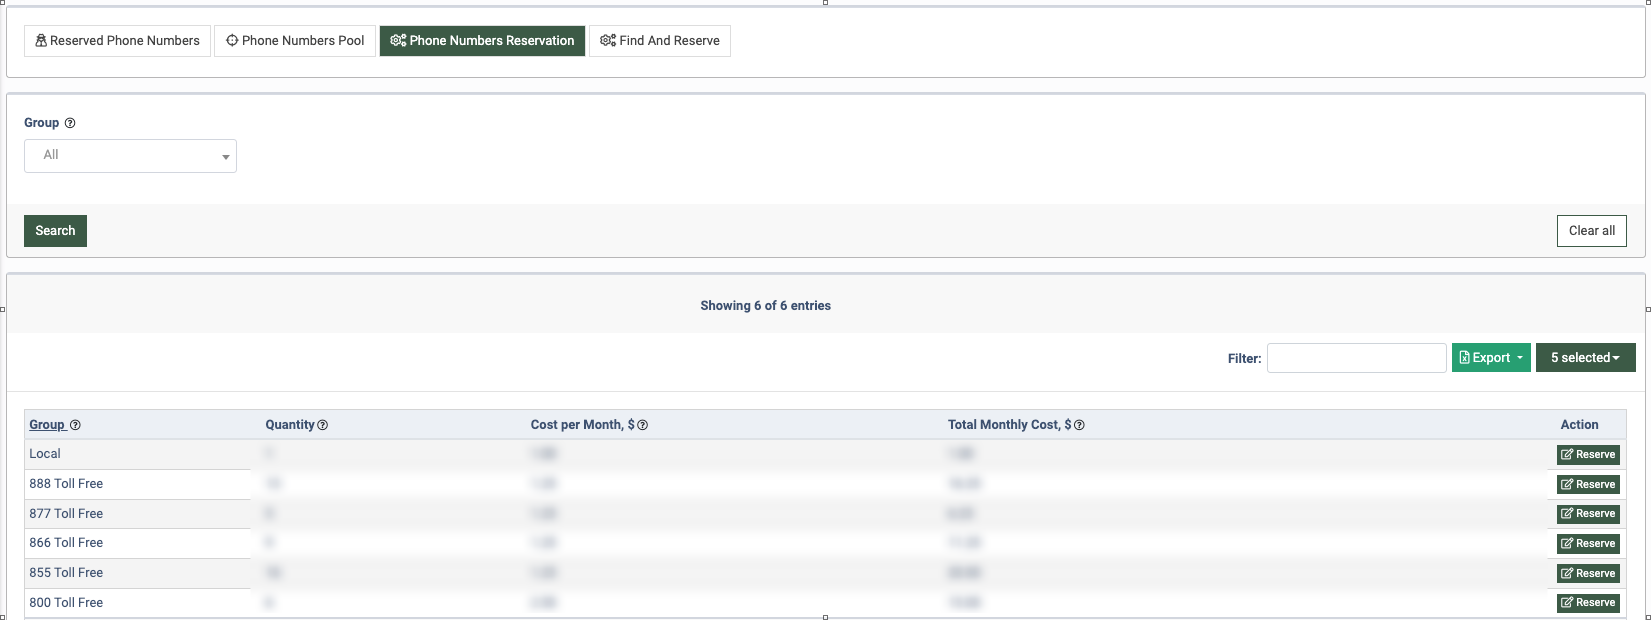
Phone Numbers Reservation tab
The “Phone Numbers Reservation” tab displays the list of phone number groups with information about reserved phone numbers and their cost. The list contains the following information:
-
Group: The name of the phone number group (Local /Toll-Free).
-
Quantity: The number of phone numbers reserved for the group.
-
Cost per Month, $: The price of one phone number reservation per month for the group.
- Total Monthly Cost, $: The total cost of the phone numbers reserved for this group per month.
- Total: The total number of all reserved phone numbers in all groups and their monthly cost

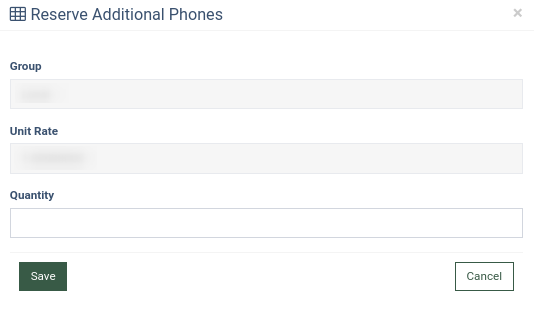
To reserve a phone number, select the group from the list and click the “Reserve” button in the “Actions” column. Enter how many phone numbers you would like to reserve in the pop-up window and click the “Save” button. The reserved phone numbers will appear on the “Reserved Phone Numbers” tab.
Find And Reserve tab
The “Find and Reserve” tab allows you to search for a specific phone number and reserve it. To find the phone number matching the input letters/keywords, click the “ABC” button.
Note: After clicking the “ABC” button, the “Please enter a word to decode it” pop-up window will appear. You can enter the Latin letters which will be transformed into numbers as soon as you click the “OK” button. The letters correspond to the keys on old push-button phones, e.g. MNO - 6, TUV - 8, etc.
-1.png?hsLang=en) The list of available phone numbers contains the following data:
The list of available phone numbers contains the following data:
-
Group: The phone number group (Local / Toll-Free).
-
Cost per Month, $: The price of one phone number reservation per month.
-
Phone Number: The phone number that is available for reservation. If the “ABC” filter is applied, the phone number will contain a matching keyword.
You can narrow down the search results by using the following filters:
- Group: Select the phone number group the numbers are assigned to. (Local/Toll-Free).
- Phone Number: Enter the Phone Number.
- State: Select the state the phone numbers are assigned to.
- Cities: Select the cities to which the phone numbers are assigned.
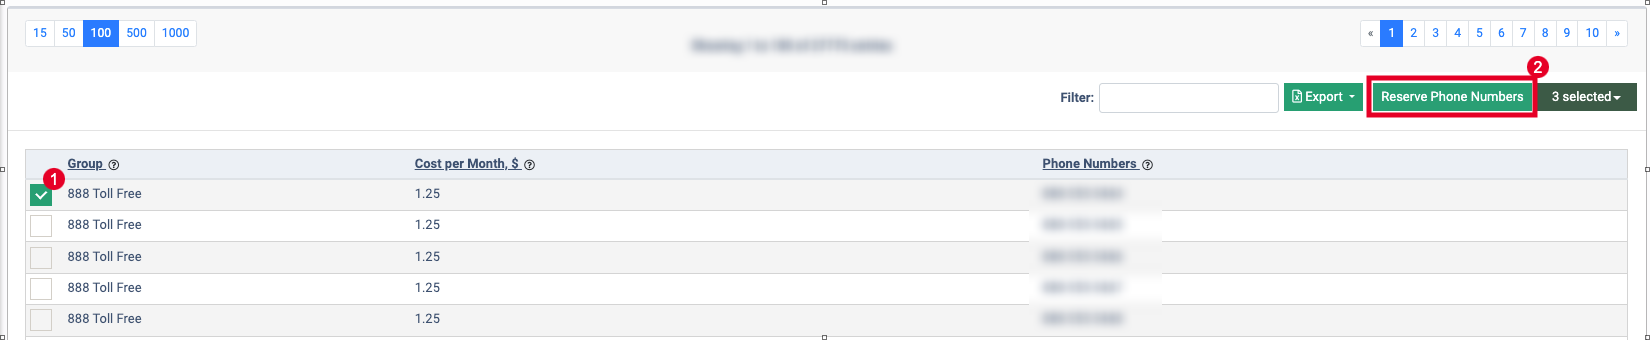
To reserve a phone number, select the number from the list (1) and click the "Reserve Phone Numbers" button (2).
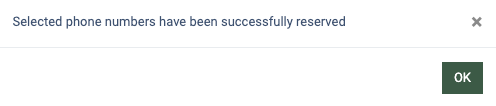
Click the “OK” button to confirm the changes.

After that, a pop-up window will appear with the confirmation about the successful reservation.