You can set a schedule for any report except “Lead Search” and “Lead Details” reports.
To view the list of scheduled report exports and export statuses, go to the All Reports > Extras > Scheduled Report Export section.
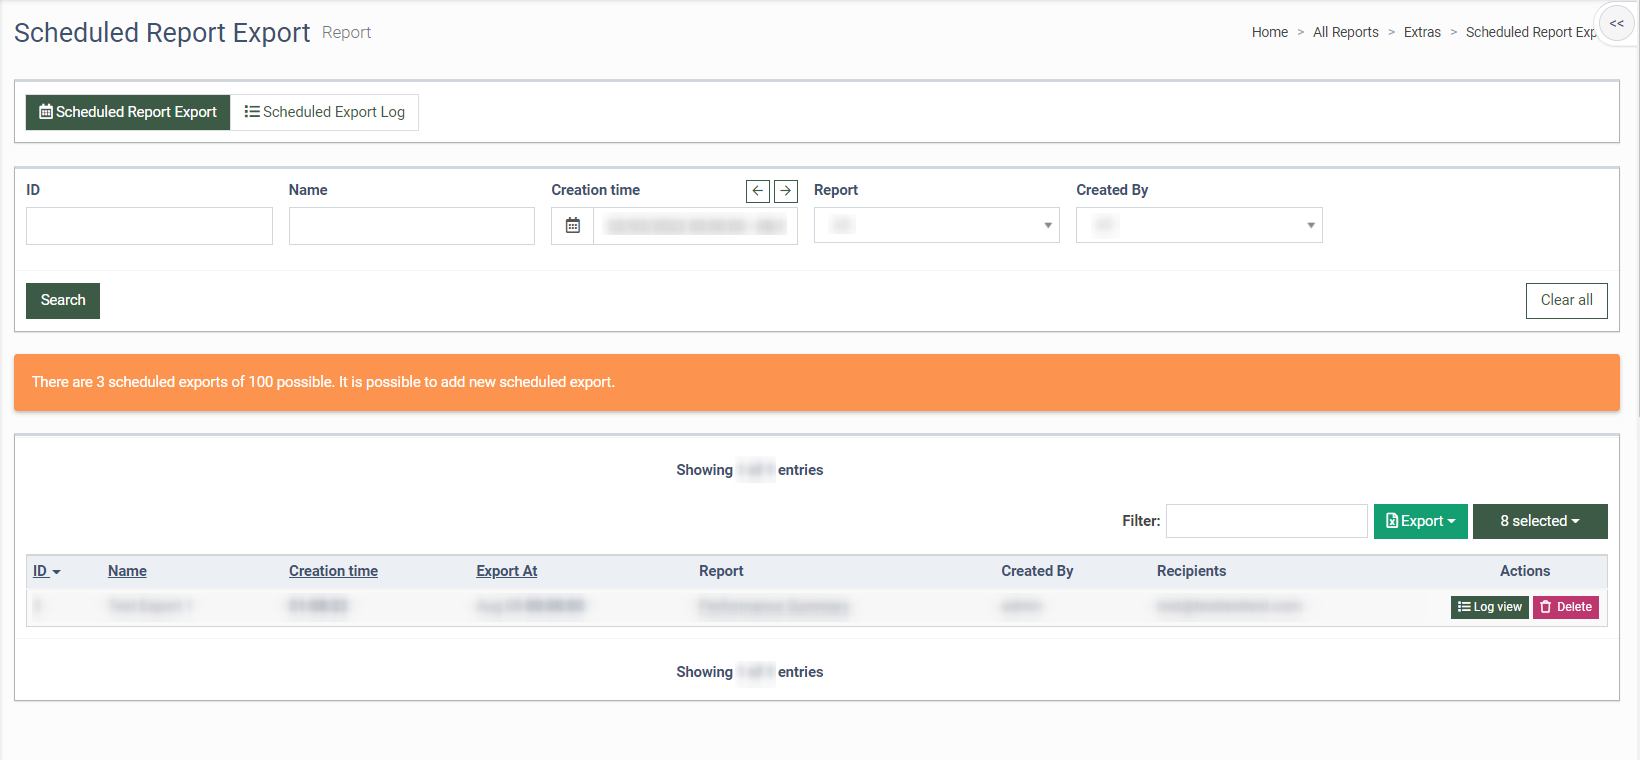
Scheduled Report Export
The “Scheduled Report Export” tab displays the list of scheduled report exports.
The list of requests contains the following information:
-
ID: The unique identification number of the scheduled report export.
-
Name: The name of the scheduled report export.
-
Creation time: The date and time of the export creation.
-
Export At: The date and time of the next export.
-
Report: The name of the scheduled report.
-
Created By: The name of the user who created the export.
-
Recipients: The list of the emails to receive the export.
You can narrow down the search results by using the following filters:
-
ID: Enter the unique identification number of the scheduled report request.
-
Name: Enter the name of the scheduled report request.
-
Creation time: Select the time range of the request creation.
-
Report: Select the name of the scheduled report.
-
Created By: Select the name of the user who created the request.
To view logs for the scheduled reporting, click the “Log View” button in the “Actions” column.
To delete the record from the list, click the “Delete” button in the “Actions” column.
Scheduled Export Log
The ”Log Scheduled Reporting” tab displays the status of the scheduled reporting export.
The report contains the following information:
-
Name: The name of the export.
-
Creation time: The day and time of the export creation.
-
Report: The name of the scheduled report.
-
Status: The status of the current export.
-
Start time: The day and time when the export started.
-
Finish time: The day and time when the export was finished.
You can narrow down the search result by using the following filters:
-
Name: Enter the name of the scheduled report export.
-
Creation time: Select the time range of the export creation.
-
Report: Select the name of the scheduled report.
-
Status: Select the status of the export.
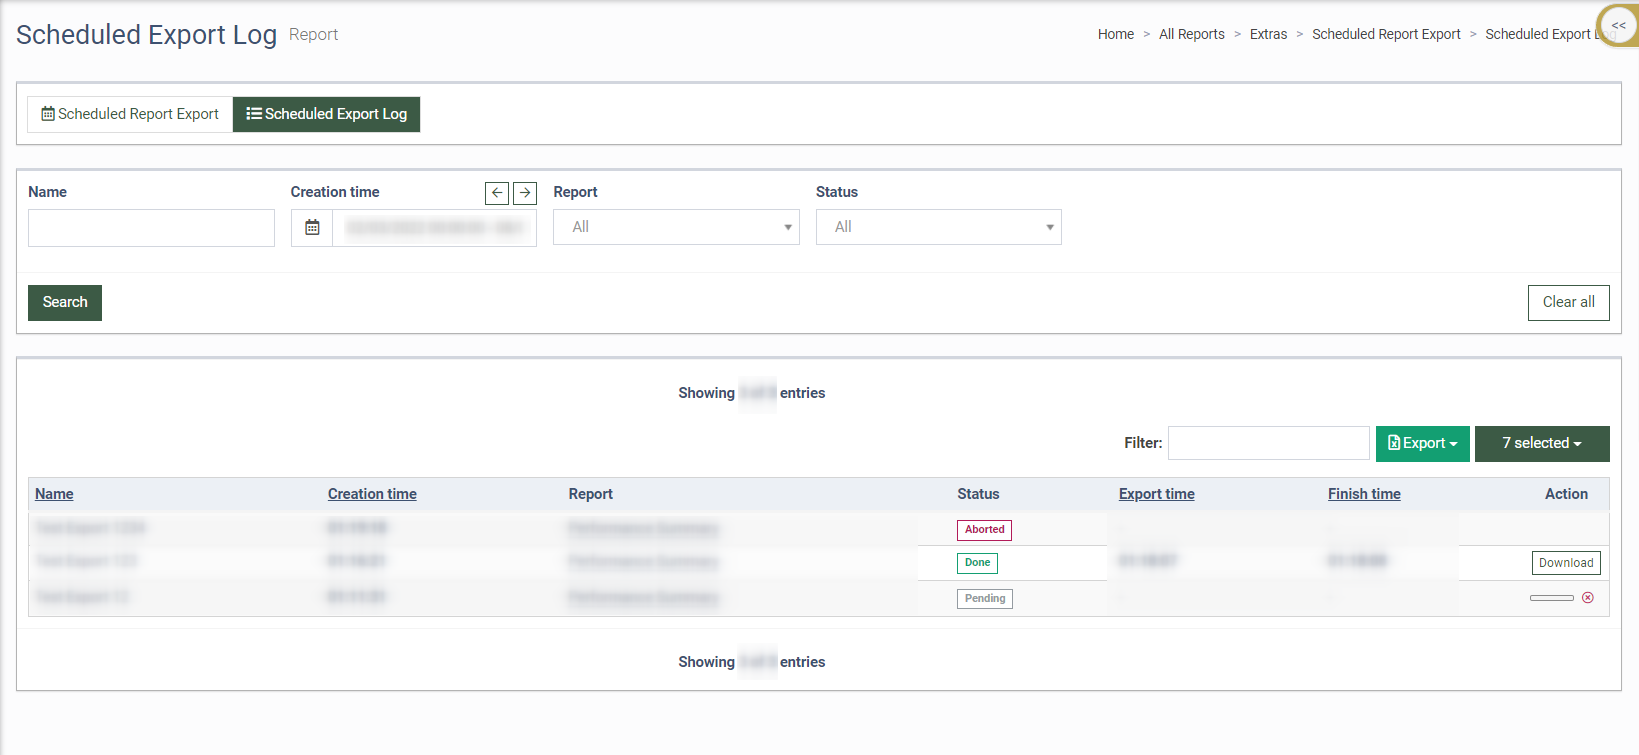
To stop the pending export process, click the “Abort” button in the “Action” column.
To download a file with the executed export, click the “Download” button in the “Action” column.
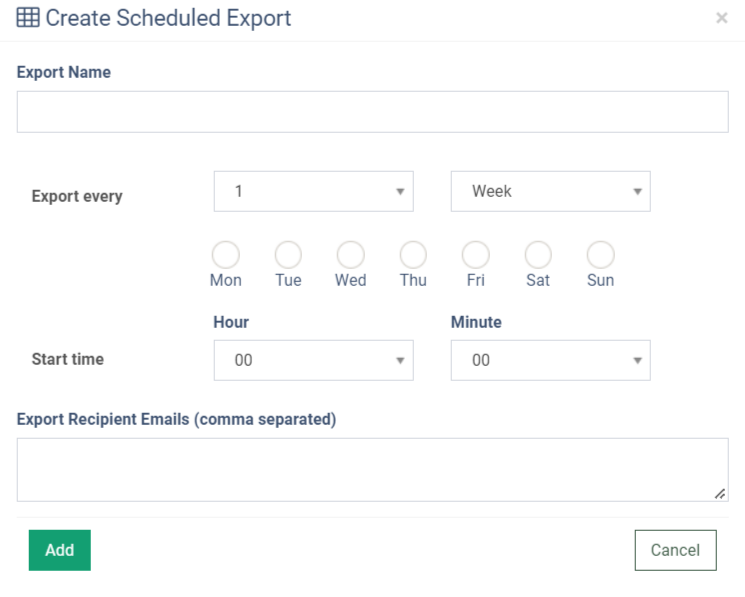
To create a scheduled reporting export request, click the “Export” button and select the “Scheduled Export” option. Enter the export name in the “Export Name” field in the pop-up window. Select the number of weeks or months for the repeat period, select the day and time to start export, and enter recipient emails in the “Export Recipient Emails (comma separated)” field. Click the “Add” button to complete the action.