The SIP Headers feature allows you to transfer different kinds of data between the PHONEXA telephony server and the Buyer’s telephony server using the SIP protocol. You can set up the SIP Headers feature for the Product, the Buyer, and the Campaign.
The SIP Headers feature allows you to transfer different kinds of data between the PHONEXA telephony server and the Buyer’s telephony server using the SIP protocol. The buyer’s system should support the SIP protocol and custom (non-standard) SIP headers processing. To use the SIP Headers feature, set up the buyer's endpoint as a SIP trunk or Trunk group. Read more about the SIP trunking feature on the Knowledge Base. You can set up the SIP Headers feature for the Product, the Buyer, and the Campaign.
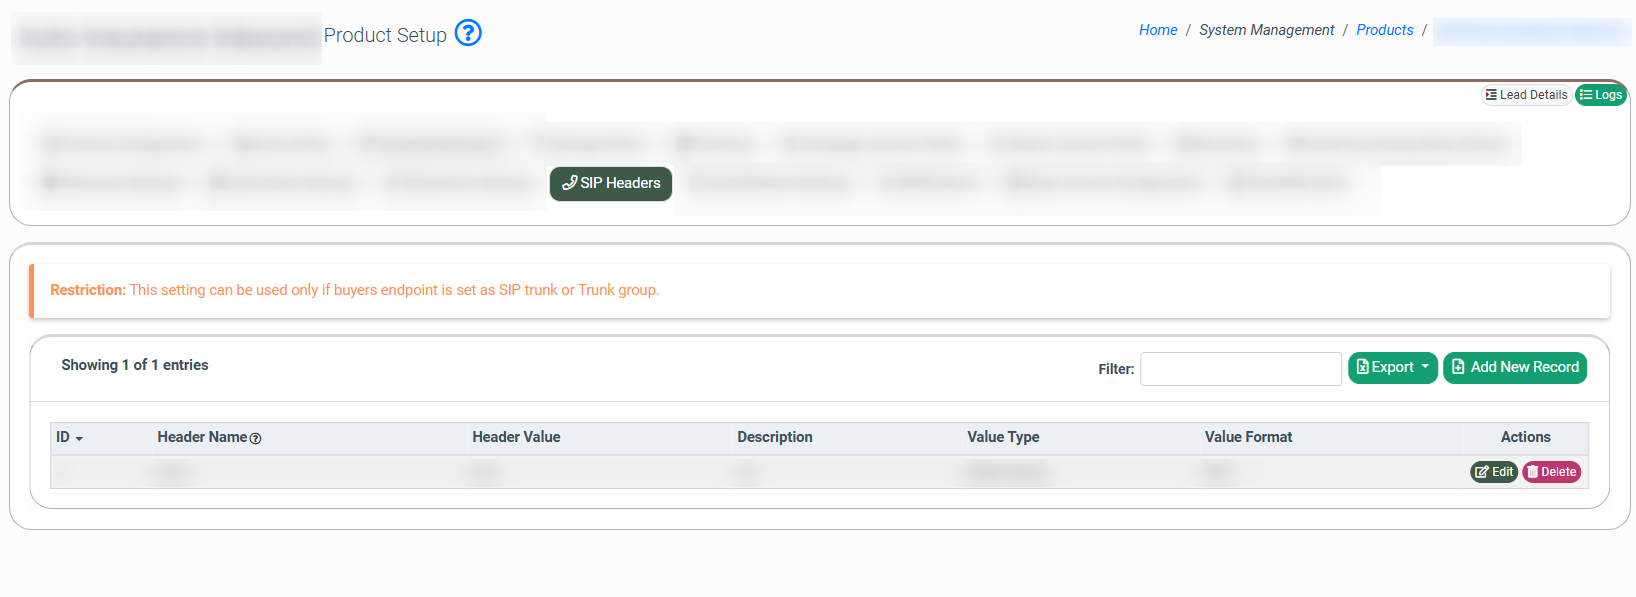
To set up or edit the SIP Headers feature for the Product, go to the System Management > Products section, click the “Settings” button, and select the “SIP Headers” tab.
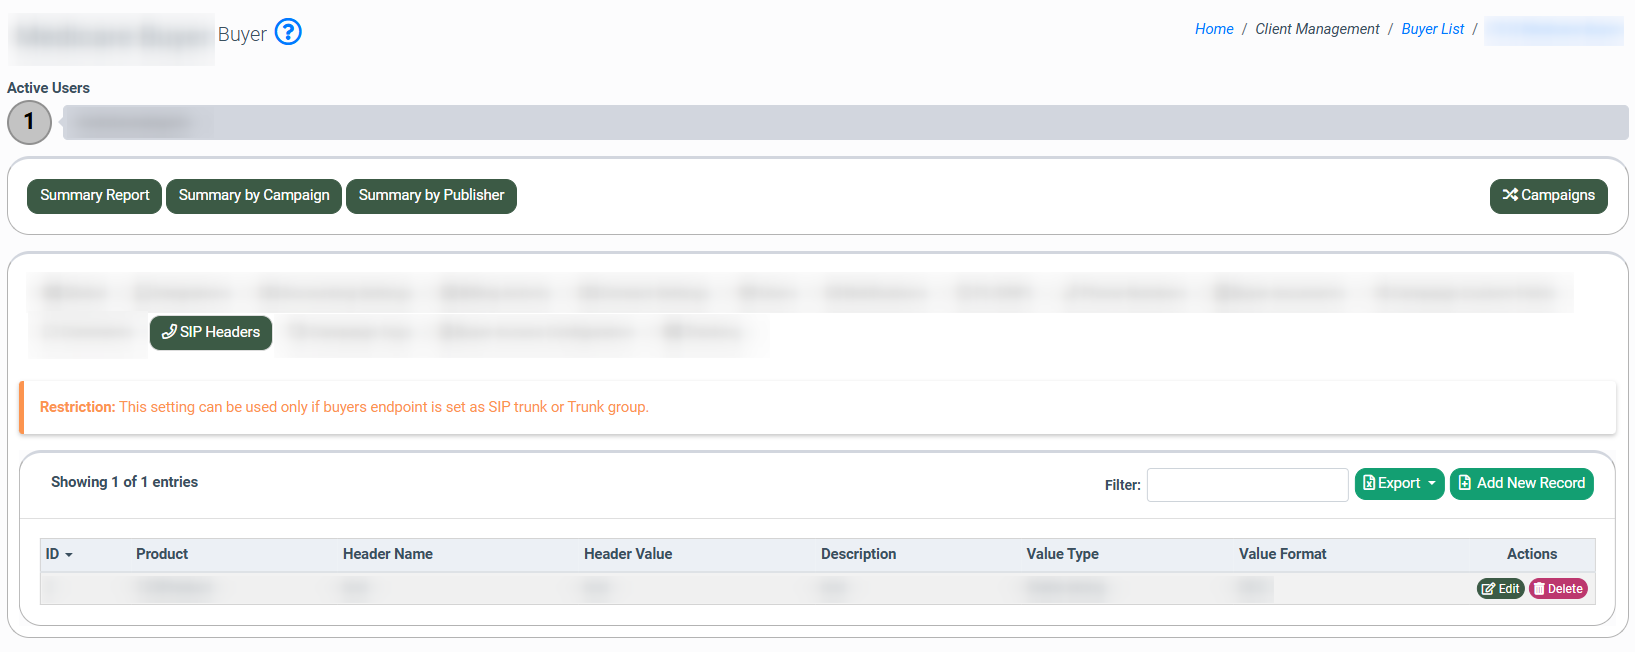
To set up or edit the SIP Headers feature for the Buyer, go to the Client Management > Buyer List section, click the “Settings” button and select the “SIP Headers” tab.
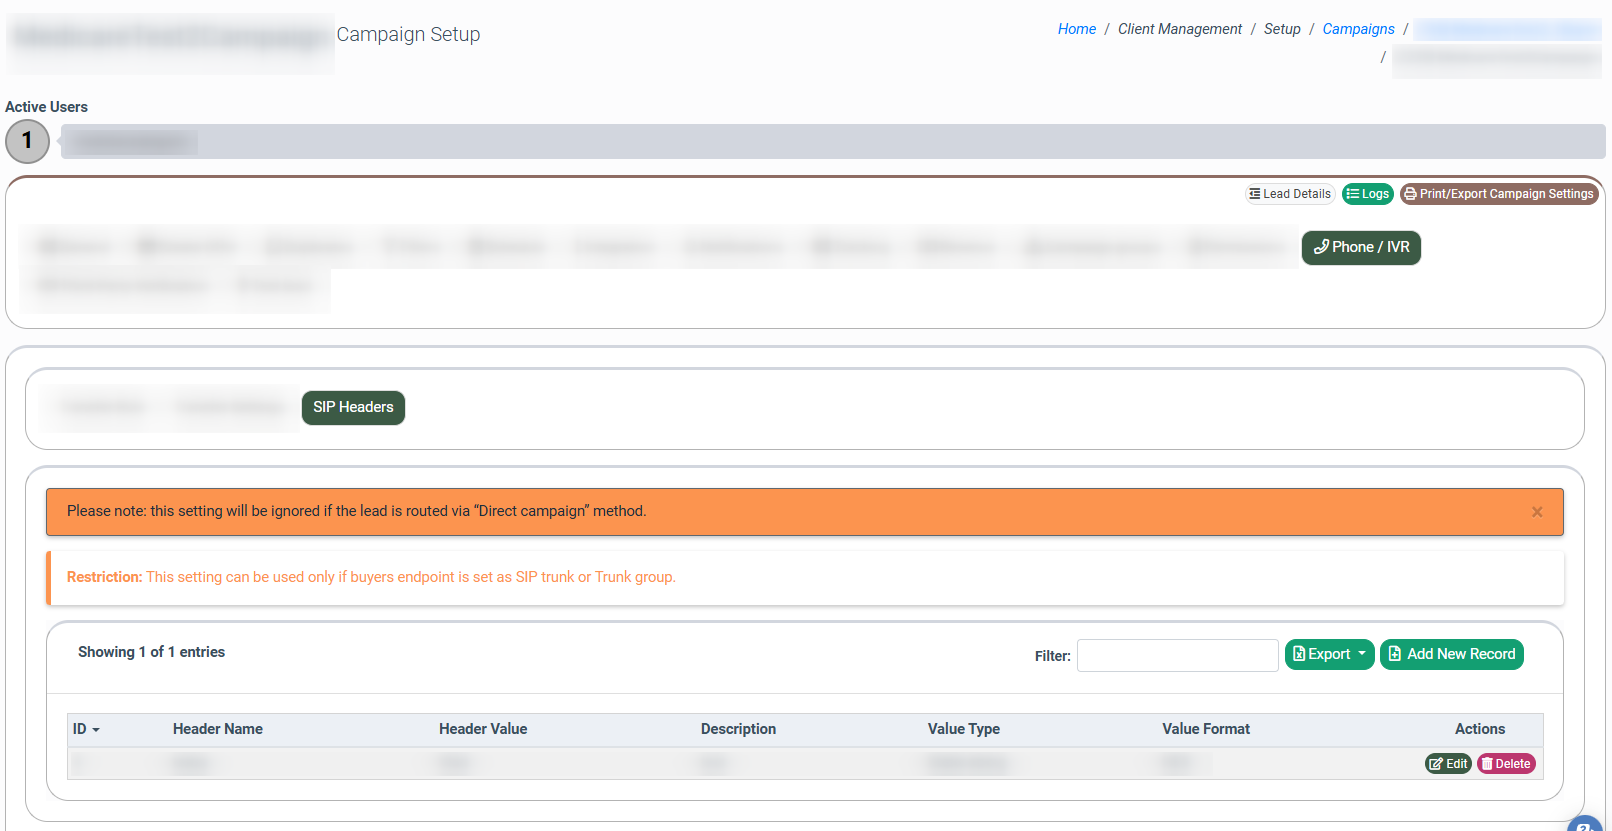
To set up or edit the SIP Headers feature for the Campaign, go to the Client Management > Campaigns section, click the “Configure” button, and select the “Phone/IVR” tab, click the "SIP Headers" subtab.
To create a new “SIP Header” record, click the “Add New Record” button.
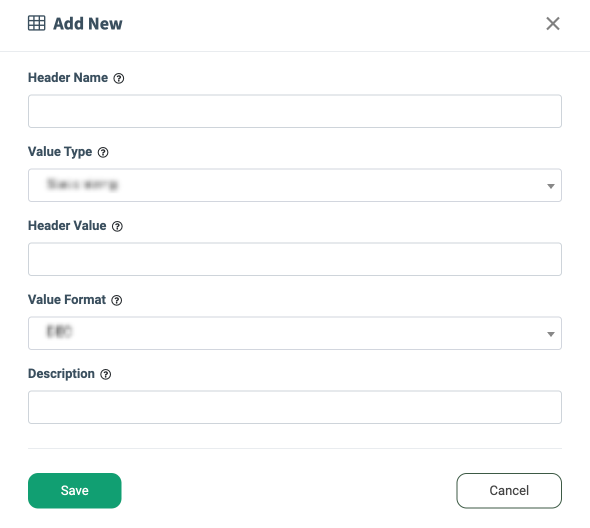
Fill in the following fields in the “Add New” pop-up window:
-
Product - select the product for which you want to set up the header. (This field is applicable only when adding a new “SIP Header” for the buyer).
-
Header Name - the SIP Header name that's going to be transferred.
-
Value Type - select a SIP Header value type:
-
"Static String" transfers the static (constant) value.
-
"Dynamic String" transfers the dynamic value depending on the selected Header Value.
-
“Mixed Value” transfers a combination of the static value and the dynamic value.
-
-
Header Value - the field that depends on the “Value Type” field:
-
Select the "Static String" type and enter the data that you want to transfer to the “Header Value” field.
-
Select the "Dynamic String" type to send dynamic values and choose one of the following header values: Lead ID, Public Lead ID, Product ID, Publisher ID, Source ID, Channel ID, Campaign ID, and Campaign Price.
-
Select the “Mixed Value” type to enter the mixed header value, e.g. LeadID={leadId}.
-
-
Available Header Placeholder - the field that contains the list of all available header placeholders. Note: The "Available Header Placeholder" field is available only when the “Mixed Value” type value is selected.

-
Value Format - the field that defines the encoding to send the header value:
-
The DEC format converts the entire “Header Value” field to the decimal system. The DEC format is set by default.
-
The HEX format converts the entire “Header Value” field to a hexadecimal code.
-
-
Description - enter an additional description for the header.
You can transfer up to five SIP Headers in the context of one call in total. Please note that the system processes the Campaign’s SIP Headers first, then the Buyer’s SIP Headers, and then the Product’s SIP Headers.
Example 1:
You set up 1 SIP Header for the Product, 2 SIP Headers for the Buyer, and 3 SIP Headers for the Campaign. The system will transfer only 5 SIP Headers: 3 Campaign’s SIP Headers and 2 Buyer’s SIP Headers. The Product’s SIP Header will not be transferred.
Example 2:
If you created the Campaign’s SIP Header and the Product’s SIP Header with the same name (e. g. the “NAME” title) only the Campaign’s SIP Header will be transferred, but not the Product’s SIP Header.
Example 3:
If you select the “Mixed Value” type in the “Value Type” field, the additional “Available Header Placeholder” field will appear. You can choose the header placeholder in the “Available Header Placeholder” field. The selected placeholder will be added in the required format (with curly braces) to the “Header Value” field, e.g. {leadId}. After that, you can enter the static part in the “Header Value” field, e.g., {leadId}TEXT, or add another header placeholder by selecting it in the “Available Header Placeholder” field. The new placeholder will be added to the “Header Value” field, e.g., {leadId}TEXT{productId}.