
The Trusted IP List option allows you to create and manage your trusted IP addresses, so you can skip two-factor authentication or pin code when logging into the system from a trusted IP address.
Note: It is not recommended to use this option if you have dynamic IP or VPN connection.
To view the list, go to the Account settings > My profile section, select the “Security” tab, and “Trusted IP List” subtab.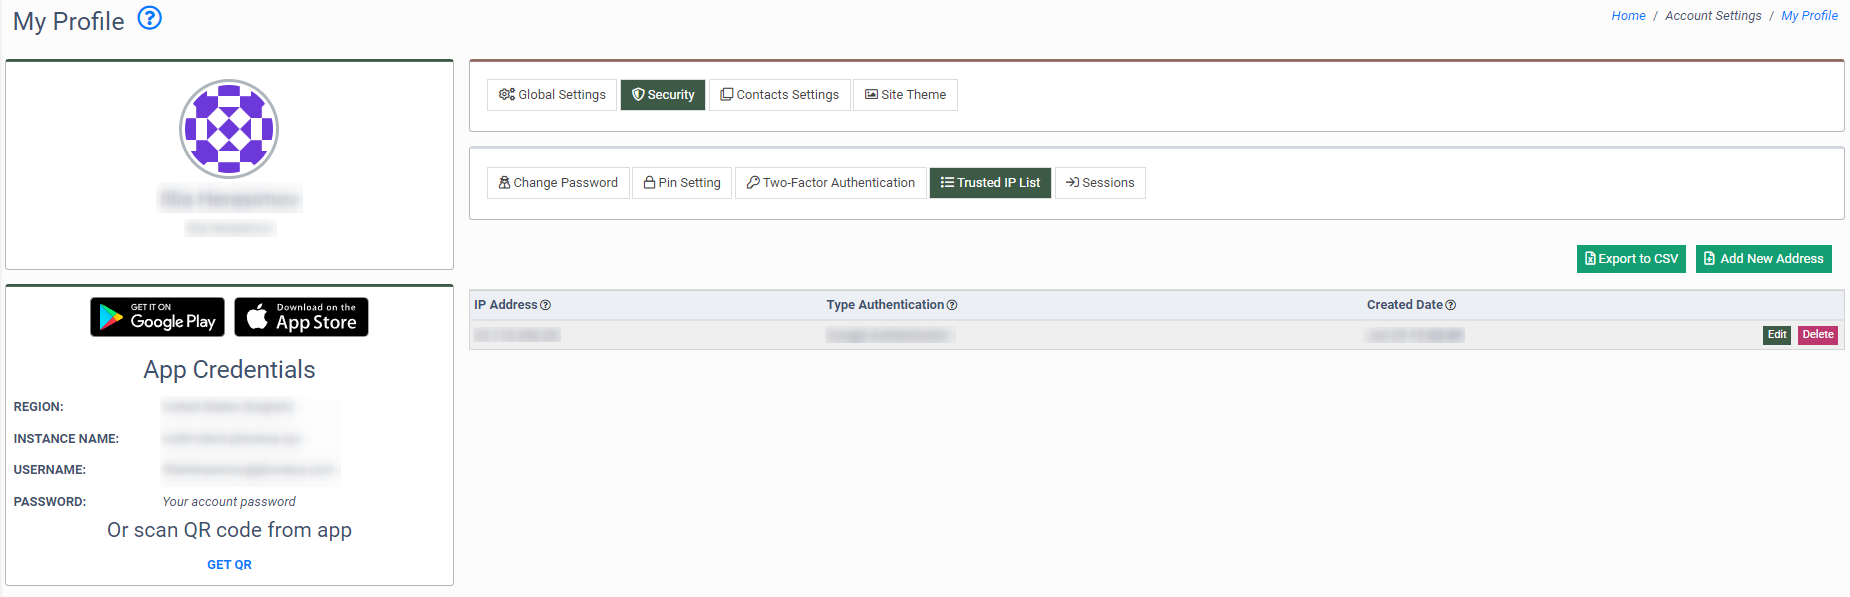
The Trusted IP list contains the following information:
- IP Address: The trusted IP address.
- Type Authentication: The type of two-factor authentication set for this IP address.
- Created Date: The date of the trusted IP creation.
To add a new IP address to the Trusted IP list, click the “Add New Address” button and fill in the following fields in the pop-up window:
- Auth Type: Select the type of the two-factor authentication that you would like to skip. (e.g., if you want to disable Google Authenticator for the Trusted IP, select the “Google Authenticator” option).
- IP: Enter the IP address (by default, the field displays your current IP address).
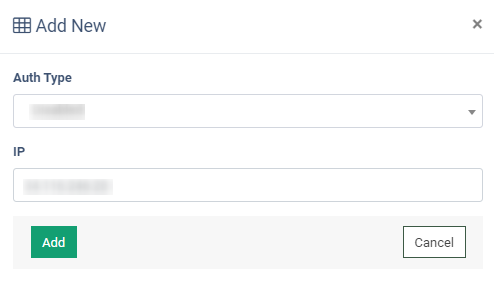
Click the “Add” button to complete. Click the “Cancel” button to discard the changes.
To edit the record, click the “Edit” button in the “Action” column.
To delete the Trusted IP, click the “Delete” button in the “Action” column.