To access the list, go to the Vendor Management > Custom Payouts section.
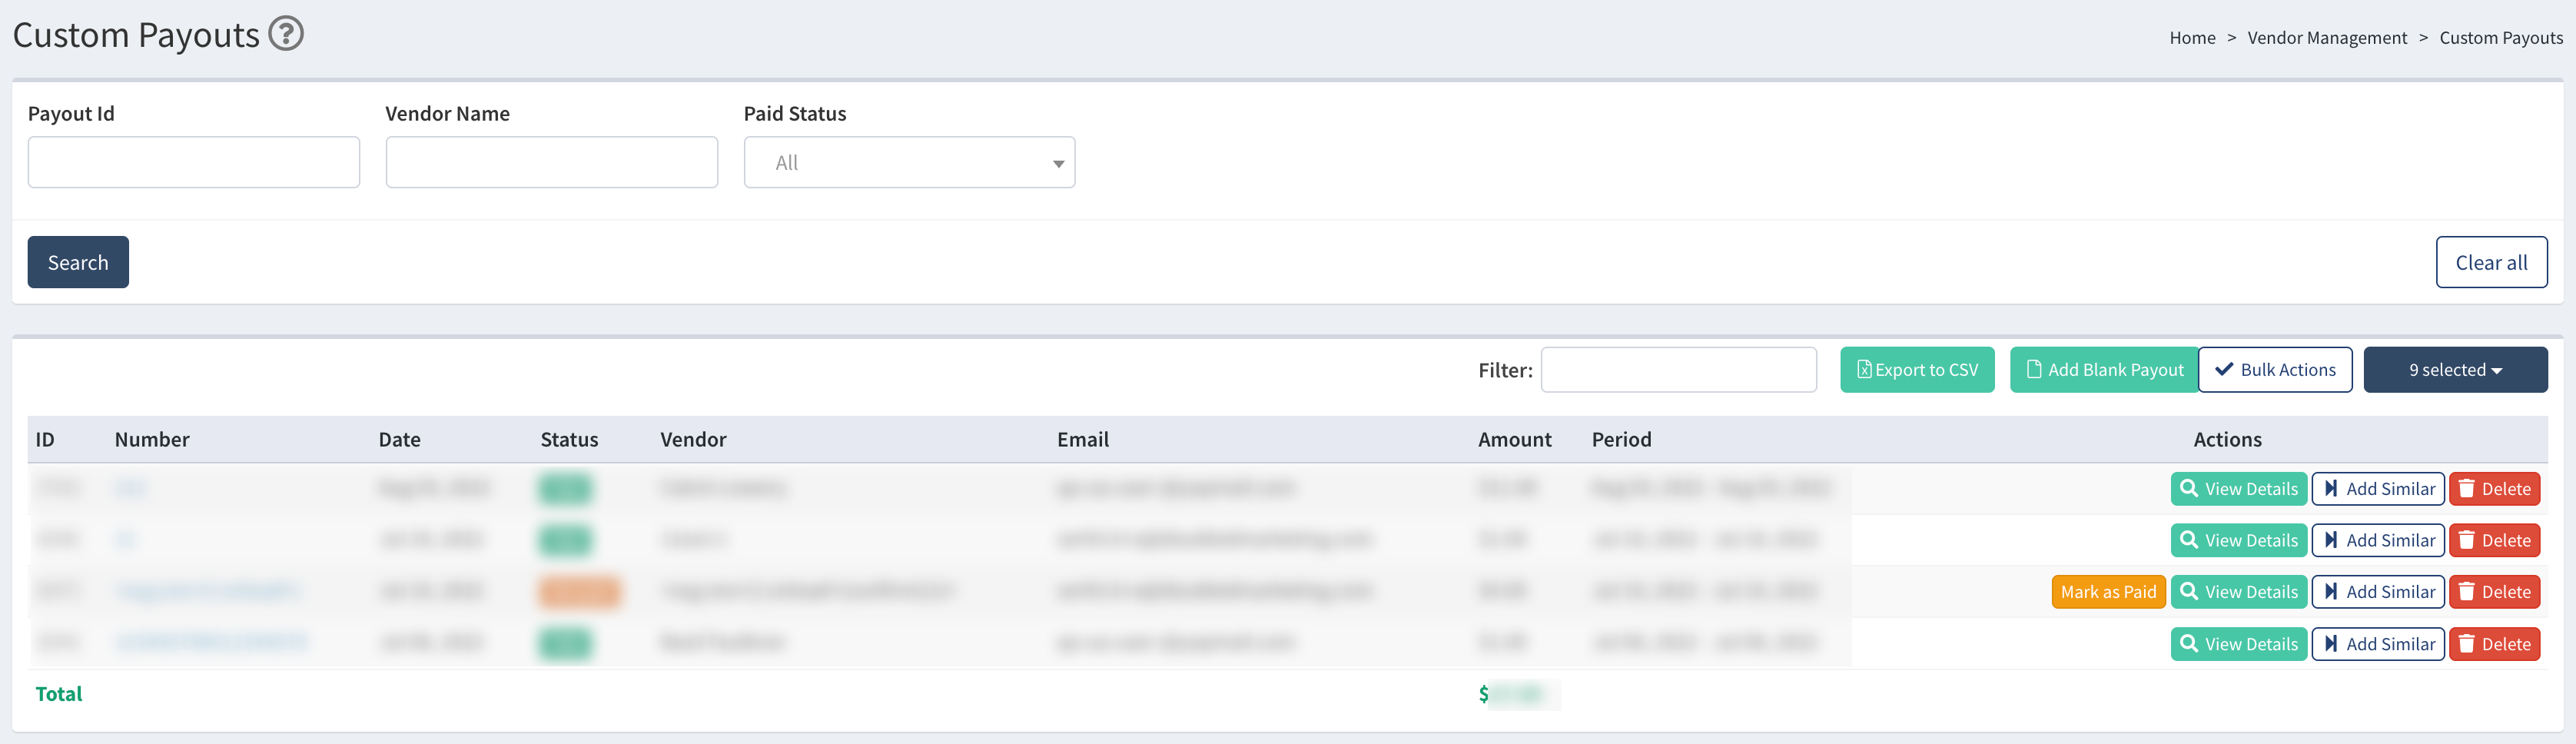
You can narrow down the search results by using the following filters:
- Payout ID: Fill in the Payout ID
- Vendor Name: Fill in the name of the Vendor.
- Paid Status: Select the payout status (Paid / Not Paid).
The list contains the following information:
- ID: The system-generated number of the payout record.
- Number: The manually added number of the payout record.
- Date: The date the payout document was created.
- Status: The status of the payout.
- Vendor: The name of the Vendor for which the payout is created.
- Email: The email address of the recipient.
- Amount: The total amount of the payout.
- Period: The period for which the Vendor is paid.
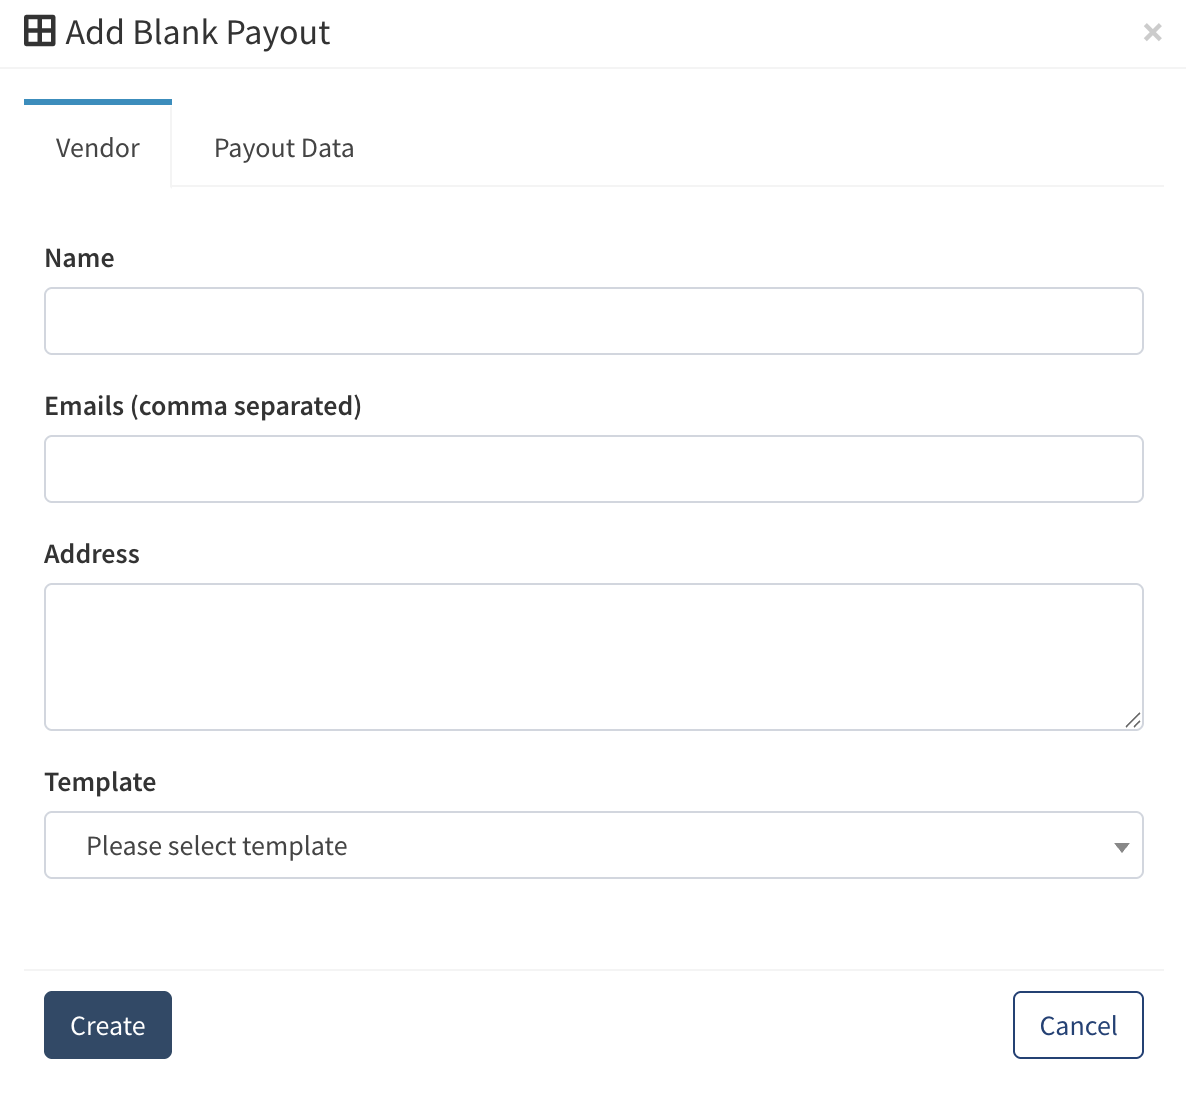
To create a new payout document, click the “Add Blank Payout” button. In the pop-up window, fill in the following data in the “Vendor” tab:
- Name: Fill in the full name of the Vendor.
- Emails: Fill in the email address of the recipient. Use commas in case there are multiple recipients.
- Address: Fill in the Vendor’s billing address.
- Template: Select the preferred template from the drop-down list.
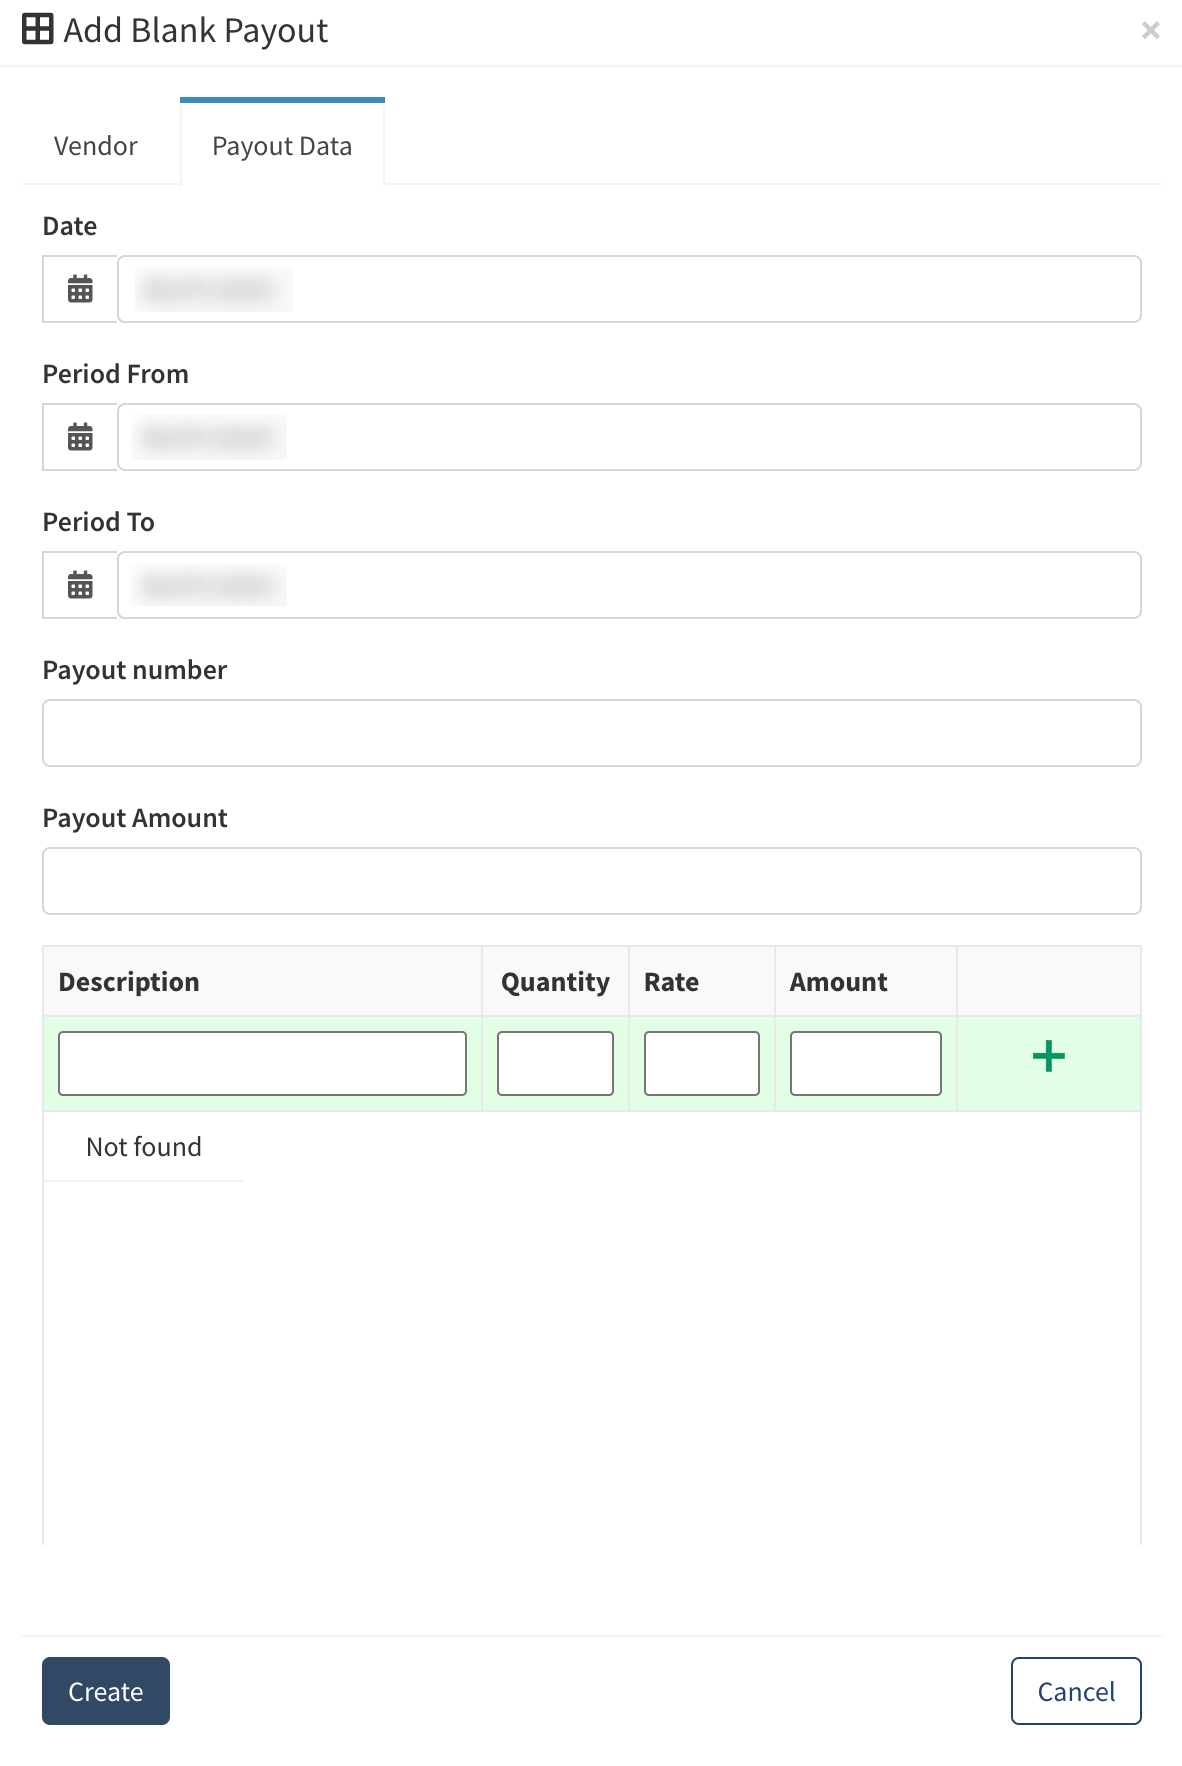
Fill in the following information in the “Payout Data” tab:
- Date: The date when the payout record is created.
- Period From / Period To: The date range for which the Vendor will be paid.
- Payout Number: The number of the payout document.
- Payout Amount: The total amount to be paid according to the document.
- Description / Quantity / Rate / Amount: The detailed information about the units for which the Vendor is paid.
To complete the record, click the “Create” button.
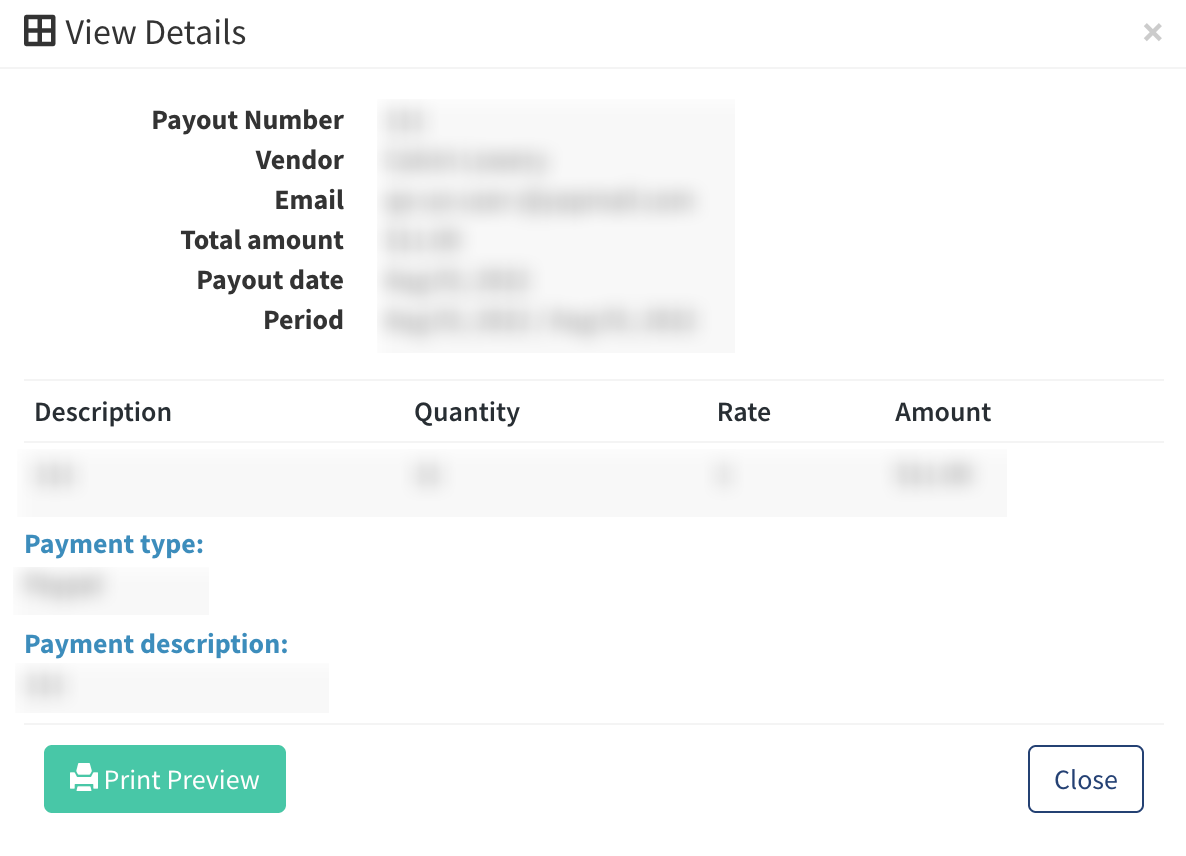
To view detailed information about the specific payout record, select the record from the list and click the “View Details” button in the “Actions” column. To edit the existing payout information, click the “Edit Payout” button in the pop-up window. To print or preview the payout document, click the “Print Preview” button.
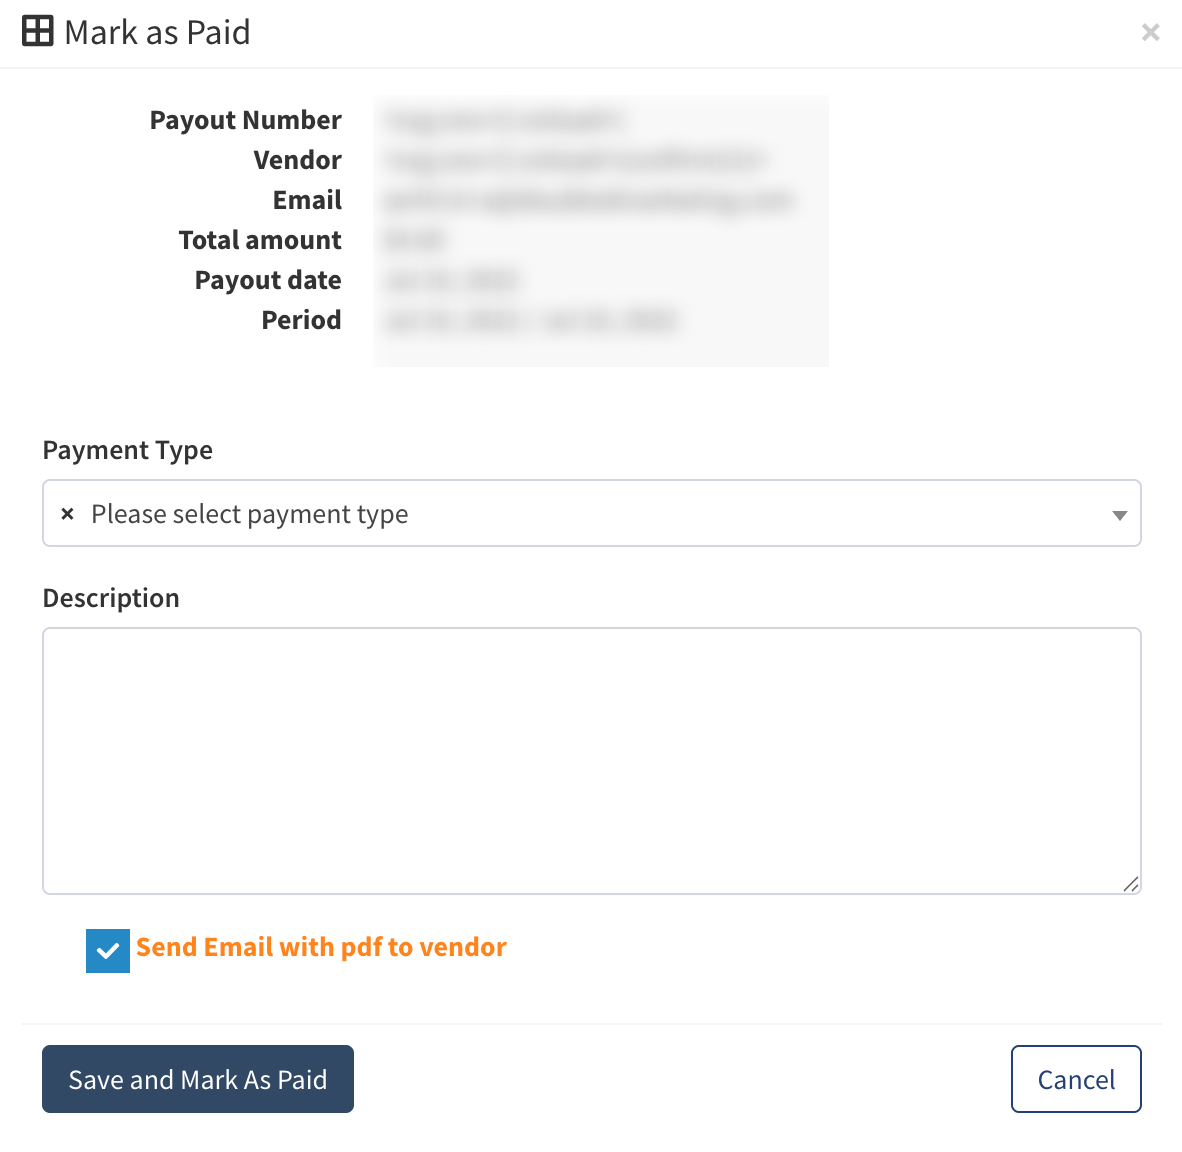
To mark the payout as paid, select the record from the list and click the “Mark As Paid” button in the “Actions” column. Fill in the following information in the pop-up window:
- Payment Type: Select the corresponding type of payment from the drop-down list.
- Description: Fill in the additional information.
To send a copy of the payout document to the Vendor, select the “Send Email with PDF to Vendor” checkbox. Click the “Save and Mark As Paid” button to complete.
To create a record based on the existing payout record, select the blank from the list, and click the “Add Similar” button in the “Actions'' column. Once you add a similar record, the first tab of the payout is filled in automatically. You still need to complete the required field in the Payout Data tab to create a similar payout document.
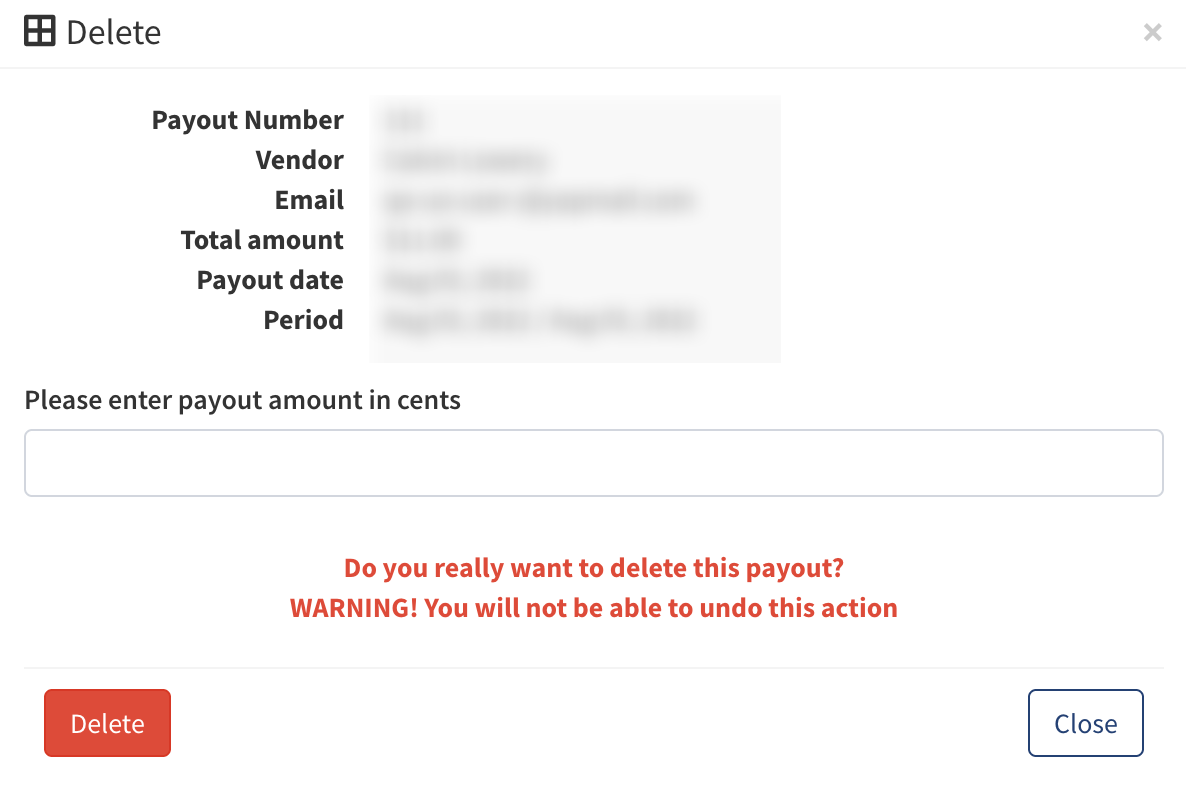
To delete the payout document from the list, select the record from the list and click the “Delete” button in the “Actions” column. Confirm the action in the pop-up window by clicking the “Delete” button once again. Please note that after deleting a payout, you will not be able to restore it.