The Voicemail boxes section allows you to create new voicemail boxes, and view and configure existing ones.
To open the Voicemail boxes list, go to the PBX Management > Setup > Voicemail Boxes.
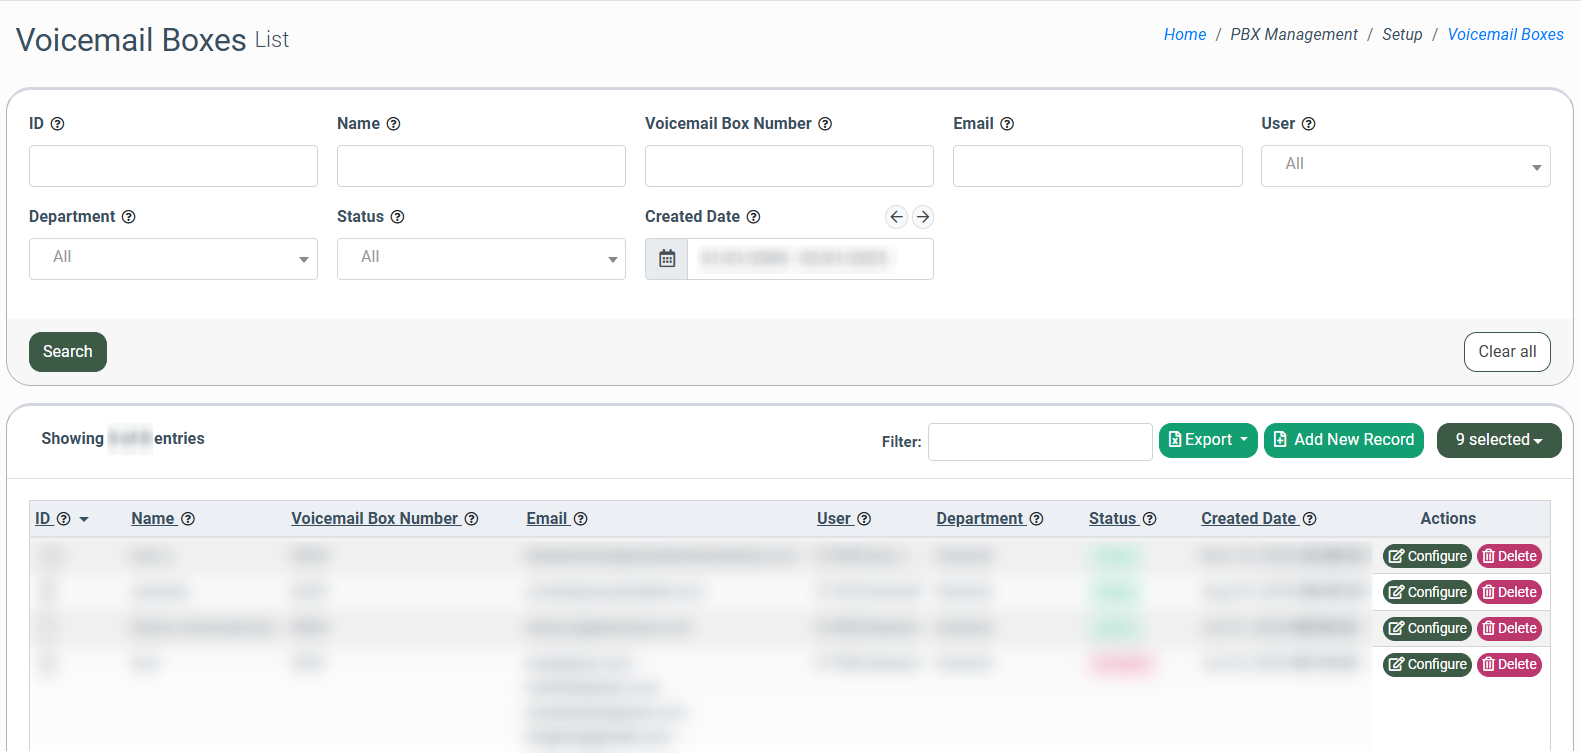
You can narrow down the search results by using the following filters:
- ID: Enter the unique identification number of the voicemail box.
- Name: Enter the name of the voicemail box.
- Voicemail Box Number: Enter the unique four-digit number of the voicemail box.
- Email: Enter the email address which is assigned to the voicemail box.
- User: Enter the system user name assigned to the voicemail box.
- Department: Enter the department's name assigned to the voicemail box.
- Status: Enter the status of the voicemail box (Active, Disabled).
- Created date: Select the date of the voicemail box creation.
The Voicemail boxes list contains the following data:
- ID: The unique identification number of the voicemail box.
- Name: The name of the voicemail box. Note: Click on the name of the Voicemail box to be redirected to the Voicemail Summary report regarding the following Voicemail box.
- Voicemail Box Number: The unique four-digit number of the voicemail box.
- Email: The email address(-es) for notifications about new voicemails.
- User: The name of the notification receiver (system user).
- Department: The name of the department whose operators have access to the following voicemail box.
- Status: The status of the voicemail box (Active, Disabled). Note: After the Voicemail box status is set to “Disabled”, voicemails from that box remain available in the Voicemail Summary report.
- Created date: The date of the voicemail box creation.
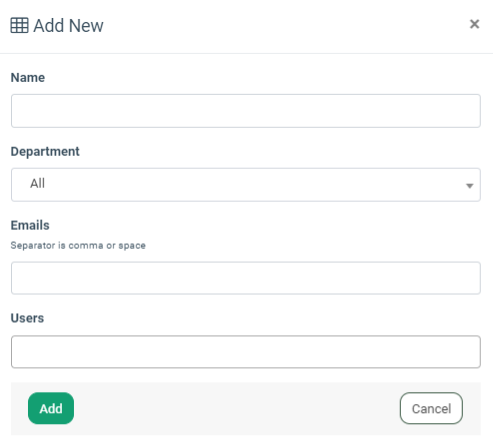
How to Create a New Voicemail Box
To add a new voicemail box, click the “Add New Record” button. In the “Add New” pop-up window fill in the following fields:
- Name: Enter the name of the voicemail box.
- Department: Select the department whose operators will have access to the following voicemail box.
- Emails: Enter the email address(-es) to send notifications about new voicemails. Note: You can also enter the email that is not registered in the system. The separator is a comma or space.
- Users: Select the system users to send notifications about new voicemails.
Click the “Add” button to complete the action.
How to Configure a Voicemail Box
To configure the voicemail box, click the “Configure” button in the “Actions” column. You will be redirected to the configuration page of the selected voicemail box. This page contains 2 tabs:
The "General" tab.
The “General” tab allows you to edit the general settings of the Voicemail box.
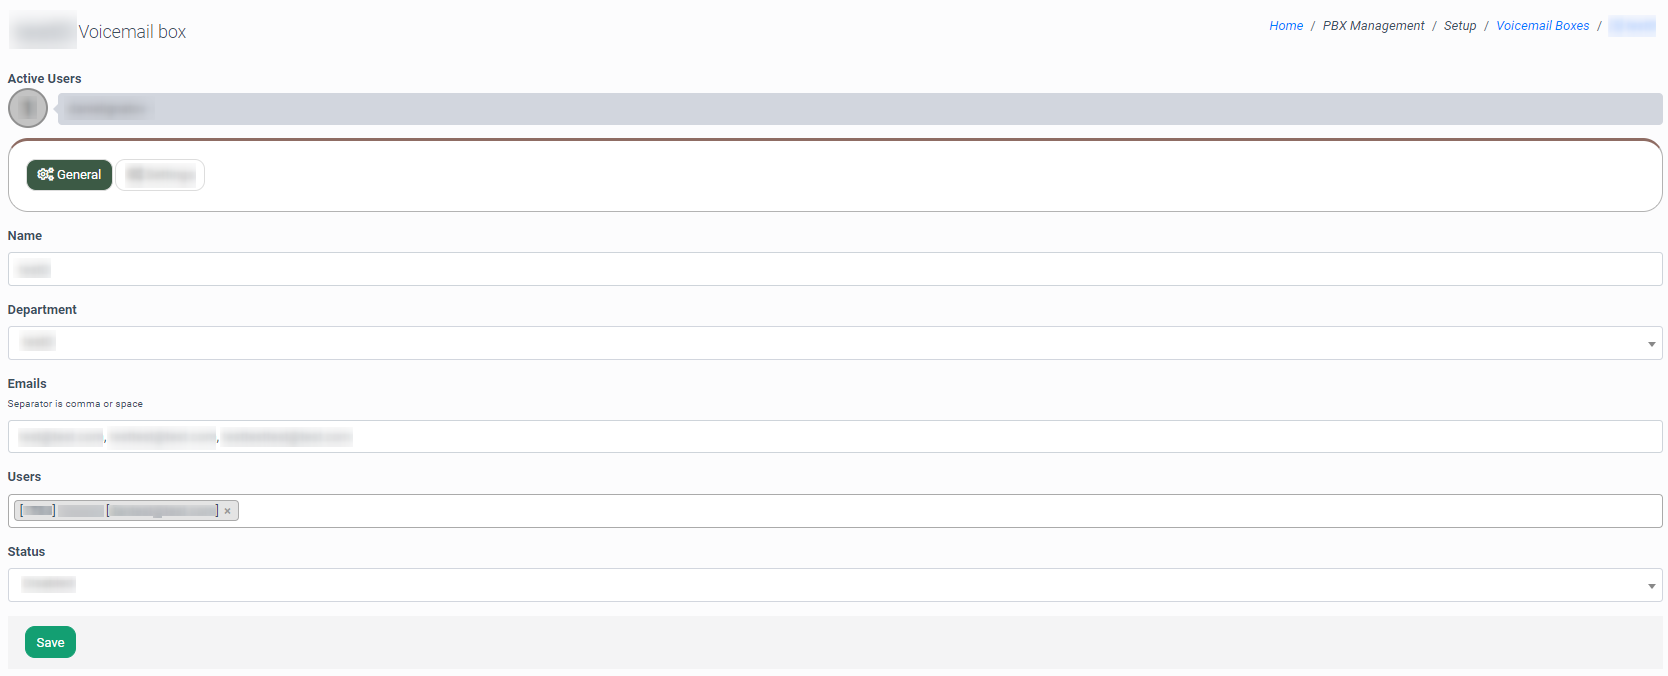
The “General” tab contains the following information:
- Name: Enter the name of the voicemail box.
- Department: Select the department whose operators will have access to the following voicemail box.
- Emails: Enter the email address(-es) to send notifications about new voicemails. Note: You can also enter the email that is not registered in the system. The separator is a comma or space.
- Users: Select system users to send notifications about new voicemails.
- Status: Select the status of the voicemail box (Active, Disabled).
The "Settings" tab
The “Settings” tab allows you to set up the PIN code, upload and download the greeting audio file, and configure email notifications.
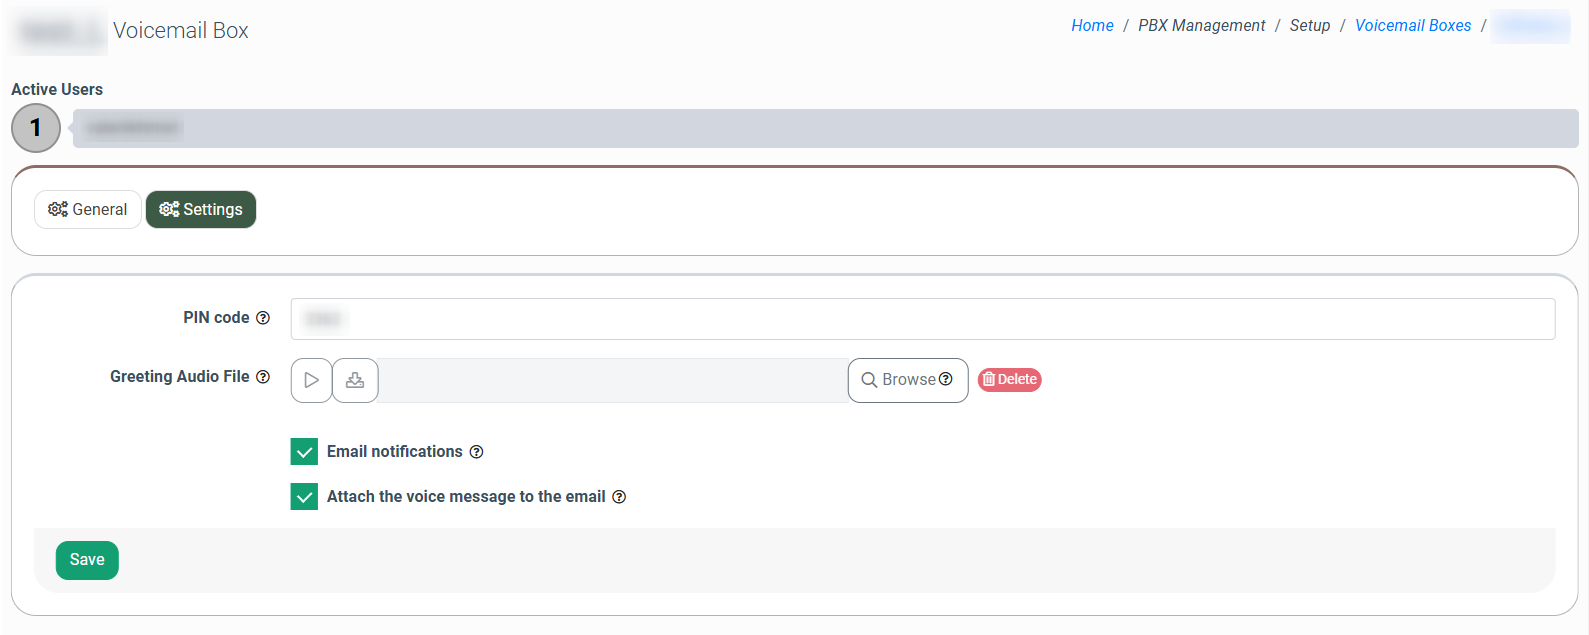
The “Settings” tab contains the following data:
- PIN code: Enter the PIN code for the voicemail box. Note: This PIN code should contain four characters and must be a number. The operator should dial the service number “*99”, navigate through the voice menu, and enter the voicemail box by inputting the PIN code.
- Greeting Audio File:
- Click the “Play” button to play the attached audio file.
- Click the “Download” button to download the attached audio file to your device.
- Click the “Browse” button to upload the audio file and attach it to the Voicemail box.
- Click the “Delete” button to delete the attached audio file from the Voicemail box. In the “Delete” pop-up window, click the “Delete” button to confirm or click the “Cancel” button to close the window.
- Email notification: Check the box to allow the system to send a notification that a voicemail has been received.
- When the box is checked, the “Attach the voice message to the email” will appear. Check the box, to attach the voice message to the email with a notification that a voicemail has been received.
How to Delete a Voicemail Box
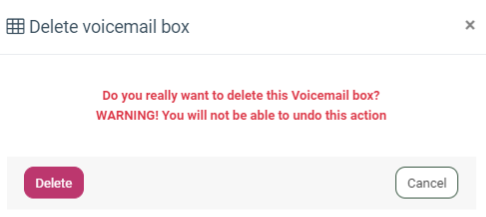
To delete the voicemail box, click the “Delete” button in the “Actions” column. In the “Delete voicemail box” pop-up window, click the “Delete” button to confirm the action, or click the “Cancel” button to close the window. Note: Once the Voicemail box is deleted, the voicemail messages from it are stored in the Voicemail Summary report.
Click the "Export" button and select the "Current Page to CSV" option to export the current page to CSV, or select the "All Pages to CSV" to export all pages to CSV.