Buyer Reports: Lead Return/Adjustment
Find out how to process and view the history of lead transactions in our guide to the Buyer Report: Lead Return/Adjustment section.
To view the report, go to the All Reports > Buyer Reports > Lead Return/Adjustment section.
In order to correctly invoice your Buyers and pay your vendors without performing manual calculations, we recommend subscribing to Books360. Books360 will pull the necessary information from all the reports, and add any lead returns processed for the invoice or payment period.
Adjustment Details
Grouped Report
Lead Return Requests
Adjustment Details
The Adjustment Details tab allows you to view a comprehensive list of all transactions due to Lead Returns.
You can narrow down the search results by using the following filters:
- Lead ID: Enter the unique identification number of the lead.
- Return Date: Select the date range of the report.
- Product: Select the Product.
- Method: Select the submission method (POST, FORM).
- Redirect Status: Select the redirect status (Yes, No).
- Publisher: Select the Publisher.
- Publisher Channel: Select the Publisher Channel.
- Publisher Source: Select the Publisher Source.
- Buyer Agent: Select the Buyer Agent.
- Buyer: Select the Buyer.
- Buyer Campaign: Select the Buyer Campaign.
- Group ID: Enter the identification number of the group.
- Adjustment Type: Select the Adjustment Type (Lead Return, Lead Price Adjustment).
- Buyer Disposition: Select the Buyer Disposition status (Converted, Bad Contact, Never Applied, Withdrawn, Pending).
The Adjustment Details list contains the following information:
- ID: The unique identification number of the lead.
- Quality: The quality bubbles display the number of times the lead has been seen in the system today, yesterday, in 30 days, or 45 days.
- Date: The date and time when the lead entered the system.
- Adj. Date: The date and time of the lead adjustment.
- Adjusted By: The name of the user that adjusted the lead.
- Buyer Disposition: The Buyer Disposition status.
- Buyer Comment: The comment from the Buyer.
- Reason: The reason for the return. Note: This field is applicable for lead returns only.
- Buyer: The name of the Buyer.
- Publisher: The name of the Publisher.
- Redirect: The redirect status of the lead.
- Publisher Adj., $: The Publisher payout adjustment amount.
- TTL Adj., $: The total revenue adjustment amount.
- REF Adj., $: The referral fee adjustment amount.
- AGN Adj., $: The agent fee adjustment amount.
- Publisher, $: The final Publisher payout amount.
- ADM, $: The Admin revenue amount.
- TTL, $: The final revenue amount.
- REF, $: The final referral fee amount.
- AGN, $: The final agent fee amount.
- Product: The name of the Product.
- Channel: The Publisher’s Channel.
- Method: The submission method.
- Source: The Publisher source.
- Email: The email address of the lead.
Note: If the price for the lead is adjusted more than once, the report will reflect the total adjustment amount for the date when the last adjustment was made. The decrease in the amount is marked with a red down arrow icon next to the column value. The increase is displayed with a green up arrow icon.
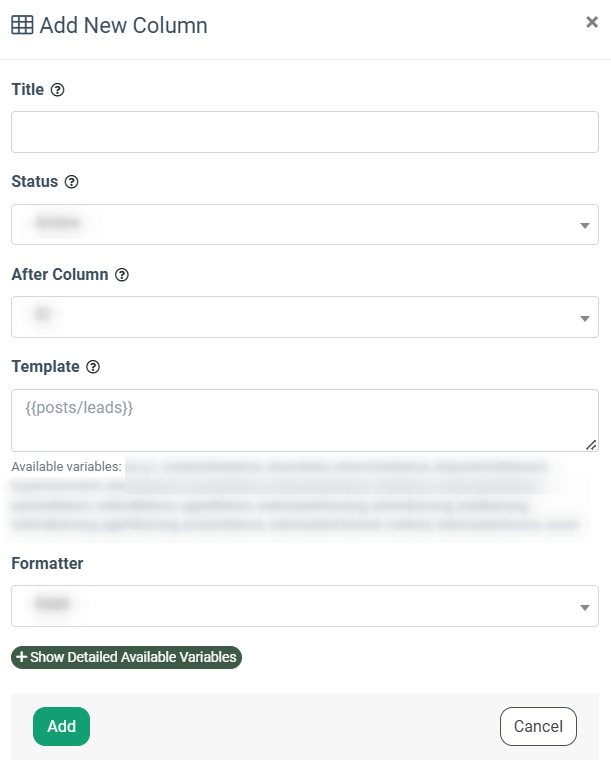
To create a custom column, click the “Add New Column” button and fill in the following fields in the pop-up window:
- Title: Enter the name of the column.
- Status: Select the status (Active, Disabled).
- After Column: Select the column after which you want the custom column to be placed.
- Template: Enter the variable you want the custom column to contain.
- Formatter: Select the format type for the custom column (RAW / ROUND / CURRENCY).

To view the list of all data columns available in the report, along with the corresponding variables' names, click the “Show Detailed Available Variables” button.
The name of the report column will be displayed in the “Report Column Title” field, and the name of the corresponding variable will be displayed in the “Variable” field of the list.
To edit or remove the custom column, click the “Change Columns” button and select the corresponding icon next to the title of the column.
Read more about how to create custom columns and how to manage them in this Knowledge Base article.
To upload the Lead Return file, click the “Import CSV” button. Read more about lead return import in the following Knowledge Base article.
Grouped Report
The Grouped Report tab allows you to view the lead returns by Buyer's request, grouped according to the debits and credits data.
You can narrow down the search results by using the following filters:
- Return Group ID: Enter the identification number of the return group.
- Return Date: Select the date range of the report.
- Product: Select the Product.
- Publisher: Select the Publisher.
- Buyer Agent: Select the Buyer Agent.
- Buyer: Select the Buyer.
The Grouped Report list contains the following information:
- ID: The unique identification number of the group.
- Return Date: The date and time of the lead return.
- Product: The name of the Product.
- Buyer: The name of the Buyer.
- Publisher: The name of the Publisher.
- Publisher, $: The final Publisher payout amount.
- TTL, $: The final revenue amount.
- Reason: The reason for the return. Note: This field is applicable for lead returns only.
- Returned By: The name of the user that returned the lead.
Lead Return Requests
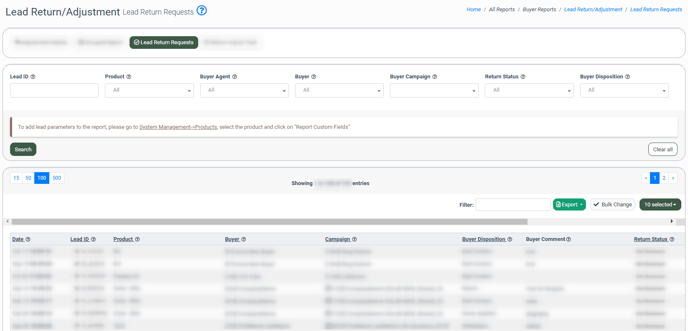
The Lead Return Requests tab allows you to view all lead return requests created in the system. You can approve or reject a lead return request and add a comment to the record.

You can narrow down the search results by using the following filters:
- Lead ID: Enter the unique identification number of the lead.
- Product: Select the Product.
- Buyer Agent: Select the Buyer Agent.
- Buyer: Select the Buyer.
- Buyer Campaign: Select the Buyer Campaign.
- Return Status: Select the Return Status (Not Reviewed, Refund Confirmed, Rejected).
- Buyer Disposition: Select the Buyer Disposition status (Converted, Bad Contact, Never Applied, Withdrawn, Pending).
The Lead Return Requests list contains the following information:
- Date: The date and time when the lead entered the system.
- Lead ID: The unique identification number of the lead.
- Product: The name of the Product.
- Buyer: The name of the Buyer.
- Campaign: The name of the Campaign.
- Buyer Disposition: The Buyer Disposition status.
- Buyer Comment: The comment from the Buyer.
- Return Status: The lead return status.
- Admin Comment: The comment from the Admin.
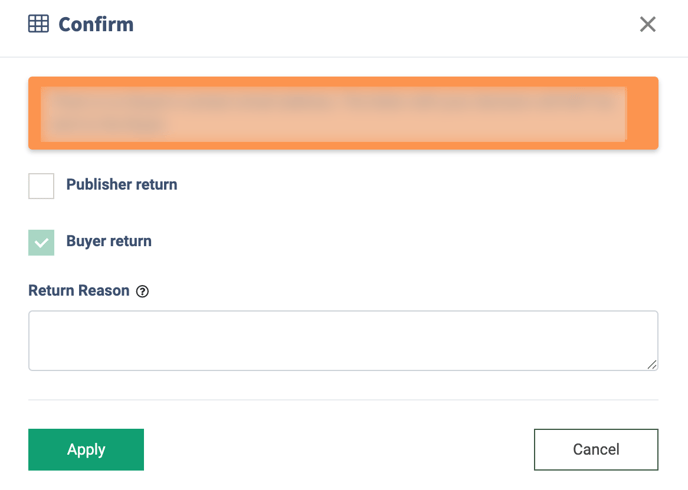
To approve the lead return, click the “Confirm” button in the “Actions” column. In a pop-up window, select the corresponding checkboxes and type your comment into a “Description” field. Click the “Apply” button to confirm your intention.

Note: If there’s no Buyer’s contact email address, the system will show you the warning on top of the pop-up window. The letter with your comment won’t be sent to the Buyer.
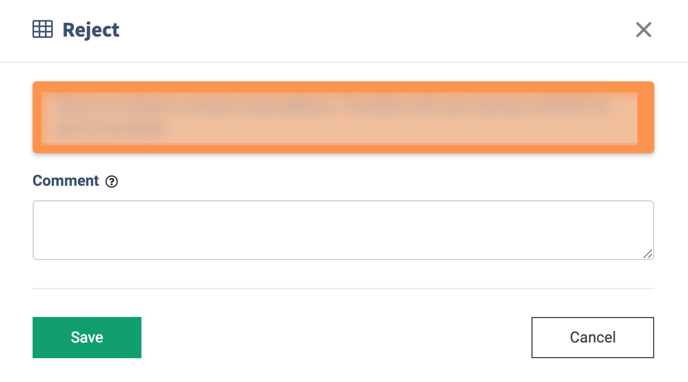
To reject the lead return, click the “Reject” button in the “Actions” column. Type your comment into the corresponding field in the pop-up window, and click the “Save” button to proceed.

Note: If there’s no Buyer’s contact email address, the system will show you the warning on top of the pop-up window. The letter with your comment won’t be sent to the Buyer.
Click the "Export" button and select "Current Page to CSV" to export the current page to a CSV file or "All Pages to CSV" to export all pages to a CSV file.


