To view the Export/Import Tasks list, go to the All Reports > Extras > Export/Import Tasks section.
The report contains the following tabs:
How to Export the Data from the Report Sections
Export Tasks
The “Export Tasks” tab allows you to view the list of exports initiated in the LMS and Call Logic components. You can download the reports table and delete export tasks.
Note: Only exports implemented through the "All Pages to CSV" feature are displayed in the Export Tasks list. If you export only the current page, such an export is not displayed in the list.
You can narrow down the search results by using the following filters:
- ID: Enter the unique identification number of the report.
- URL: Enter the link to the report`s export request.
- Creation Time: Select the date range when the report`s export was performed.
- Status: Select the report`s export status (Aborted, Deleted, Error, Pending, Processing, Success).
- Requested by User: Select the user that made the report`s export request.
Click the “Search” button to generate the list.
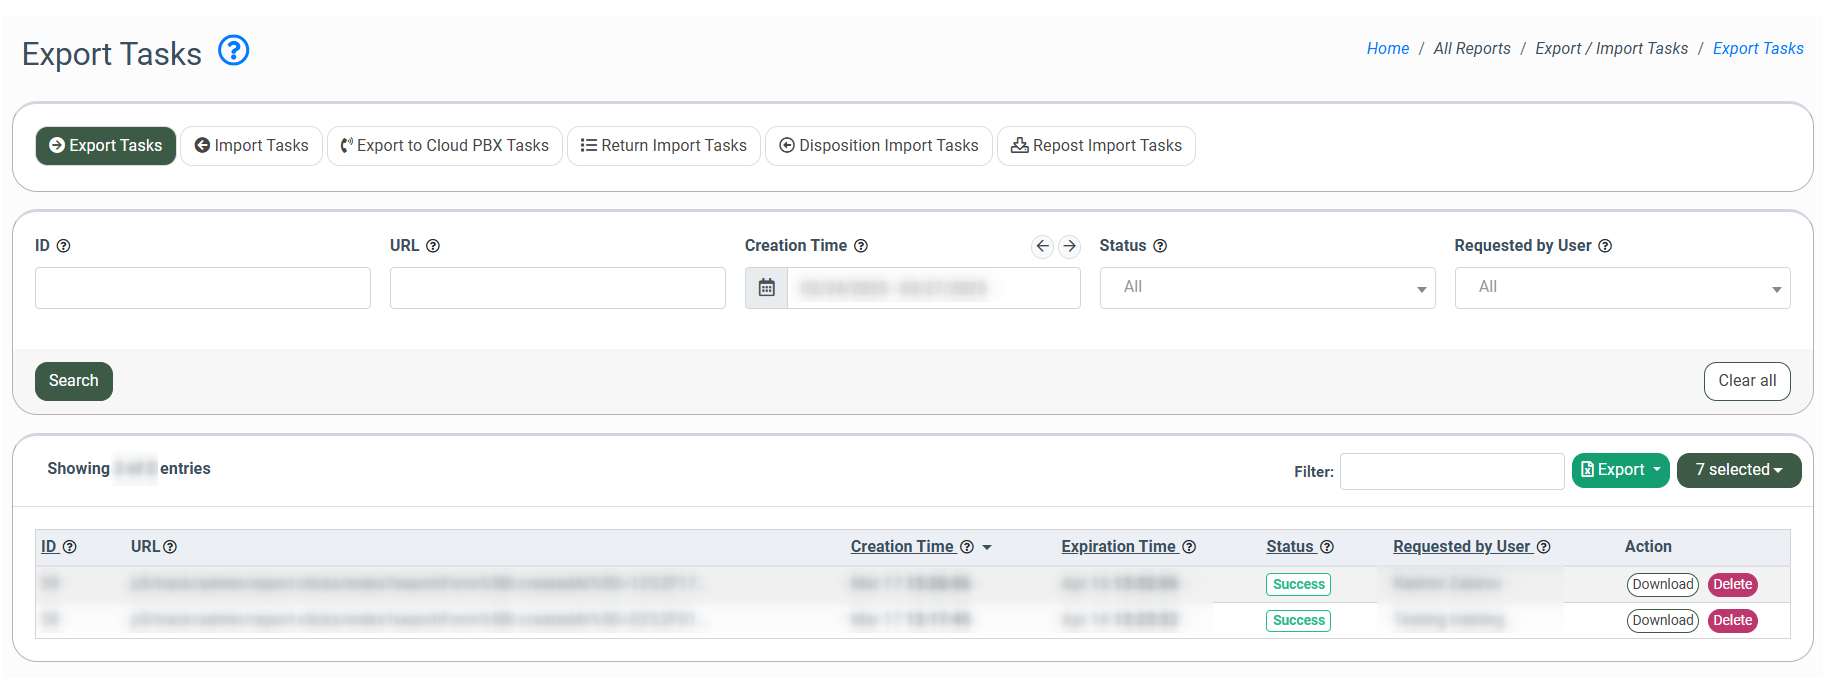
The Export Tasks list contains the following information:
- ID: The unique identification number of the export.
- URL: The link to the report`s export request.
- Creation Time: The date and time when the report`s export was performed.
- Expiration Time: The report`s expiration date and time.
- Status: The ongoing status of the report`s export progress.
- Requested by User: The name of the user who requested the report`s export.

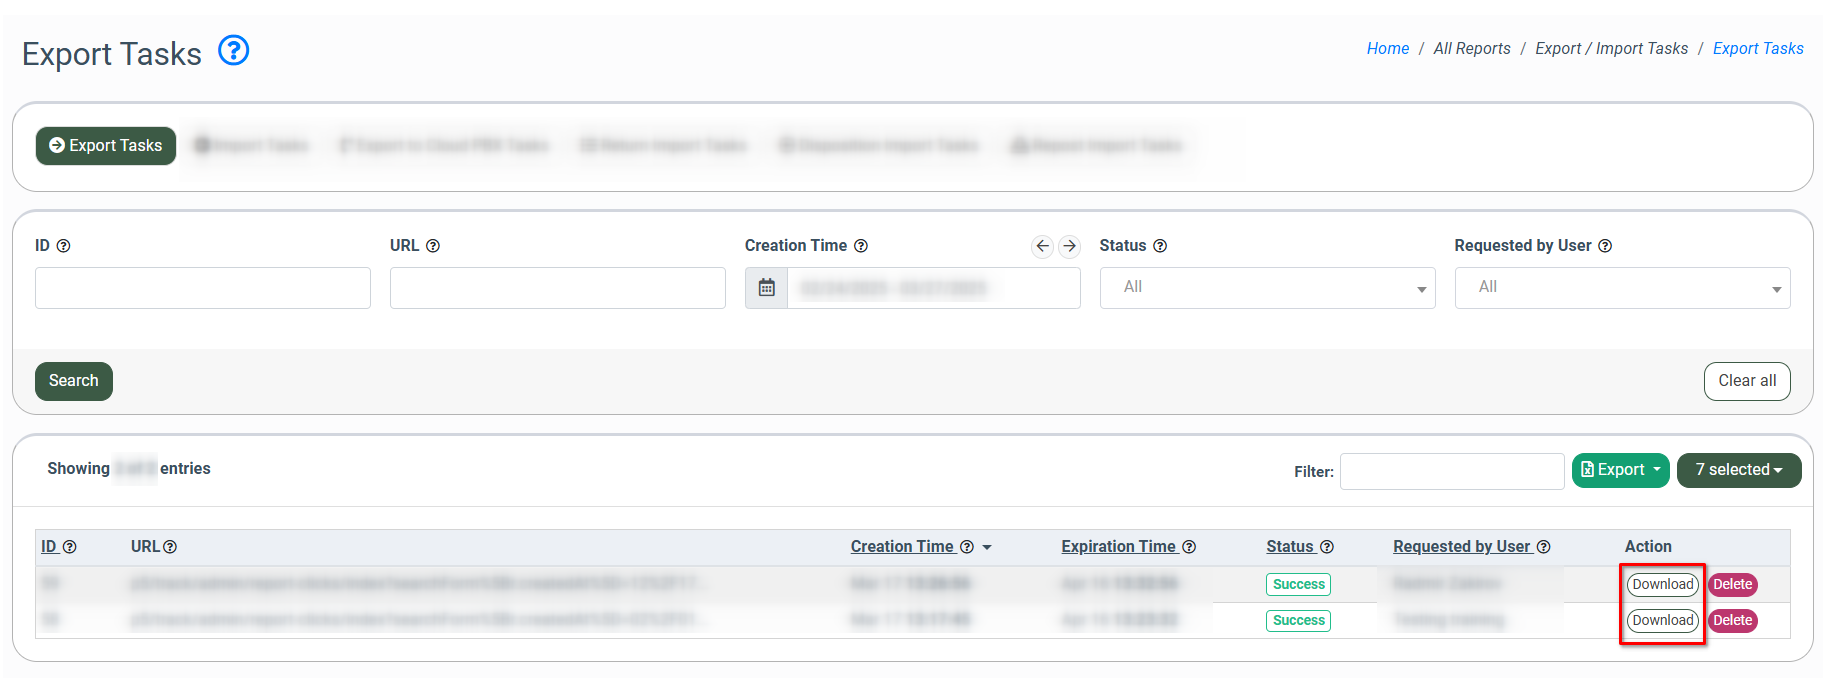
To download the report, click the “Download” button in the “Action” column.
To delete the report created via the export task, click the “Delete” button in the “Action” column.
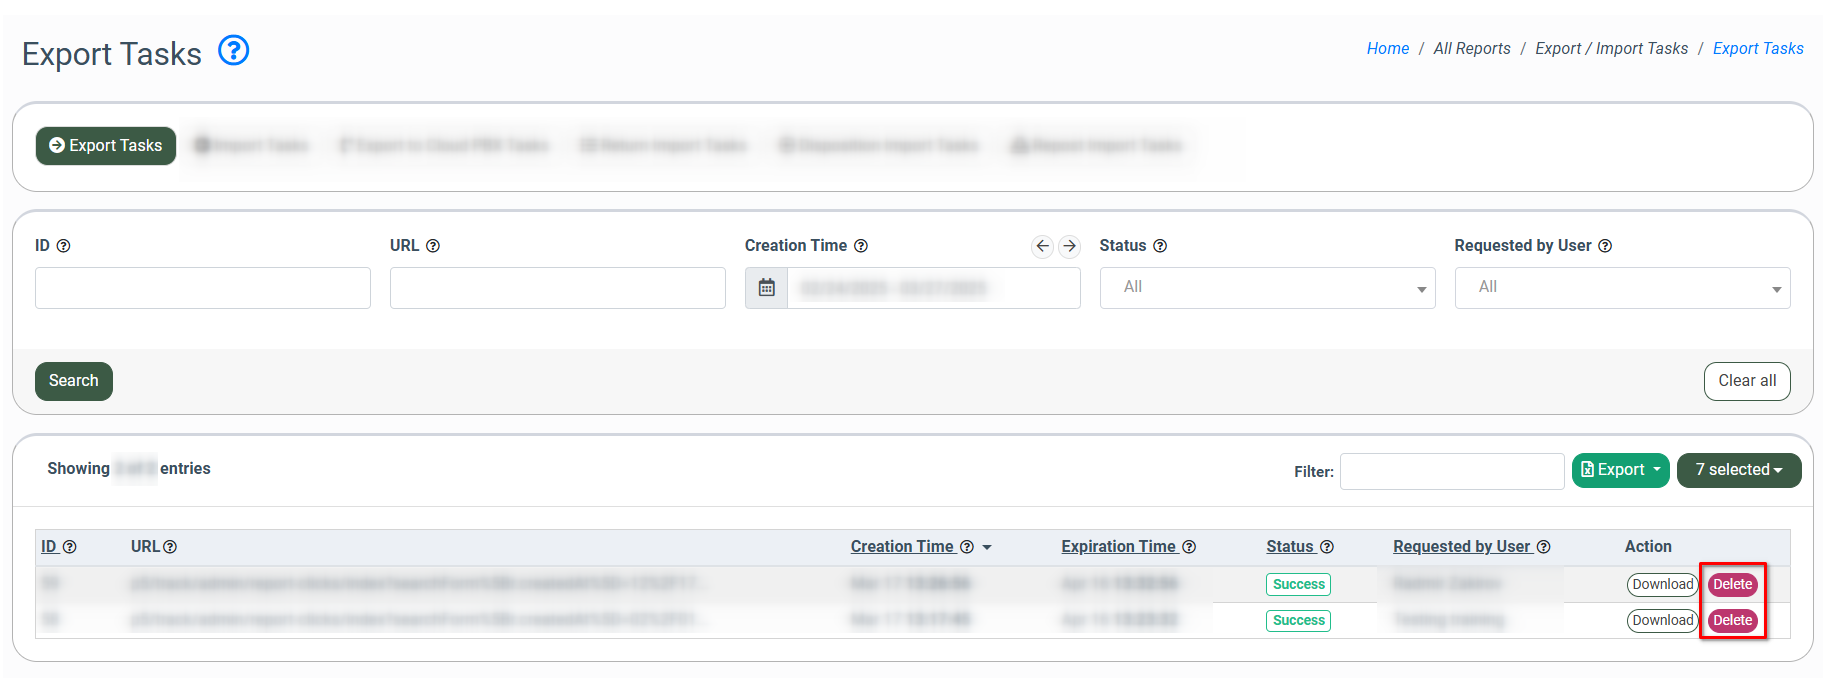
Confirm the deletion operation by clicking the “Submit” button in the “Delete” pop-up window.

To abort the ongoing export task, hover to the right of the loading bar in the “Action” column and click the “Abort” button.

In the “Abort” pop-up window, enter “Yes” into the “Type “Yes” to abort the export task” field, and click the “Submit” button to complete the action.

Import Tasks
In the “Import Tasks” tab, you can view a detailed list of tasks processed by different components such as Call Logic, LMS Sync, E-Delivery, Cloud PBX, Lynx, Opt-Intel, and HitMetrix. The tasks cover various import operations, such as importing forms or integrations, importing product and extra product fields, adding contacts to different lists (including all contacts and opt-out lists), etc.
You can narrow down the search results by using the following filters:
- ID: Enter the unique identification number of the import task.
- Category: Select the category of the import task (Import Form, Import Integration, Set PL/DNPL Values, Import Media Buy Record, Import Product, Import Product Extra Field, Add to All Contacts, Add to Email Opt-out List, Add to Phone Opt-out List).
- Component: Select the component to which the import task is related (Call Logic, LMS Sync, E-Delivery, Cloud PBX, Lynx, Opt-Intel, HitMetrix).
- Requested by User: Select the user that made the import task request.
- Creation Time: Select the date range when the import task was created.
- Status: Select the import task status (New, In progress, Done, Error).
Click the “Search” button to generate the list.
The Import Tasks list contains the following information:
- ID: The unique identification number of the import task.
- Category: The category of the import task.
- Component: The component to which the import task is related.
- Creation Time: The date and time when the import task was performed.
- Status: The ongoing import task status.
- Requested by User: The nickname of the user that made the import task request.
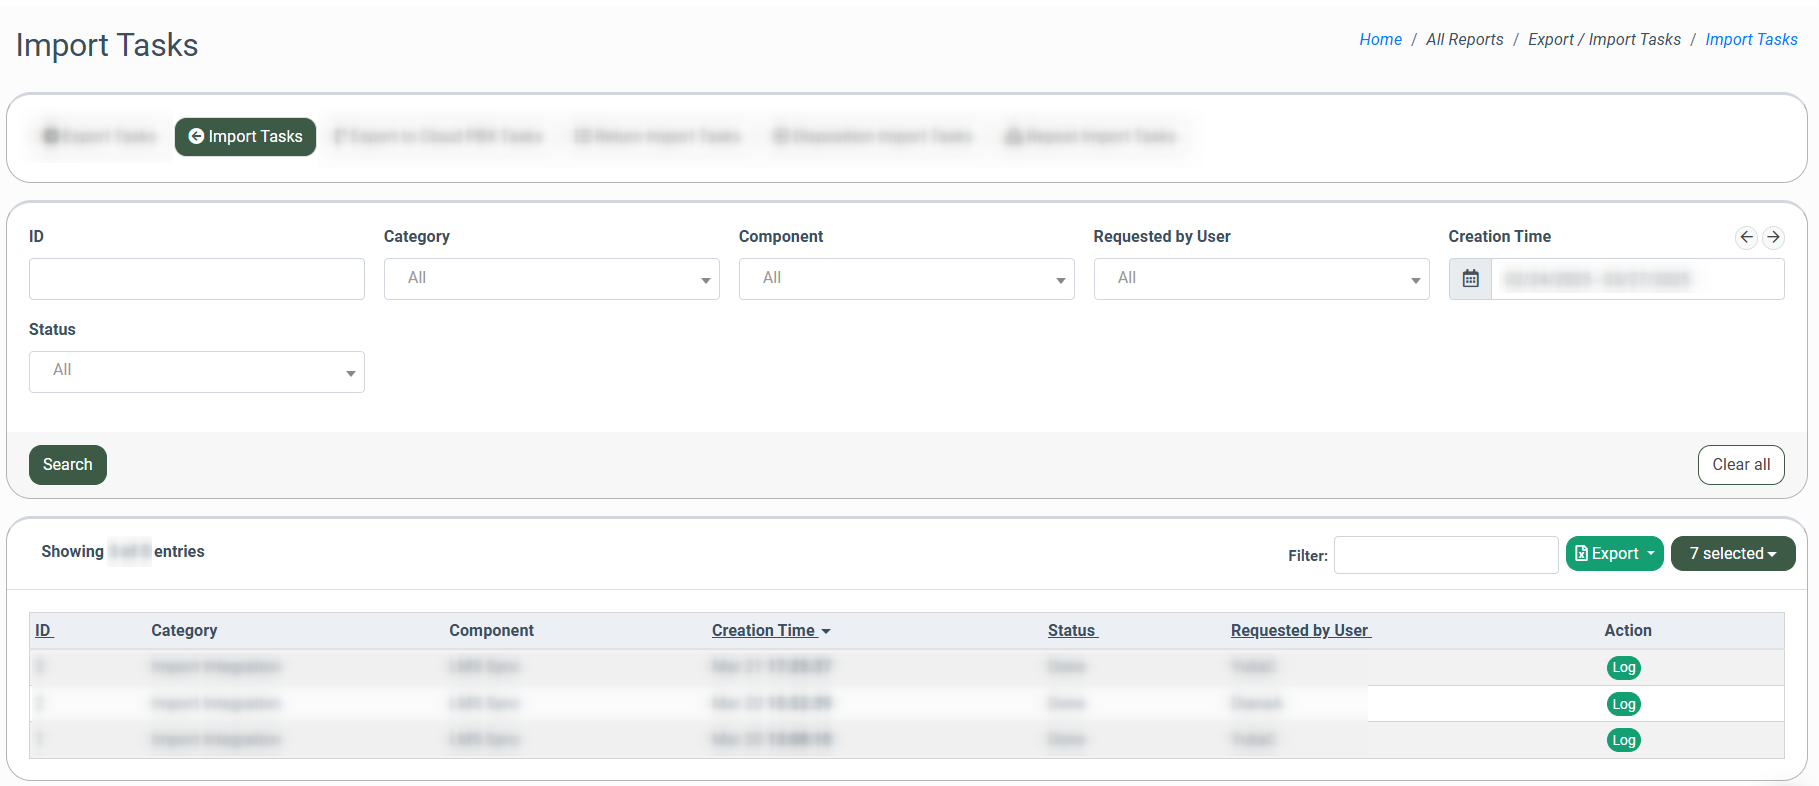
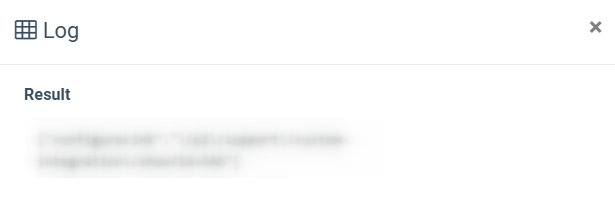
To view the detailed information about the import task result and system data, click the “Log” button in the “Action” column and view the available information in the “Log” pop-up window.
Export to Cloud PBX Tasks
The “Export to Cloud PBX Tasks” tab allows you to view the list of initiated leads exports from the LMS and Call Logic components to the Cloud PBX Dialing List. You can track the execution stage and the status of the leads export and abort the leads export tasks.
Note: The Export to Cloud PBX Tasks list displays exports initiated in the Publisher Lead Details report. Find more information about it in this Knowledge Base article.
You can narrow down the search results by using the following filters:
- ID: Enter the unique identification number of the leads' export task.
- Created At: Select the date range when the leads' export was performed.
- Status: Select the leads export status (Pending, Exporting, Preparing, Importing, Completed, Error, Aborted).
- Requested by user: Select the user that made the leads' export request.
Click the “Search” button to generate the list.
The Export to Cloud PBX Tasks list contains the following information:
- ID: The unique identification number of the leads' export task.
- Task type: The type of the task (Export Leads to Cloud PBX).
- Created At: The date and time the leads' export was performed.
- Progress, %: The execution stage in percentage (%).
- Status: The status of the leads' export.
- Requested by User: The name of the system user who requested the leads’ export.
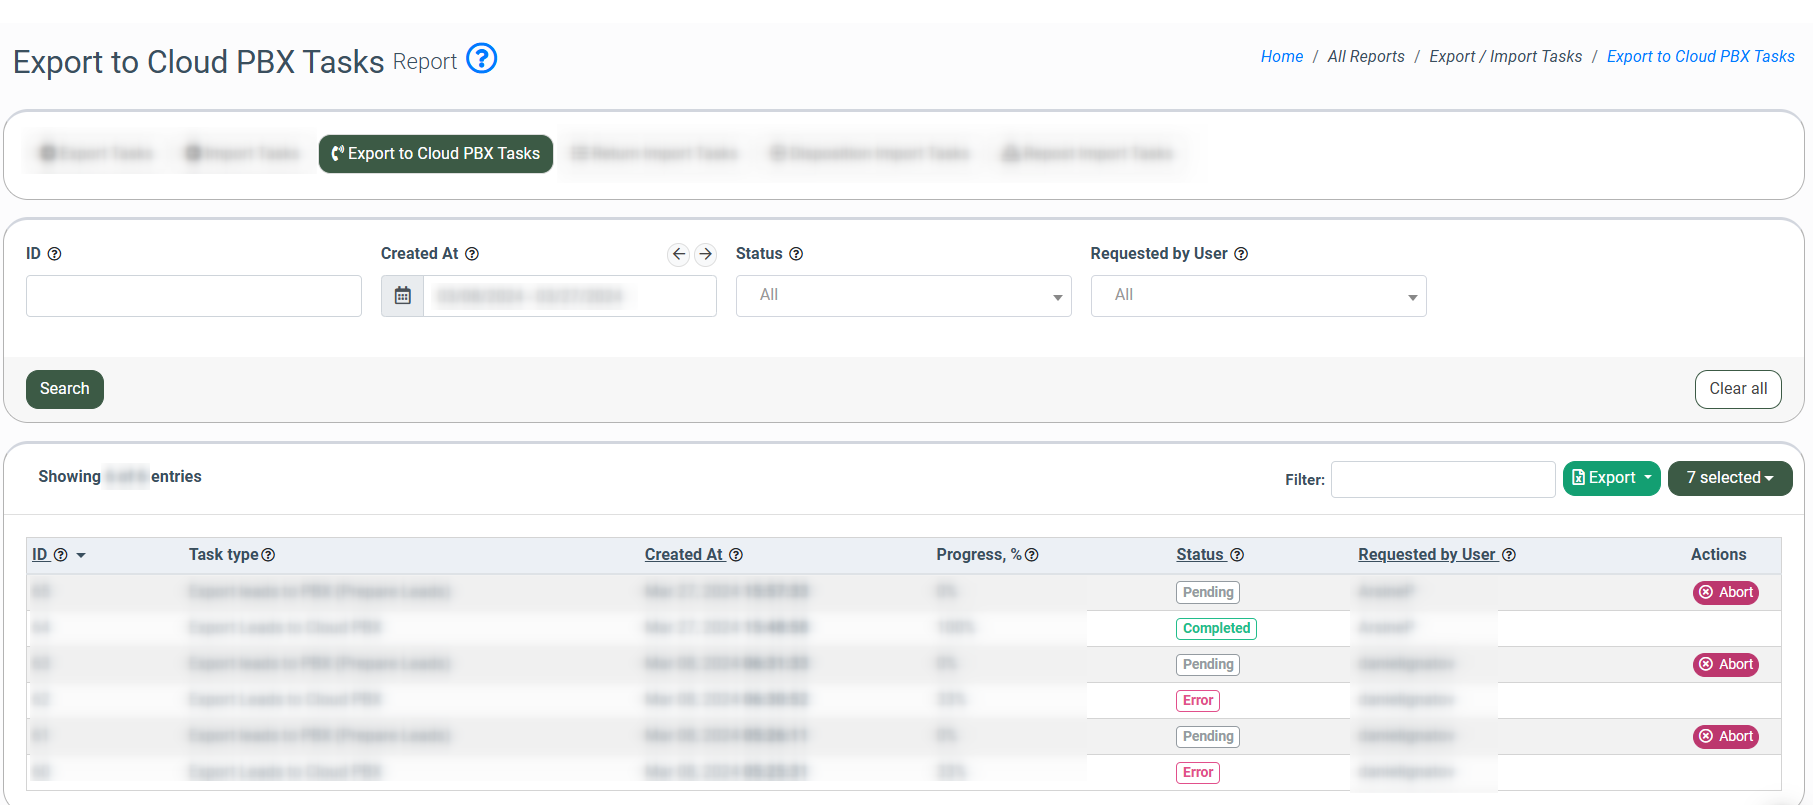
To abort the ongoing active leads' export task, click the “Abort” button in the “Actions” column.

Return Import Tasks
The “Return Import Task” tab allows you to manage returns via CSV file import to handle large volumes of data from customers at the end of the month.
It would help you manage returns from the Buyers who send return lists in spreadsheets when processing this data manually is time-consuming.
Read more about the Lead Return requests in the following Knowledge Base article.
You can narrow down the search results by using the following filters:
- File Name: Enter the name of the file that was imported.
- Creation Time: Select the date range when the return import task was created.
- Product: Select the Product for which the return import was requested.
- Requested By User: Select the system user who requested the return import.
- Buyer: Select the Buyer on behalf of which the return import was requested.
- Status: Select the ongoing status of the return import task (Pending, Importing, Done, Error).
- Has Unresolved Conflicts: Select "Yes" or "No" to include or exclude leads with unresolved conflicts in the search results.. Note: The conflict shows only if, after processing the CSV file, during the search for a lead by Email or Phone Number, several leads were found for the specified date range.
Click the “Search” button to generate the report.
The Return Import Task list contains the following information:
- File Name: The name of the file that was imported.
- Creation Time: The date and time when the return import task was created.
- Requested By User: The name of the system user who requested the return import.
- Product: The name of the Product.
- Buyer: The name of the Buyer.
- Status: The ongoing status of the return import task.
- Imported: The number of imported lead returns.
- Failed: The number of lead returns that failed to import.
- Conflicted: The number of lead returns with conflicts. Note: The conflict shows only if, after processing the CSV file, during the search for a lead by Email or Phone Number, several leads were found for the specified date range.
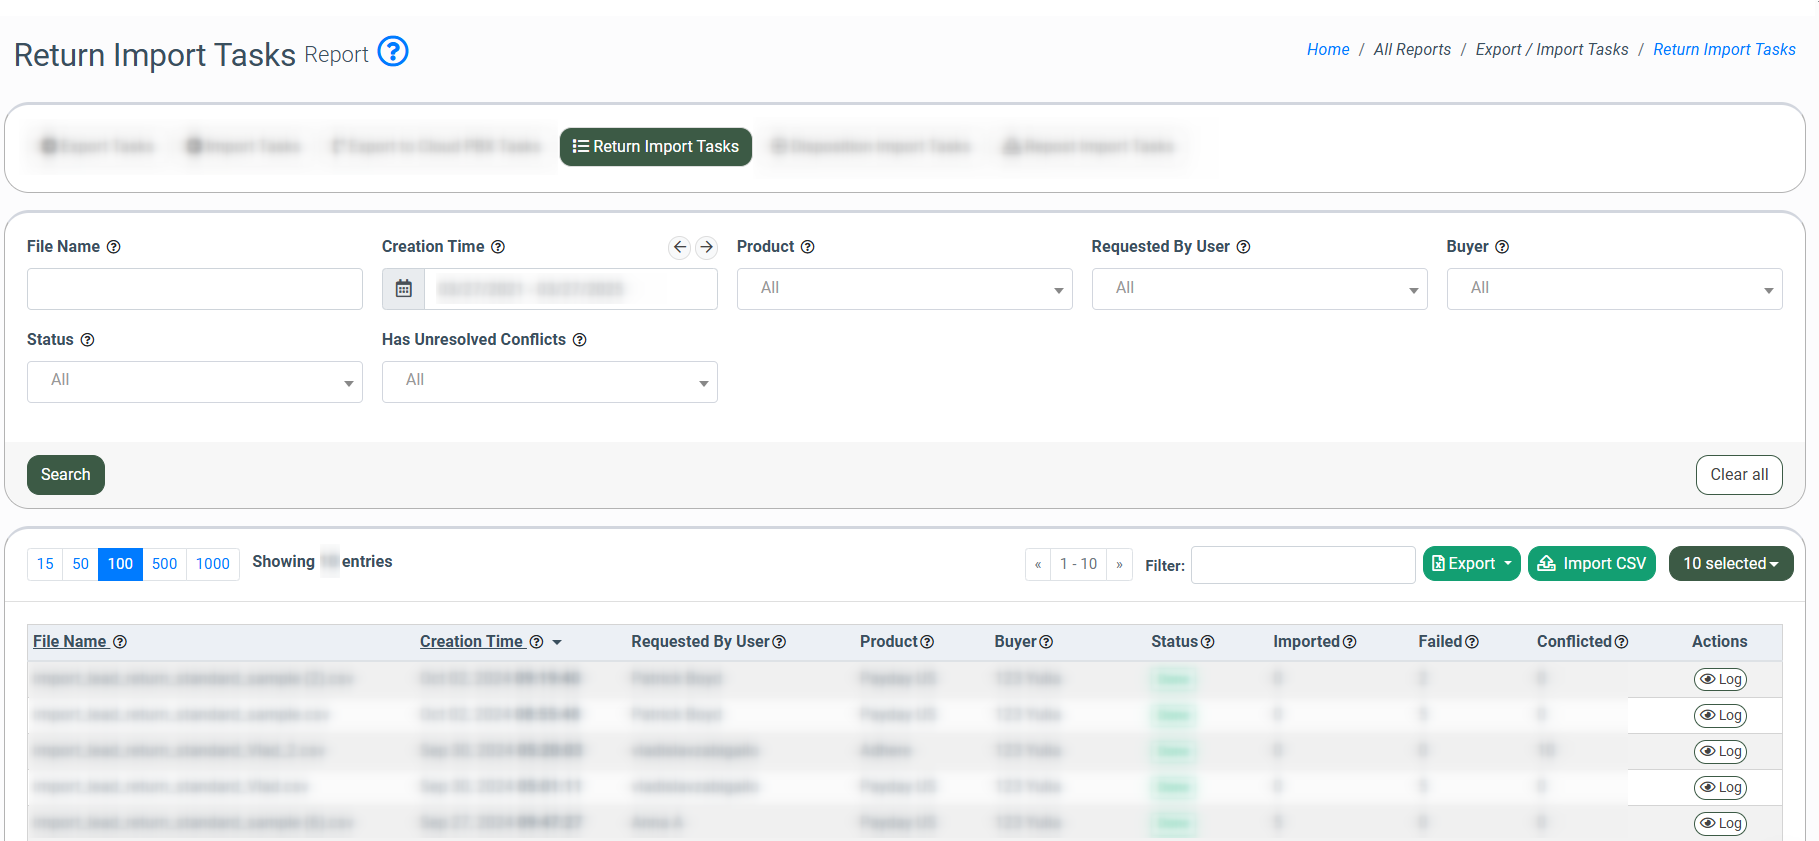
To upload the Lead Return file, click the “Import CSV” button and fill in the required fields in a pop-up window:
- Product: Select the Product.
- Buyer: Select the Buyer.
- Type: Select the import type:
- Standard: This type is based on email or phone number (LMS and Call Logic accordingly)
- Advanced: This type is based on the lead ID.
- Date Range: Select the return date range.
- Publisher Return: Check the box for the system to perform a publisher return for all leads found in the document, in addition to the buyer return.
- CSV File: Select the CSV file to import returns.
Click the “Import” button to proceed.
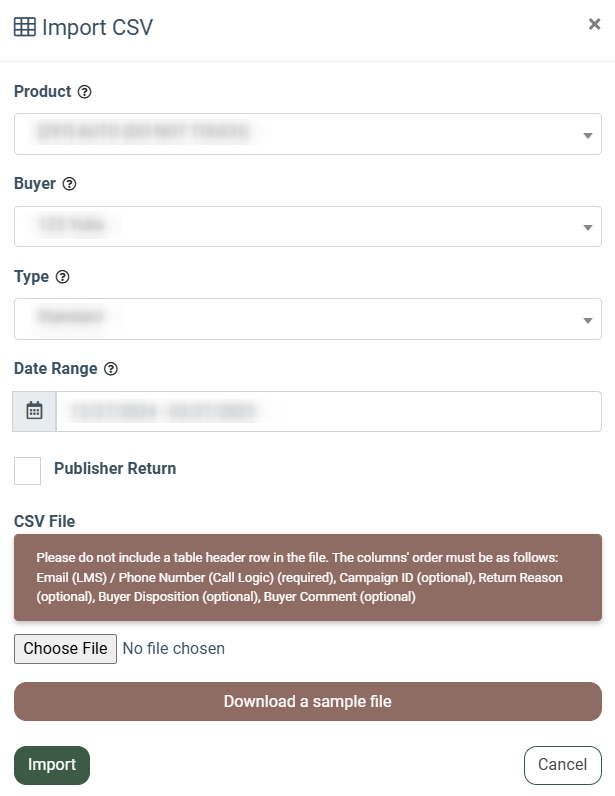
To download a sample file, click the “Import CSV” button and select the Type (Standard or Advanced) in a pop-up window. Click the “Download a sample file” button.
The columns' order for the “Standard” type must be as follows: Email / Phone Number (required fields, depending on the component LMS/Call Logic), Campaign ID (optional), Return Reason (optional), Buyer Disposition (optional), and Buyer Comment (optional). Please do not include a table header row in the file.
The columns' order for the “Advanced” type must be as follows: Lead ID, Campaign ID (optional), Return Reason (optional), Buyer Disposition (optional), and Buyer Comment (optional). Please do not include a table header row in the file.
Note: If the document contains a Campaign ID, the system will perform a Partial Return only for the specified Campaign. The Campaign must belong to the selected Buyer.
To view the result of the import, click the “Log” button in the “Actions” column. The system will open a new page with data separated into 3 tabs: Imported, Failed, and Conflicted.
The conflict shows only if, after processing the CSV file, during the search for a lead by Email or Phone Number, several leads were found for the specified date range. To confirm the return with the conflict, click the “Resolve Conflicts” button in the “Action” column.
On the new page, click the “+” button next to the corresponding email or phone number to display lead IDs found by the system in the selected time range of the import task.

To resolve the conflict, click the “Confirm Return” button next to the corresponding lead ID.

Click the “Confirm” button in the pop-up window to apply the lead return.
After the confirmation, the system will display the checkmark in the “Returned” column, and the “Confirm Return” button will disappear next to the other leads.

Disposition Import Tasks
The “Disposition Import Tasks” tab allows you to import CSV files with the Leads disposition data to the system and review the status of the imported files.
Read more information about the Buyer Disposition feature in the following Knowledge Base article.
You can narrow down the search results by using the following filters:
- ID: Enter the unique identification number of the disposition import task.
- File: Enter the name of the file that was imported.
- Creation Time: Select the date range of the disposition import task creation.
- Requested by User: Select the user that has imported the file with dispositions.
- Buyer: Select the Buyer.
- Campaign: Select the Campaign.
- Status: Select the current status of the disposition import task operation (Aborted, Deleted, Error, Pending, Processing, Success).
Click the “Search” button to generate the list.
The list of disposition import tasks contains the following information:
- ID: The unique identification number of the disposition import task.
- File: The name of the file that was imported.
- Creation Time: The date and time of the disposition import task creation.
- Execution Time: The date and time of the disposition import task completion.
- Requested by User: The name of the user that has requested the disposition import operation.
- Product: The name of the Product.
- Buyer: The name of the Buyer.
- Campaign: The name of the Campaign.
- Time Zone: The time zone that was selected upon import.
- Status: The current status of the import task.

To import the data from the CSV file, click the “Import CSV” button and fill in the information in the following fields of the “Import CSV” pop-up window:
- Product: Select the Product.
- Get Buyer from CSV file: Check the box to import the data to the “Buyer” field from the CSV file. If the checkbox is marked, the “Buyer” field will be inactive for selection.
- Buyer: Select the Buyer.
- Type: Select the “Standard” or “Advanced” option. Note: The “Standard” option allows you to import the CSV file in a format with the following columns' order: Email, Buyer Disposition, Buyer Comment (optional), Date (optional), Campaign Id (optional). The “Advanced” option allows you to import the CSV file in a format with the following columns' order: Lead Id, Buyer Disposition, Buyer Comment (optional), Campaign Id (optional).
- Time Zone: Select the timezone according to which the imported leads were processed. The timezone that is set in the system is selected by default.
- CSV File: Select the file with the data you would like to upload. Please, follow the requirements for the CSV file format:
- It is required to follow the specified column order - Email, Buyer Disposition, Buyer Comment (optional), Date (optional), Campaign Id (optional). If the “Get Buyer from CSV file” checkbox is marked, the column order will be: Buyer, Email (for LMS), Phone Number (for Call Logic), Buyer Disposition, Buyer Comment (optional), Date (optional), Campaign Id (optional)..
- You need to remove the headers from your table; the import data should start from the first row.
- Otherwise, the system will respond with the “Error” status. You can view the error logs in the “Status” tab of the current section.
Click the “Import” button to start the data import into the system.

To check the error logs in case of an unsuccessful import operation, click the “Error Log” button in the “Action” column, and you will be redirected to the “Error Log” section.

The logs records contain the following information:
- Creation Time: The date and time of the log record creation.
- Row Number: The number of the row with the wrong data format.
- Row Content: The fragment of the data with the wrong format.
- Error Message: The type of error.
Repost Import Tasks
The “Repost Import Tasks” tab allows you to view information about the repost import status and manage the tasks related to the import process.
Read more information about the Repost Automation feature in the following Knowledge Base article.
You can narrow down the search results by using the following filters:
- ID: Enter the unique identification number of the queue.
- Queue Name: Enter the queue name.
- Product: Select the Product.
- Date: Select the period during which the queue is created.
Click the “Search” button to generate the list.
The Repost Import Tasks list contains the following information:
- ID: The unique identification number of the queue.
- Author: The name of the system user who launched the import.
- Queue Name: The name of the queue.
- Reject Queue Name: The name of the queue that is used for reposting leads with the “Reject” status from the import.
- Product: The name of the Product.
- File Name: The name of the file that was imported.
- Status: The import’s status.
- Rows Count: The number of rows in the imported CSV file.
- Rows Processed: The number of processed rows from the imported CSV file.
- Rows Failed: The number of rows that failed to be processed from the imported CSV file.
- Created At: The date and time when the import started.
- Executed At: The date and time when the import finished.

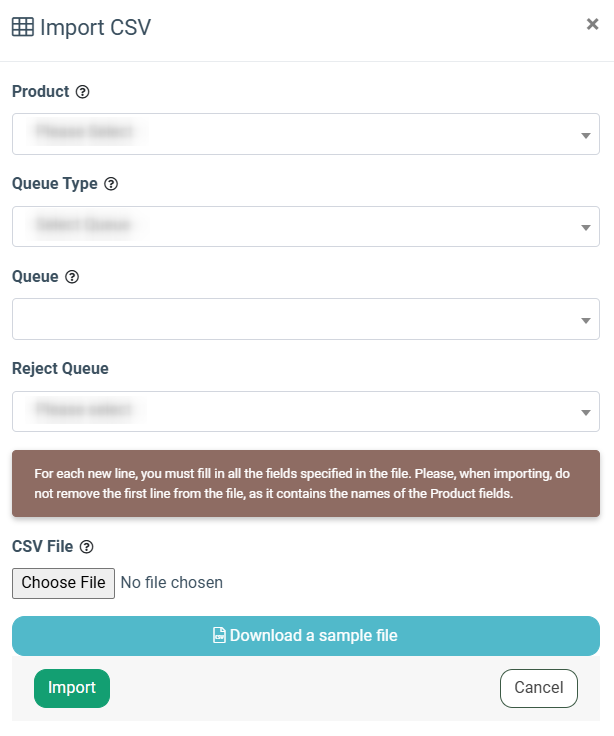
To import leads to the collection from the CSV file, click the “Import CSV” button.
Fill in the following fields in the “Import CSV” pop-up window:
- Product: Select the Product.
- Queue Type: Select the “New Queue” option to create a new queue for this lead or the “Select Queue” to add the lead to an existing queue.
- Queue: Select the queue from the list. Note: Only queues that were created for the lead import (using the “Add New Lead” or “Import CSV” options) are displayed in this list.
- Reject Queue: Select the queue from the list. Use this queue to repost leads from the import with the “Reject” status.
- CSV File: Click the “Choose File” button to select the file for import. You can download a sample file to check the format and use it as an example by clicking the “Download a sample file” button.
Click the “Import” button to complete the process.
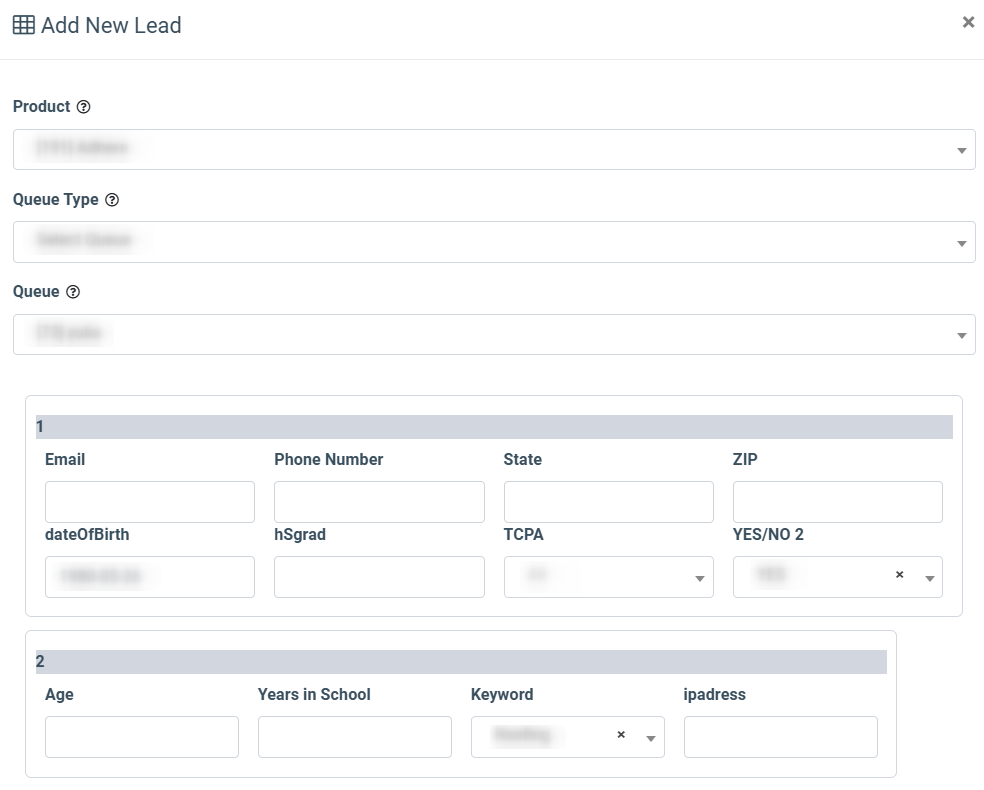
To add a lead to the collection manually, click the “Add New Lead” button.
Fill in the following fields in the “Add New Lead” pop-up window:
- Product: Select the Product.
- Queue Type: Select the “New Queue” option to create a new queue for this lead or the “Select Queue” option to add the lead to an existing queue.
- Queue: Select a queue from the list. Note: Only queues that were created for the lead import (using the “Add New Lead” or “Import CSV” options) are displayed in this list.
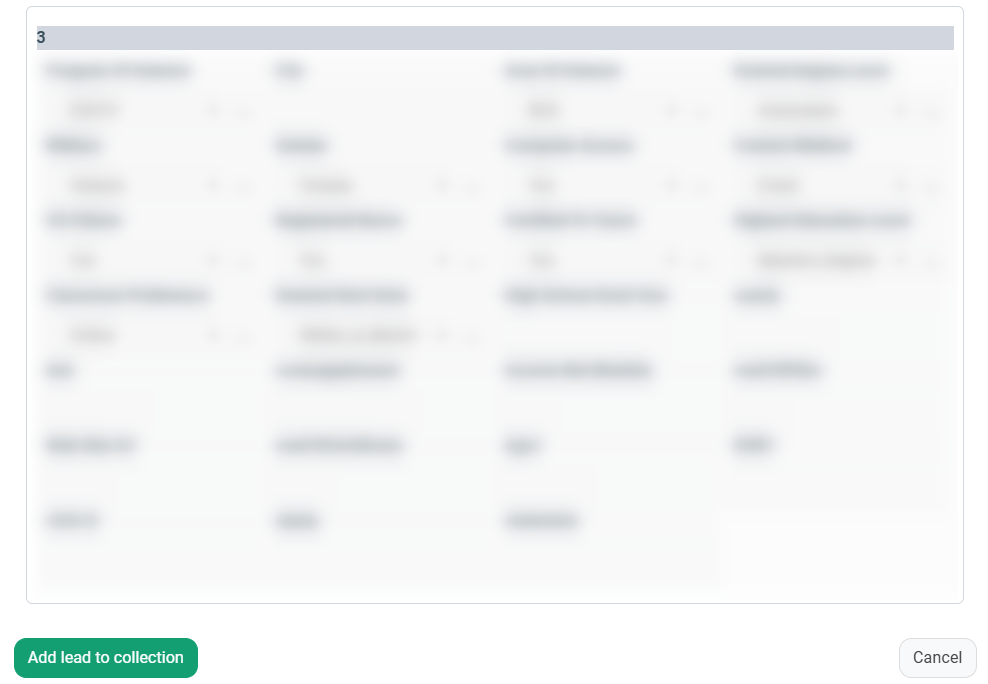
Enter the lead information into the corresponding fields and click the “Add lead to collection” button to complete the process.
To cancel the import process, click the “Stop” button in the “Actions” column. Click the “Yes, stop it” button to confirm your intention in the pop-up window.

How to Export the Data from the Report Sections
To export the section`s data, click the “Export” button and select the “Current Page to SCV” or “All Pages to CSV” type from the drop-down list. To create a scheduled export request, select the required tab of the report, click the “Export” button, and select the “Scheduled Export” option.

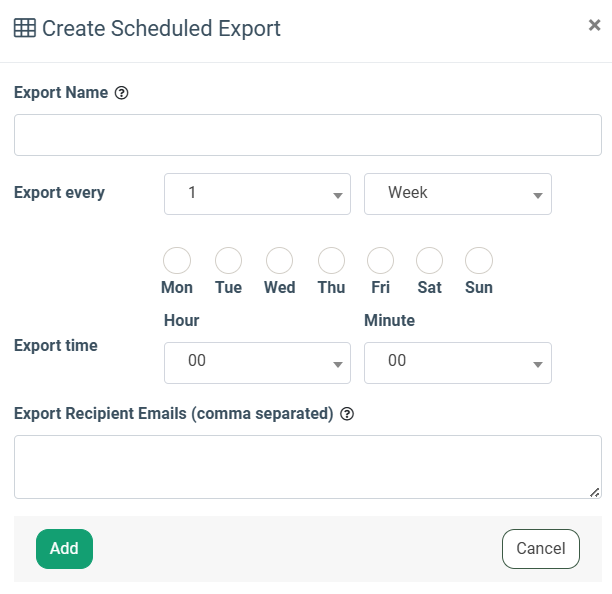
Fill in the following fields in the “Create Scheduled Export” pop-up window:
- Export name: Enter the name for the export.
- Export every: Select the preferred frequency for report exports.
- Export time: Select the preferred time to start the report exports.
- Export Recipient Emails (comma separated): Enter recipient emails separated by a comma.
Click the “Add” button to complete the action or click the “Cancel” button to close the window.