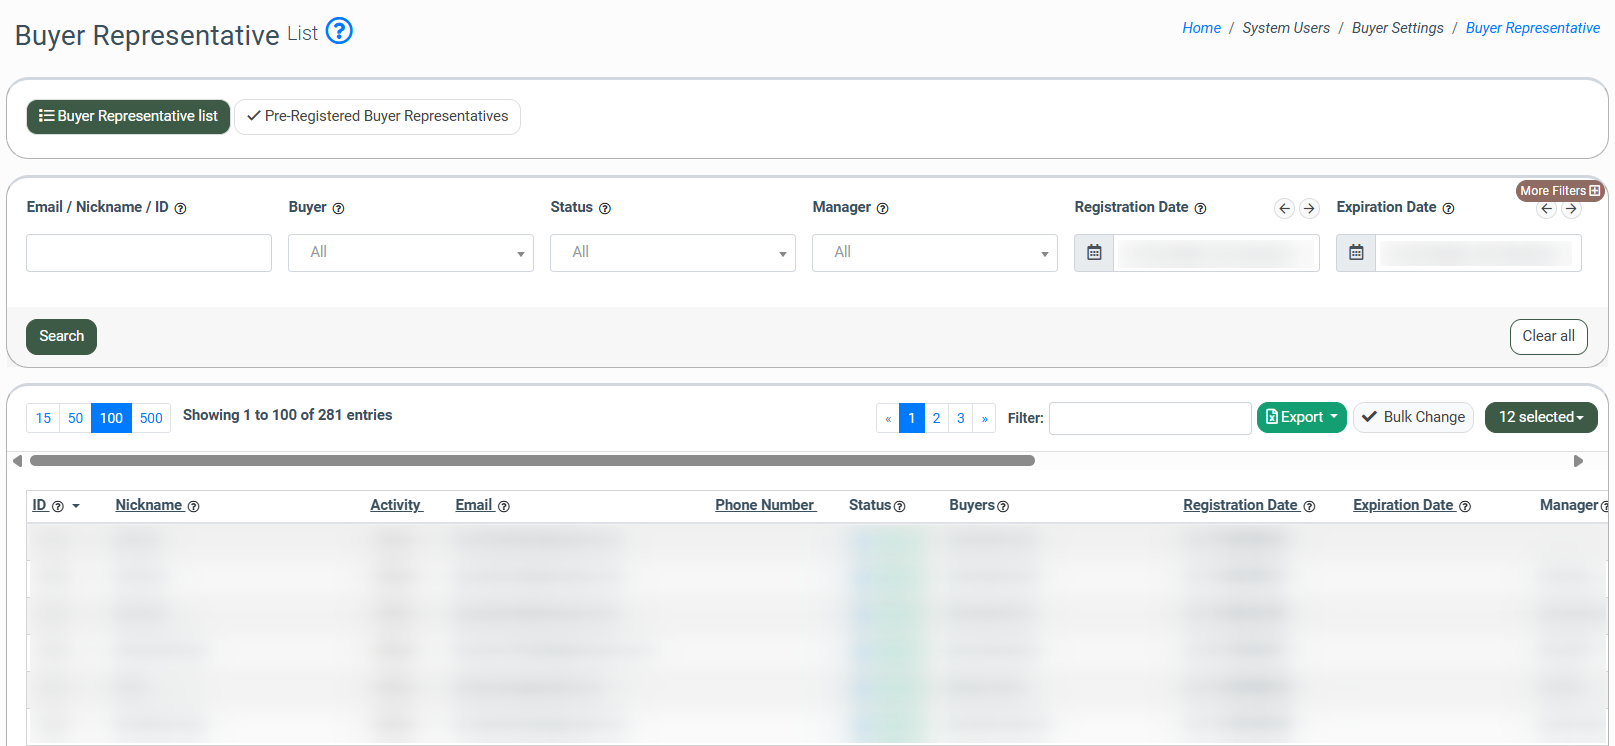
To view the list, go to the Client Management > Setup > Buyer Representative section. The section contains two tabs:
Note: The Buyer Agent Senior can view and manage all the Buyer Representatives.
The Buyer Agent can view and manage only the Buyer Representatives that were assigned to him.
Note: The Buyer Agent Senior and the Buyer Agent can view and manage all the Pre-Registered Buyer Representatives.
Buyer Representative list
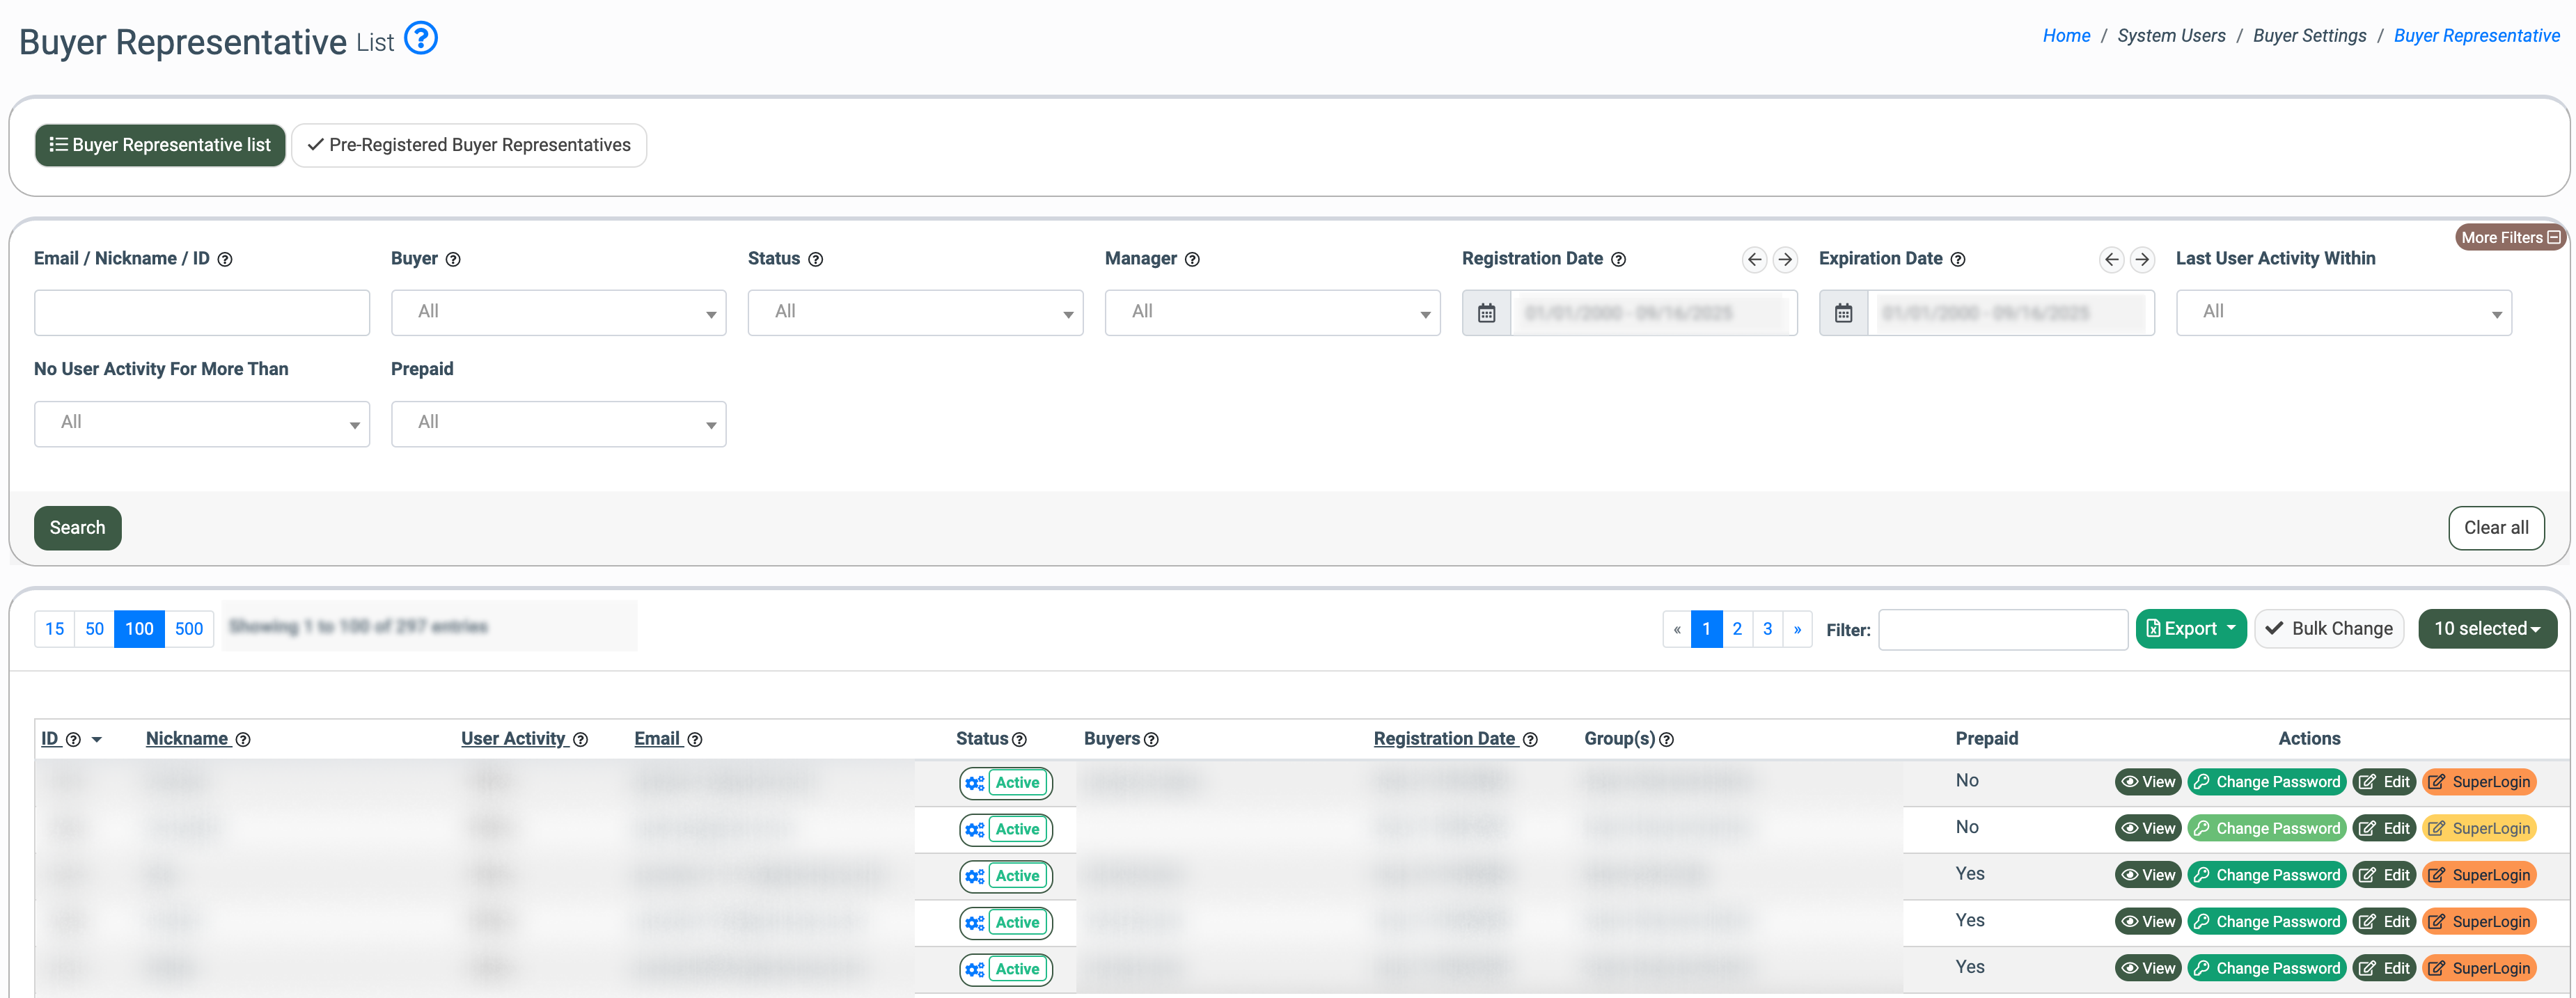
The Buyer Representative tab allows you to view and manage the list of all Buyer Representatives registered in the system. The list contains the following information:
- ID: The unique identification number of the Buyer Representative.
- Nickname: The nickname of the Buyer Representative.
- User Activity: The activity status of the Buyer Representative:
- Online: The last activity was less than 10 minutes ago.
- Recently Online: The last activity was less than 30 minutes ago.
- Away: The last activity was less than 1 hour ago.
- Offline: The last activity was more than 1 hour ago.
- First Name: The first name of the Buyer Representative.
- Last Name: The last name of the Buyer Representative.
- Email: The email address of the Buyer Representative.
- Phone: The phone number of the Buyer Representative.
- Status: The status of the Buyer Representative (Active, Deleted, Disabled).
- Buyers: The name of the assigned Buyer.
- Registration Date: The date and time when the Buyer Representative was registered.
- Expiration Date: The date and time when the Buyer Representative’s access expires.
- Manager: The name of the assigned Manager.
- Group(s): The assigned system role(s).
- Prepaid: The indication whether the Buyer has a prepaid model.
You can narrow down the search results by using the following filters:
- Email / Nickname / ID: Enter the Email address, Nickname, or ID of the Buyer Representative.
- Buyer: Enter the name of the assigned Buyer.
- Status: Select the status of the Buyer Representative user (Active, Deleted, Disabled, Pending).
- Manager: Select the assigned Manager.
- Registration Date: Select the date of the Buyer Representative’s registration.
- Expiration Date: Select the date when the Buyer Representative’s access expires.
- Last User Activity Within: Select the range for the Buyer Representative’s last activity (Week / Two Weeks / Month / Three Months / Six Months / Year).
- No User Activity For More Than: Select the range for the Buyer Representative’s inactivity (Week / Two Weeks / Month / Three Months / Six Months / Year).
- Prepaid: Select whether the Buyer has a prepaid model.
How to Edit Buyer Representative User
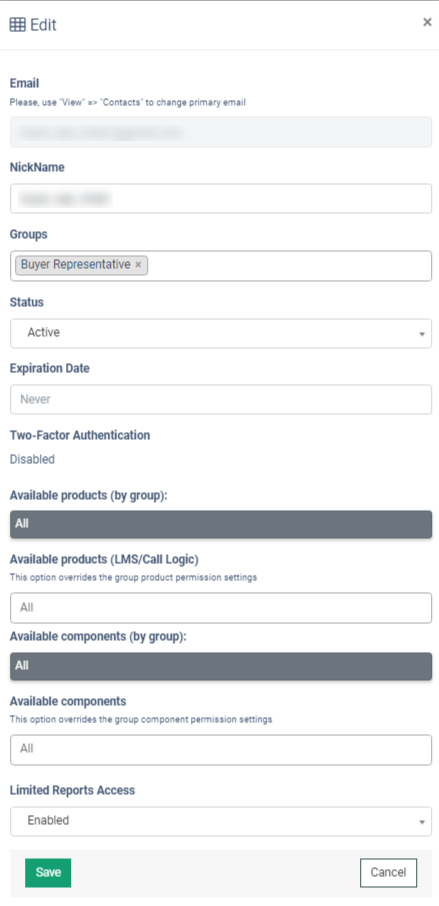
To edit the Buyer Representative information, click the "Edit" button in the "Action" column and fill in the following fields in the “Edit” pop-up window:
- Email: Please, use "View" => "Contacts" to change the primary email.
- NickName: Enter the nickname of the Buyer Representative.
- Groups: Select the group to assign the system role to the Buyer Representative.
- Status: Select the status of the Buyer Representative user (Active, Deleted, Disabled, Pending).
- Expiration Date: Select the date when the Buyer Representative’s access expires.
- Two-Factor Authentication: Shows the information about two Two-Factor Authentication (Enable / Disable).
- Available products (by group): Shows the information about the products accessed on the group level.
- Available products (LMS/Call Logic): Select the available product for the Buyer Representative.
- Available components (by group): Shows the information about the components accessed on the group level.
- Available components: Select the available components for the Buyer Representative.
Note: This option overrides the group product permission settings.
- Limited Reports Access: Click to enable/disable limited report access.
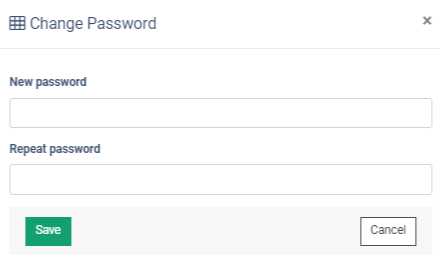
How to Change the Password for Buyer Representative
To change the password for the Buyer Representative, click the "Change Password" button in the "Action" column and fill in the following fields in the “Change Password” pop-up window:
- New password: Enter the new password.
- Repeat password: Repeat the new password.
 To log in under the selected Buyer Representative user, click the “Superlogin” button opposite the selected user.
Buyer Representative Setup Page
To view the additional information about the Buyer Representative, including general data, contact details, existing tickets, login history, and user logs, click the "View" button in the "Action" column. The system will redirect you to the Buyer Representative information section. This section contains the following tabs:
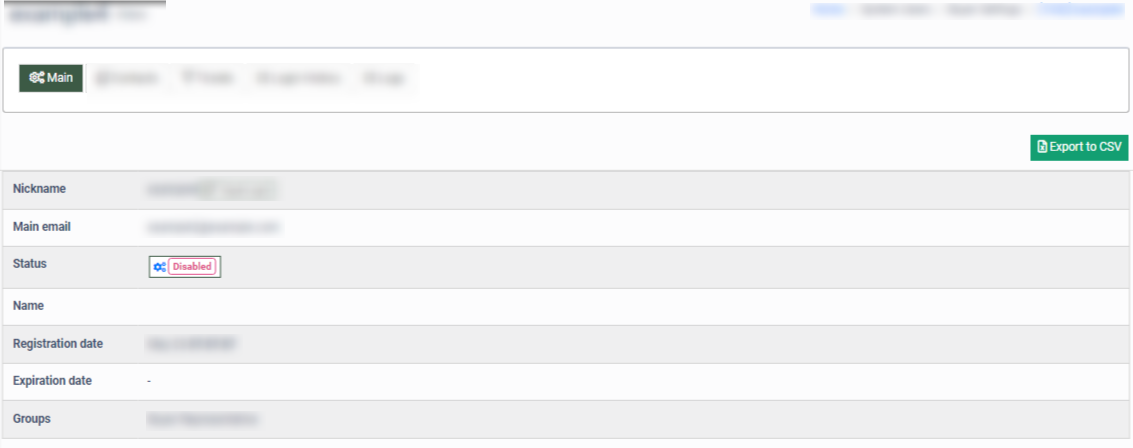
Main
The “Main” tab allows you to view the general information about the Buyer Representative and contains the following information:
- Nickname: The nickname of the Buyer Representative.
- Main email: The primary email of the Buyer Representative.
- Status: The Buyer Representative status (Active, Deleted, Disabled). To change the user`s status, click the button with the “Gear” icon. In the “Change Status” pop-up window, select the status in the “Status” field and leave a comment. To complete, click the “Save” button.
Note: If you select the “Deleted” status for the Buyer Representative, it will be deleted from the system.
- Name: The name of the Buyer Representative.
- Registration Date: The date and time when the Buyer Representative’s was registered.
- Expiration Date: The date and time when the Buyer Representative’s access expires.
- Groups: The assigned system role(s).
Click the “Export to CSV” button to export all data to the “CSV” file.
Contacts
The “Contacts” tab allows you to view, add, and remove the contact details of the Buyer Representative. It contains the following information:
- Type: The type of contact (Email, Cell Phone, Landline, Physical Address, Microsoft Teams, Web Site).
- Status: The status of the Buyer Representative (Active, Deleted, Disabled).
- Value: The contact details.
- Verify: The contact status (Primary, Verified, Not Verified).

To add a new contact for the Buyer Representative, click the “Add New Record” button and fill in the following fields in the “Add New” pop-up window:
- Type: Select the type of contact information (Email, Cell Phone, Landline, Physical Address, Microsoft Teams, Web Site).
- Value: Fill in the contact details.
Note: The name of the field depends on the selected contact type.
Click the “Add” button to confirm.

To set the contact as a primary, click the “Set Primary” button.
To confirm, click the “Set Primary” button in the pop-up window.
To remove a contact, click the “Delete” button in the “Actions” column.
Note: Not available for primary contacts.
Confirm the action in the pop-up window.
Tickets
The “Tickets” tab allows you to view the list of tickets created by the Buyer Representative in the system and contains the following information:
- ID: The unique identification number of the ticket.
- Status: The processing status of the ticket.
- Updated: The date and time of the last changes.
- Subject: The subject of the ticket.
- User: The name of the user.
- Group: The ticket category.
- Messages: The number of messages in a thread.
You can narrow down the search results by using the following filters:
- Ticket ID: Enter the unique identification number of the ticket.
- Ticket Status: Select the current status of the ticket.
- Group: Select the category of the ticket.
- Manager: Select the name of the assigned manager.
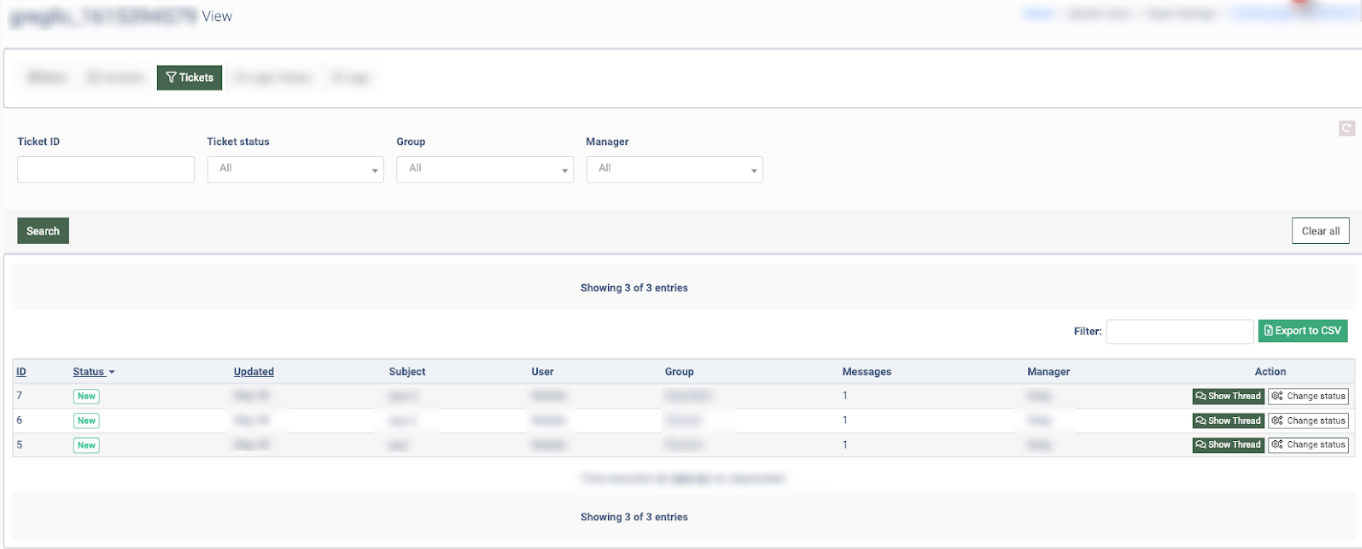
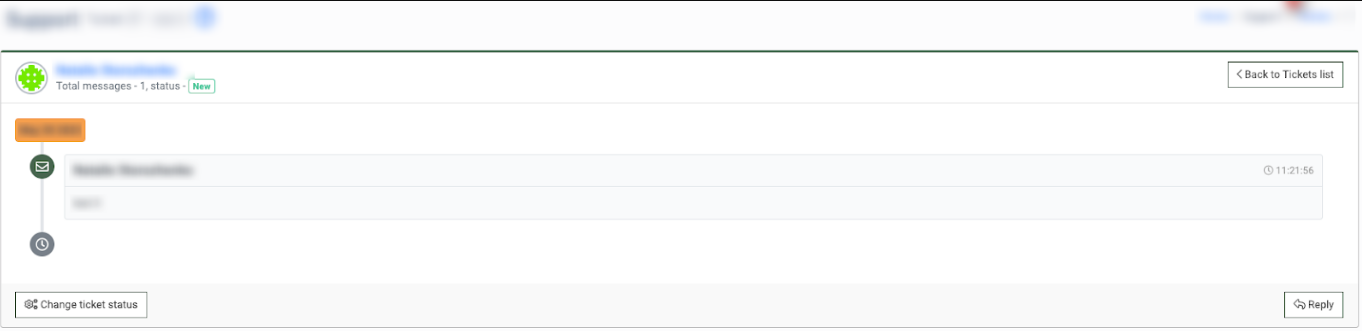
To view the ticket messaging history, click the “Show Thread” button.
To edit the ticket’s status, category, or reassign it to another manager, click the “Change Status” button.
Note: Read more about the Tickets in the Knowledge Base article.
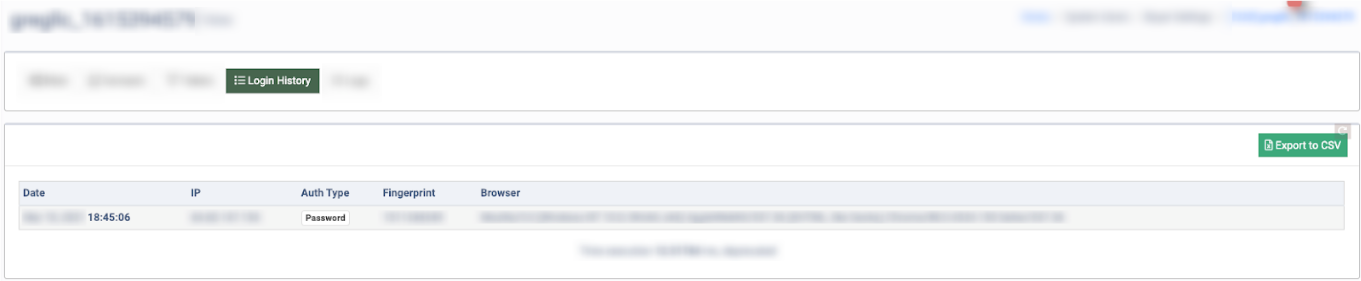
Login History
The “Login History” tab allows you to view the Buyer Representative login history and contains the following information:
- Date: The date and time of the user login.
- IP: The IP address of the user.
- Auth Type: The authorization type.
- Fingerprint: The unique browser fingerprint.
- Browser: The name and type of the browser.
Logs
The “Logs” tab redirects you to the “User Manipulation Log” report with preset search parameters. The “User Manipulation Log” section allows you to view detailed information about all actions applied to the system by the Buyer Representative.
Read more about the User Manipulation Log report in this Knowledge Base article.
Pre-Registered Buyer Representatives
The Pre-Registered Buyer Representatives tab allows you to view, approve and reactivate buyer representatives who are pre-registered in the system. The list contains the following information:
- ID: The unique identification number of the Pre-Registered Buyer Representative.
- Company: The name of the Pre-Registered Buyer Representative company.
- Cell Phone: The phone number of the Pre-Registered Buyer Representative.
- Nickname: The nickname of the Pre-Registered Buyer Representative.
- First Name: The First Name of the Pre-Registered Buyer Representative.
- Last Name: The Last Name of the Pre-Registered Buyer Representative.
- Email: The email address of the Pre-Registered Buyer Representative.
- Skype: The Skype login of the Pre-Registered Buyer Representative.
- Buyer Agent: The name of the assigned Buyer Agent.
- Registration Date: The date and time when the Pre-Registered Buyer Representative’s was registered.
You can narrow down the search results by using the following filters:
- Email / Nickname / ID: Enter the Email, Nickname, or ID of the Pre-Registered Buyer Representative.
- Status: Select the status of the Pre-Registered Buyer Representative user (Active, Deleted, Disabled).
- Registration Date: Select the date when the Pre-Registered Buyer Representative’s was registered.
- Buyer Agent: Select the name of the assigned Buyer Agent.
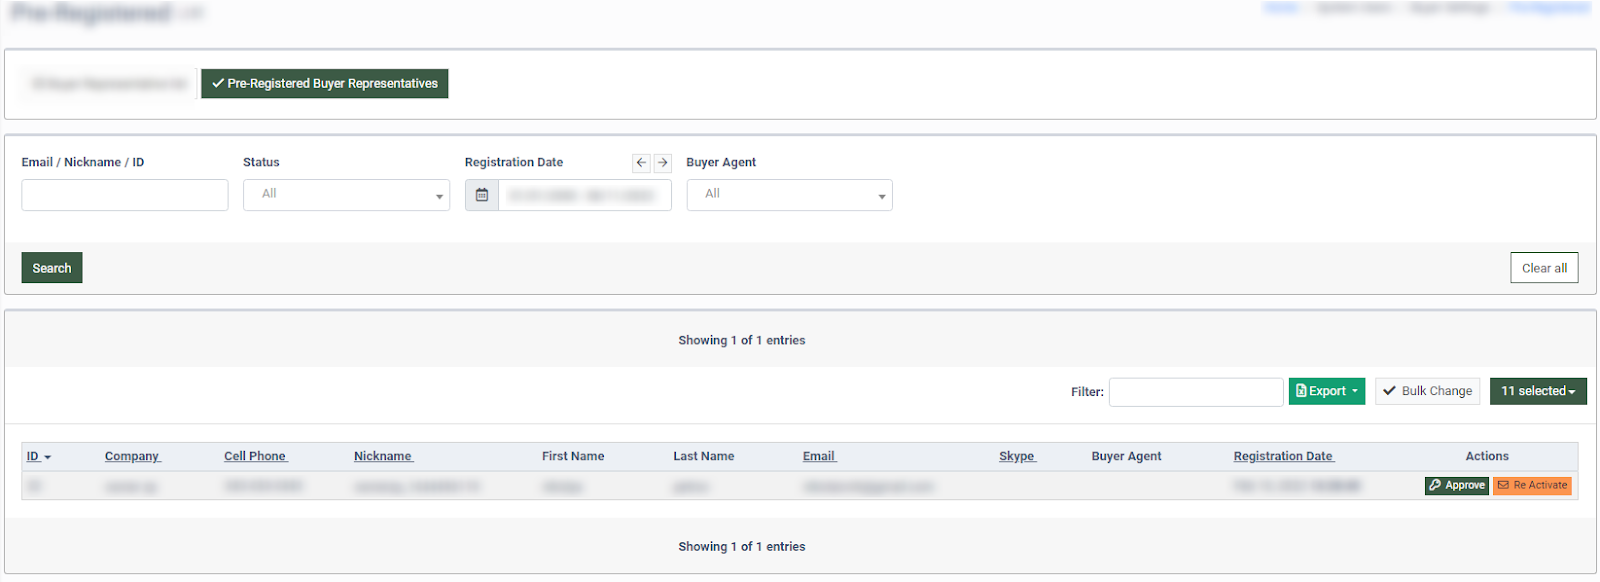
To approve the Pre-Registered Buyer Representative, click the "Approve" button in the "Action" column and click the “Approve and Create User” button in the “Approve” pop-up window.

To approve the registration for the Pre-Registered Buyer Representative, click the "Re Activate" button in the "Action" column and click the “Send e-mail” button in the “Re Activate” pop-up window.
