In addition to campaigns, it can be used for managing inbound calls through queues, IVR, voicemails, and other functionalities, where assigning a phone number requires selecting a Call Group to ensure call handling is performed based on its settings. While you can create multiple call groups, only one can be associated with a campaign at a time, but a single call group can be used by multiple campaigns simultaneously.
The Call Groups section allows you to view, create, manage, and delete call groups. To view the list of the available call groups, go to the PBX Management > Setup > Call Groups section.
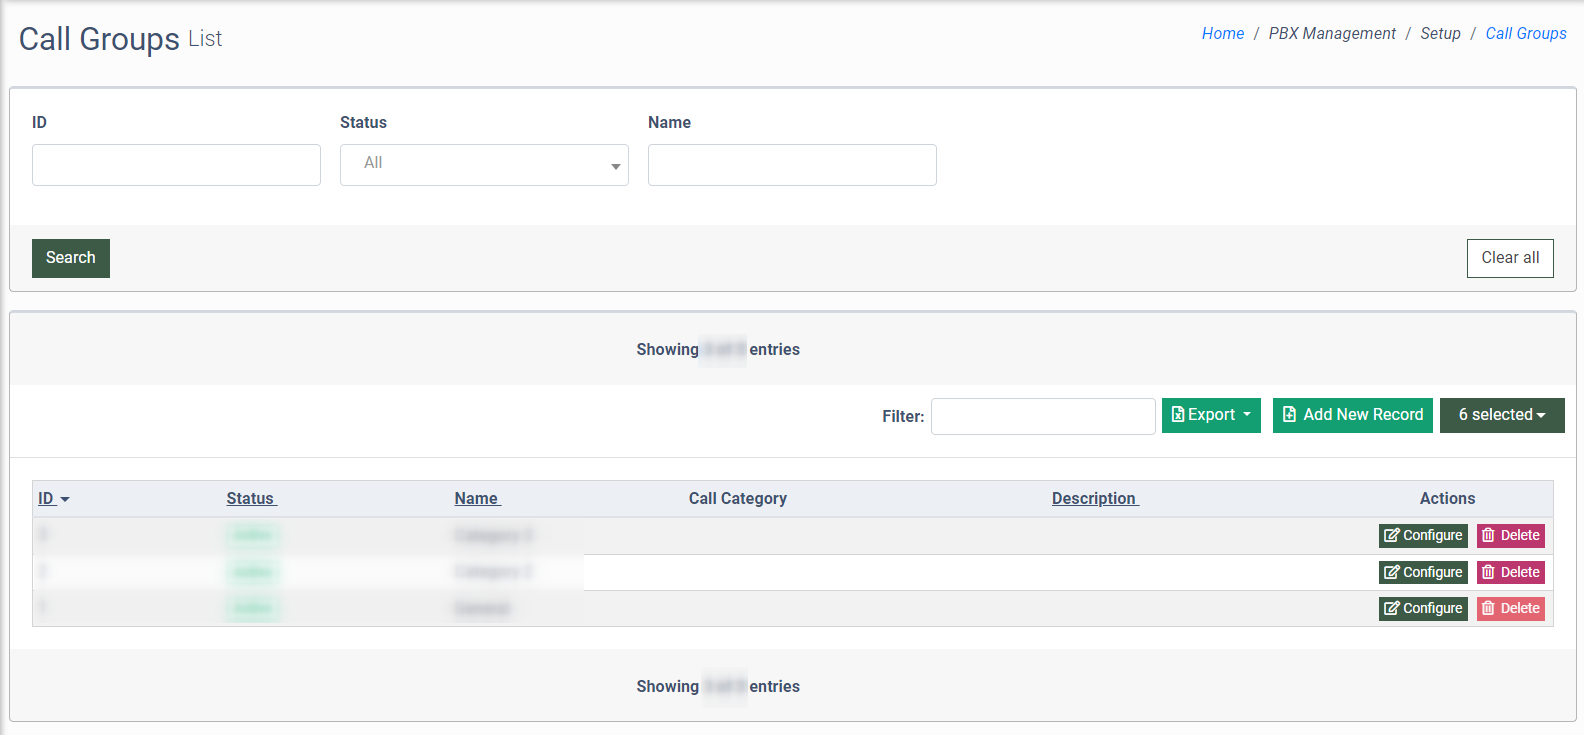
You can narrow down the search results by using the following filters:
- ID: Enter the unique identification number of the Call Group.
- Status: Select the current status of the Call Group (Active, Disabled, Deleted).
- Name: Enter the name of the Call Group.
The list of available Call Groups contains the following information:
- ID: The unique identification number of the Call Group.
- Status: The current status of the Call Group.
- Name: The name of the Call Group.
- Call Category: The classification of calls based on their purpose, such as Telemarketing Calls, QC (Quality Control) Calls, or Technical Support.
- Description: A brief description of the Call Group.
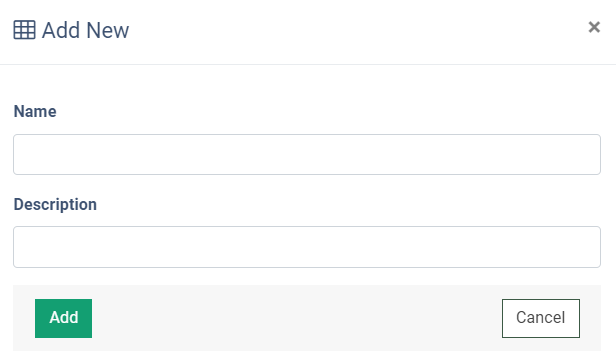
To create a new call group, click the “Add New Record” button and fill in the following fields in the “Add New” pop-up window:
- Name: Enter the name of the Call Group.
- Description: Enter the brief description of the Call Group.
Click the “Add” button to complete the action.
To set and configure the existing Call Group, click the “Configure” button in the “Actions” column.
Read more about the Call Group configuration in the following Knowledge Base article.
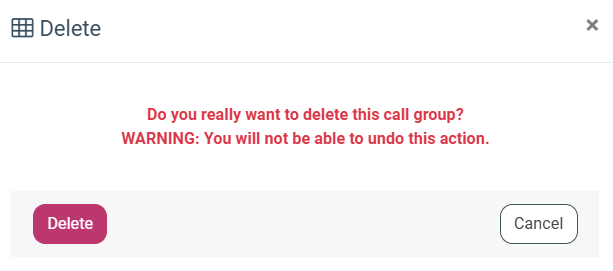
To remove the Call Group from the list, click the “Delete” button in the “Actions” column. Confirm the deletion operation by clicking the “Delete” button in the “Delete” pop-up window.