To open the “Contact List Builder,” go to the List Management > Contact List Builder section.
-1.png?hsLang=en)
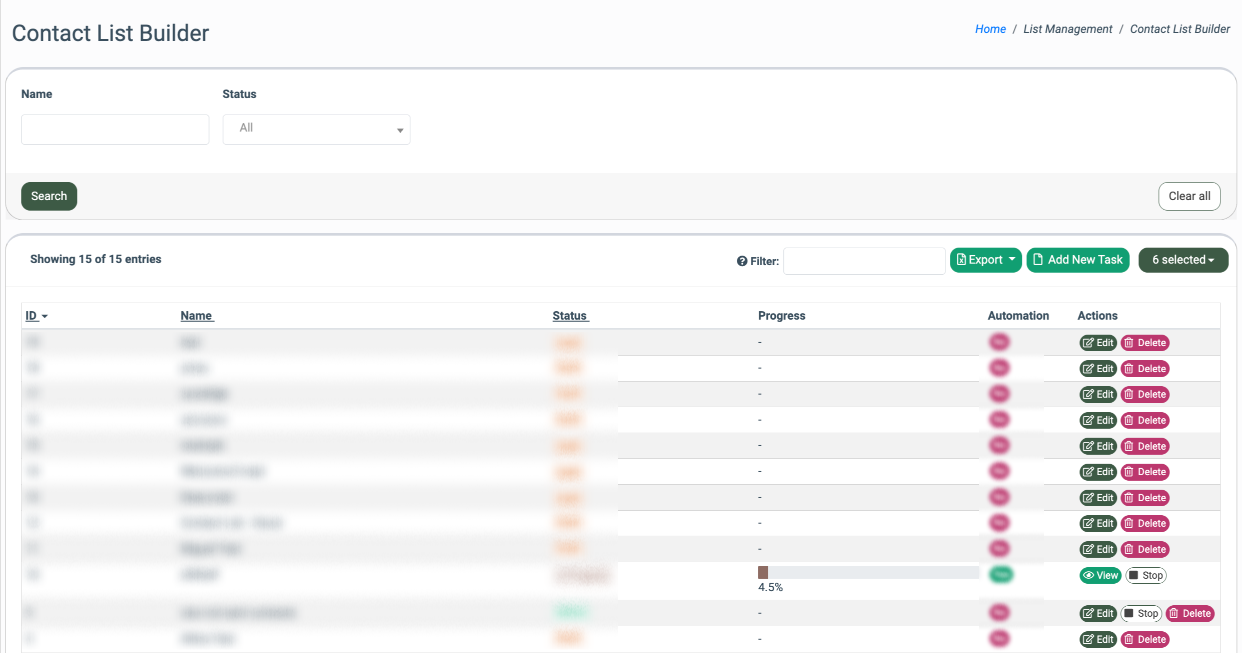
The blocks with the graph contain the following information:
-
ID: The unique identification number of the contact list.
-
Name: The name of the contact list.
-
Status: The status of the contact list (Draft, Active, In Progress, Deleted).
- Progress: The progress of the contact list.
- Automation: The list’s automation status (Yes / No). Note: If this setting is enabled, the system will automatically run this script every 2 minutes and add applicable contacts to the target list.
You can narrow down the search results by using the following filters:
-
Name: Enter the name of the contact list.
-
Status: Select the status of the contact list (Draft, Active, In Progress, Deleted).
To add a new contact segmentation task to the list, click the “Add New Task” button, fill in the “Name” field, and click the “Add” button to confirm.
-1.png?width=670&height=264&name=unnamed%20(2)-1.png)
Click the “Edit” button in the “Action” column to open the Segment Editor module.
Note: You can read more about How To Segment Contacts in this Knowledge Base article.
To start the process of segmentation, click the “Start” button in the “Actions” column, and confirm your intention in the pop-up window.
-1.png?width=670&height=273&name=unnamed%20(3)-1.png)
Once you refresh the page, the system will display a progress bar in the “Progress” column.
To stop the process of segmentation, click the “Stop” button in the “Actions” column, and confirm your intention in the pop-up window.
-1.png?width=670&height=275&name=unnamed%20(4)-1.png)
Click the “Delete” button in the “Action” column to remove the segment from the system. Click the “Delete” button to confirm.
-1.png?width=670&height=294&name=unnamed%20(5)-1.png)