1. First, you need to create an Affiliate group. To do so, go to the Affiliates > Groups section and click the “New” button.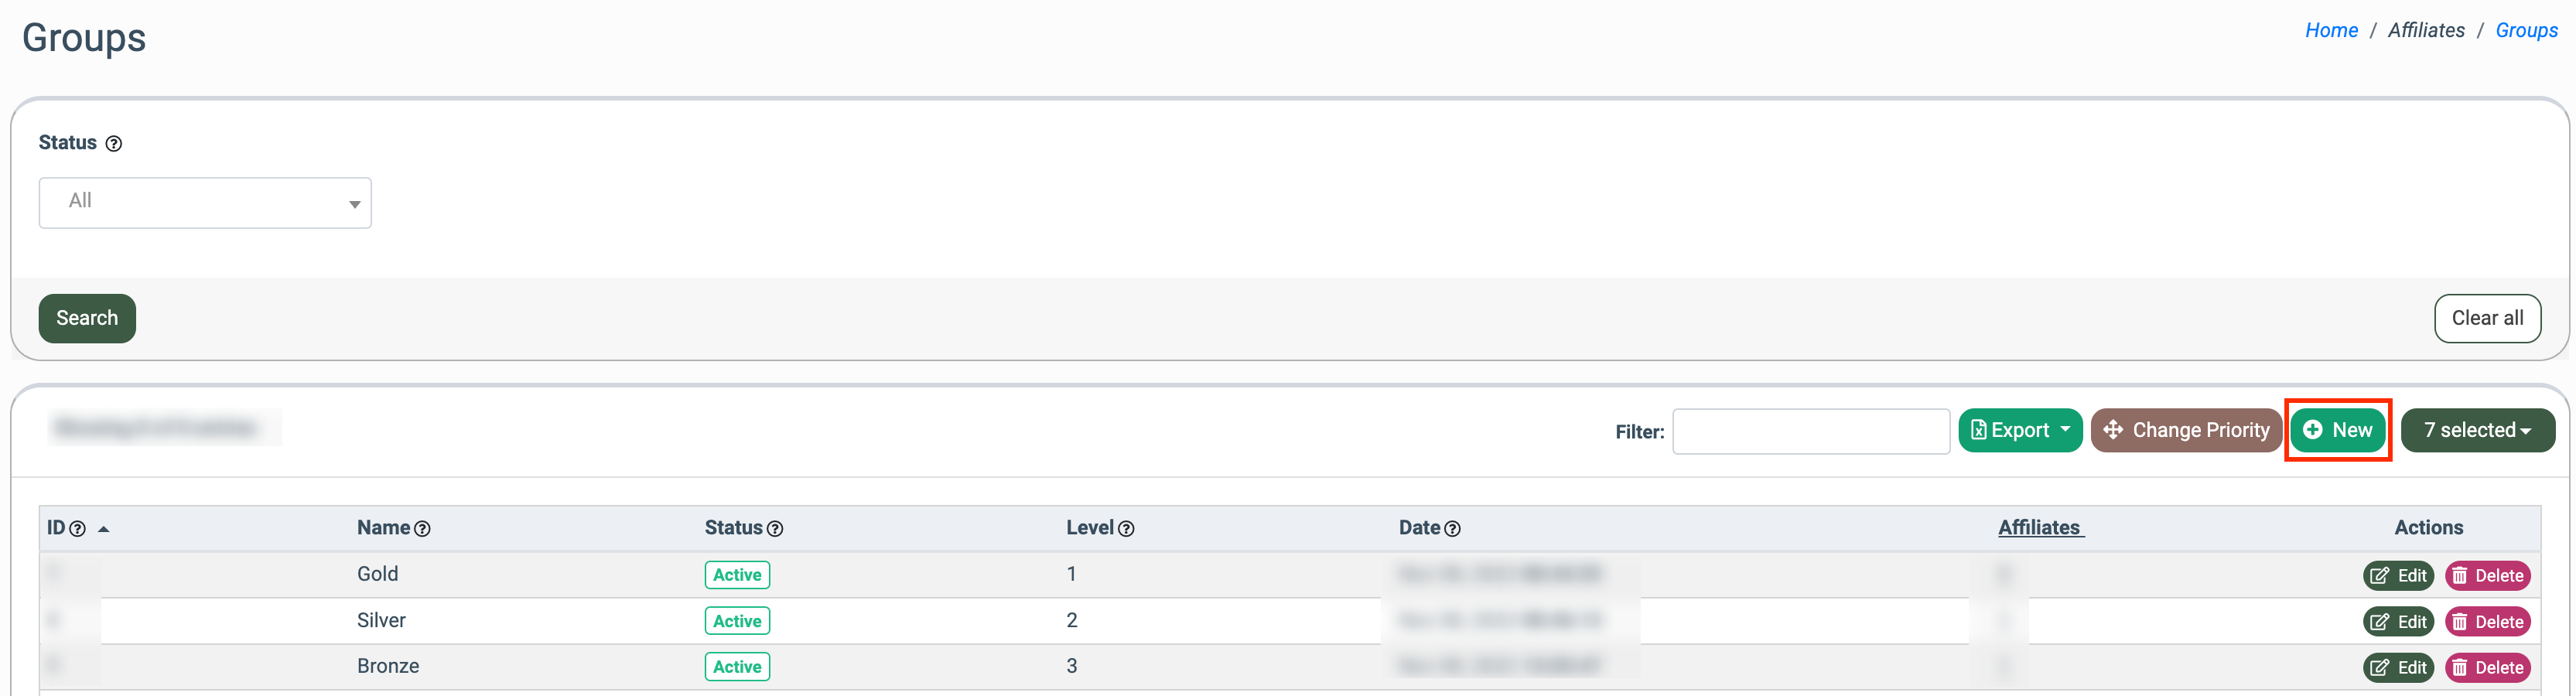
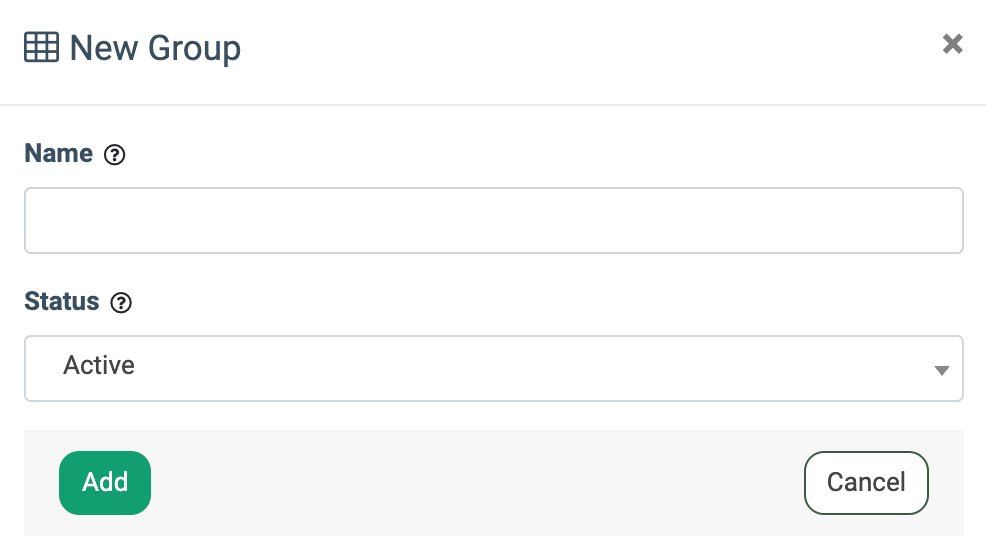
In the pop-up window, fill in the following fields:
- Name: Enter the name of the group.
- Status: Select the group’s status (Active / Inactive)
Click the “Add” button to confirm.

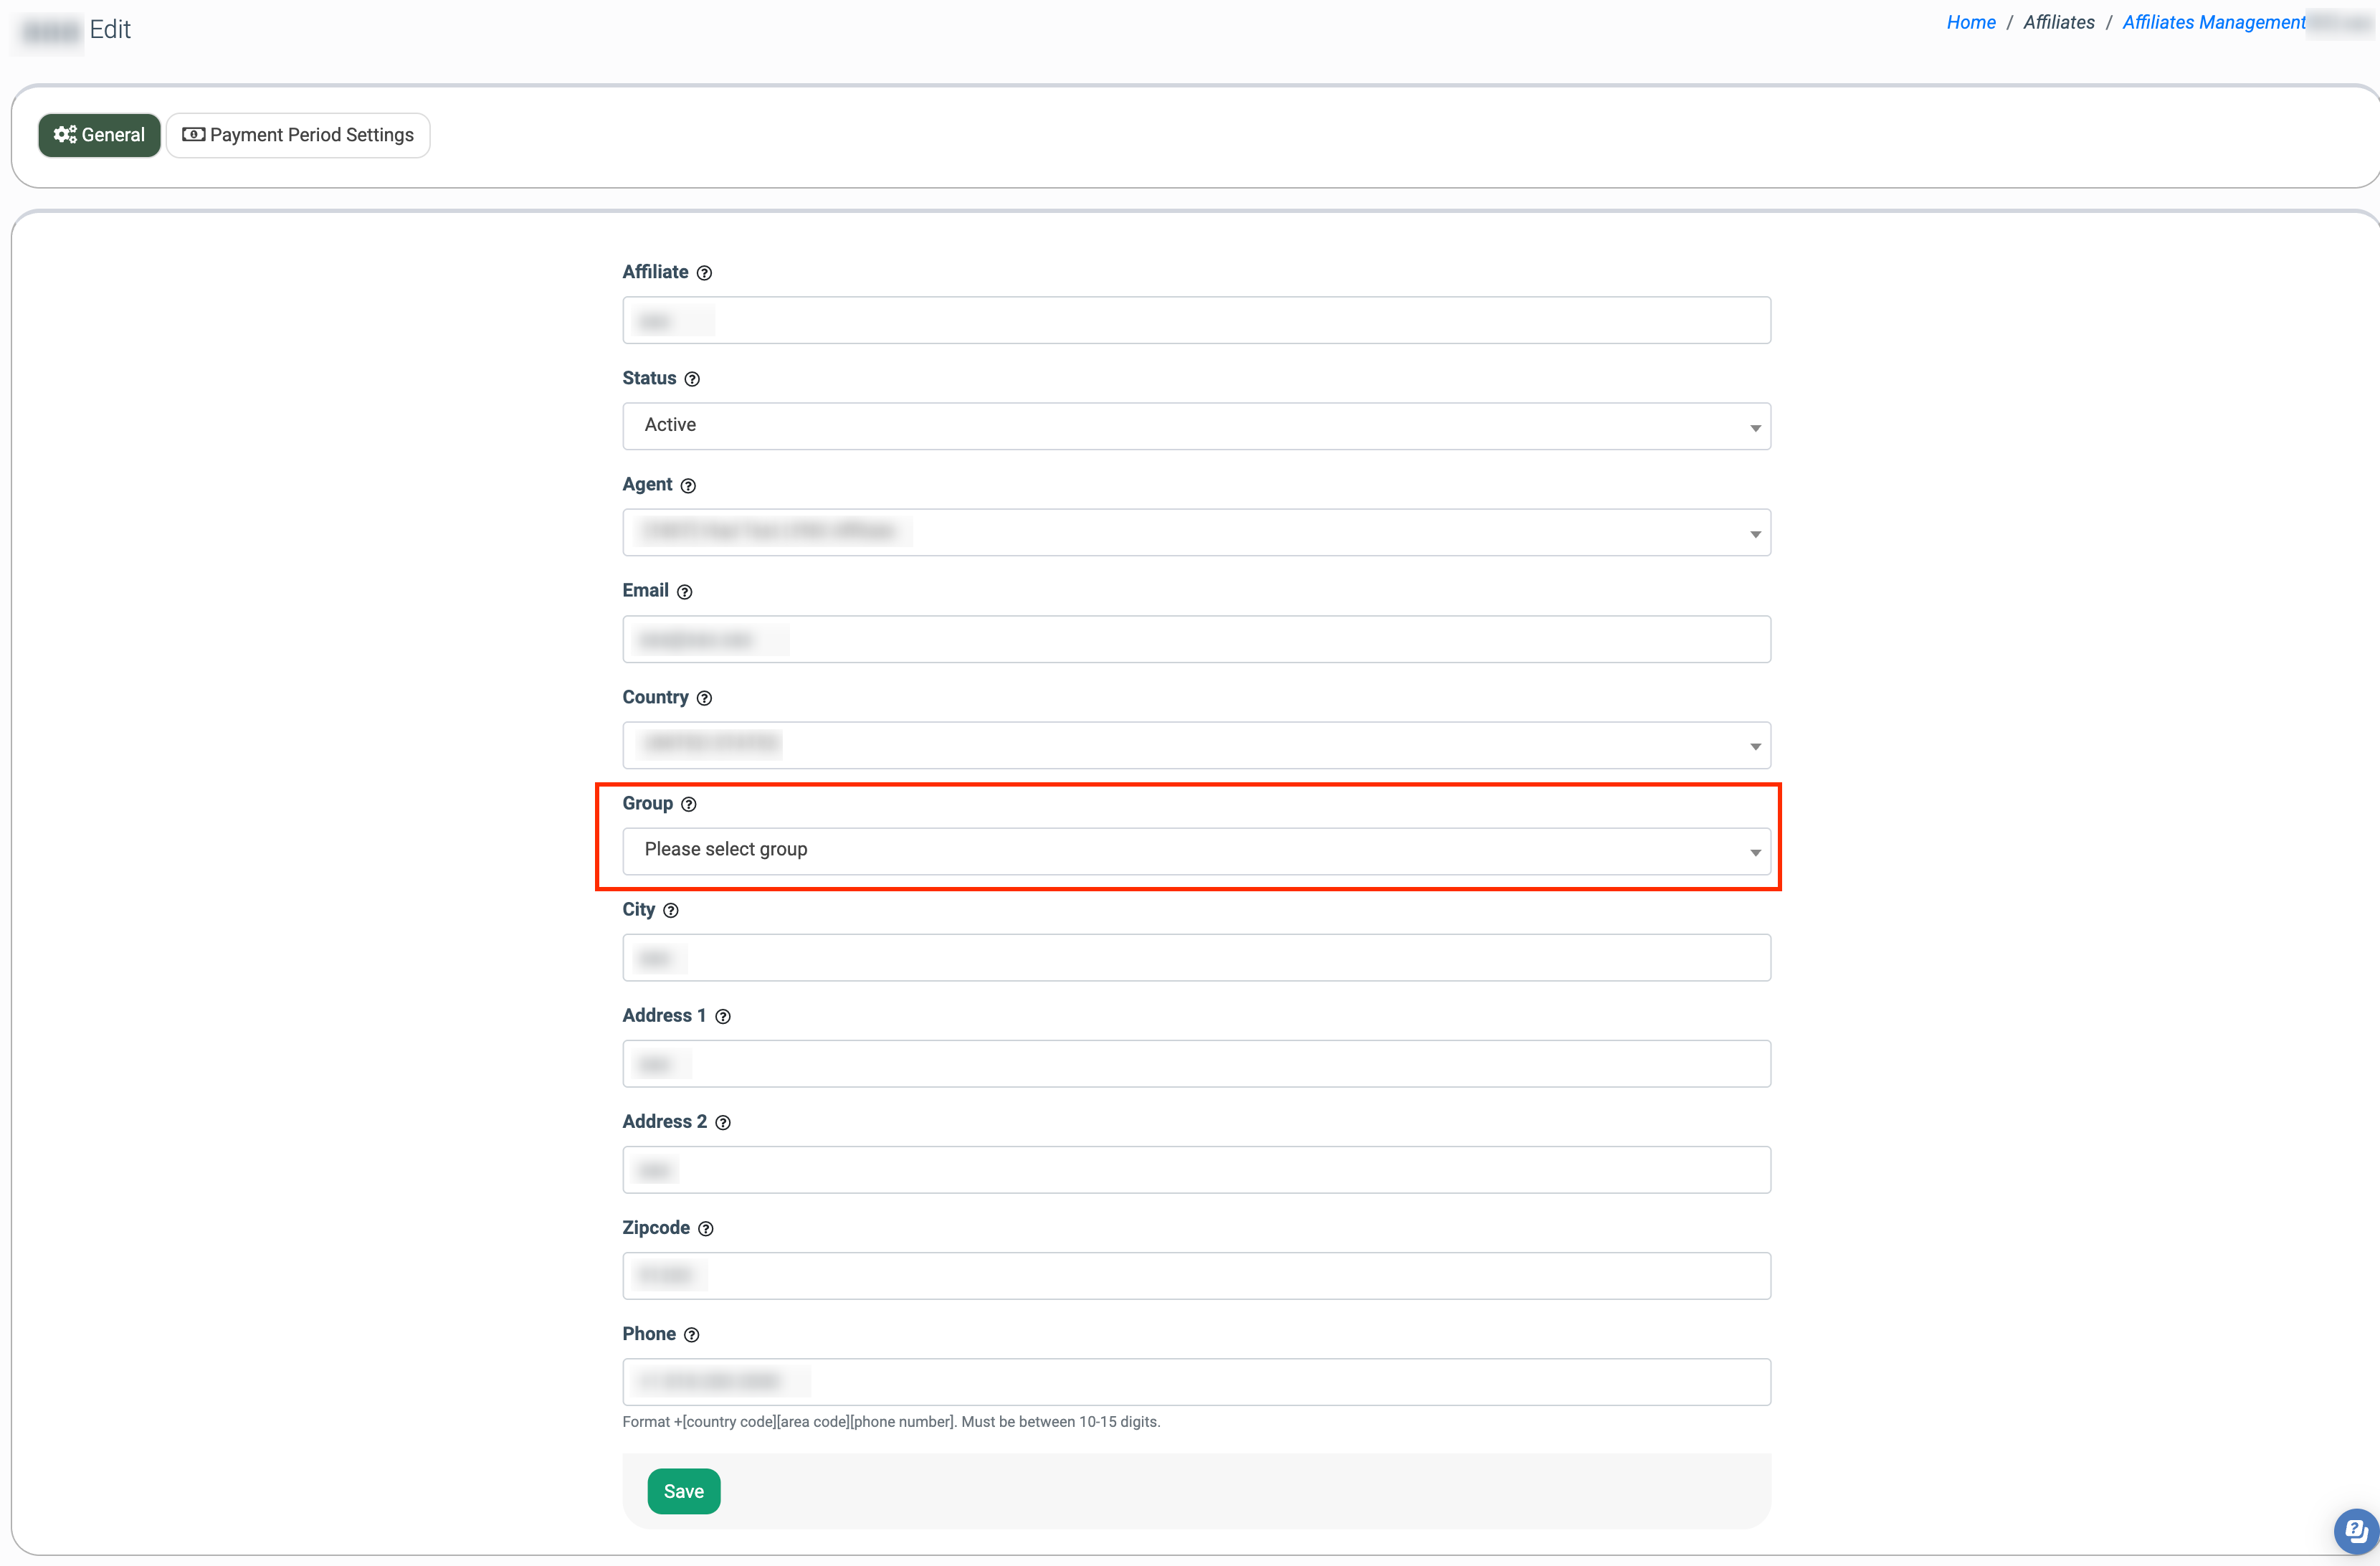
In the "General" tab, select the group you created earlier using the "Group" field. Click the "Save" button to confirm your changes.
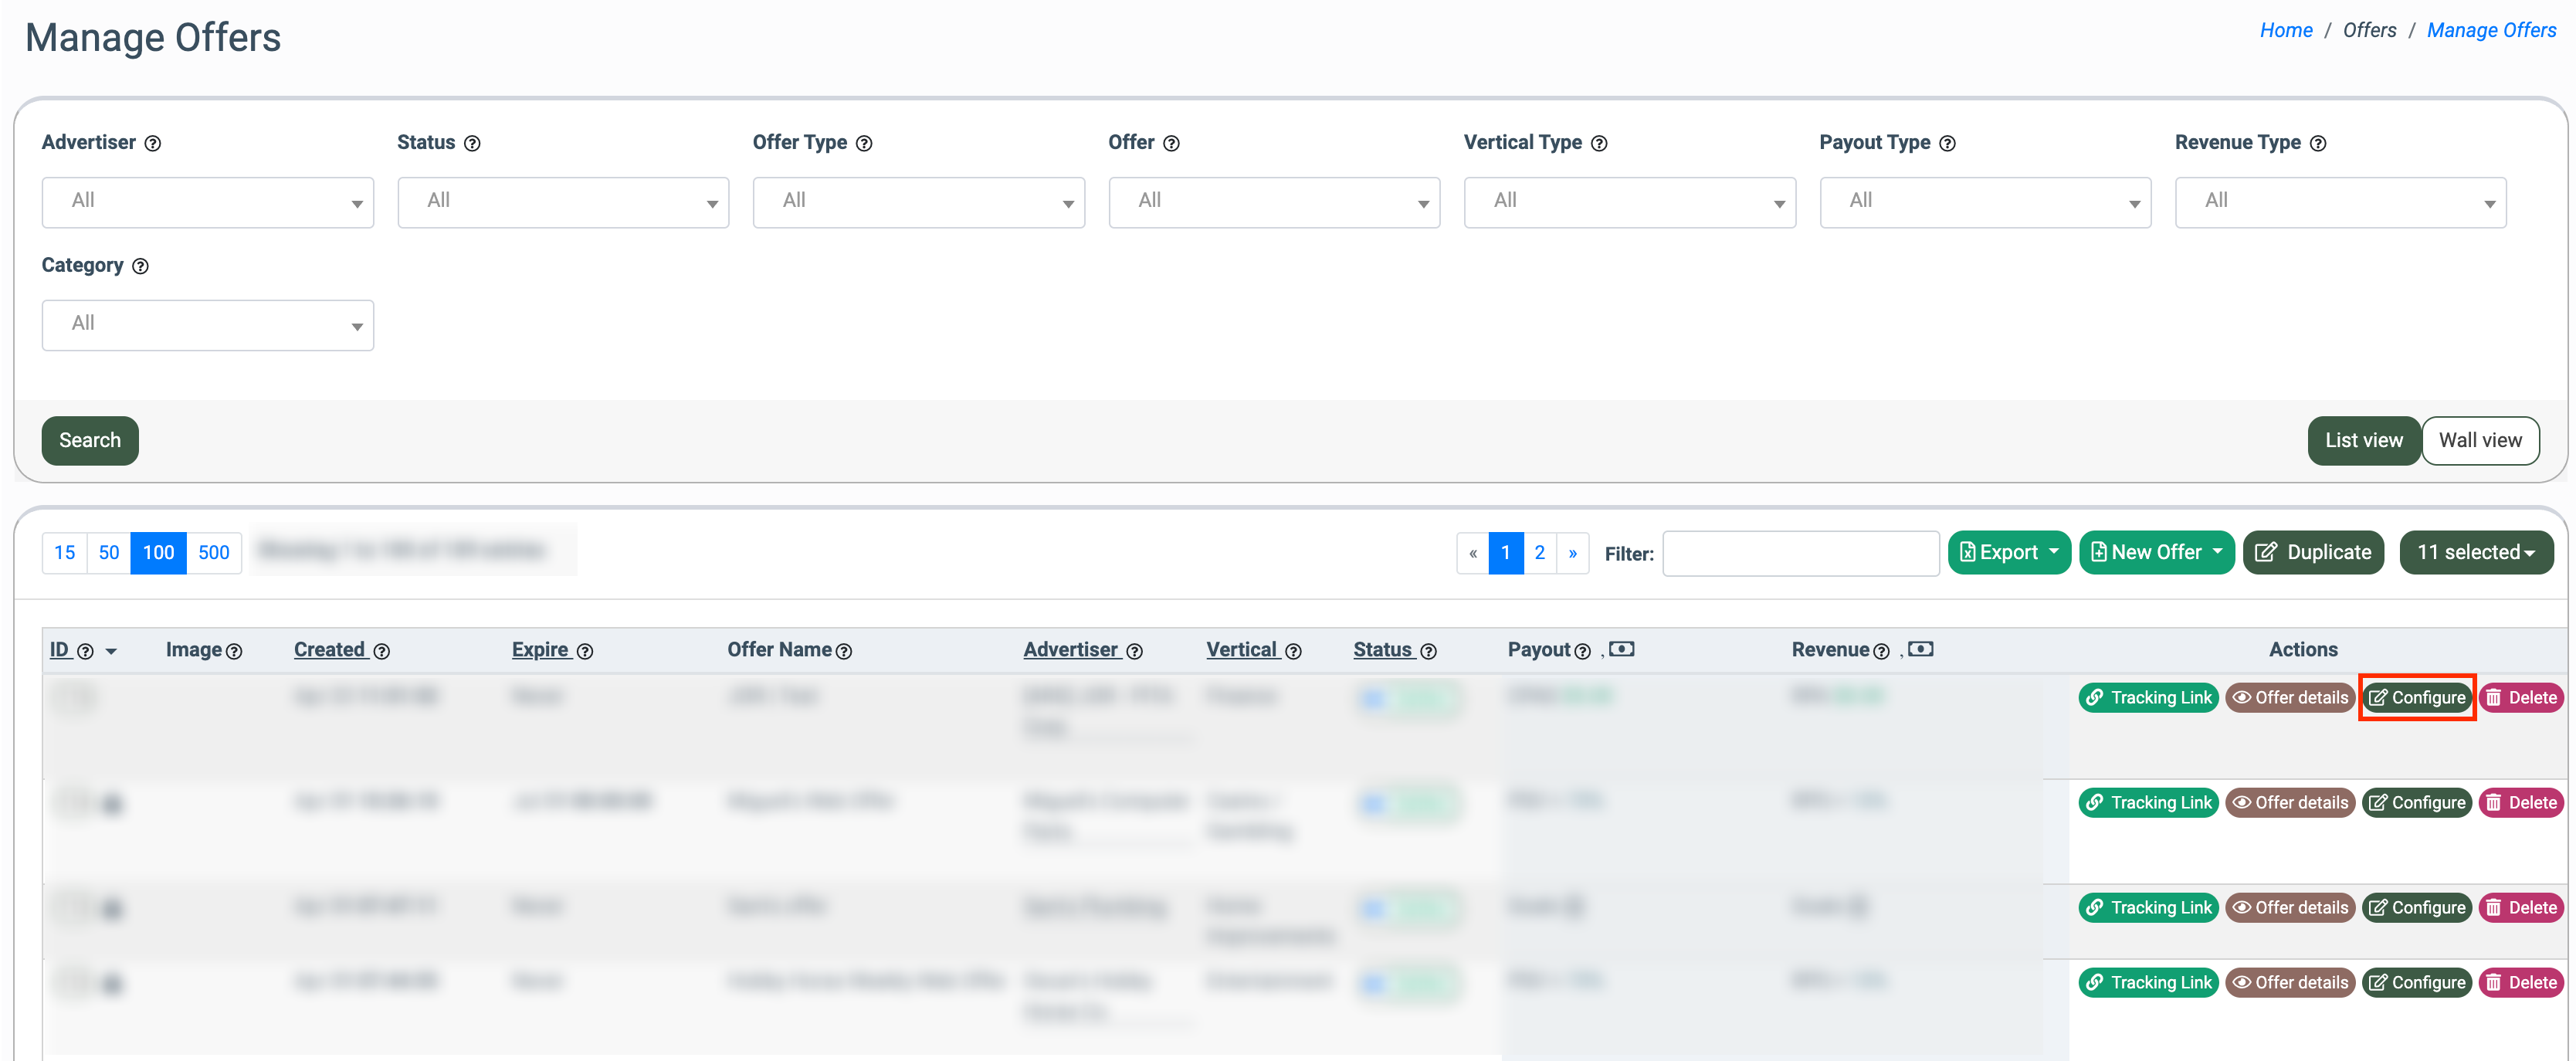
On the Offer Setup page, select the “Payout” tab and fill in the following fields:
- Type: Select the “Cost per Conversion (CPA)” option.
- Method: Select the “Tiered by Groups” option.
- Payout per conversion (Group Name): Enter the amount you want to pay the Affiliate per conversion for the selected tier (group).
Click the “Save” button to confirm the changes.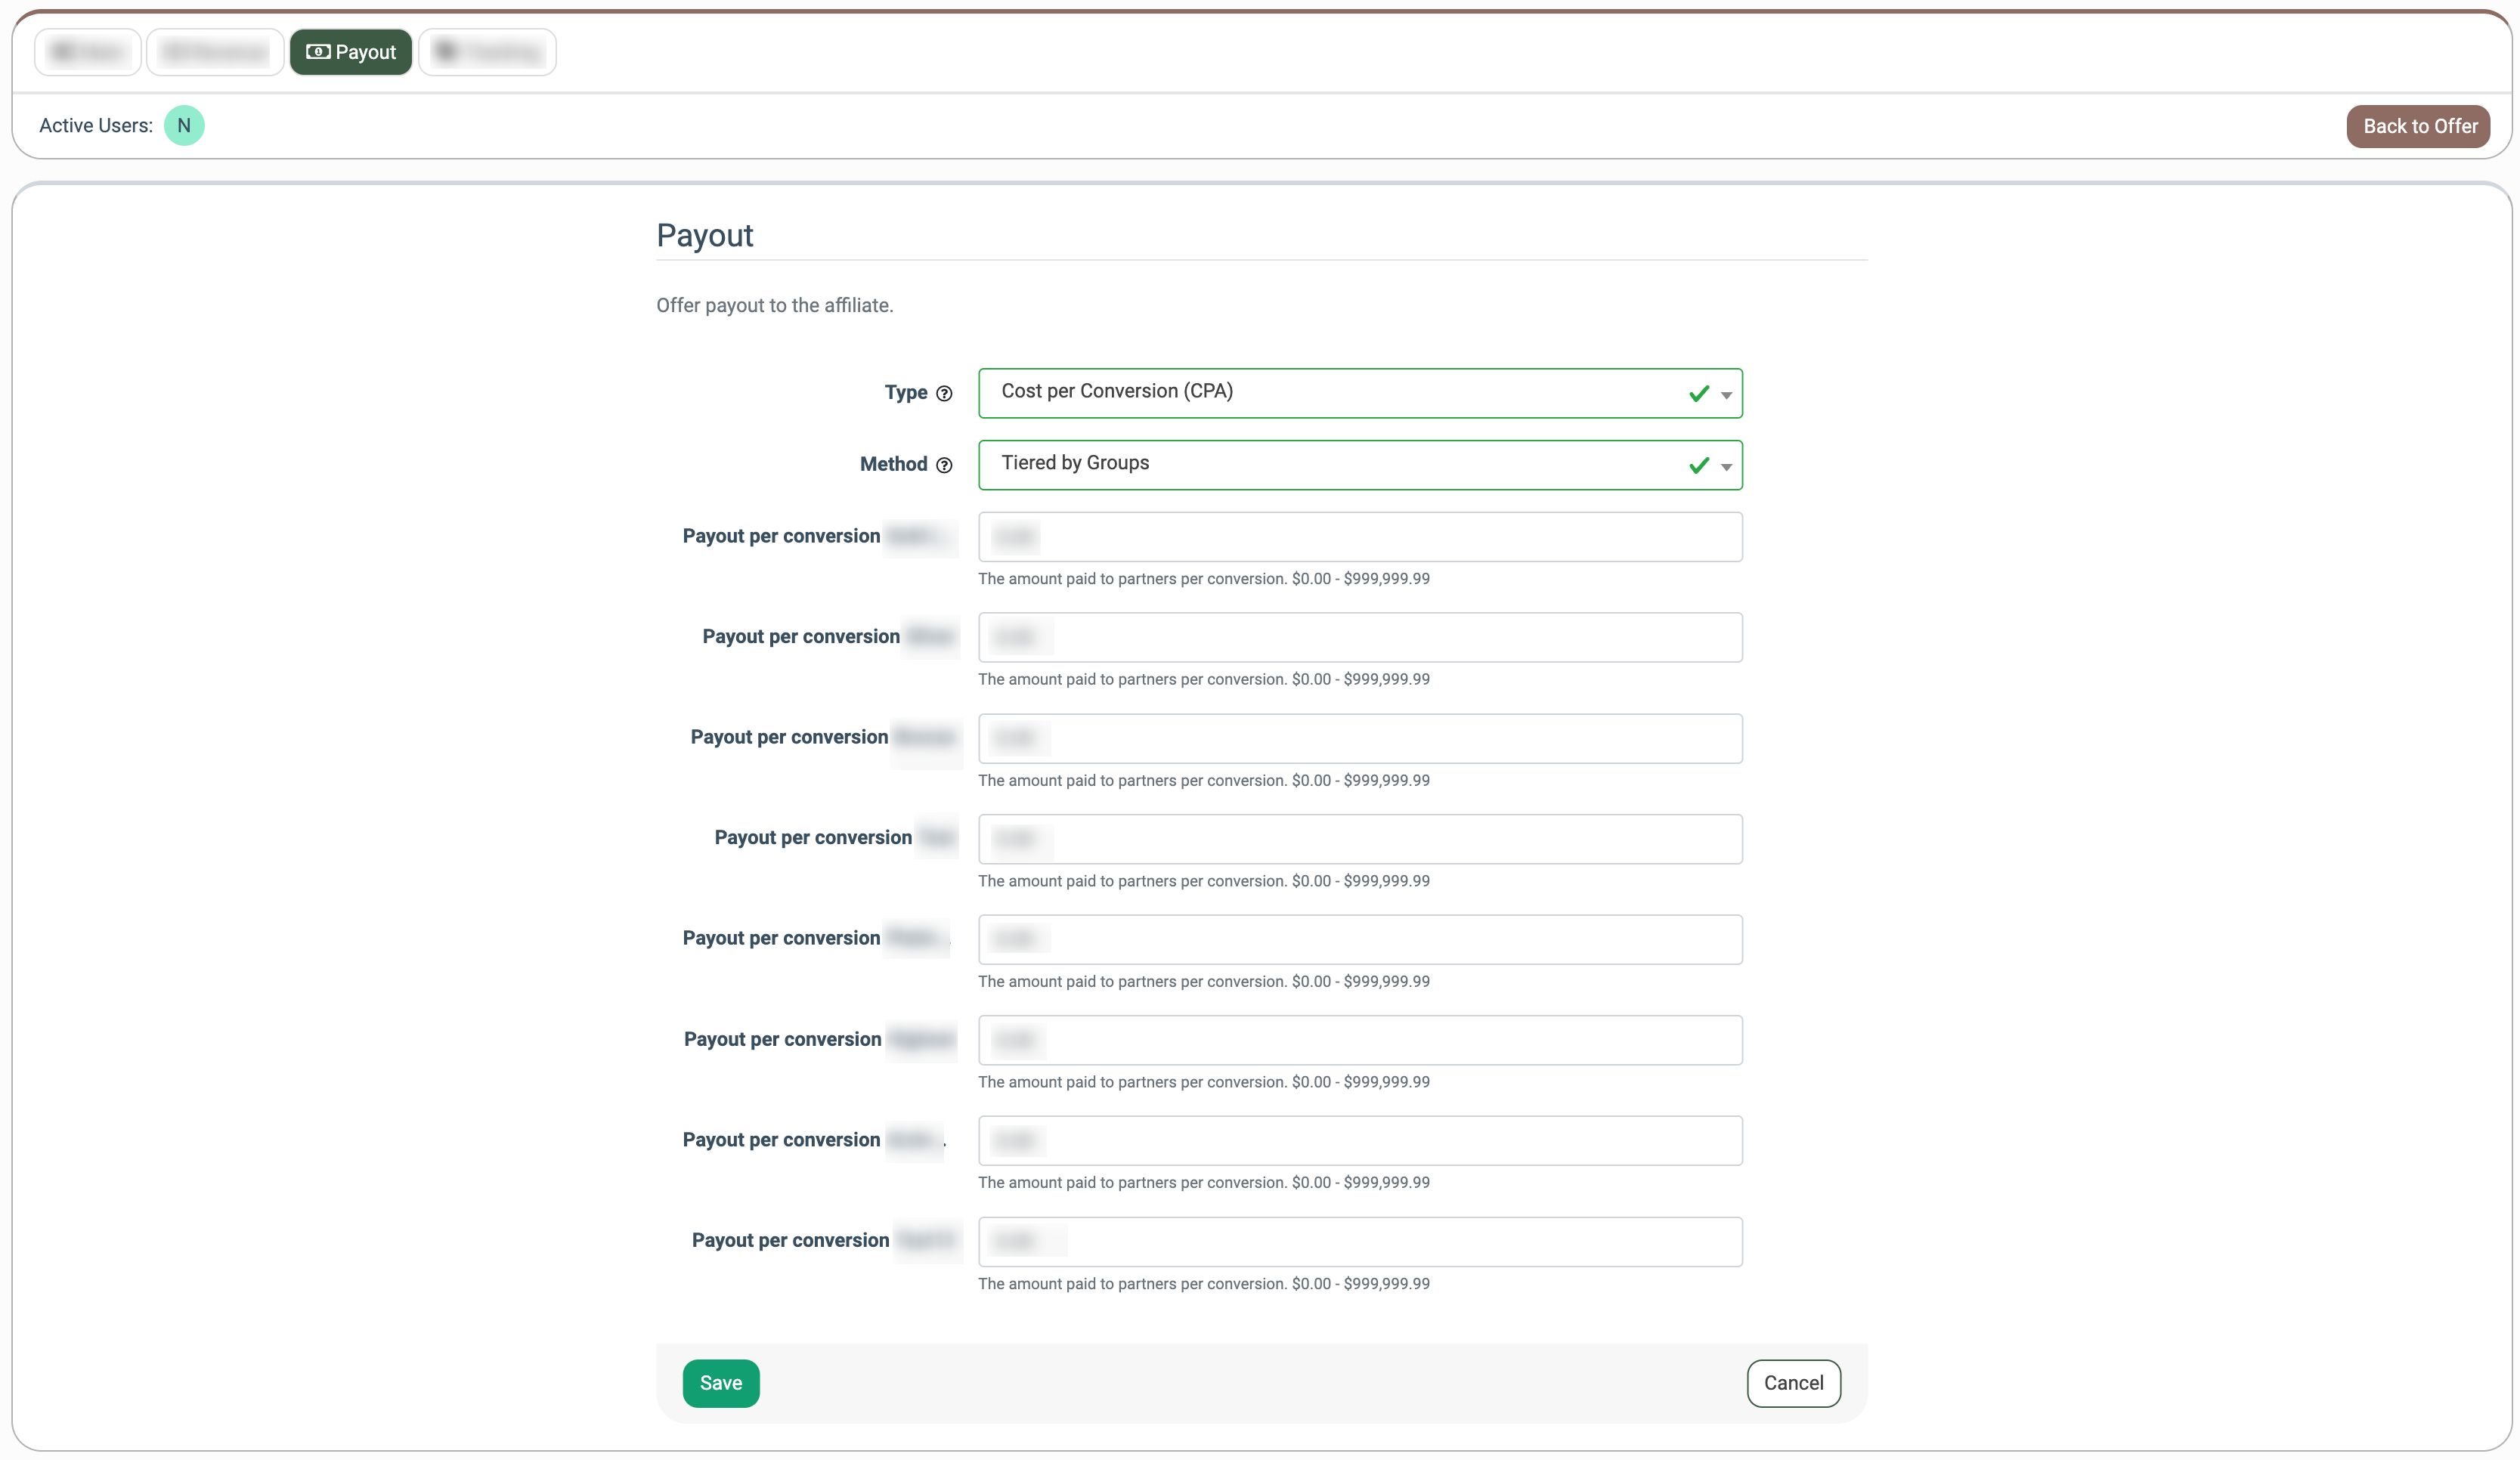
You can view payouts and group Affiliates by the created tiers via the Affiliate Management section.